For a long time, people could not tell me and my twin sister, Brooklyn, apart, so I decided to cut my hair and donate it to charity. Ever since I’ve had my hair at this shoulder length, I’ve been doing these wand curls. So many of our viewers have been asking for a tutorial on how I create them, and that is what I am going to teach you today.
 These wand curls are super easy to create. I begin by sectioning off my hair into three layers (a bottom layer, middle layer, and top layer), and then I use my 25mm curling wand. As I curl each strand, I wind them away from my face, and then hold it there for a few seconds.
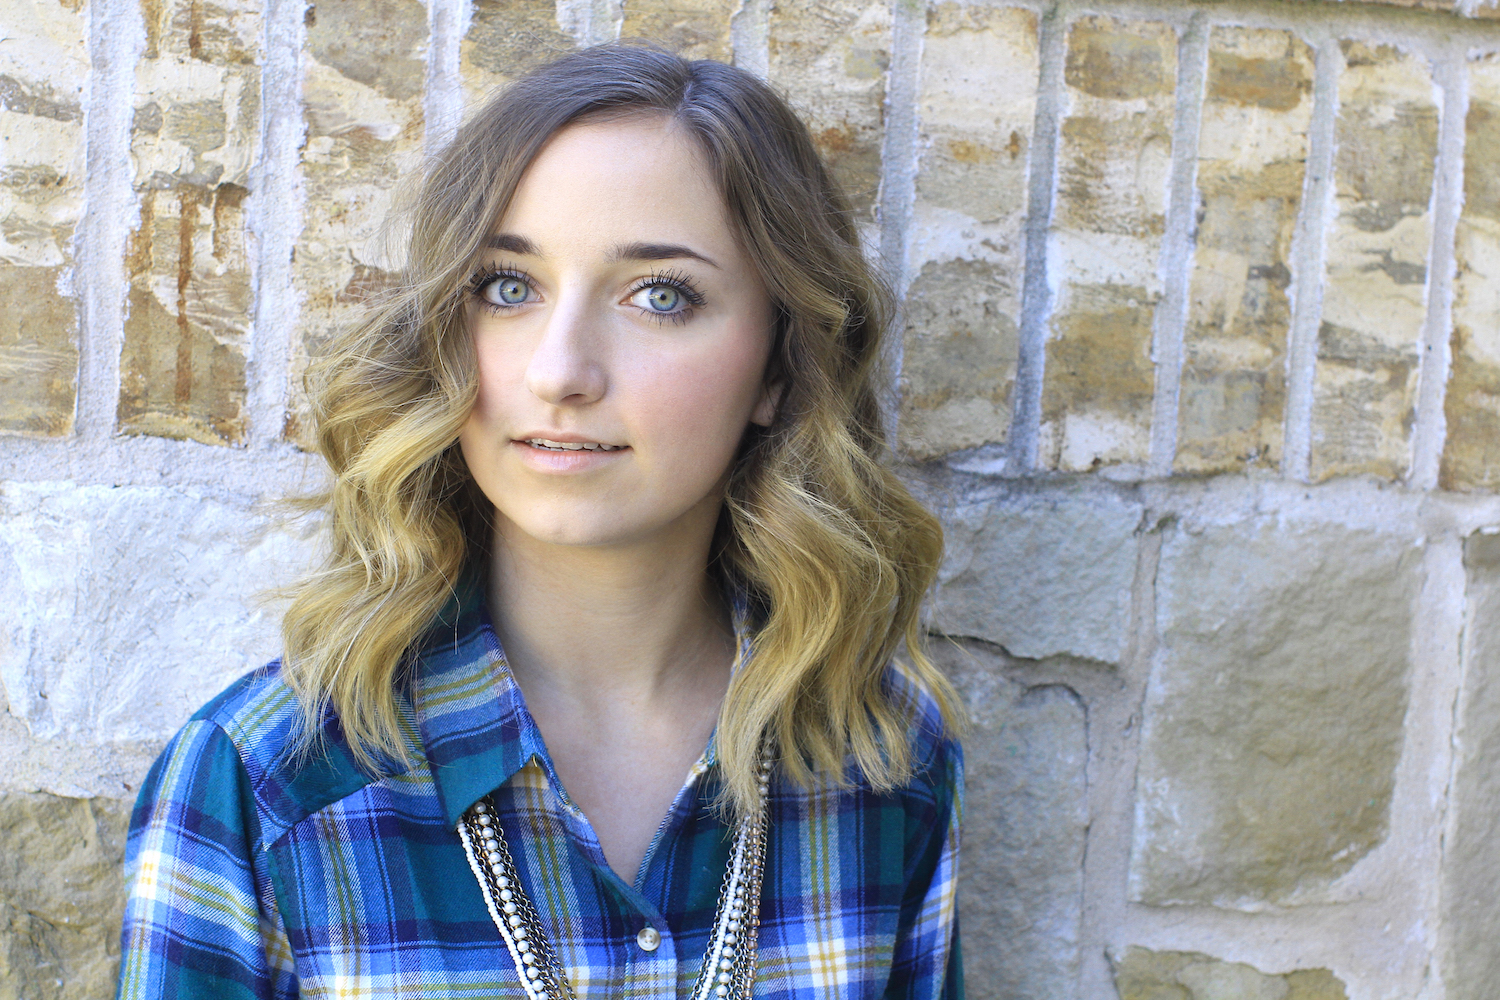
 As I release the curl from the wand, I gently tug the hair strand a bit just to give the curl some length. This is an important step to keep your short curled hair from forming a triangle shape on your head.
To see your own photo recreations of this style featured in our app, feel free to tag your photos on IG with: #CGHWandCurls
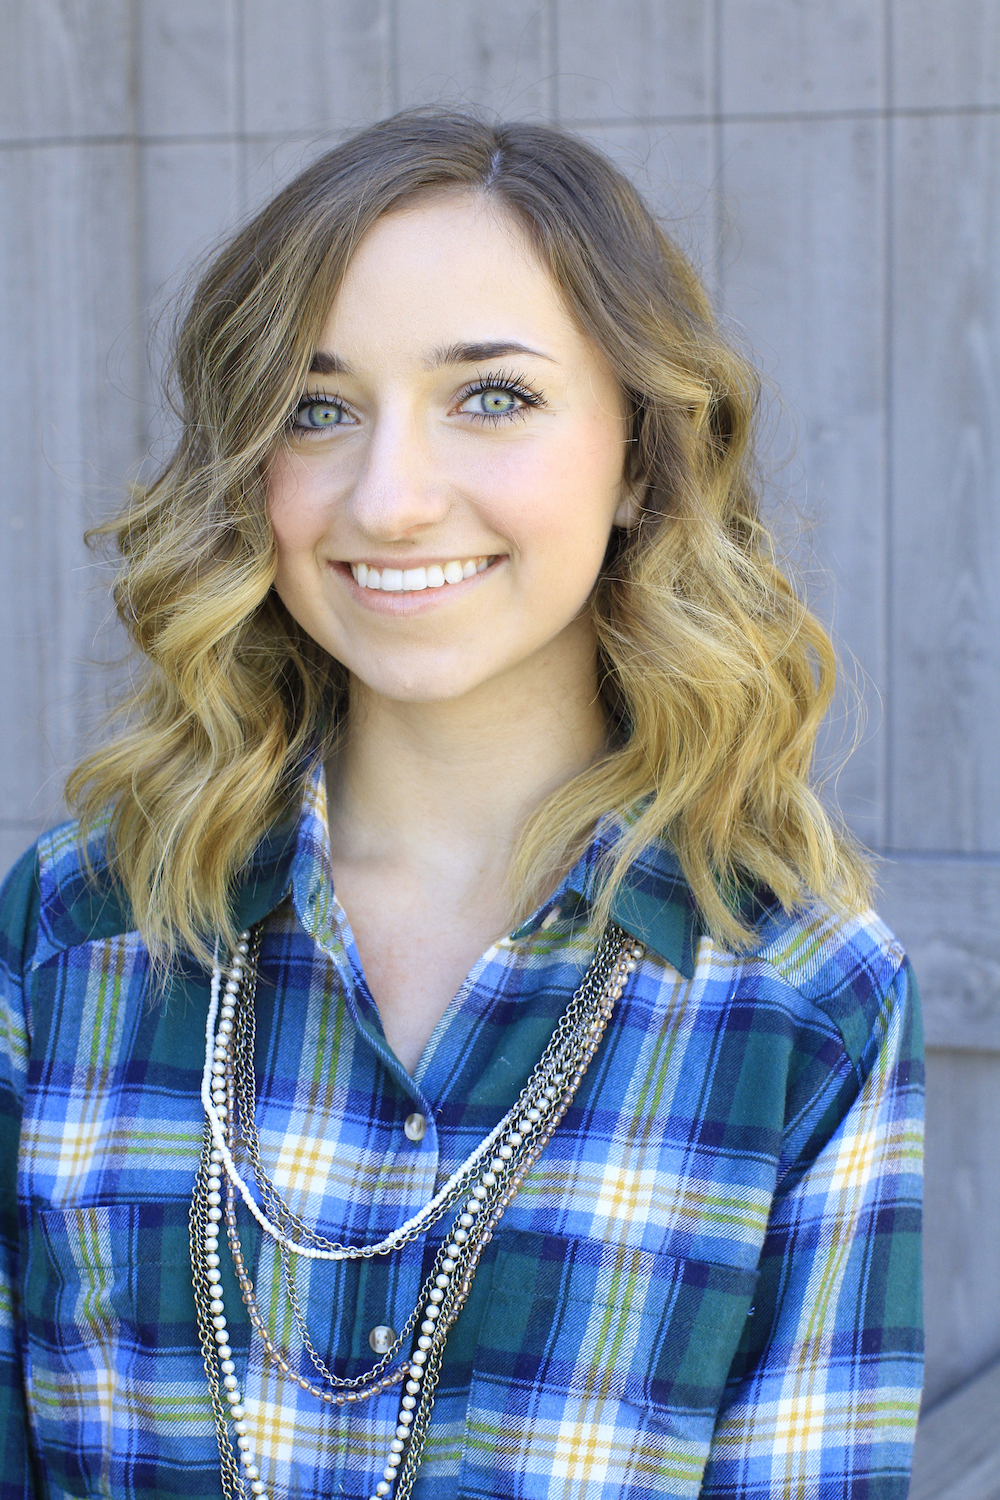
Items Needed: Brush, rat-tail comb, spray bottle, 25mm curling wand, hairspray {if desired}.
Time Requirement: 7-10 minutes
Skill Level: Easy
Video Tutorial:
Step-by-Step Instructions:
- Begin by parting your hair hair into three sections, a top layer, middle layer, and bottom layer {and temporarily secure the top two layers out of the way while you curl the bottom layer first}…
- With a 25mm curling wand, begin curling your hair by wrapping each strand away from the face…
- As you release each curl, gently tug down from the bottom of the strand to help lengthen the curl…
- Once you have finished curling the bottom layer, drop down the second layer of hair and continue curling…
- Repeat Steps #2-4 through the middle and top layers…
- Once you finish the top layer of curls, gently swing your head from side to side to cool down your curls…
- Then, feel free to take a straightener and straighten the ends of the curls that from your face to loosen them up {you want your eyes and face to be the feature from the front, not crazy tight curls.
- Gently finger comb the curls, part your hair to your liking, and add hairspray {if desired}.
Please feel free to leave a comment below telling us what you think of my Wand Curls tutorial, and be sure to let Brooklyn know that you want to see her do a DIY hairstyle soon!
Happy Hairstyling!
With Valentine’s Day right around the corner, here are 5 cute DIY heart decorating ideas that are super cute and fun for the family to do during an activity night! Click below to see!


Love these curls! Please have a look at my wand curls tutorial: https://catholichomeschoolaustralia.com/2017/04/24/basic-wand-curls/
Such a gorgeous look. Going to cut my hair about that length soon
Love love these curls! I’ve never really been a fan of the super tight curls, so I think these are super perfect!
Cute!
love this look how the curls looks natural
love bailey’s short hair
Gorgeous
Ii love all the kids and even the parents hair
This helps a lot ! Thanks !
Cute!
Very nice. Love the flannel too!
Wish I could do this to my hair!! 🙁
So pretty and elegant:)
I don’t have short hair but if I ever do I would wear my hair like that every day.
Nice and simple ????
This tutorial was really helpful. I recently tried to curl my hair with a curling wand and it was not looking to good. This tutorial was really helpful on how to use the curling wand. I can’t wait to try it out! 🙂
I need try this! My stylist said I should have soft curls cuz of my short hair…
<3<3 adorable.
This look is great! Bailey looks very pretty and mature! This look will always be in my favorites!
So helpful!????
I love wand curls, they are so fun.
Love how curling wands give such amazing curls ????
Will this look work for longer hair as well? Love this look!
Love it
love the short hair ideas
This look is so cute!!!
Cute!
Love It
OMG BAILEY your beautiful!!!!!!!!!!!!!!
So cute! My hair doesn’t curl with regular curling irons but this work PERFECTLY!
Gorgeous wand curls! Love it????
I have been dying to find out how to do her AWESOME CURLS!!! This helped me so much????
Love this hairstyle so much!! ????????????✨
This is really pretty! Shame I don’t have a decent curling wand…
This was really helpfull!!
Her curls are always so perfect, now I know how!
I love this!
Love these curls
This is so helpful becaouse i never know what to do to my short hair and now i do so thanks!
I just bought a 25mm wand, so I’m excited to try this look!:)
Love this!
So awesome! Makes me want to chop my hair haha
such pretty curls!!!!!!
Love this look!!
Love this look! Since i have short hair too
Love this look!!!
What type of curling wand do you have/ recommend ?
I have short hair that is impossible to curl this was a life saver
love Bailey <3 Beautiful hair
http://nohairstyle.com/
love these curls! I will definitely be trying a similar style on my long hair! x
http://www.abeeesaurus.blogspot.co.uk