Today we have not 1 but 3 great hairstyles to show using a Waterfall Braid. Abby loves this option for several reasons. First, it’s Gorgeous! Second, it’s great to cover crazy flyaways. Last, it looks way more complicated than it is.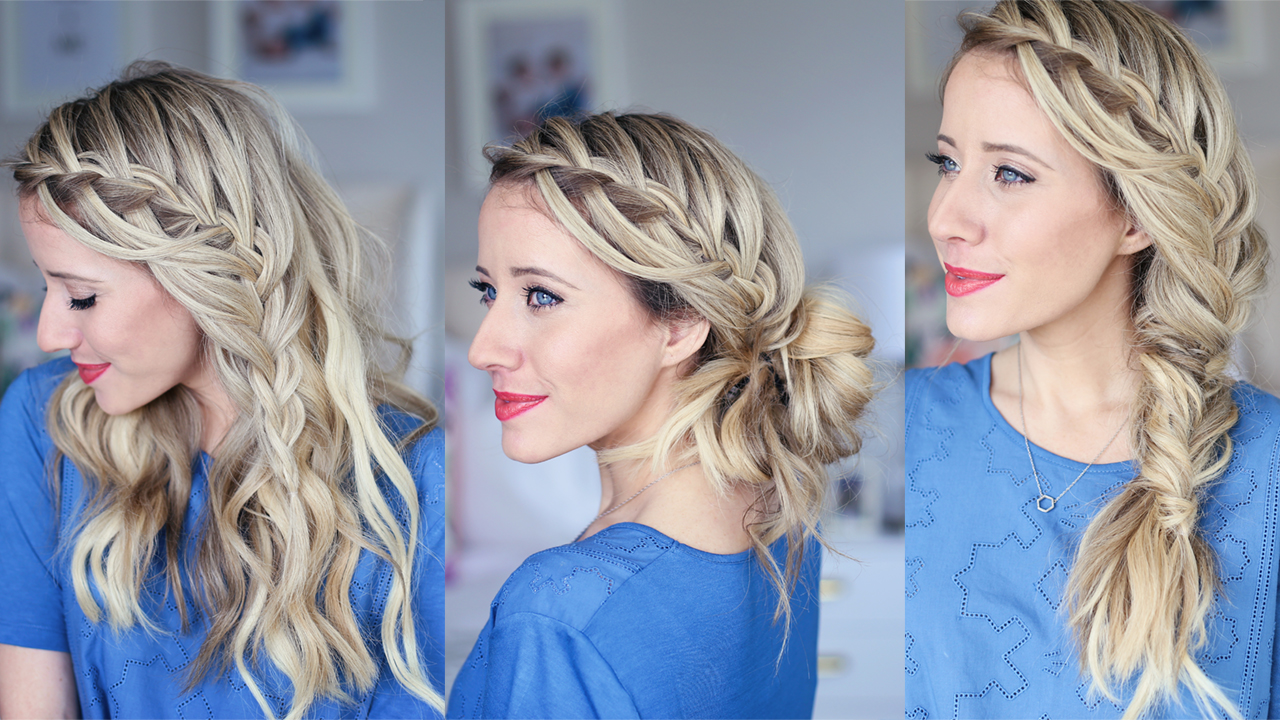 Option #1- Cascade Waterfall
This is such a beautiful and unique look. We love this as an option to tame crazy flyaway hair, growing out bangs, or simply because you want to keep your hair off your face.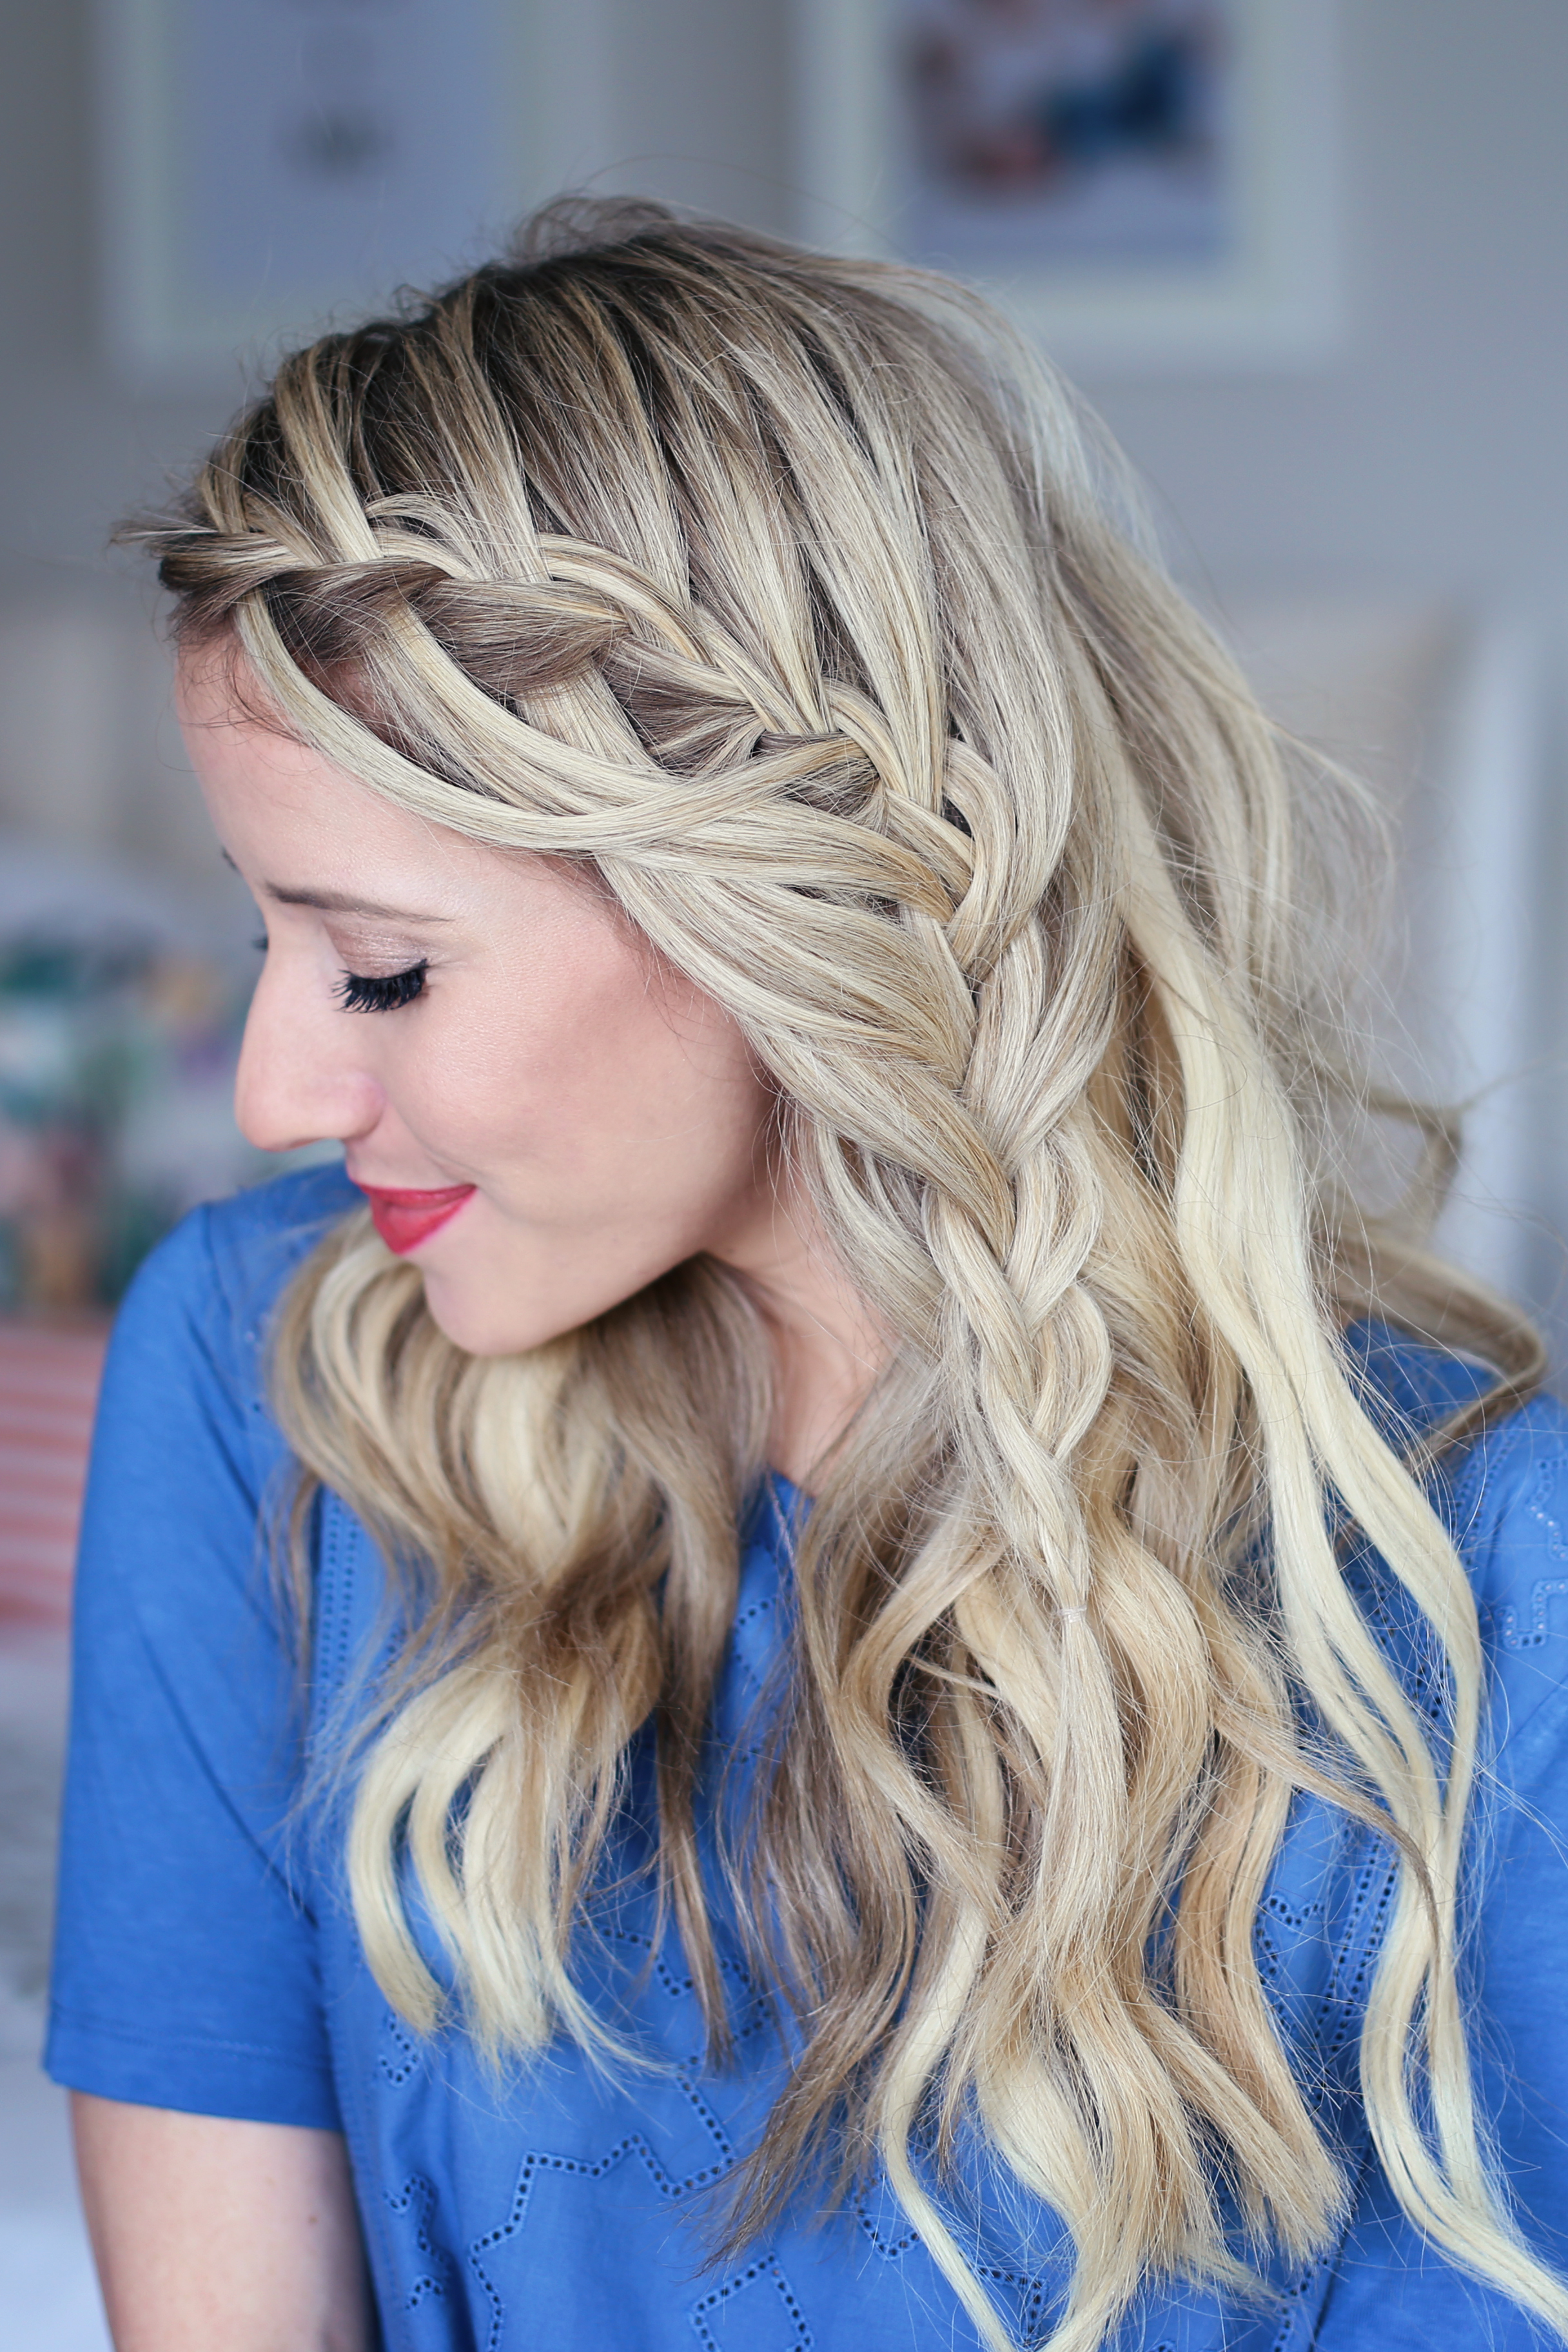 Option #2- Cascade Waterfall + Messy Bun
Adding the Messy Bun is pretty versatile. It works for day, night, home or office. This build-able hair option is perfect for any age and is sure to draw the compliments from friends and family!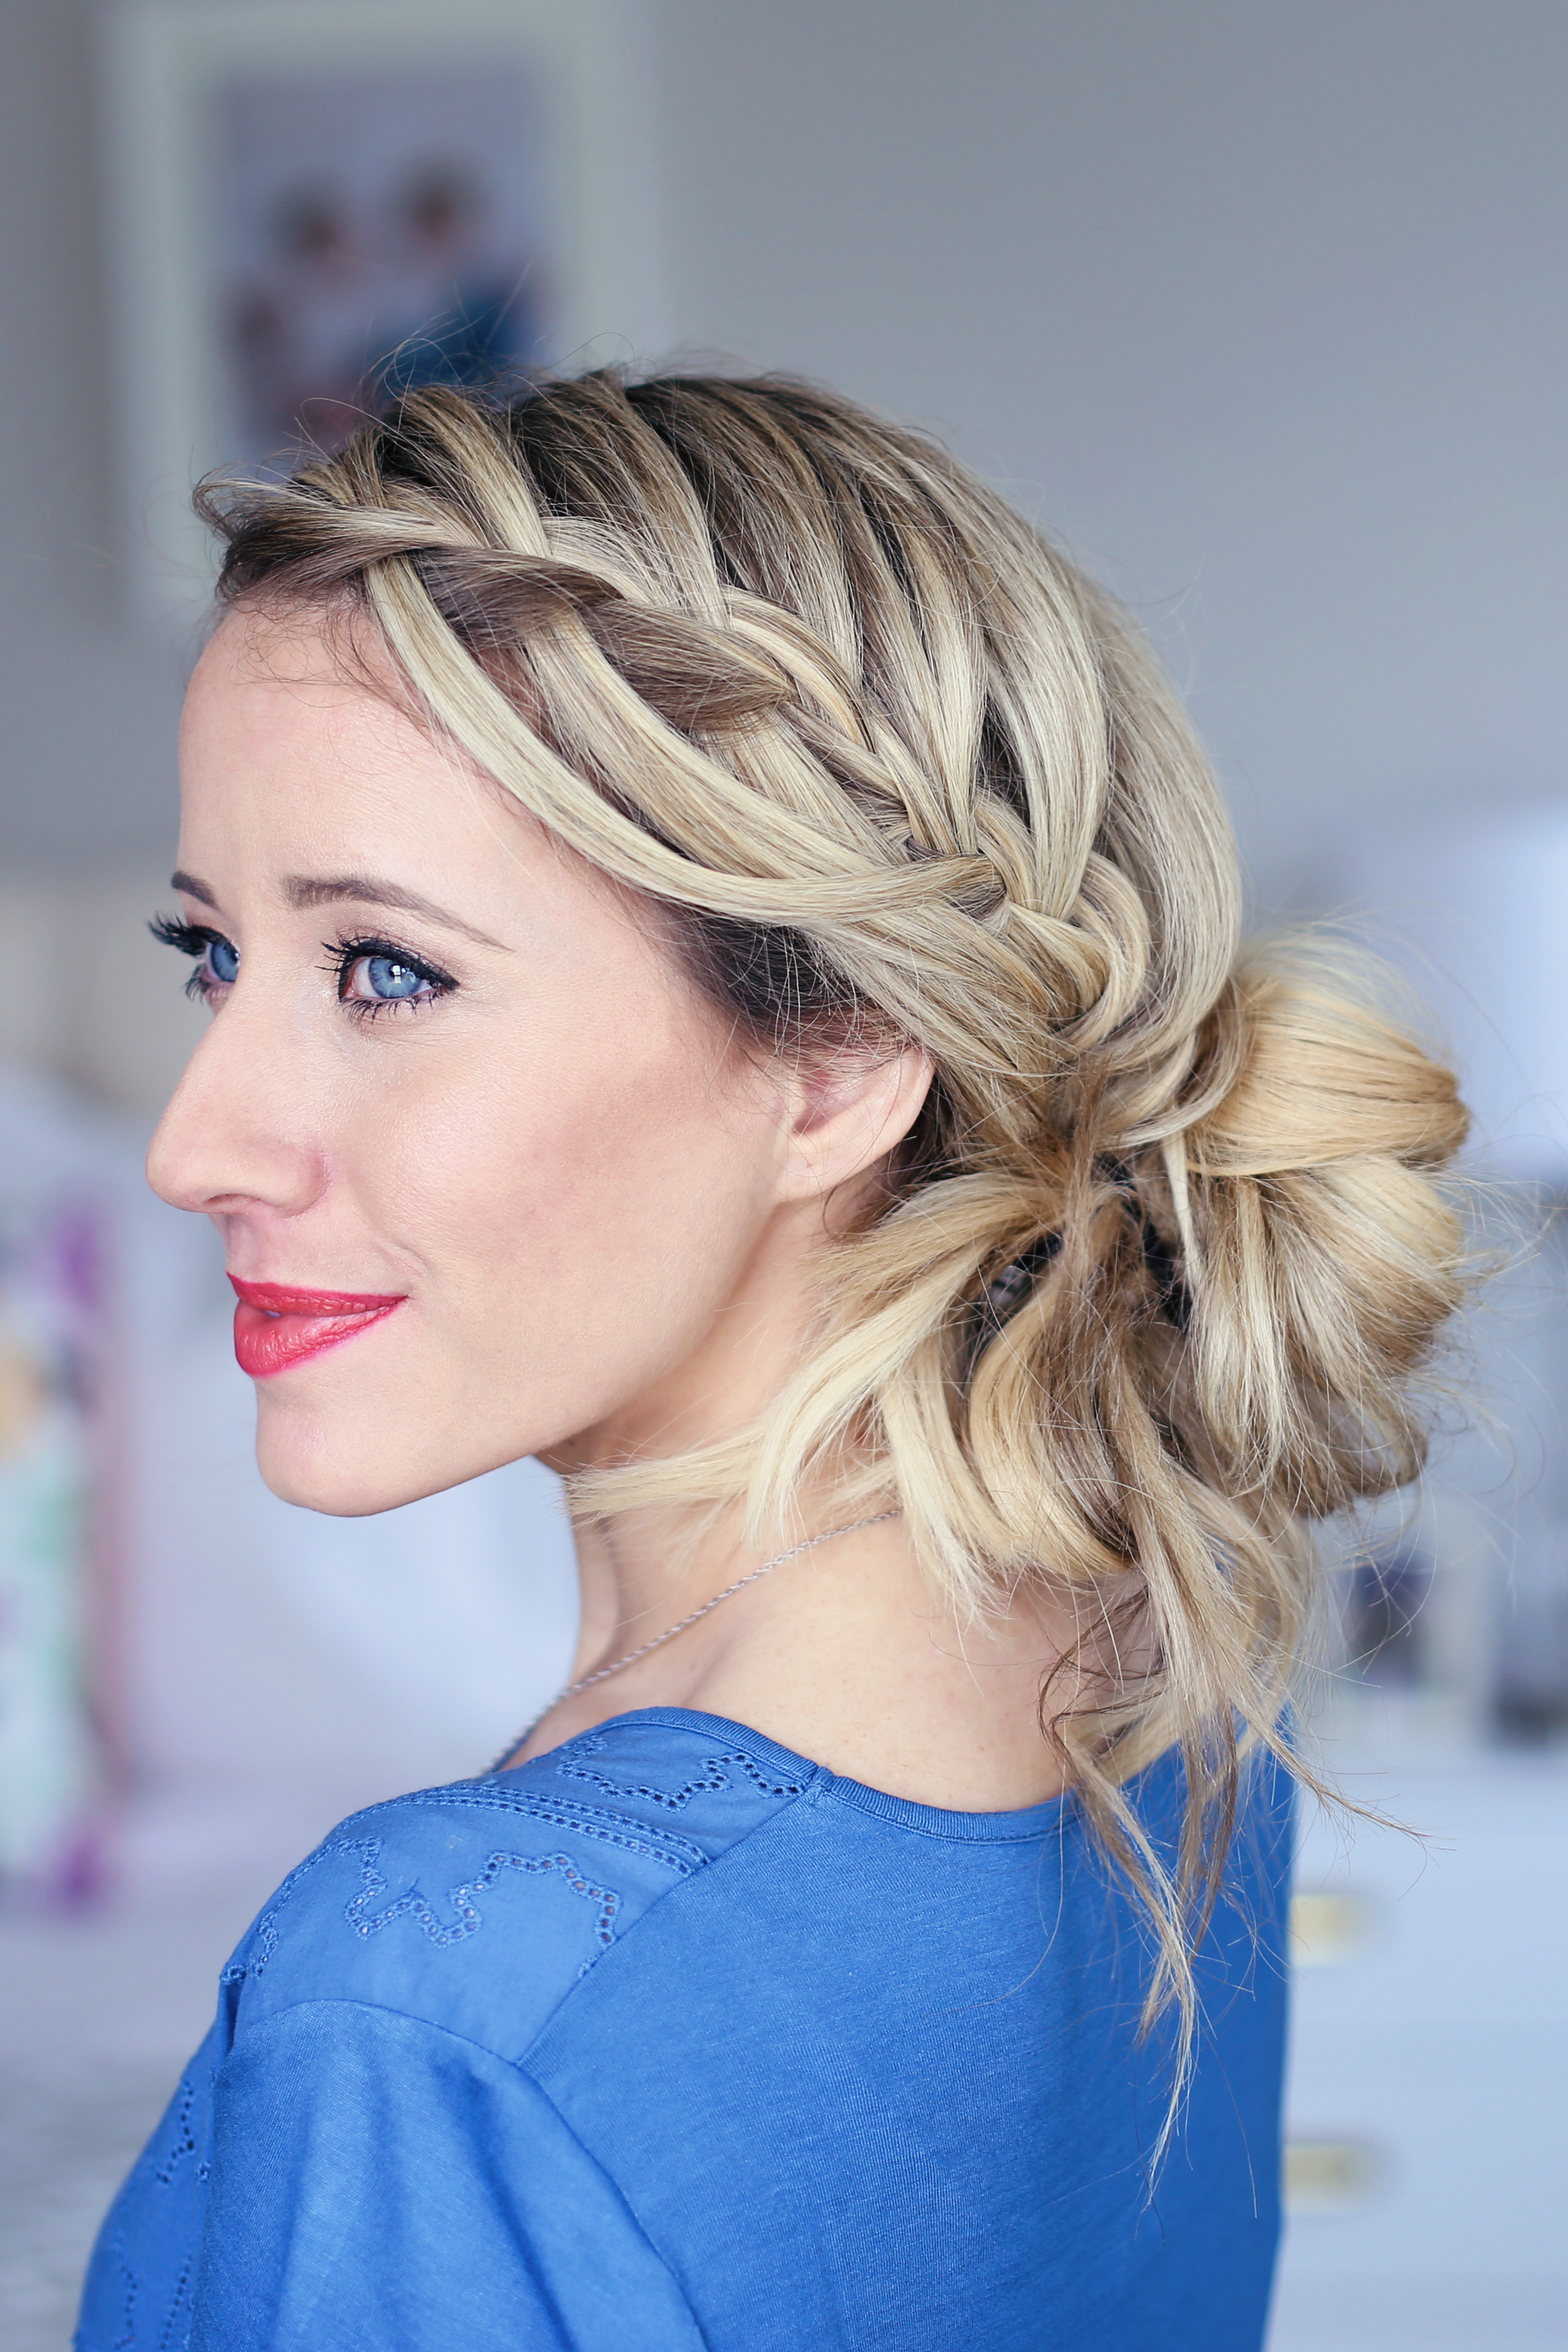 Option #3- Cascade Waterfall + Side Braid
If keeping your hair off your face isn’t enough, simply add a side braid! All three options are simply stunning!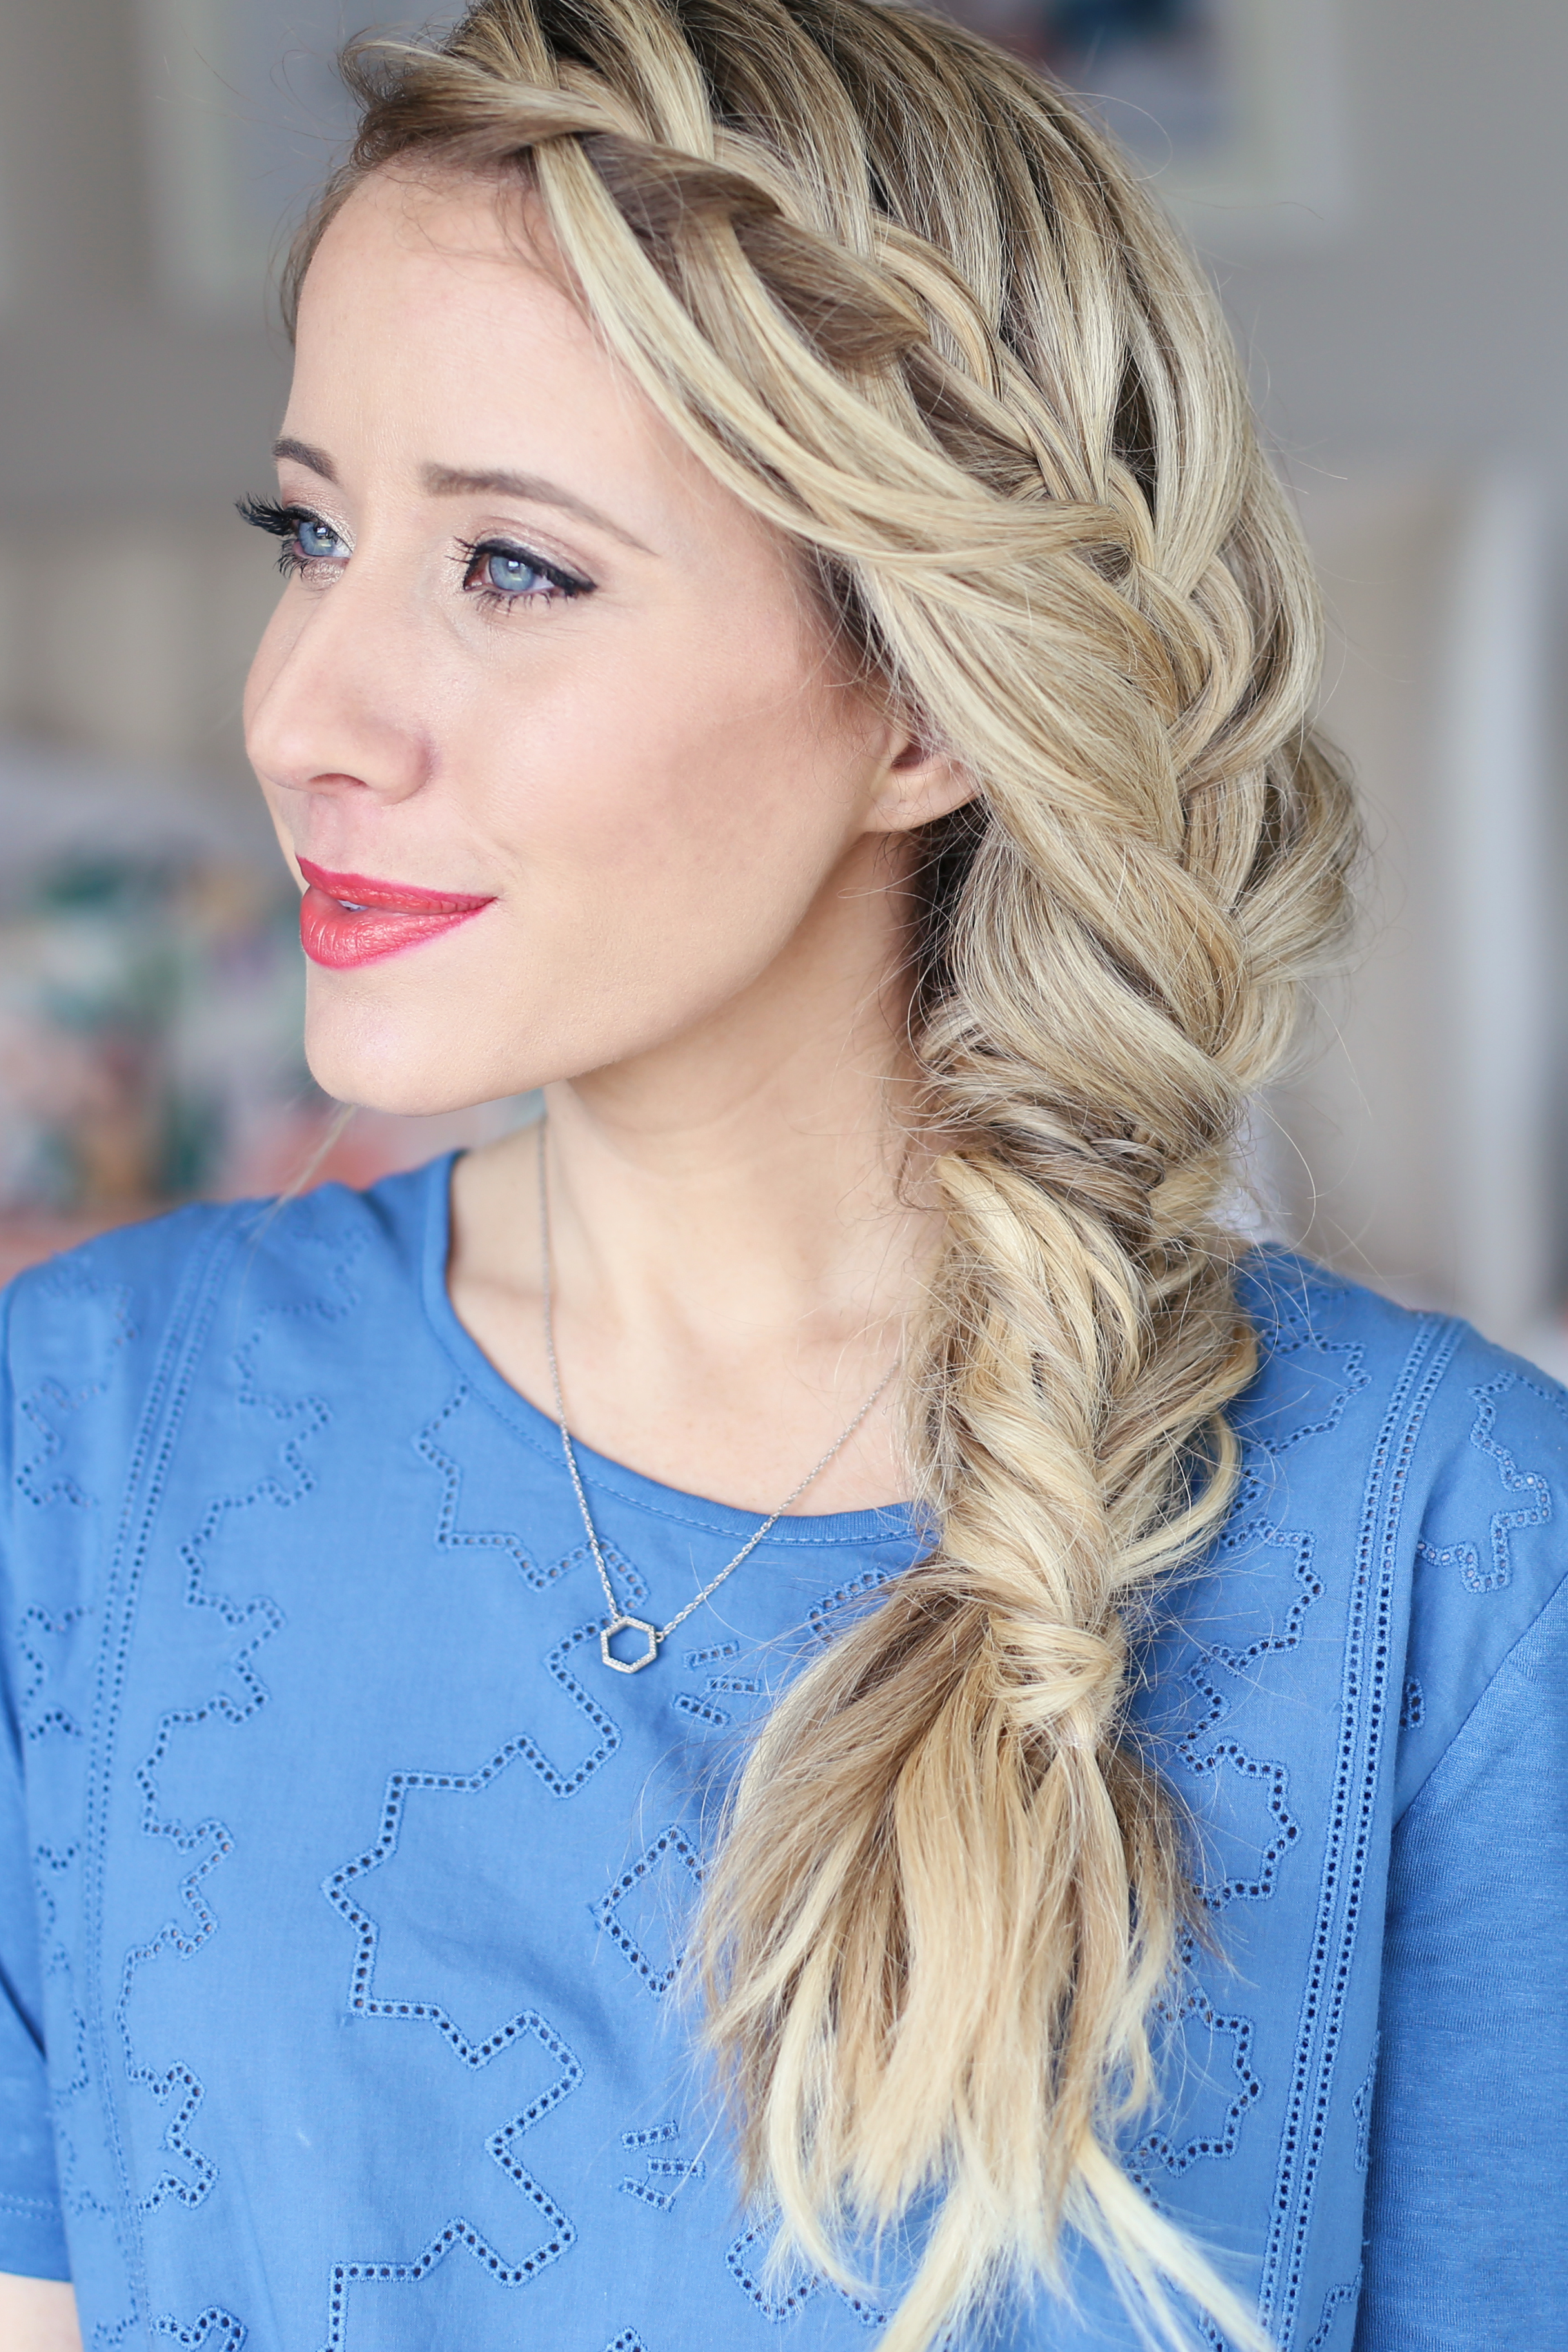 Items Needed: Brush, rat-tail comb, hair elastics, hairspray {if desired}.
Time Requirement: 5-10 minutes
Skill Level: Medium
- Start by parting your hair to the preferred side.
- On the heavy side of the part, pick up a small triangle section of hair. Split the section into 3 small pieces and begin a regular waterfall braid.
- Braid down until you have dropped 4 stitches. (see video for further details)
- When you add hair into the 5th stitch you will be adding the pieces you dropped in the first 4 stitches. (Shown in video)
- When you run out of the dropped sections to add, finish with a regular 3 strand braid down and secure with an elastic.
- Tug and loosen your braid to get the beautiful cascade effect.
- Abby added loose curls to remainder of hair for this first look. Add hairspray if desired.
- Option #2– Adding a Messy Bun.
- Pull all of your hair over to the side of your braid. Using a regular elastic, pull the hair thru once. Leave the ends hanging out just a little, twist the elastic and pull the hair thru one more time. (shown in video)
- Fluff your messy bun and pin where needed.
- I like to also pull out a few whispies around my face on the opposite side of the braid. Add hairspray if desired.
- Option #3– Adding a Side Braid.
- Pull all of your hair to the braid side.
- Take a small piece of hair close to your neck and another small piece of hair on the outside of the hair. Essentially you are creating a topsy tail. (shown in video)
- Bring those two pieces to the front and secure with a little elastic. Now, flip that little section up and under.
- Repeat steps 14-15 all the way down until you run out of hair.
- You will want to tug and loosen here and there to get a nice fluffy look.
- Finish with a little hairspray if desired.
This week on Brooklyn & Bailey… “Did Brooklyn get her first kiss?” Click on the video and see!


I love that you can do this hairstyle so many different ways!!
It looks so good!
This is so cute!
so cute
lovely
All three of these look so pretty. I can’t wait to try them out! 🙂
Super cute! Must try this.
I LOVEEEE this ????????
So so lovely!!
????????????
cute
I love this hairstyle and can’t wait to try it out
Love the effortless curls
Can’t wait to try this hairstyle out!
Looks hard but yet so simple 🙂
I did my cousins hair for her date and this was the hairstyle I did. She’s been begging me to do her hair ever since.
I need to try this ????????????
i love your hairstyles i literally watch all your videos
I love your videos and this hairstyles are really pretty!
i would definitely love to try these hairstyles