Valentine’s Day has passed for another year, but we can wear heart hairstyles all year long! This hairstyle is so…
Valentine’s Day Hairstyles
Page 2 of 4

It is the week of LOVE. If you are looking for a stylish heart hairstyle you cam to the right…
Valentine’s Day is right around the corner. Today, I am going to share how to create another cute heart…
CGH loves Holiday Hairstyles! Valentine’s Day is one of our very favorites for sure! Valentine’s Day is right around the…

Everyone loves the Waterfall Braid! And a great bun is in the love column as well. Put them together and you…

How to Create a Faux Fishtail Crown Braid
I think that this Faux Fishtail Braid Crown is absolutely stunning! We’ve shown you how to use this faux braiding…

If you love tiebacks and braid backs, this hairstyle is for you! I love that this hairstyle is so simple…

3 Romantic Hairstyles for Valentine’s Day
Hello Lovelies! So happy to be back with some love in the (h)air inspiration for you this month! 😉 We’re…
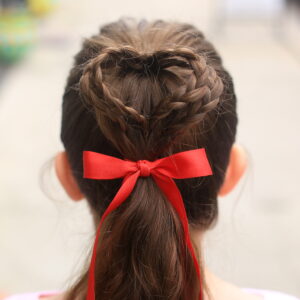
Cute Heart Ponytail | Valentine’s Day Hairstyles
It’s that time of year again, where we start seeing heart hairstyles everywhere! Just take a look at your Instagram…
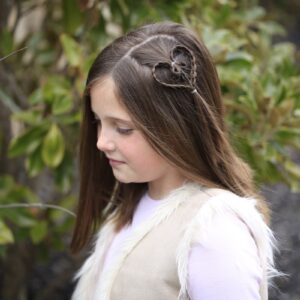
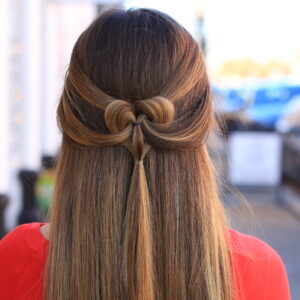
Cute Heart Accents | Valentine’s Day Hairstyles
Today we will be showing you how to create Heart Accents, fitting right into our Valentine’s Day Hairstyle theme we’ve…
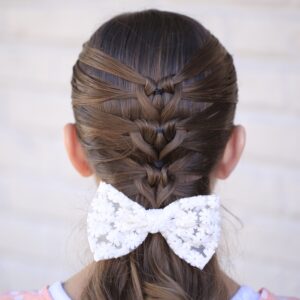
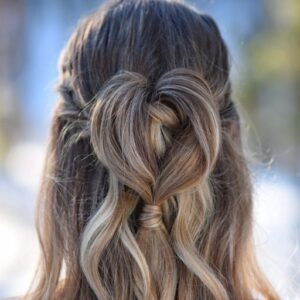
Mermaid Heart Braid | Cute Valentine’s Day Hairstyles
I can’t believe another Valentine’s Day is here! With only a few weeks to go, it is now time for…

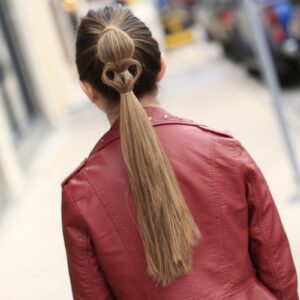
Rope-Braided Heart | Valentine’s Day Hairstyles
We are gaining quite the extensive list of Valentine’s Day Hairstyles, with some from as far back as 2009. Feel free…