Easy Valentine’s Day Hairstyles | DIY Hairstyles
Today I’ve put together a compilation of 3 of my favorite Valentine’s Day Hairstyles from CGH! What I love most…
Easy Valentine’s Day Hairstyles | DIY Hairstyles
Today I’ve put together a compilation of 3 of my favorite Valentine’s Day Hairstyles from CGH! What I love most…
Easy DIY ZOOM Hairstyles | Cute Girls Hairstyles
With all the #Zoom classes going on, Rylan is back today to teach you her 3 EASY DIY Zoom Hairstyles…
Bailey’s Mini Fishtail Braids | DIY Bandana Hairstyle for Short Hair
Any of you short-haired people out there will know the struggle when it comes to creating cute braids on your…
How to French Braid | Back to Basics 101
In order to become a skilled hair braider, you absolutely MUST know how to properly French Braid! Today, I’m going…
Flipped Ponytail Updo | Hairstyles For The Holidays
Today, I’m showing you the Flipped Ponytail Updo! You might not have a ton of occasions that call for a…
Bantu Knot Out Tutorial | No-Heat Curls
I love playing with Paisley’s hair, but I’m always looking for ways to create cute hairstyles using as little heat…
Spooky Good Hairstyles| Halloween How-To’s
Trick-or-treating might look a little different this year, but the costumes will still be essential. And what’s a good costume…
3-Strand Pull-Thru Braid | DIY Easy Hairstyles
Today, I’m going to be showing you guys an adorable DIY hairstyle. Every time that I wear this 3-Strand Pull-Thru…
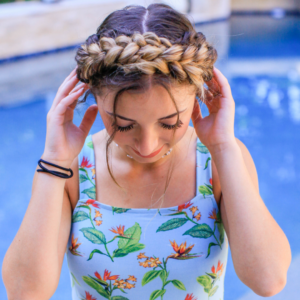
Milkmaid Braids DIY | Ft. Brooklyn McKnight
No one loves the milkmaid braids more than Brooklyn! It’s always been her go-to hairstyle whether she’s in a rush…
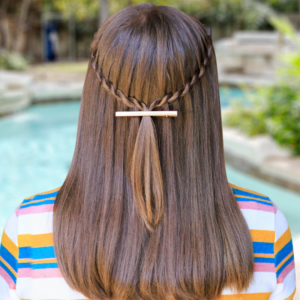
Waterfall Twist Hairstyle HACK | Easy DIY
Time to open the time capsule – I’m sure you all remember the original Waterfall Twist we created over 7…
Easy Back to School Hairstyles | Do It Yourself
It’s that time of the year again – the beginning of the school year! Whether you’re in the comfort of…
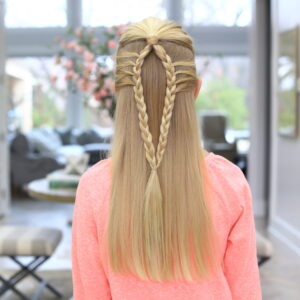
Mermaid Loop Braid | Easy Braided Hairstyles
Whimsical and versatile are exactly the words to describe the Mermaid Loop Braid. I absolutely love this look for so…