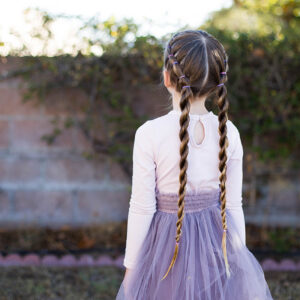
Frozen 2 Anna’s Double Braid-Back
I still can’t believe it’s been six years since Frozen first premiered in theaters. My kids seemed so little when…
Frozen 2 Anna’s Double Braid-Back
I still can’t believe it’s been six years since Frozen first premiered in theaters. My kids seemed so little when…
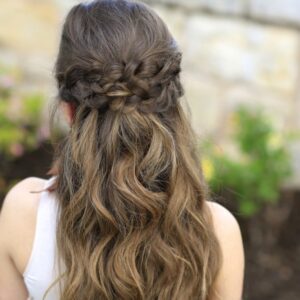
Stunning Hairstyle Ideas for Prom | My Favorites
Can you believe it’s prom season already? I love getting the kids ready for prom every year from the dresses…
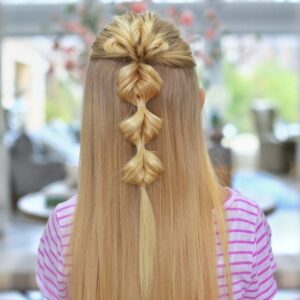
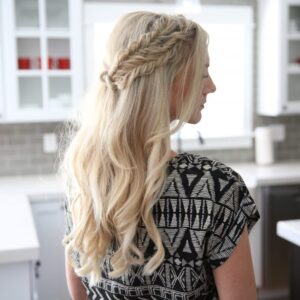
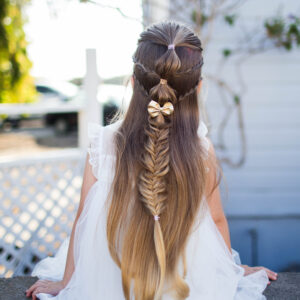
How to Create Triple Flip Faux Fishtails
You can never go wrong with a half-up hairstyle. The Triple Flip Flips definitely a family favorite. This hairstyle does…
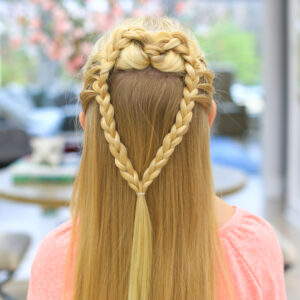
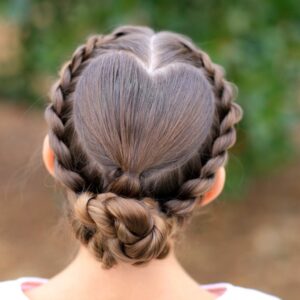
Mermaid Heart Braid | Valentine’s Day Hairstyle
I hope you guys are ready for another DARLING hairstyle tutorial that’s perfect for Valentine’sDay! Heart hairstyles are seriously some…
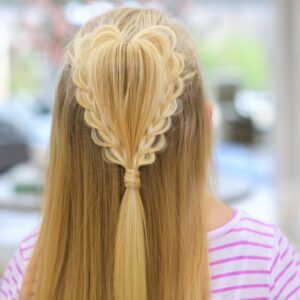
Fluffy Heart Braid | Valentine’s Day Hairstyle
January is flying by, and Valentine’s Day will be here before we know it! Every year I love thinking up…
Elegant and Beautiful Hairstyles for Special Occasions
I know I’m enjoying every second of this holiday season. This is definitely one of the busiest times of the…
Love is in the h(air)! The season of love is in full swing, and that means one thing: DATE NIGHT!…
4 Valentine’s Day Hairstyle Ideas
Valentine’s Day is right around the corner, and having the perfect hair is an absolute must! Whether it’s date night,…
Today we have a NEW HAIRSTYLE! It has been awhile but we are very excited to share the #CGHFishtailPony with you!This…
I’m loving this Twist Wrapped Ponytail style! It’s so great to use for any athletic event as it keeps the…
Today we have a great athletic hairdo to share. The #CGHbandedtwist is a combination of twists and banded ponytails.This hairdo …
Today we are sharing a beautiful combo hairstyle that is great for every day or a special occasion. It is…