
Today we’ll teach you a hairstyle we call the Braid Flip Combo. It is one of our easiest hairstyles, yet…
Ponytails
Page 4 of 12
In this tutorial we will show you how to create the Chinese Staircase Braid. This braid has been on our…
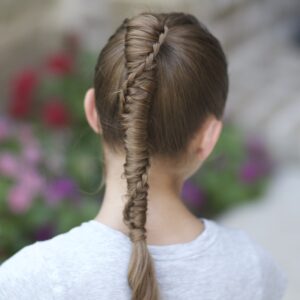
The No-Band Bubble Fishtail Braid
We first posted our original hair-wrapped bubble fishtail back in 2011. We then showed you a banded bubble fishtail just…
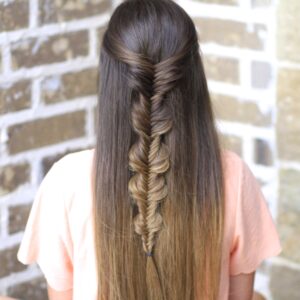
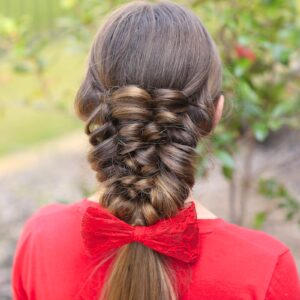
I’ve loved Stacked Braids for a long time. Pretty genius, really, accenting a braid down the spine of another braid!…
Dutch Accent Ponytail | Short Hairstyles
So, a few weeks ago, Bailey posted an “Outfit-of-the-Day” {OOTD} photo on Instagram of the clothing she put together and…

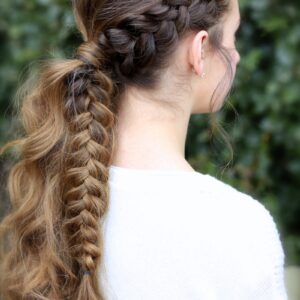
Twisted Edge Fishtail Combo | Braid and Updo
There have been so many viewer requests, sending in photos and asking for us to create a tutorial for this…
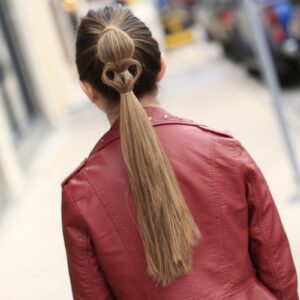
Cute Heart Ponytail | Valentine’s Day Hairstyles
It’s that time of year again, where we start seeing heart hairstyles everywhere! Just take a look at your Instagram…
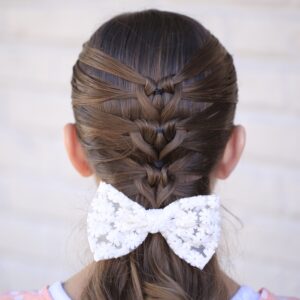
Mermaid Heart Braid | Cute Valentine’s Day Hairstyles
I can’t believe another Valentine’s Day is here! With only a few weeks to go, it is now time for…
The Viking Braid Ponytail | Hairstyles for Sports
When we started playing around with this hairstyle, it totally seemed like something a viking princess would’ve worn, hence the name…
How to Create a Banded Puff Braid
A few months ago, Alicia, my friend from high school shared a photo with me on Facebook of this hairstyle…

Monster High’s Sirena Von Boo | Halloween Hairstyles
Monster High videos are some of the most popular videos on YouTube, and the YT channel behind the most viral…

Bailey’s Dorothy Braids | Halloween Hairstyles
Ever since Brooklyn and I were little girls, we were fascinated with Dorothy from The Wizard of Oz, starring Judy…