For this week’s tutorial, we wanted to show you how to lace two simple braids together. Why do we like this?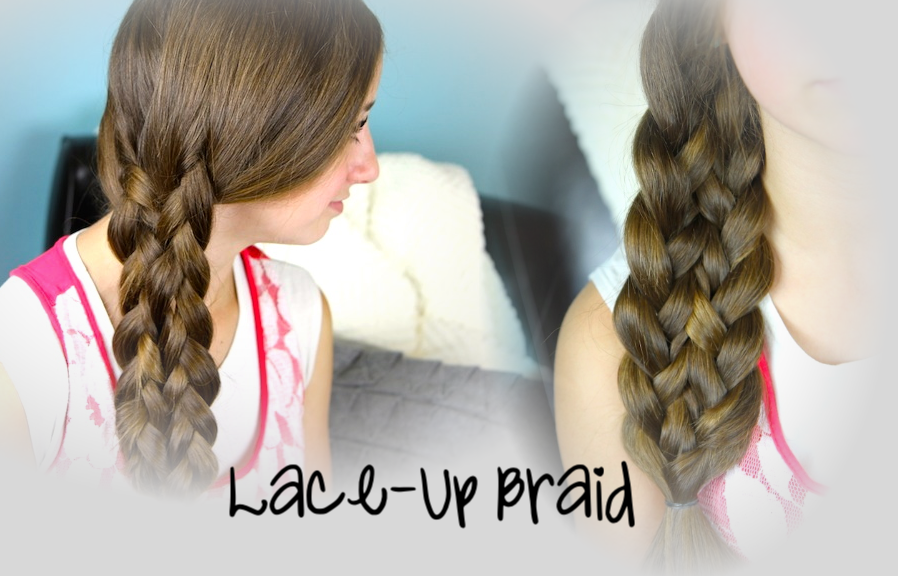
Because some girls can spend up to 20+ minutes trying to create a 6-strand braid. It takes so long to learn the stranding, but you can get the same look in only a few minutes by using our cheat method!
All you have to do is create two simple inverse braids, and then use one previously-excluded free strand to lace them together… just like lacing up boots!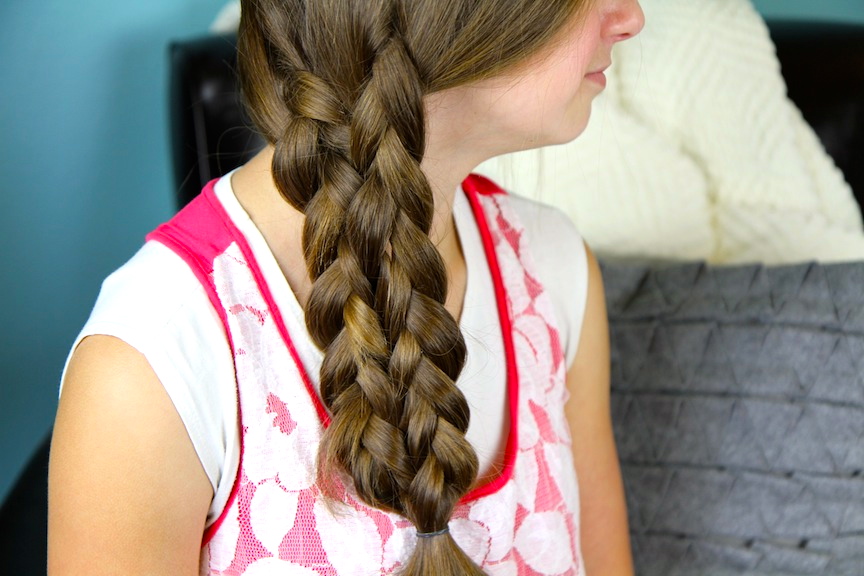
Once you get the lacing technique down, you can tie together a 4+ strand braid, or any number of individual braids!
Try it and see how many comments you get! When you tell your friends that this hairstyle only took you just a few minutes to do, they will not believe you!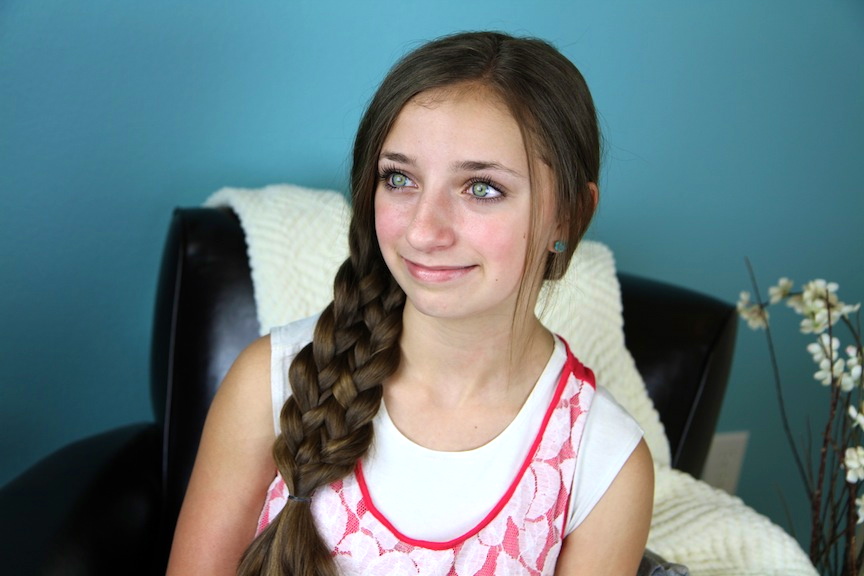
Items Needed: Brush, rat-tail comb, spray bottle, 2 hair bands, 1 small hair elastic, and hairspray {if desired}.
Time Requirement: 3-5 minutes
Skill Level: Easy
Step-by-Step Instructions:
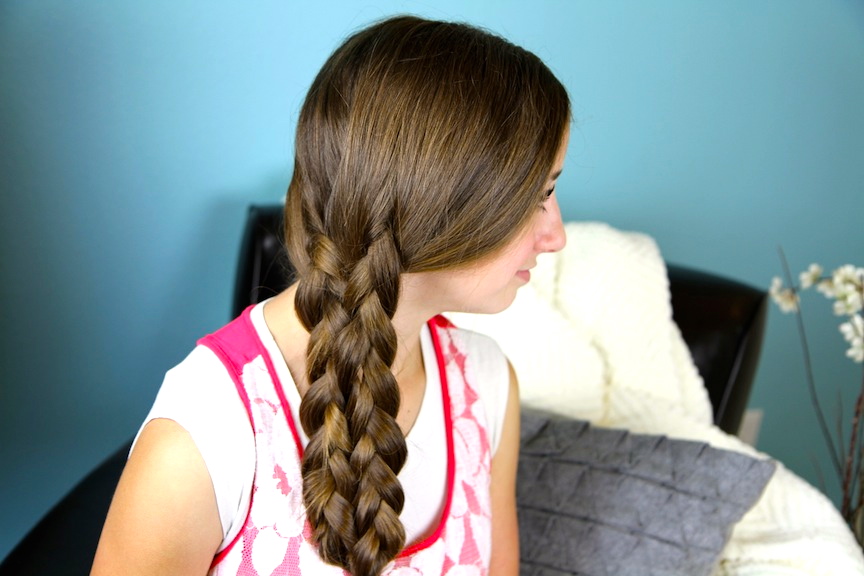
- Begin by deciding where you want to place the braid. I wanted mine over my daughter’s shoulder, but you can also do it straight down the back if you wish.
- Separate the hair into two nearly equal sections…
- Now pull a 1-inch strand of hair off of one of those two sections. You should now have three strands {2 large equal sections and one small 1-inch section in the middle of the two bigger sections}…
- Using elastics secure one large section and the small section out of the way…
- Working with the left-most hair section {one of the large ones}, divide it into three equal strands and create a normal inverse 3-strand braid, and secure the end with an elastic…
- Now release the right-most hair section, the other large one, divide it into three strands, and create a normal inverse 3-strand braid, and secure the ends with an elastic…
- You should now have two inverse simple braids with a small 1-inch strand of hair in between them…
- We now want to lace them together. Taking one braid poke your index finger and thumb through the edge piece and pull the “lace up” strand through it…
- Go to the second braid and using the same fingers, poke a hole through the top section of stranding and pull the lace up strand through it…
- Now pull that strand tight and the two braids should lace up right next to each other.
- Continue to work your way down the braids, switching sides and lacing as you go down, from right to left. Each time, you poke your two fingers through a stitch of braid and pull the “lace up” strand through. {Think of as lacing up a shoe or a boot.}
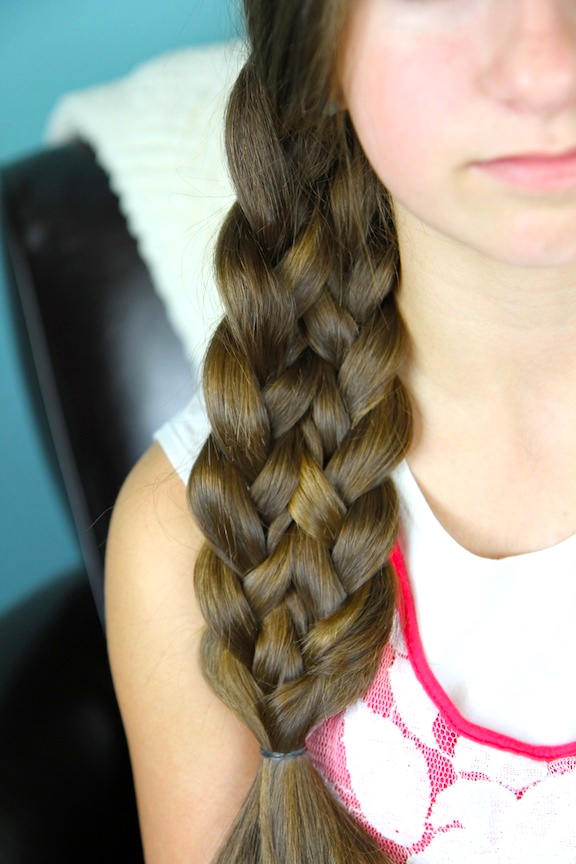
- When you reach the end of the braid, pull the laced strand tight so that the two braids stay together, and secure the entire braid with an elastic…
- Remove any extra elastics.
- Pancake the outside edges of the braid, by tugging on the elbows, for added flair.
Please feel free to leave me a comment below letting us know what you think! As always, if you loved this hairstyle, please feel free to share it!
Happy Hairdoing!

Also, don’t forget the video this week from my twins’ YouTube channel! They had a blast filming this DIY Galaxy Glow Jar tutorial, and we know you will love it, too!


can you show us a tutorial of the Lace-Up braid straight down before Saturday please and thank you 😀
Like this one PLZZZ And THANK YOU again 😀
Awesome hairstyle!! I think you are just amazing Mindy.
That is so cool and it’s really easy. I’m adopting a little girl from Haiti. Maybe can you do a tutorial on sweet pea so I have some good ideas for her hair?
Wow it looks awesome, I will definitely try it tomorrow
It looks difficult but it is easy… AWESOME ; )
You could even lace together 2 dutch/reverse braids 🙂
BEAUTIFUL
Hey Mrs. Mindy!
Do you have to be un expert or professional to do these gorgeous Hairstyles??? they look super difficult!
Wow, this turned out super pretty, and was so easy! Thanks for the fabulous hairstyles!
I really love it:)
How long do the glow jars last typically?
They last for about an hour…
Nice
Hi I made a Glow Jar and I looked at it and had an idea, what if you did Halloween or Christmas jars you could do orange glow sticks and glitter and cut out shapes for a jack o lantern and taped them on the front of the jar! or the same with Christmas except green glow stick with Christmas cutouts! 😀
I just recently found your website. Thank you so much for all the inspiration! I was gettig getting tired of braiding my daughters hair in just pigtails. Thank you for the time you take to make tutorials. Love this braid I will be trying it real soon.
Hi Mindy,
I tried this hairstyle today but decided to change it up a bit. I grabbed a little section at the top (like the bangs) and used that as the middle strand to lace up the two braids. I made two dutch lace braids (grabbing only hair from the front of the head) and I braided them pretty much right next to eachother so it wouldn’t be to much of a stretch lacing them up. Then I justed laced them together and combined it all together in a normal 3 strand braid. It turned out great, pretty much just what you did except it was like a dutch braid version.
Thanks for the inspiration!
What is the song in your intro?
it’s a cute song and i just want to hear the whole song.
thanks
Hi Mindy! I absolutely adore your hairstyles! I was just wondering what you used to create this website. I know it’s not blogger, but i have no idea what other things are used to create websites. Thanks!
Hi Mindy! I am a writer and fellow blogger and I’m just starting out. I have been an admirer of your website for a long time and it would mean so much if you checked out my blog and told me what you thought!
I also love the hairstyle! You are so creative!
I would use it for halloween and put it outside and have the porch lights off to kinda frighten people
i would use it for party’s! instead of hanging those paper chinese lanterns, i would tie the glow jars to a string & use that!
hi , can u make a videoo of sweet pea hair tuturial.she is sooo cute!!!!
IT MAKES ME THINK OF CHALLAH BREAD AND THATS NOT EASY TO BRAID BUT BEAUTIFUL AND PRACTICE MAKES PERFECT LOVE IT
I love Challah!!
The glow jars are cool
mindy this is AWESOME .i love ur hairstyles
Wow looks so cool! I don’t have enough hair to create this look sadly xx.
http://www.beautyandlouise.com
So simple and so clever. Once again you have showed us how to make something spectacular with the minimum of fuss. Love your ideas and your explanations.
Love this! the second i saw it i instantly tried on myself and it turned out beautiful!!!!