We were contacted the other day by Intermountain Moms {mommy network on Facebook} to thank us for shouting out their page to our fans in a recent video. As part of that “Thank You” they are offering an exclusive giveaway to our US and International fans where you have a chance to win 1 of 5 Sephora $100 gift cards! Simply click the link, like their page, and let them know what you would use the gift card to buy! The giveaway ends on Dec 9th, 2012, at midnight, so be sure to enter!
* ~ * ~ * ~ * ~ * ~ * ~ * ~ *
Many of you know how popular our Waterfall Braid has become! It has become the most searched, modern braid on the Internet. In fact, our Self Waterfall Braid tutorial is by far the most popular hairstyle tutorial on YouTube {at over 18,000,000 views}!
Since our first Waterfall Braid posting back in 2009, we promised to bring you beautiful variations of this braid and today’s promises to be another beautiful one!
Here we show you how to create the Waterfall Braid using the Dutch Braid instead of a French Braid. Yes, it can be done… and next week we will upload how to DIY {Do-It-Yourself} this braid!
What I particularly love about the Dutch version is that the braid really pops out, creating the perfect accent for the falling strands!
The stranding {or stitching, as we call it} for the Dutch Waterfall Braid can be quite difficult. I will explain the steps the best way I can, but please be sure to view the video to gain a complete understanding:
- Begin by picking up a small section of hair where you want to start the braid {I started on the front, above the right eye}…
- Divide this small section into three strands…
- Begin a normal dutch braid. This means that the middle strand will always go OVER the outer strands {or you can say the outer strands will always go UNDER the middle strand}…
- Do one complete stitch by taking the middle strand over both outer edges once…
- You now drop the middle piece and let it fall out of the way.
- This is where it gets a little tricky… now pick up a small section of hair to add back into the braid and add it back as the MIDDLE piece. Do NOT add it as the bottom piece or the braid won’t work. You have basically just dropped the middle strand and replaced it with a new strand in the exact same location.
- Now take that middle strand and cross it over the outer bottom strand. This will create the outer edge that pops out of the braid…
- You then add hair to the top-outer strand {this is exactly what you would do with a regular Dutch braid) and cross the middle strand over that one…
- You have now just finished your second “stitch” at this point.
- Repeat steps 5-7 over and over again until you get to a point where you want to finish off the braid.
- Using the three remaining strands, create a basic braid down the remainder of the hair and secure with an elastic.
- Add a ribbon or any accessory as desired.
You can see our other Waterfall Braid variations here:
- Self Waterfall Braid {over 18,000,000 views}
- Waterfall Braid {over 8,000,000 views}
- Waterfall Twist {over 3,000,000 views}
- Double Waterfall Braid
- Waterfall Braid with Spiral Curls
- Waterfall Braid with Crimped Strands
- Waterfall Combo {headband, ponytail, braid-wrapped bun, messy bun}
I am sure that this Dutch Waterfall Braid will be just as viral as the original Waterfall Braid, since everyone is wanting to learn the latter! You can be the first to master this, and be the envy of all the other girls wearing just the Waterfall Braid!
If you LOVE this hairstyle, please be feel free to blog about it, share it on Facebook, tweet it on Twitter, pin it on Pinterest, and add it on Instagram. For the first time ever, we will accept all video responses of you showing the Dutch Waterfall Braid on YouTube {just be sure you tag us as CuteGirlsHairstyles in the video title}!
Enjoy!
Items Needed: Brush, rat-tail comb, spray bottle, 1 large hair elastic, bow and hairspray {if desired}.
Time Requirement: 5 minutes
Skill Level: Hard
Happy Hairdoing!
* Note from Mindy: Don’t forget to follow us on BlogLovin, a new easy-to-use blog reader!
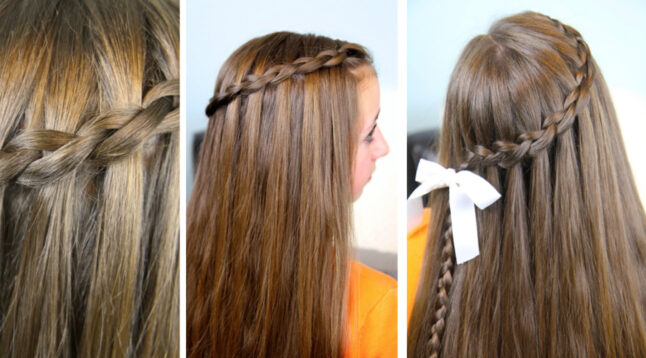
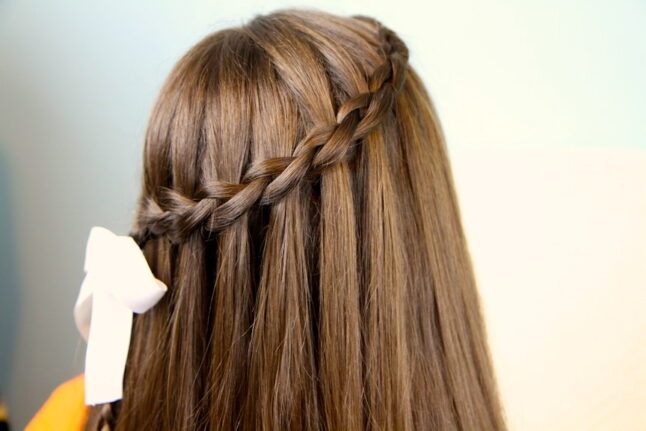
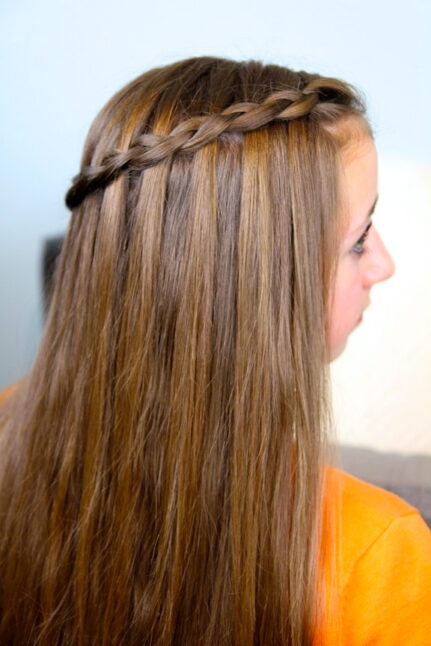
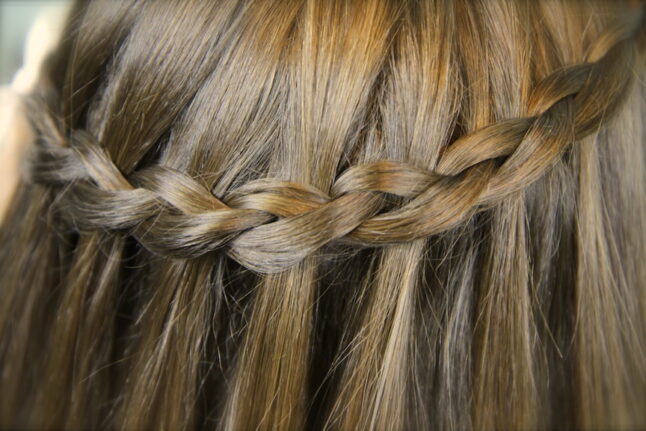
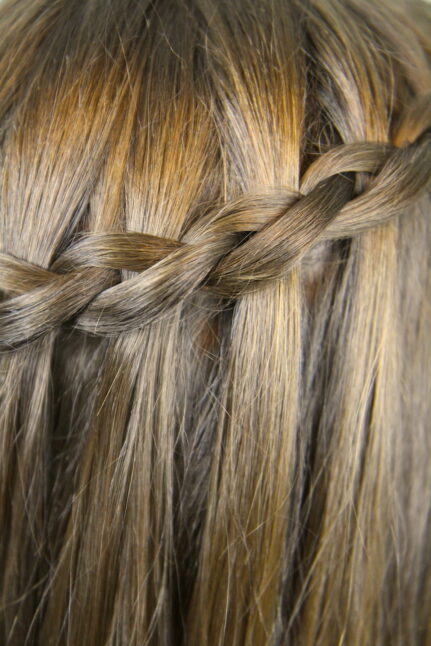
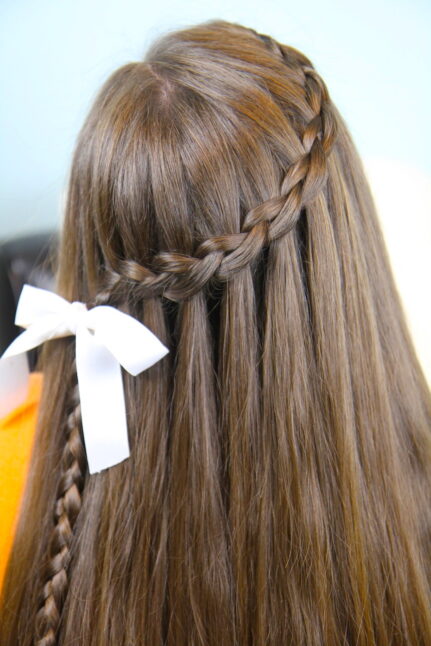


This is probably my favourite hair style! If only I could do it on my self! :p
On this style on my daughter I did the slide braid at the end instead of a regular braid. It looked so cute!
Hi mindy I love you! Can you do a video on how to do a lace braid bun
i love you
i like ur wedsiteand thanks for teaching me verey great braids
hi mindy, i am 12 years old and i love these hairstyles so much but i always have some trouble with doing it on myself because my bangs are different length how can i do it ?
Hi mindy, I have my year 6 graduation this year! I live in Australia and I tried this on myself and it looked exactly like the one you did, it was a big help and it will be,my hairstyle for my year 6 graduation! Thank you so much!
Such a cute addition to the Waterfall braid family!
Have not tried this on myself yet, but it looks great on other people.
Thank you so much Mindy!
this hairstyle is amazing and give a great look
Hey could you show how to stop a waterfall into a side ponytail
hi im new member of your site but im inspire your work great tips my hair is curly pleas give me tips how solce this problem
hey Mindy! so i am a HUGE fan! i check your blog every day! so i was wondering if you could do a tutorial for the easy “sock bun” you know, they bun that gets really big and pretty by adding a sock under it. so yah, it was just an idea! thank you for ur awesome blog!
i love it! this is how ive been doing my waterfall braids but now i can do it better! You should do a video on where you buy all your lovely girls clothes!!
I tried doing this on ED this morning from memory but failed, thought to myself ‘I need to check Cute Girls video again’ and lo and behold this post pops up in my reader! Are you psychic? Will try again tomorrow now I’ve had the information delivered to me…
I was wondering if that could be done – looks great. The braided over pony tail also looks great done with a dutch braid.
This is amazing.. I am only 13 and I can do it on myself. Request: could u please make a tutorial on th “inside-out” braid. Thanx. And HAPPY HOLIDAYS!!
so cute im from algeria love ya