I’ve noticed this cool new Scissor Waterfall Braid technique several weeks ago, and now a few YouTubers and Instagrammers have shown how to create one with their own fabulous tutorials. Viriyuemoon on IG was who I saw this from, but Princess Hairstyles, FletteMaria, and HairAndNailsInspiration have created tutorials.
This is a VERY creative braid! So many readers felt such that they began tagging me, or emailing photos of this hairstyle to me, asking for us to film a tutorial for it! Today, we will teach you how to create a Scissor Waterfall Braid Combo.
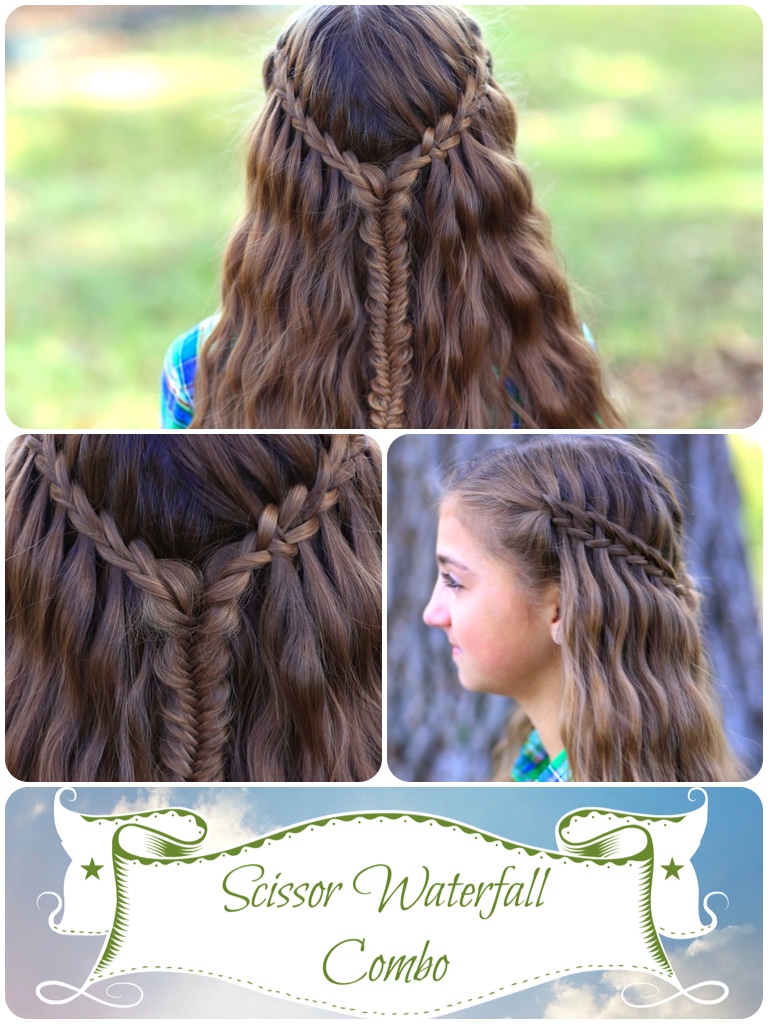
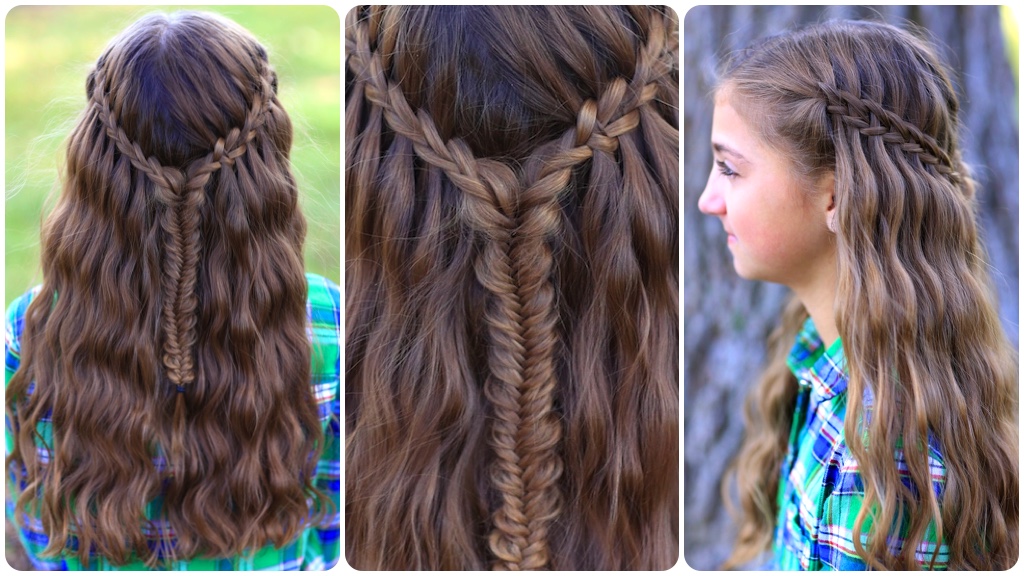
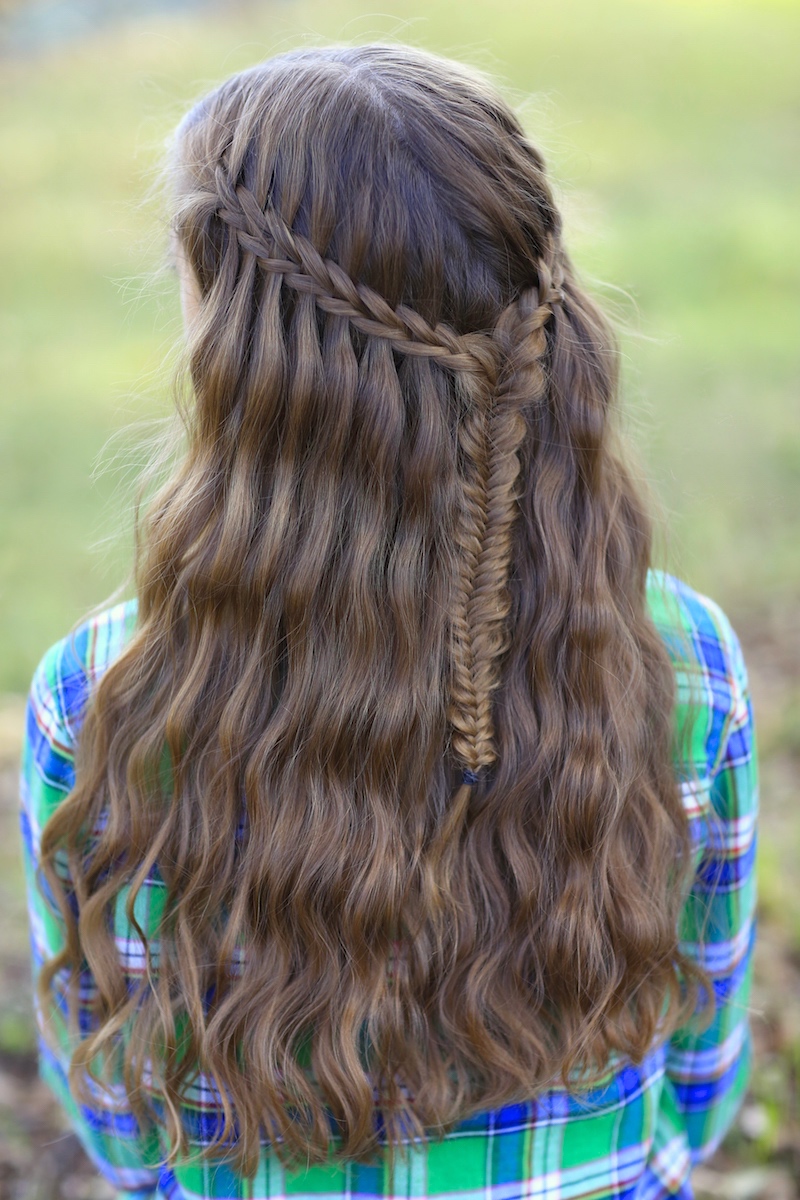
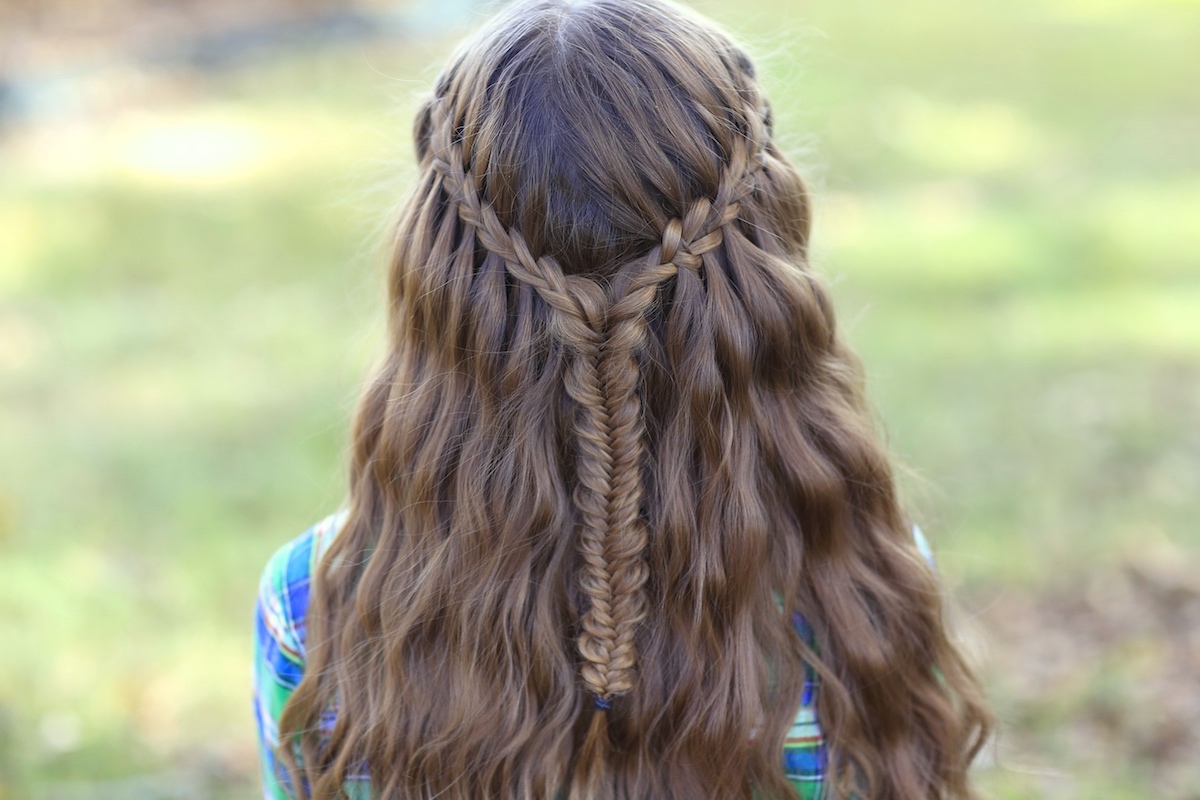
Two weeks ago Kamri volunteered to model as long as I allowed her to add a messy fishtail to it. I so loved the idea of a combination, that we decided to incorporate the Scissor Waterfall Braid with a base of waves created by a deep-V waver, and then bringing the scissor waterfalls back into a centered messy fishtail braid. It’s gorgeous!
To see your own photo recreations featured in our CGH app, feel free to tag your own photos of this hairstyle on IG with: #CGHScissorWaterfallCombo
Isn’t this braid beautiful? Although I created this combo using waves in Kamri’s hair, this would look great on straight or curly hair as well! I can imagine this being perfect for a communion, wedding, flower girl, church, or every day wear! It also hold up fairly well with activity, as the day we filmed this tutorial it was very windy and we had been active outside for a few hours. A few of these photos were taken then.
Items Needed: Brush, rat-tail comb, spray bottle, 2 small hair elastics, hairspray {if desired}.
Time Requirement: 20-25 minutes
Skill Level: Hard
Step-by-Step Instructions:
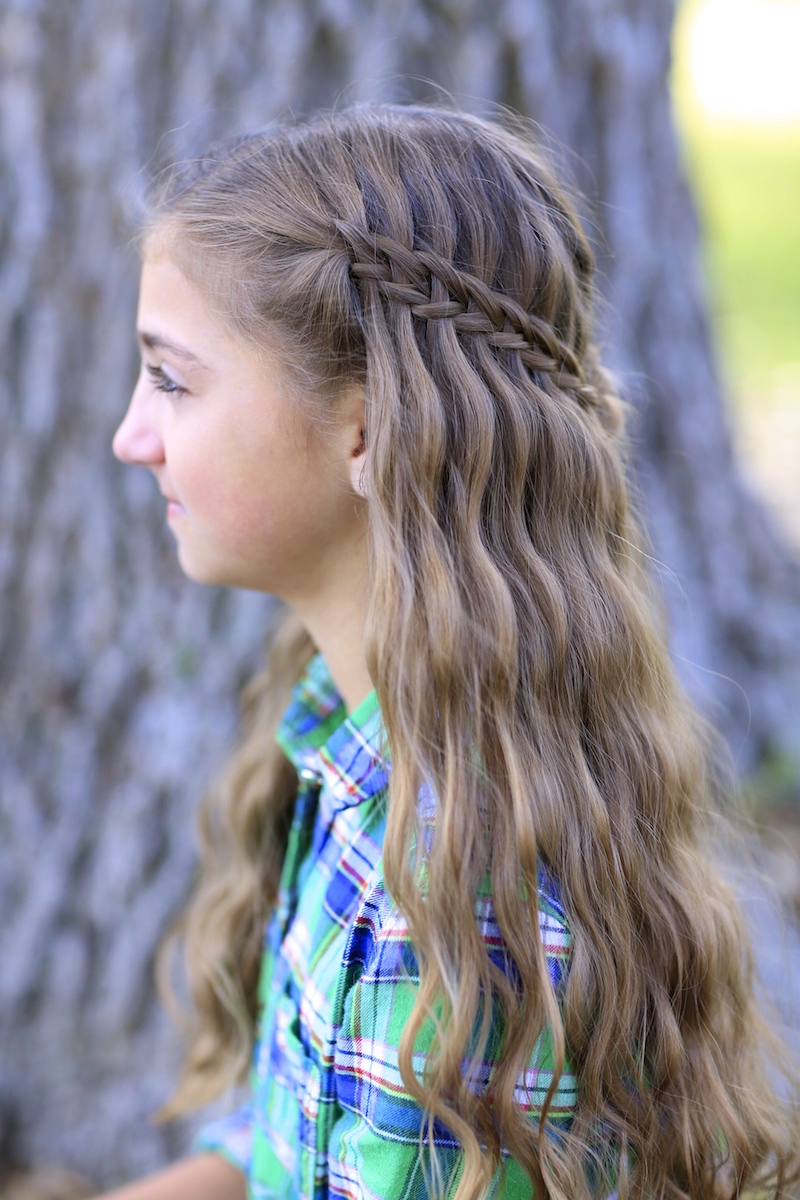
- Begin by parting hair slightly off to one side {or a middle part, if you feel inclined}…
- Now pick up a fairly large section of hair from the ear up to the part line…
- Divide this section into 4 equal strands – the two outside pieces will be Strand #1 and Strand #4, while the middle strands will be Strand #2 and Strand #3…
- Take the two middle pieces, Strands #2 & 3, and switch their places by crossing them…
- Take the outside pieces, Strands #1 & 4, and switch them with the two middle strands so they now become your new middle pieces {leaving you with new outside edges are as Strands #1 & 4 and the middle ones being Strands #2 & 3}…
- Take the middle Strands #2 & 3 and combine them into one strand for now…
- Now take the top Strand #1 and bring it across the two middle pieces and combine it with the bottom Strand #4, which just now creates your first braid stitch…
- Now pick up a small strand of hair from near the part line, take it over the combined middle Strands #2 & 3, but under the bottom Strand #4, and drop it {this becomes your first waterfelled strand}…
- Separate the middle strand back into the original two Strands #2 & 3, and separate the outside edges into Strands #1 & 4 again…
- Now take the outside strands and switch them with the middle strands as you did in Step #4, and start your numbers over again…
- Repeat Steps #4-9 for additional waterfall stitches, over and over, until you create the braid length you want {you can do one long wrap-around braid, bring two back and tie them, an accent braid or a combo braid like this one}…
- When you are finished with your waterfall portion, continue the braid with a few simple braid stitches and secure with a rubber band for now…
- Next, repeat the Scissor Waterfall Braid on the other side of the head…
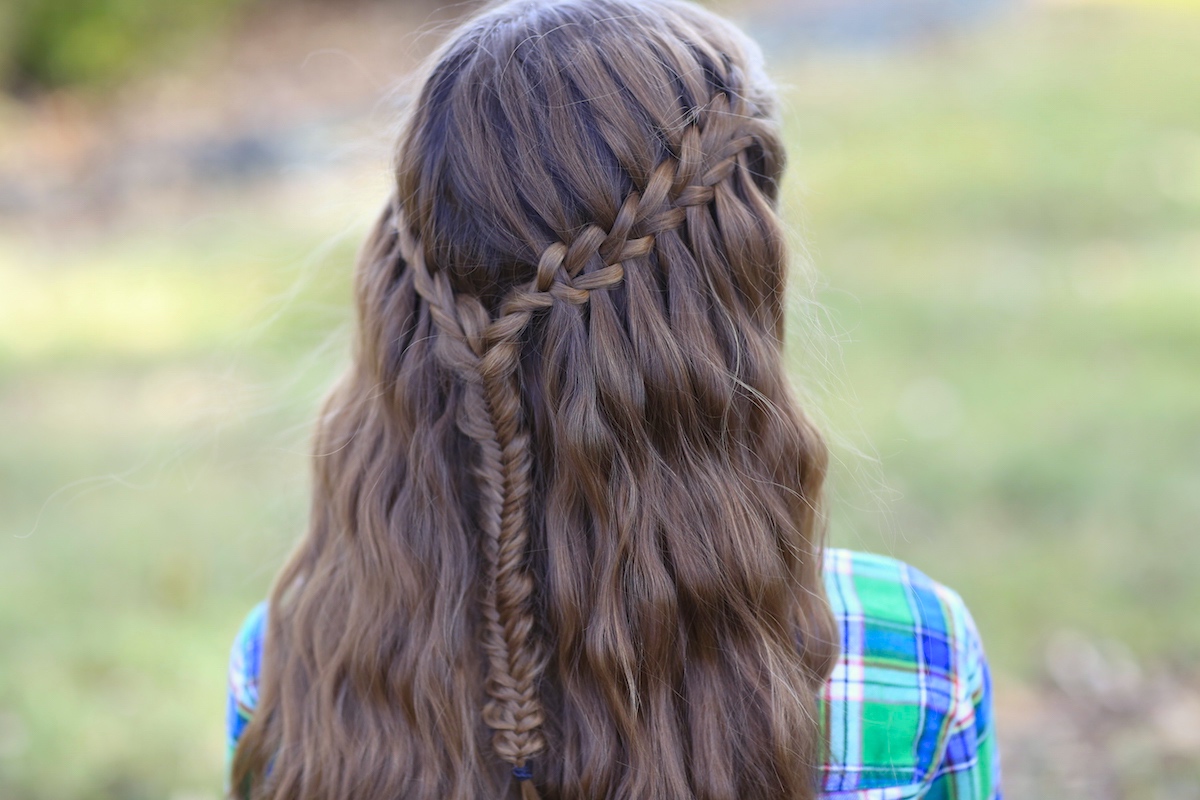
- Once both braids are complete, bring them to the back {removing your previously-placed temporary rubber band} and secure them together with a rubber band…
- Now create a Fishtail Braid with your combined strands, pancake it for a messy look, and secure with a rubber band…
- {Optional} Remove the top rubber band by.. cutting it with nail clippers, to allow the waterfall portion to flow into the fishtail braid…
- Add hairspray or accessories {as desired}.
What do you think about this Scissor Waterfall Braid Combo? How many ways can you think of to incorporate this fun braid into a combo? Feel free to share this with a friend you want to create this on you!
Happy Hairdoing!
Want to learn my family’s recipe for yummy Pumpkin Ice Cream Dessert? Think pumpkin pie, only made with ice cream! The girls show us how this week on their BrooklynAndBailey YouTube channel! Perfect for Thanksgiving or any Fall festivity, I promise! Click below to view…


I love scissor waterfall braids. At first they were hard to do but with practice I can do them better.
I love it! I will try it on my sister’s hair 🙂
Wow how come I missed this. Looks so stunning. Thank you cgh family. I just love what you do!!
Gorgeous!
Cute
They are really cute hairstyles I really like the fishtail one
Love this hairstyle so cute 🙂 For the next vid can you do a Q & A vid please @cutegirlshairstyles
I love this tutorial!! I’m definitely going to play with it during my down time at the salon today!!
that is the coolest
that’s sooo pretty! really cute. :0
This reminds me of the Zipper braid… I think it’s actually the same technique (obviously not the waterfall part of it) as the Zipper braid that you did a few months back. Is this true, or am I wrong? Just wondering! 🙂
This looks so pretty, lovely tutorial!
http://fashion-soup.com/
loved it!!
really cool 🙂
❤️ It.
This is a very cool twist on a messy fishtail and waterfall. I absolutely fell in ❤️ With it as soon as I saw it!
So pretty!!!!
You and your family have really helped me in my life. I was bullied a lot and I was cutting myself all the time on my wrist and I really didn’t see a reason to live. I was looking on youtube for some hairstyles to do when I found you guys and I was very happy that I did. Thank you so much!!
We love you, Sarah! You mean a lot to us, and lot of other people, don’t let anyone else tell you otherwise! xoxo
I LOVE all the hairstyles!! I love doing hair but I have no sisters Just 2 younger brothers(IT SUCKS!!). I do quite a bit of babysitting and when ever I walk through the door the girls ask me if I can do their hair. I love the ones that look so hard but are really easy to do. I can do most of them on myself. I have really thick hair so everything turns out a bit bigger but it still looks great! I have at least every single one memorized.
Awesome, Genya! What lucky little girls to have you as a babysitter! xoxo
That’s what my mom says all the time.