Tonight I want to introduce you to, EveliniCutza, a YouTube Beauty Guru with whom we have had a friendship for over two years now! I originally found out about Evelina when she created a YouTube video response to our popular Waterfall Braid tutorial.

Evelina is from Moldova, and not only is she beautiful but she is very creative, too! I know that you will enjoy her channel, just as we do!
As a treat to all of you, we posted two videos to YouTube tonight. This one, and another that you will see here on Wednesday night.
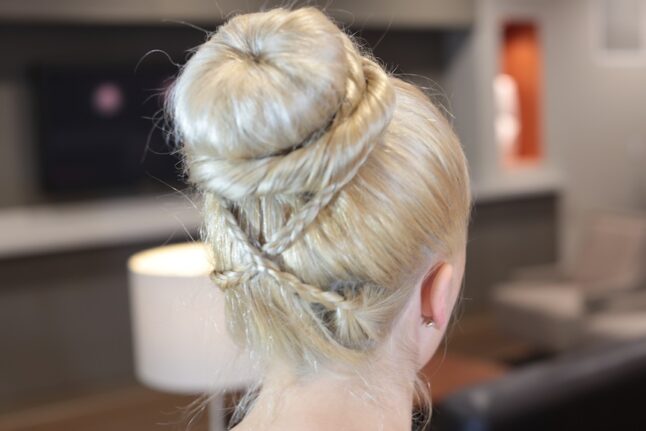
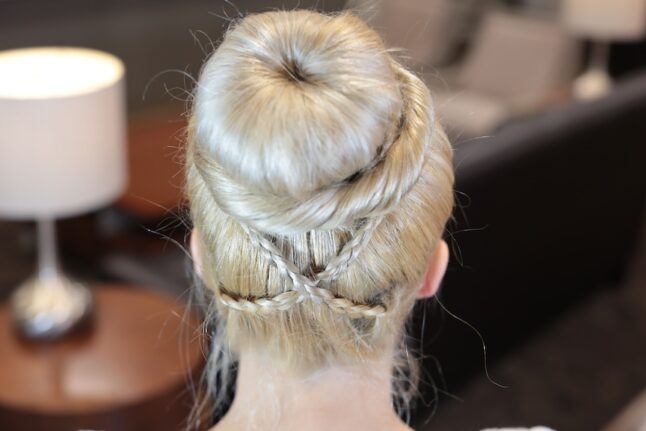
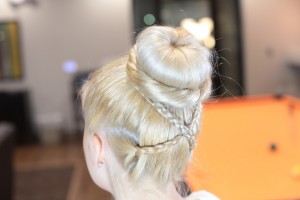
Here I show you {using Evelina as my model} how to create a gorgeous sock bun updo, with crossed micro-braid accents. The best thing about this updo, is that you can complete it in under 5 minutes!
This hairstyle is perfect for occasions such as Prom, Homecoming, a wedding, ballet, or any other formal event! {However, this does not stop me from wearing this style in a more dressed down look!}
Items Needed: Brush, rat-tail comb, spray bottle, 1 sock bun form, 2 small hair elastics, 2 large hair bands, 2-4 bobby pins, and hairspray {if desired}.
Time Requirement: 3-5 minutes
Skill Level: Medium
Step-by-Step Instructions:
- Begin by sectioning off two small square sections of hair about the size of a pencil in thickness, on the back of the head behind the ears…
- Braid each of these sections in a regular braid pattern and secure with elastics…
- Pull all the remaining hair up into a high ponytail, and secure with a hair band…
- Pull the ponytail hair through the bun maker, and slide the bun maker down the ponytail until it rests on the head, covering the hair band…
- Allow the hair of the ponytail to fall around the bun maker, an be sure to distribute it evenly until the bun maker is fully covered with hair…
- Place the remaining hair band over the hair and bun maker to create a perfect looking bun {there should still be hair still sticking out from under the rubber band}…
- Pick up a small section of the left-over hair and begin twisting it…
- As you twist, begin to add in hair into the twist and work your way around the entire bun until you have picked up all the hair…
- After twisting/adding in all the remaining hair, continue twisting the strand and secure the end of the twist a small rubber band…
- Continue winding the remaining twist and secure with a few bobby pins…
- Now, pick up the two micro-braids and cross them on the back of the head before before wrapping around the bun…
- Secure/tuck the ends of the braids between the twist and the bun, and bobby pin the ends into place.
- Tame flyaways with hairspray.
Enjoy!
Happy Hairdoing!

* Note from Mindy: Don’t forget to follow us on BlogLovin, a new easy-to-use blog reader!


I’ve tried and tried, but I can’t seem to use the bun maker!!
Dear Mindy I do not know when you will read this next but I have no bun macker and I did not understand your very breif explanation of how to make one. Do you think maybe you could film on a next tutorial how you make one of those. Or Brooklyn and Bailey could to. But when you read this please consider it!
Lots of love
Linda
Suprise! So Cool This Hair Style!
I love this hairstyle!!!! It’s amazing, and beautiful !!!
This hair style is very cool!!
This braid-sock bun is just what brides are looking for. Thanks for the video and the step by step instructions on how to get this done. It’s really helpful!
Hi,
I love your all your styles, their so cute and outgoing.But can you please make more videos of styles that a preteen can do on her own hair?
Thanks
Where do you get the bun maker? Ive been looking for them but cant find them.
Hi guys I REALLY want to thank ya’ll for all that you have done for me. I have extremely thick hair and have ABSOLUTELY nothing to do with it and ya’ll helped me a bunch!!!!!!!! It would be the best thing in the world if I could be in one of ya’lls videos! I live in Texas and Medium Brown hair sort of like Brooklyn and Bailey’s hair color. I have been one of ya’lls biggest fans for about 2 years now!!!!
Your BIGGEST fan- Hannah
i really want to thank you guysss… i had nothing to do with my hair and thanks to you i got this beautiful EASY updo that didn’t even take 5 min to do… thank u Xx
Love the buns! Thanks for the tutorial. Also, LOVE Mindy’s nail polish color! Do you mind sharing color and brand?
wow jealous of her hair style and hair color!
i need 2 really grow out my hair!
-halley 😉
Awesome
Beautiful updo!
It even looks good without the micro braids at the back.
Thank you Mindy!
I love this hairstyle!!!! It’s amazing. I have thin hair so the bun maker makes my hair look so much thicker than it really is!
Me and my friend love this style. We do this with our hair quite alot. However, we do not use bobby pins, we use “fringe pins”. They are designed to hold more hair and I find that they work better in buns (not so much on fringes).
Wow this a goregeous hairstyle! Tried it out and it looks great – thank you for sharing it with us 😀
Hey, I have found your blog while touring in the blog land. I was looking for some kind of hair style that has been described a step by step instruction for styling own hair in a very short time. This blog article impressed me a lot and I have tried this also. This was great! Thanks mate for sharing such a nice blog. Keep it up. I will visit again in your blog.
This is really a fantastic updo!!!