Be sure to subscribe to our NEW MillennialMoms YouTube channel!
For a few years now, moms have emailed in to ask me why we quit posting “Mom Minute” advice articles and videos here on CGH. I really loved doing it, but we really wanted to do something much bigger than an occasional post!
So I took the past year to scour the online world looking for moms who were talented, fun, and wonderful mothers who could help me on this project! (What I found is that “nearly all” mothers are talented, fun, and wonderful moms, making the job that much harder!)
Our family is excited to announce today the launch of our 3rd YouTube channel, MillennialMoms! A total of 8 different moms will post videos, each taking a day of the week, Mon-Sat @10am CST. They’ll touch on anything from from DIYs, Lifestyle, Food, Humor, Advice, Music Parodies, Parenting, and all things Mom!
Be sure to click here to be notified of each NEW episode! (I am so excited, I can hardly stand it!)
___________
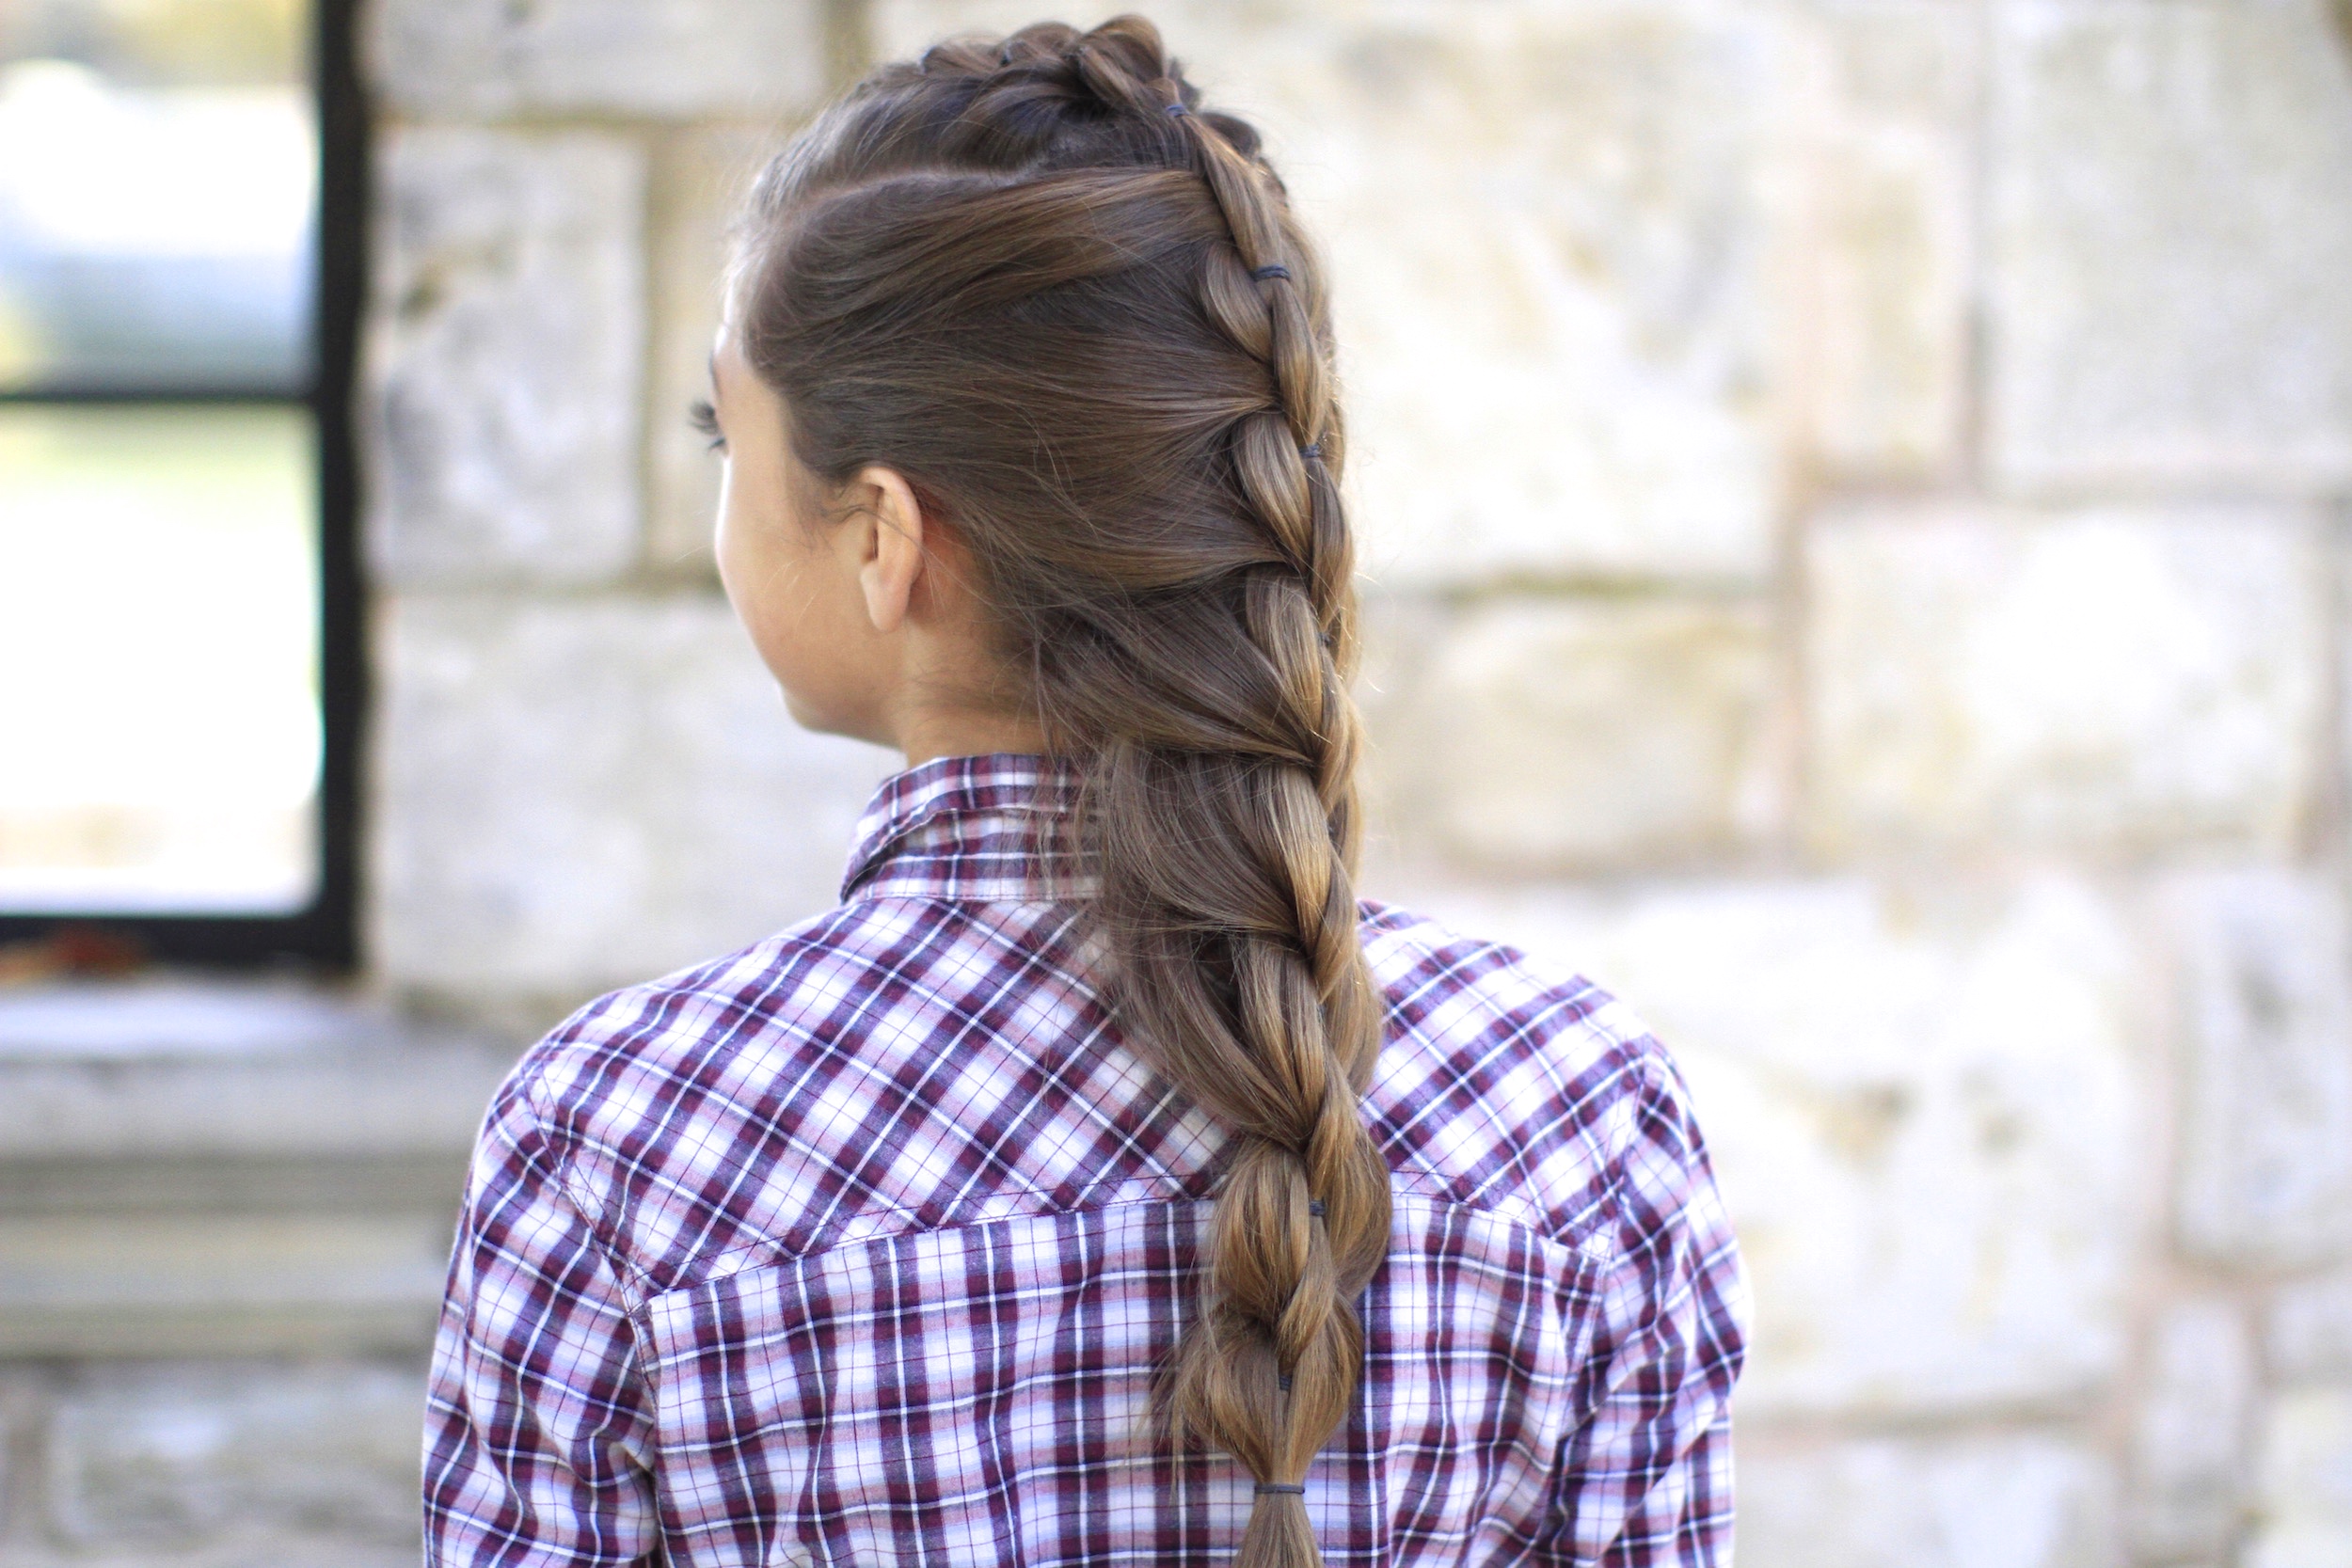
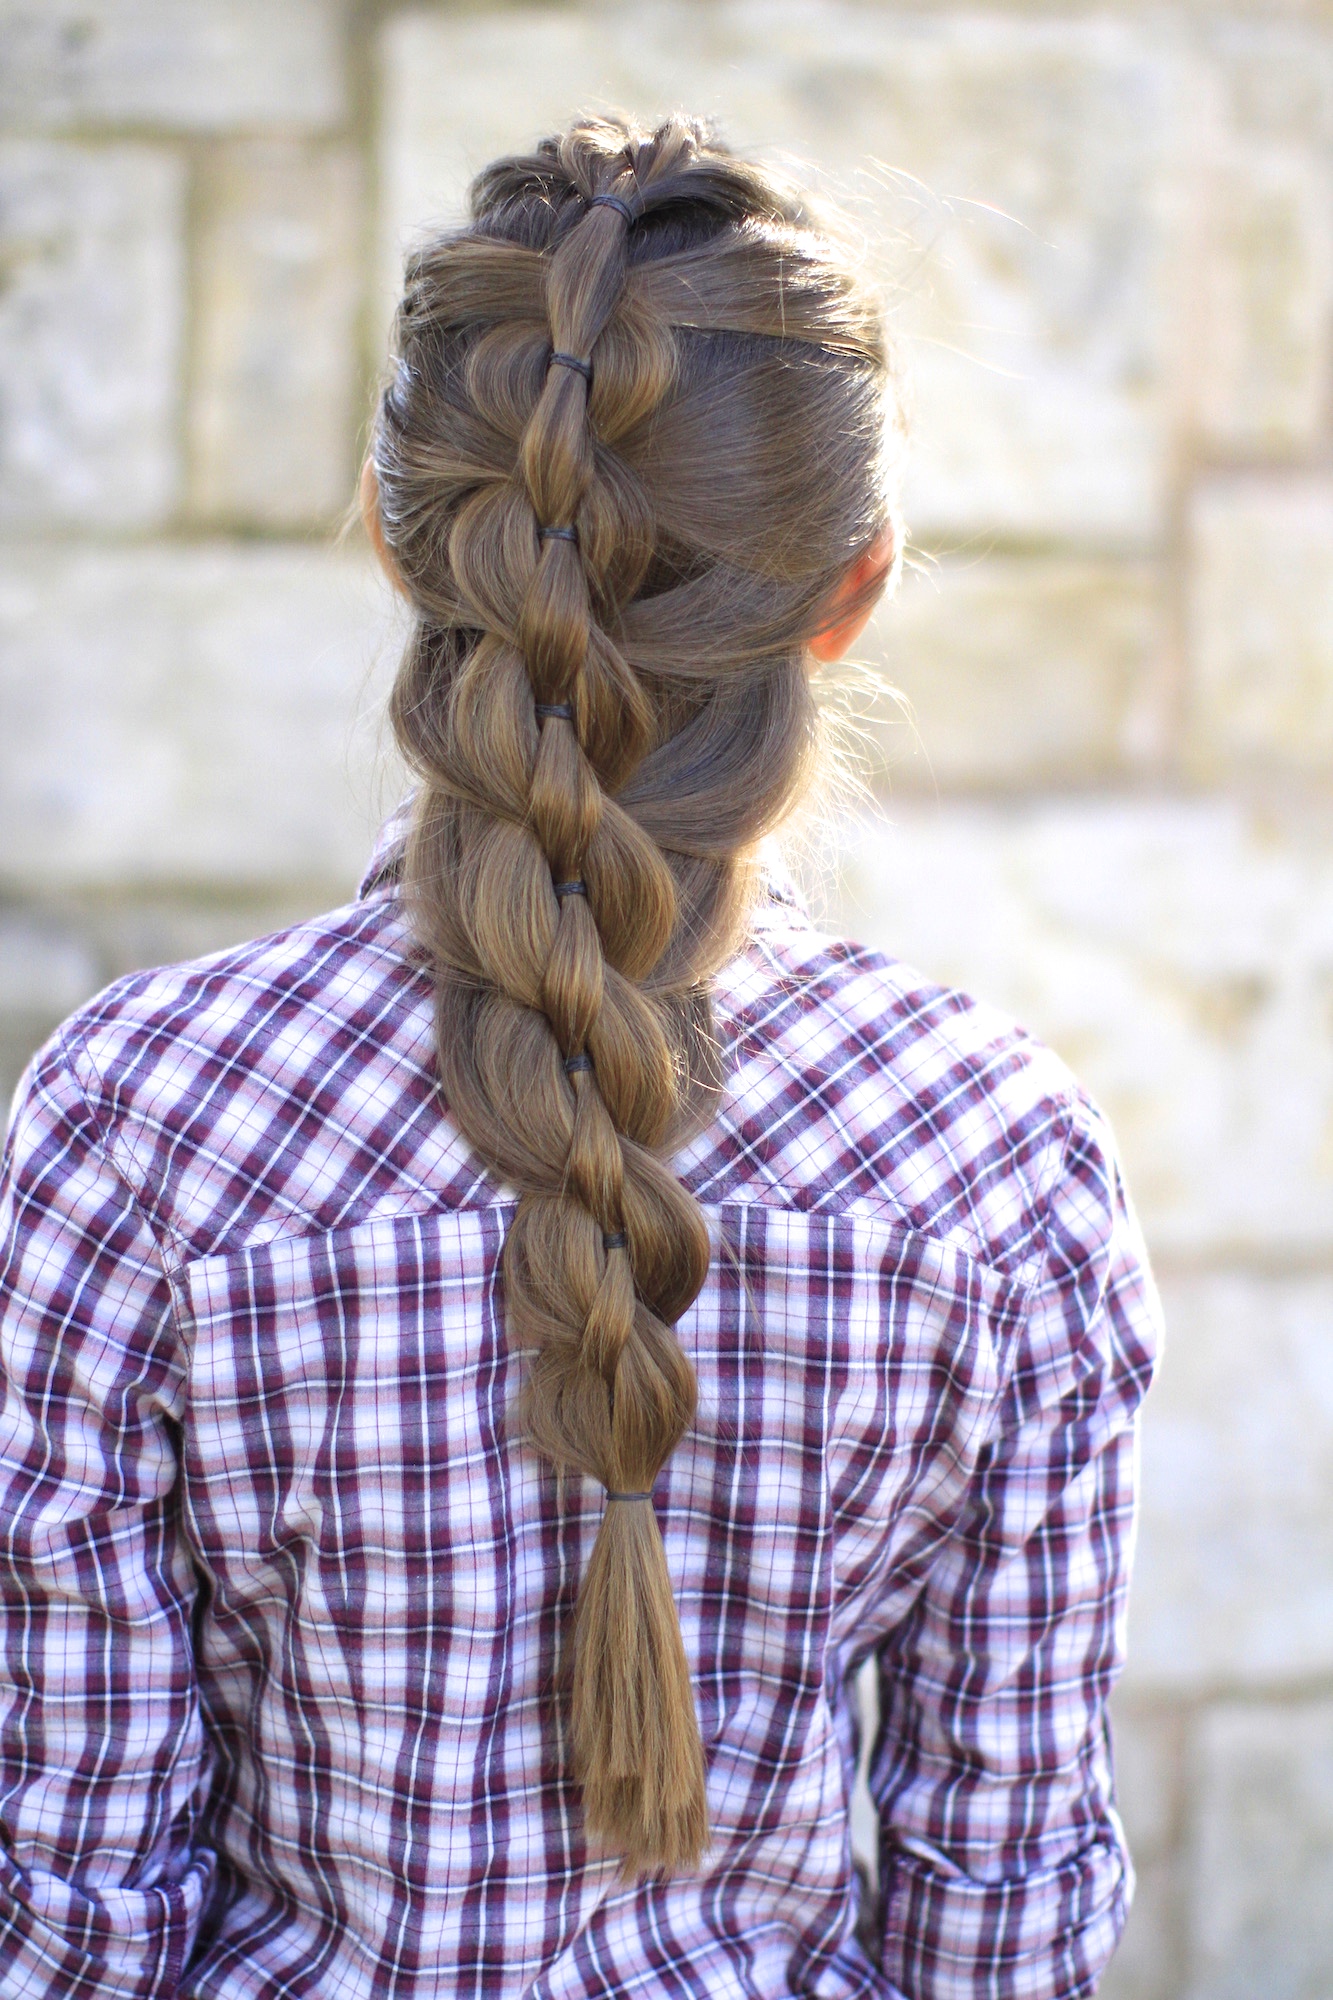
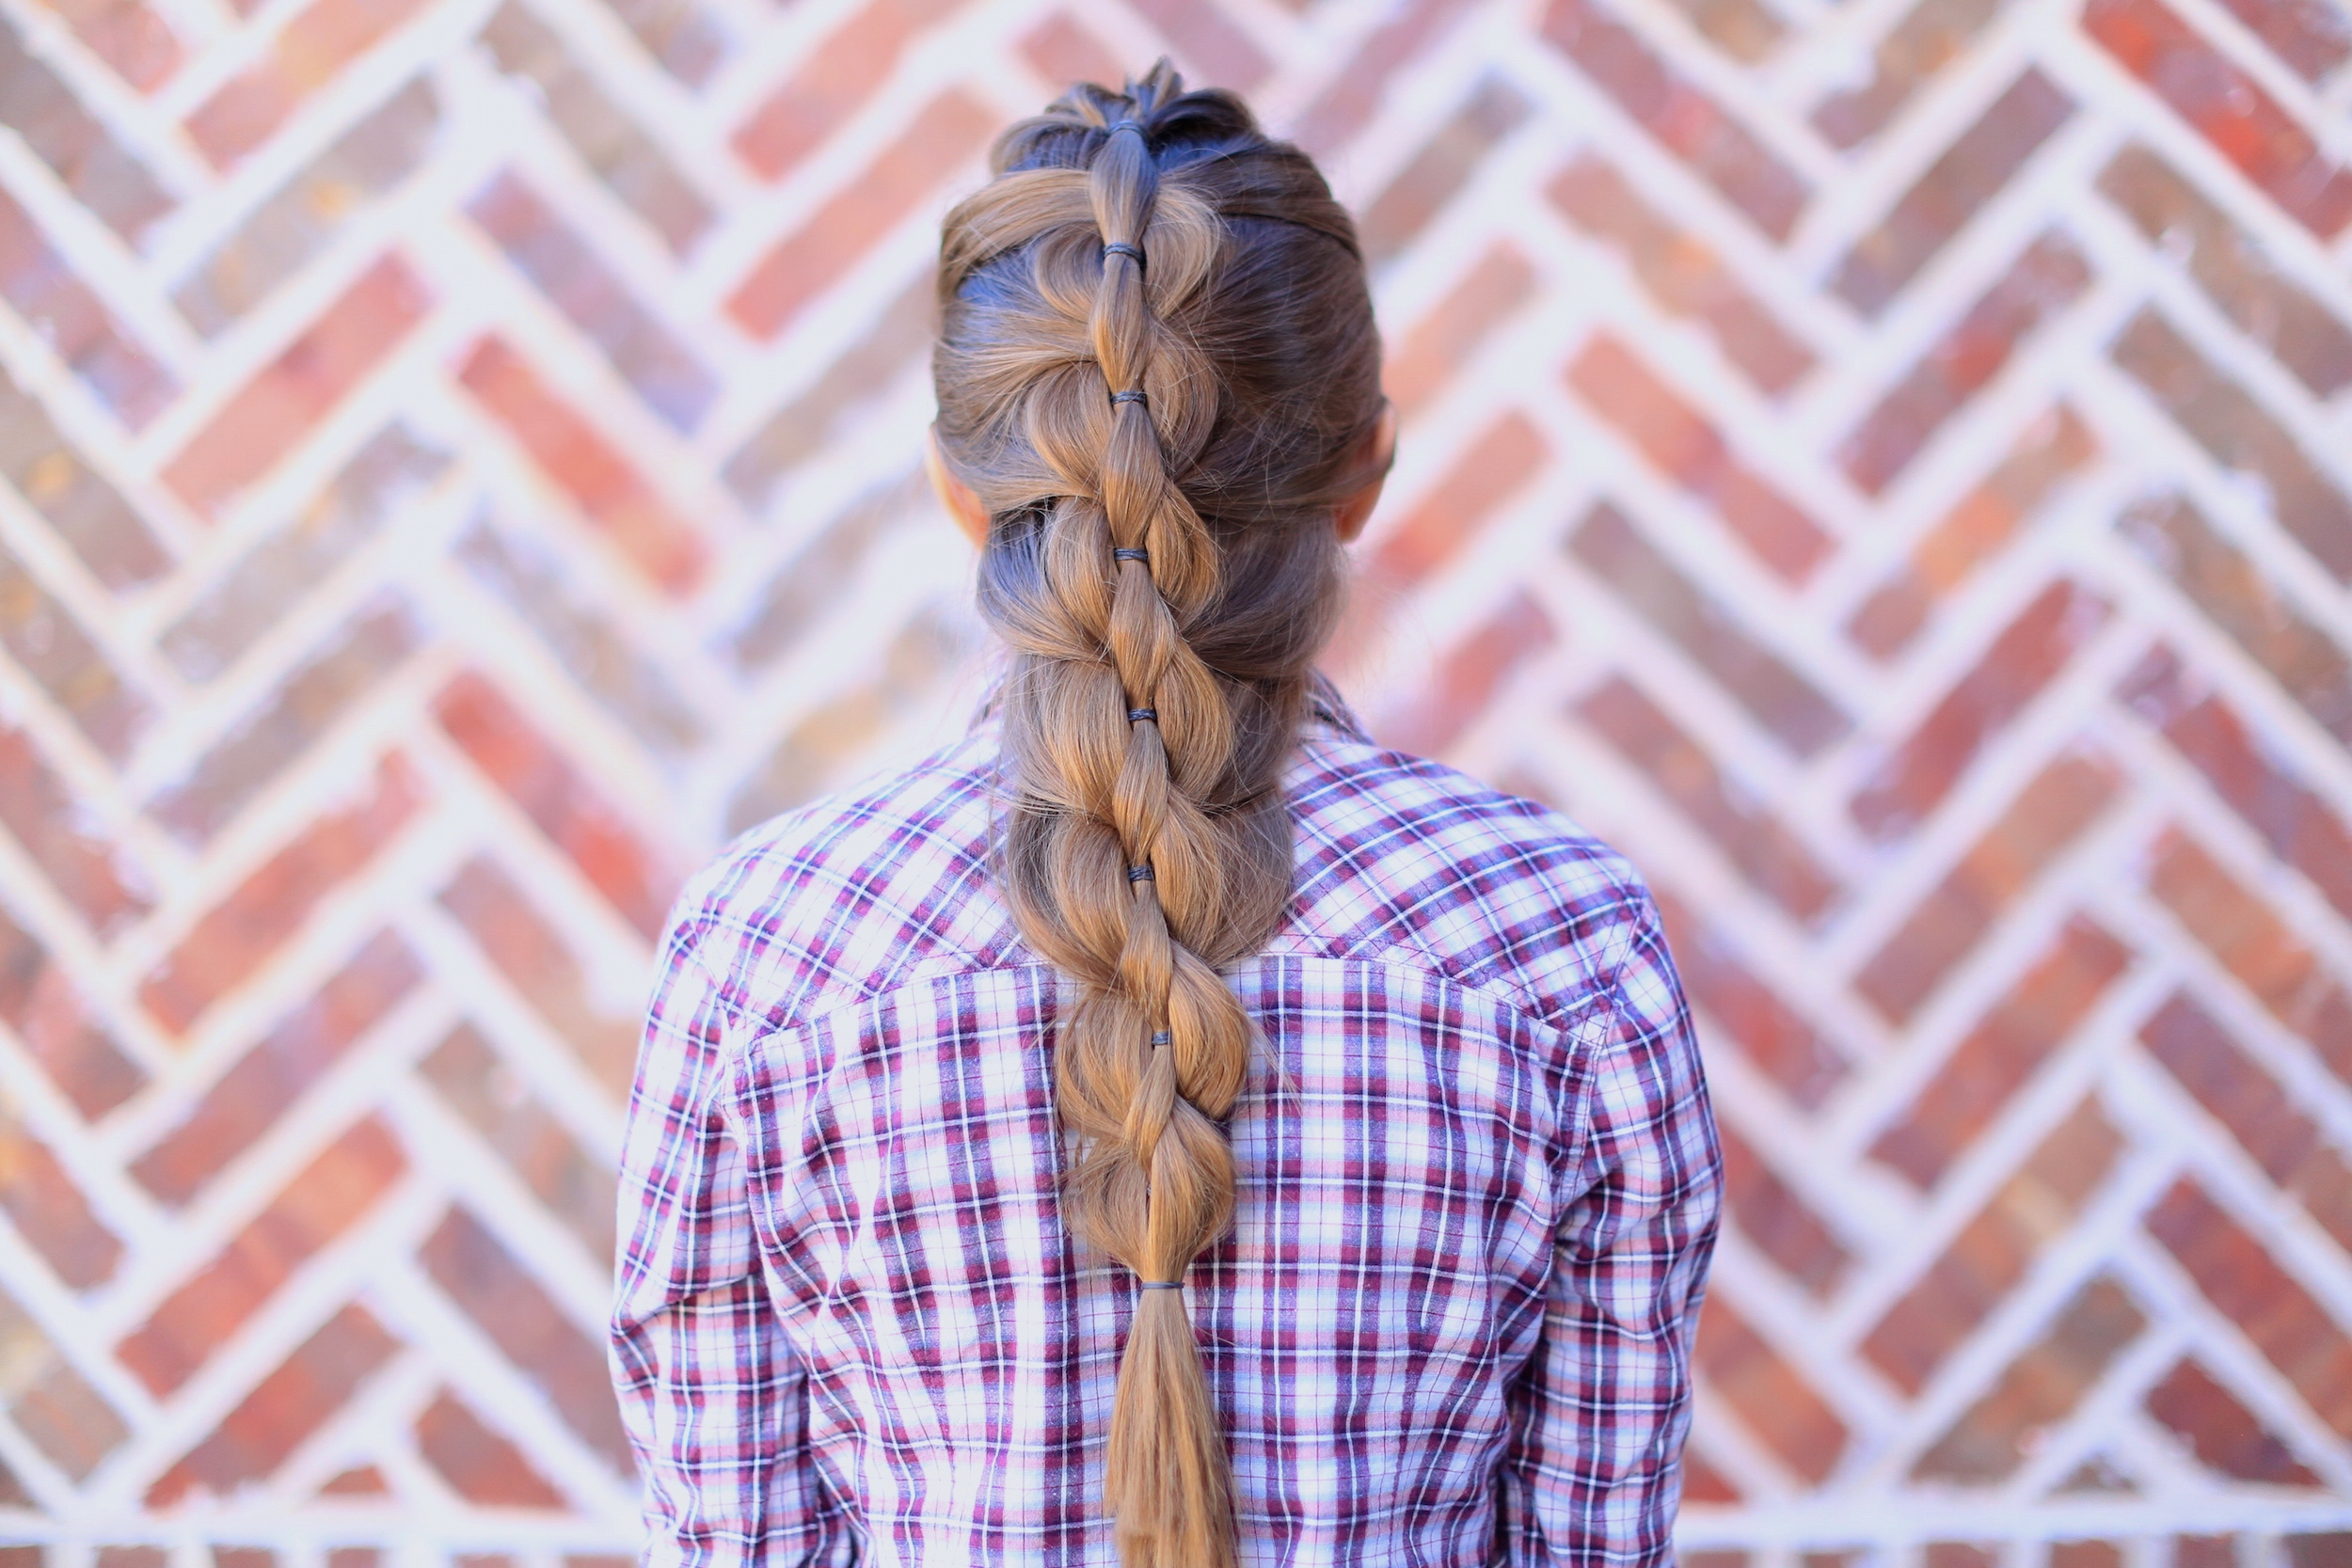
Now, the inspiration for this week’s hairstyle tutorial has been going around Facebook a ton lately, in a language that I can’t understand. I first saw it on Giang Popper’s Facebook page, but it has gone viral ever since. We think it is perfect as a Christmas hairstyle!
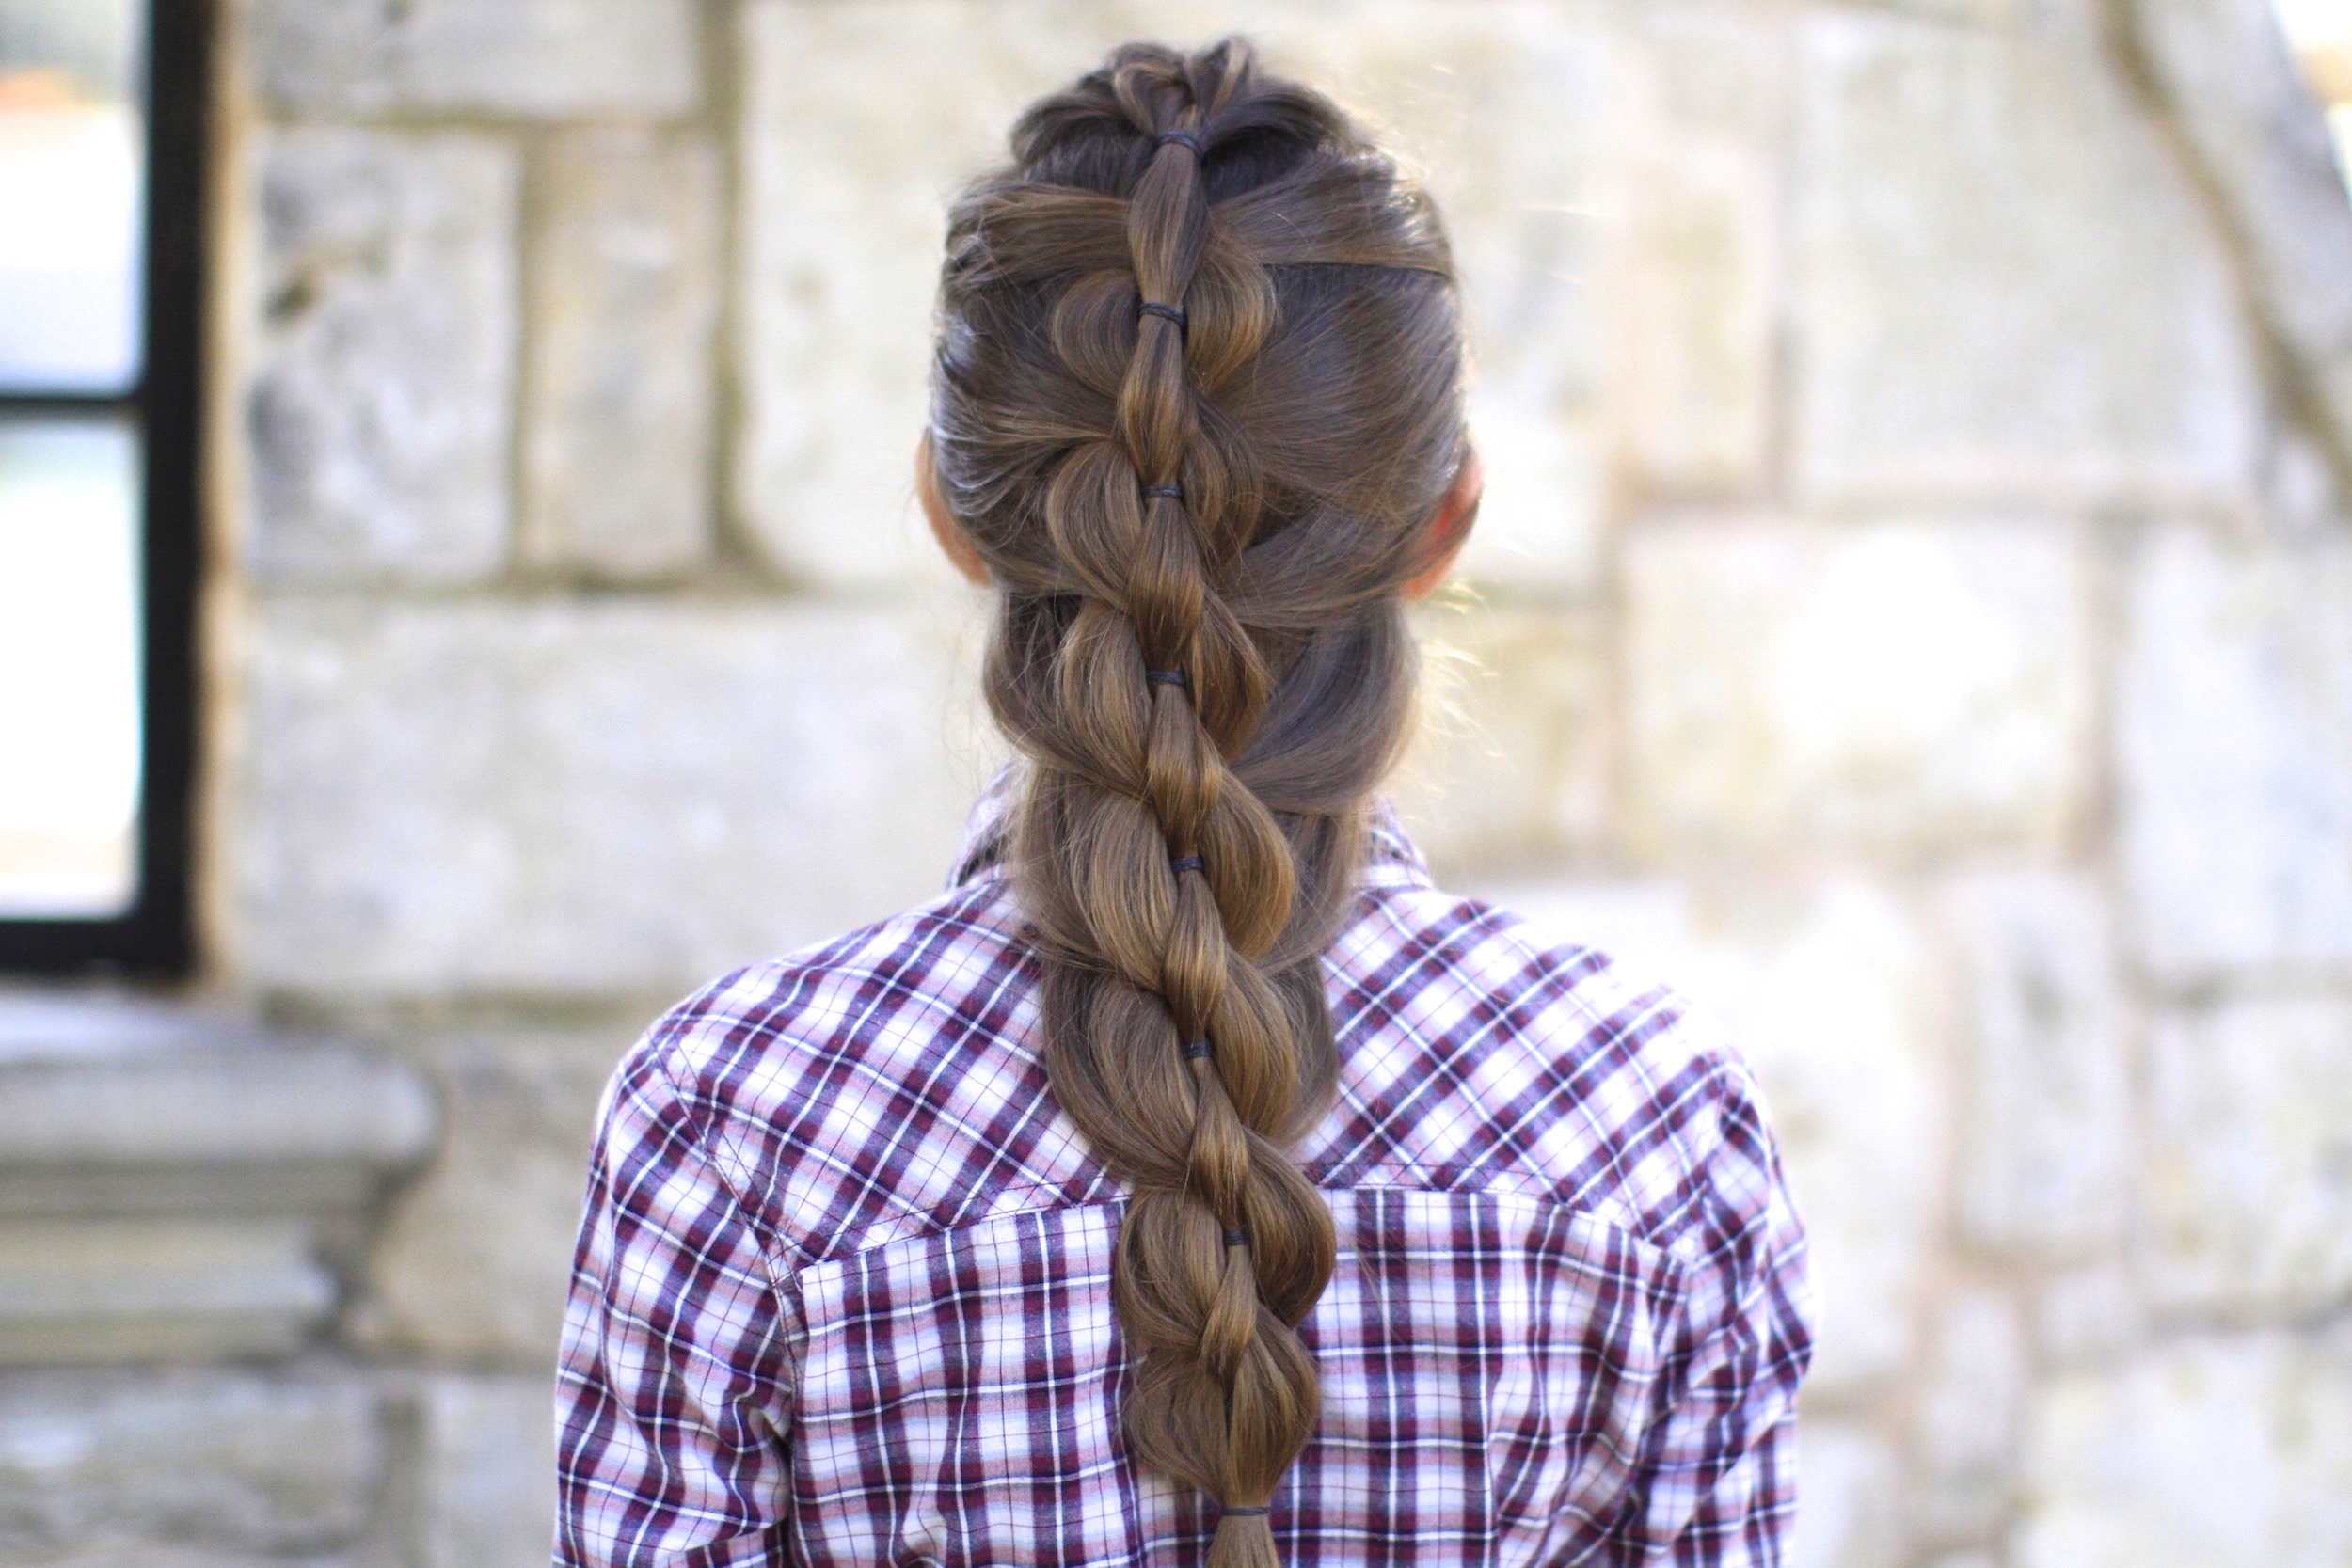 So today, we are going to teach you how to create the Pull-Through Mermaid Braid, by simply adding a banded ponytail to the top of the head and pulling the hair through the segments from both sides. The technique leaves a very elegant-looking braid that can be worn dressed up or down for almost any occasion {I would recommend not using this braid for an active day, including sports, dance, gymnastics, etc}.
To see your own photo recreations of this style featured in our app, feel free to tag your photos on IG with: #CGHPullThruMermaid
 Items Needed: Brush, rat-tail comb, spray bottle, 8-9 small hair elastics, hairspray {if desired}.
Time Requirement: 5-8 minutes
Skill Level: Easy
Video Tutorial:
Step-by-Step Instructions:
- Begin by sectioning off a rectangular area on the top of the head, and simply pull it back, add a Dutch/French braid, Flip-Unders, or any other accent, and secure with a hair elastic…
- Using the same hair you just secured of, in a half-up ponytail, add elastics every 1-2 inches down the hair leaving you with a segmented ponytail…
- Create a hole in first segment, between the 1st and 2nd elastics, and place your left index and middle finger through the hole…
- Now with your free hand, pick up a small section of hair from the right side of head, and grab it with your two left fingers pull the hair through the ponytail to the other side…
- Then place your right index and middle fingers back through the same hole…
- With your left hand, pick up a piece of hair on the left side of head, and grab it with your two right fingers and pull the hair through the ponytail to the other side…
- Repeat Steps #3-6 until you run out of hair, or segments, whichever comes first, and secure with an elastic…
- Go back and pancake the edges to your liking, to add a little volume and soften the look.
- Add hairspray {if desired}.
Please be sure leave a comment below, and let us know if you will be subscribing to our new channel!
Happy Hairstyling!
Be sure to watch the recap family vlog of our Mexico trip on BrooklynAndBailey‘s YouTube channel! It was quite eventful, to say the least!


So glad you posted this! Been trying to learn how to do a pull through braid forever!
So simple and pretty!
awesome!
This looks amazing!!!! i love it!!!
So pretty! Did this on my friend for our cèilidh at school <3