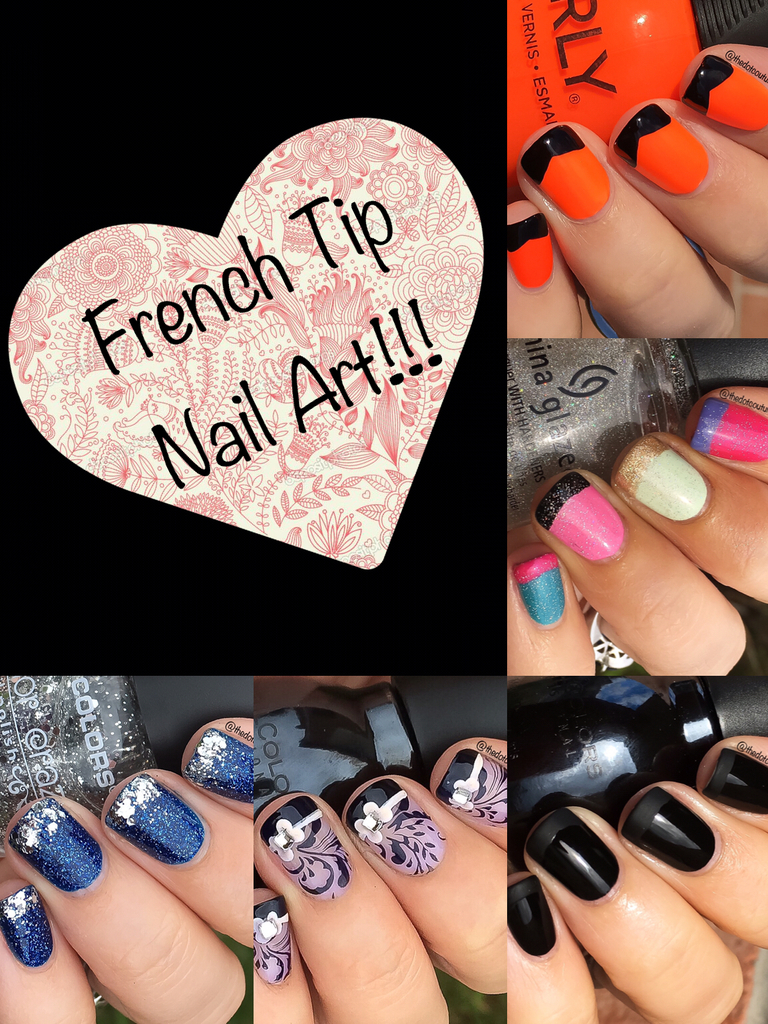
Hi guys! Jenny here from The Dot Couture. Today I’d like to talk to you about tips. French tips that is! A lot of people know about the traditional French tip where you use a sheer nude polish on the nail and the bottom tip is a more opaque white. There are soooo many different ways to wear a French tip manicure. Here are some ideas for you – and remember, these can work in ANY colour palette!
Go Chic!
I used 2 coats of black polish and applied a quick-dry top coat. I let that dry for about 15 minutes. Then I took my matte top coat and gently swept the brush along the bottom third of my nail in a slightly curved motion, from one side to the other. If you don’t feel confident just using the nail polish brush, you can also use loose-leaf hole reinforcements (just like you’d use at school) and place them on your nail as a tip guide. Leave the bottom third of your nail exposed and paint with a matte top coat. Remove the hole reinforcement immediately and you’re good to go! This look is really subtle and great for parties. Another great colour palette would be to use a deep red or burgundy polish. The matte tips show up better on dark polishes.

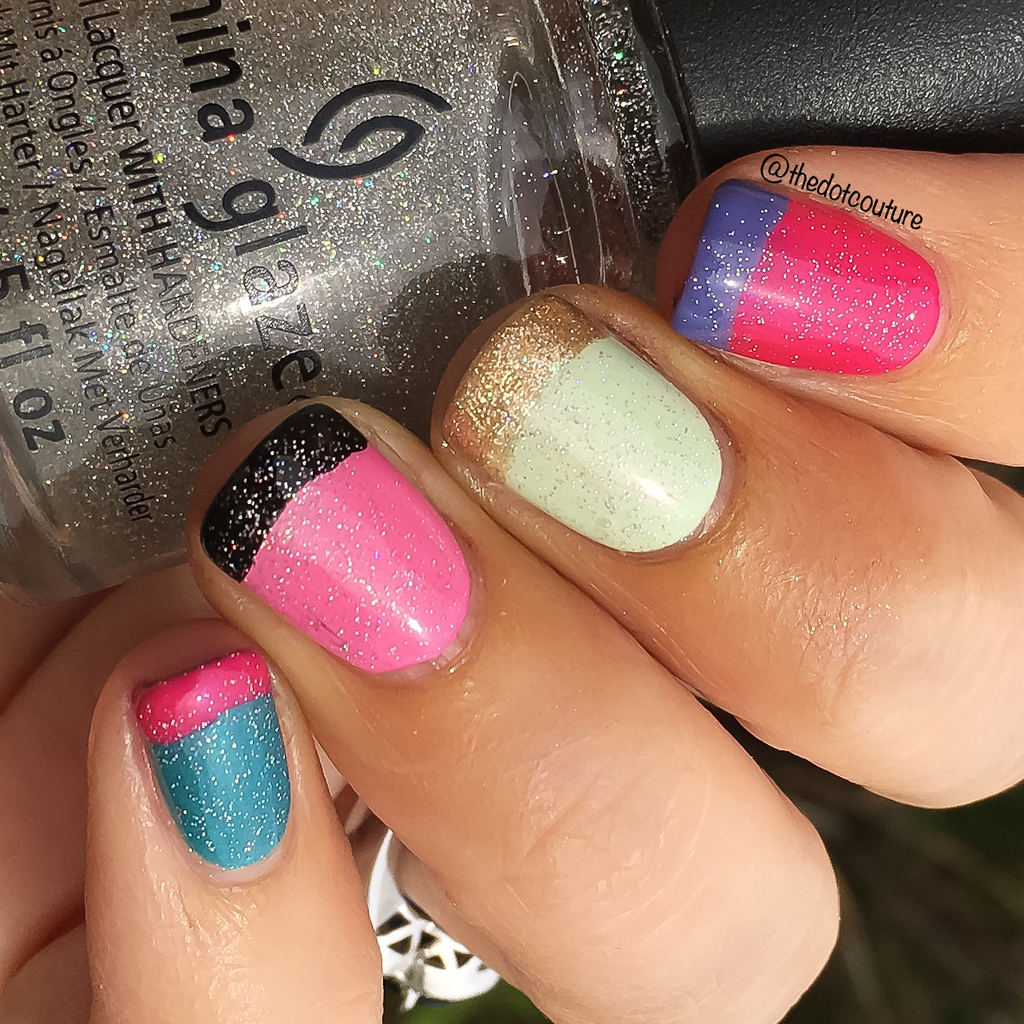
Go Funky!
Show off your wild side by trying out different colour combos. I painted my nails various base colours and just started pulling out polishes I thought would compliment them. This was all no-tools, I just used the polish brushes to sweep across the bottom of the nail. If you get any on your skin, a bit of nail polish remover or acetone on a cotton swab or small brush will clean that right up!
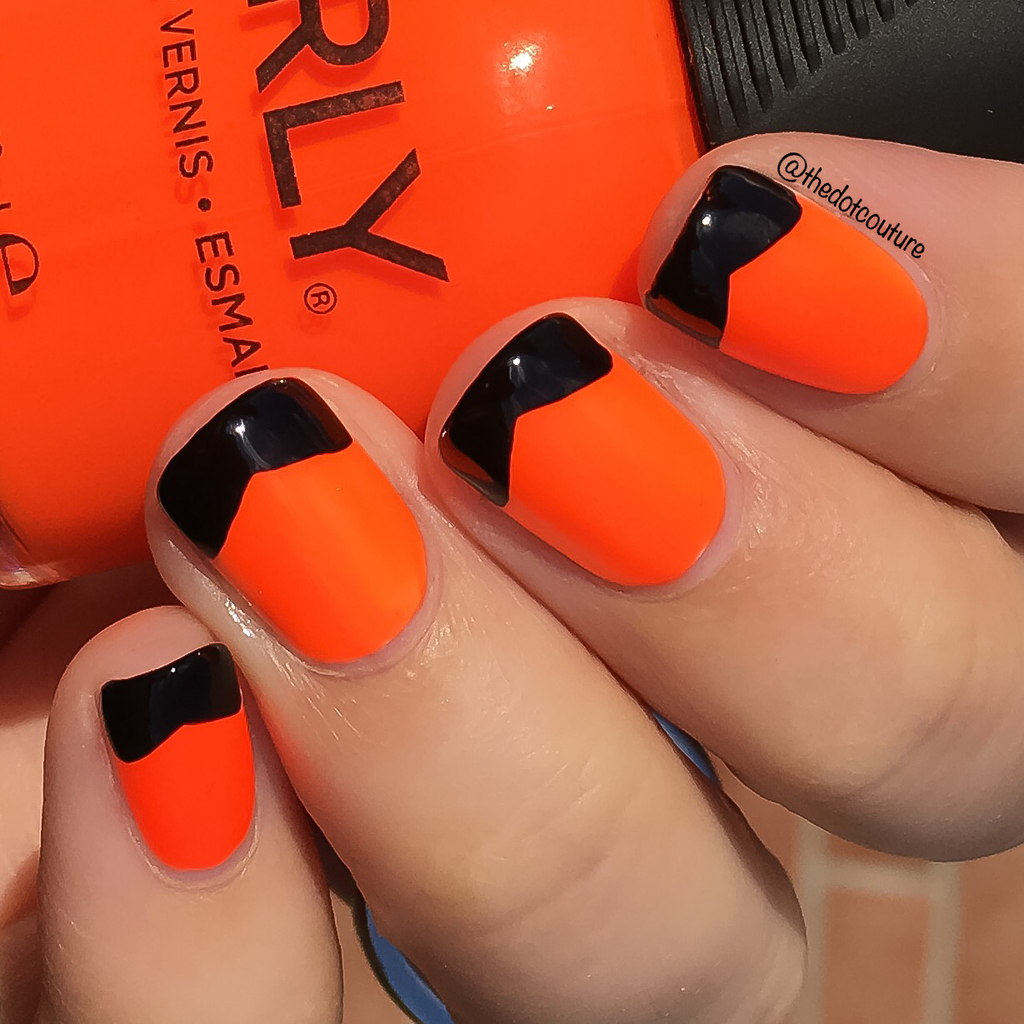
Edge It Up!
Like to march to the beat of your own drum? Try this diagonal-tip French manicure. I painted my nails a neon orange and then took my black polish (my favourite is Sinful Colors Black on Black, it’s very opaque and only $1.99 at most stores!) and starting at the edge of my nail, swept the brush downwards towards the centre bottom tip of my nail. A great trick for this is to actually rest your hand that is holding the brush on the table, and gently rotate your finger. This will keep your brush hand nice and steady and gives you a nice defined line. Apply top coat to seal it all and you’re done!
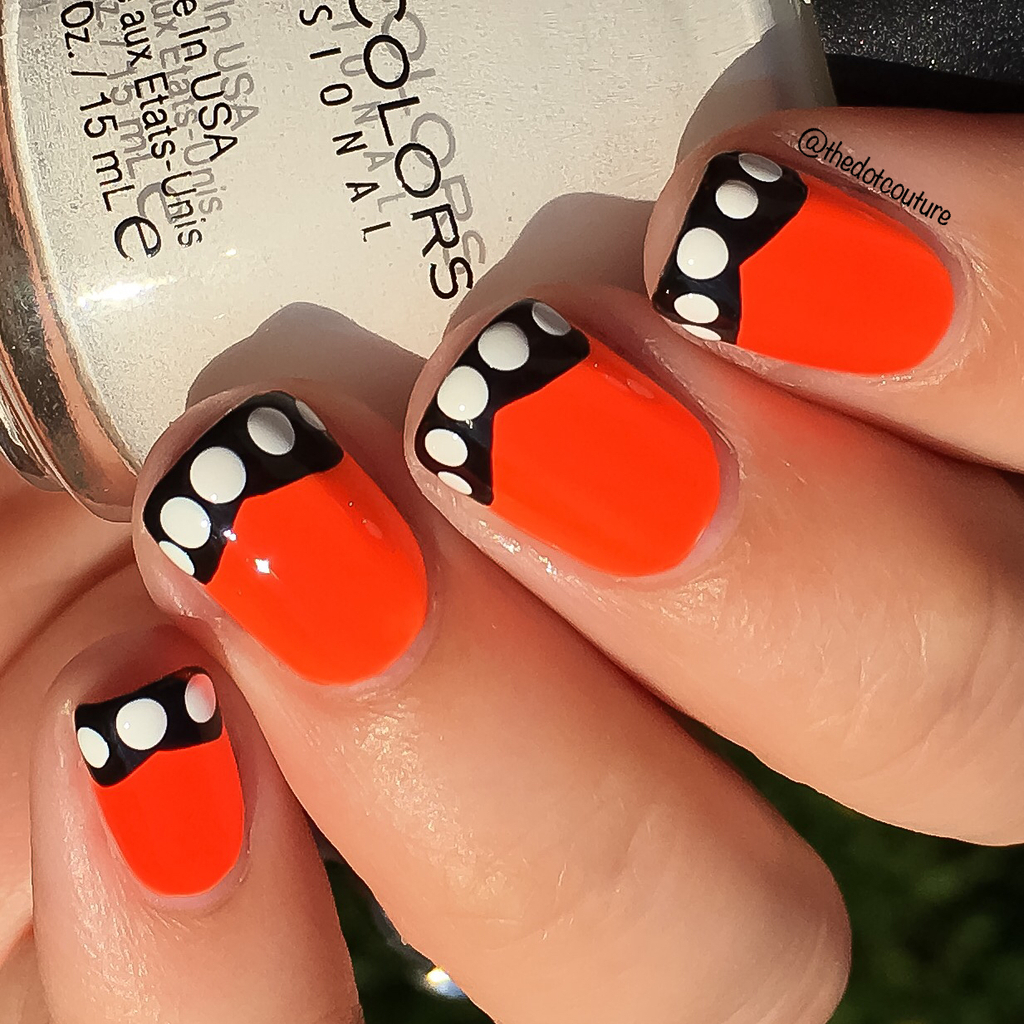
I went ahead and added onto the previous mani, but I think I took this one a little too far. Sometimes less is more in nail art. Polka dots on the existing French tip change the look up. Your possibilities are endless! These sort of remind me of a monarch butterfly’s wings.
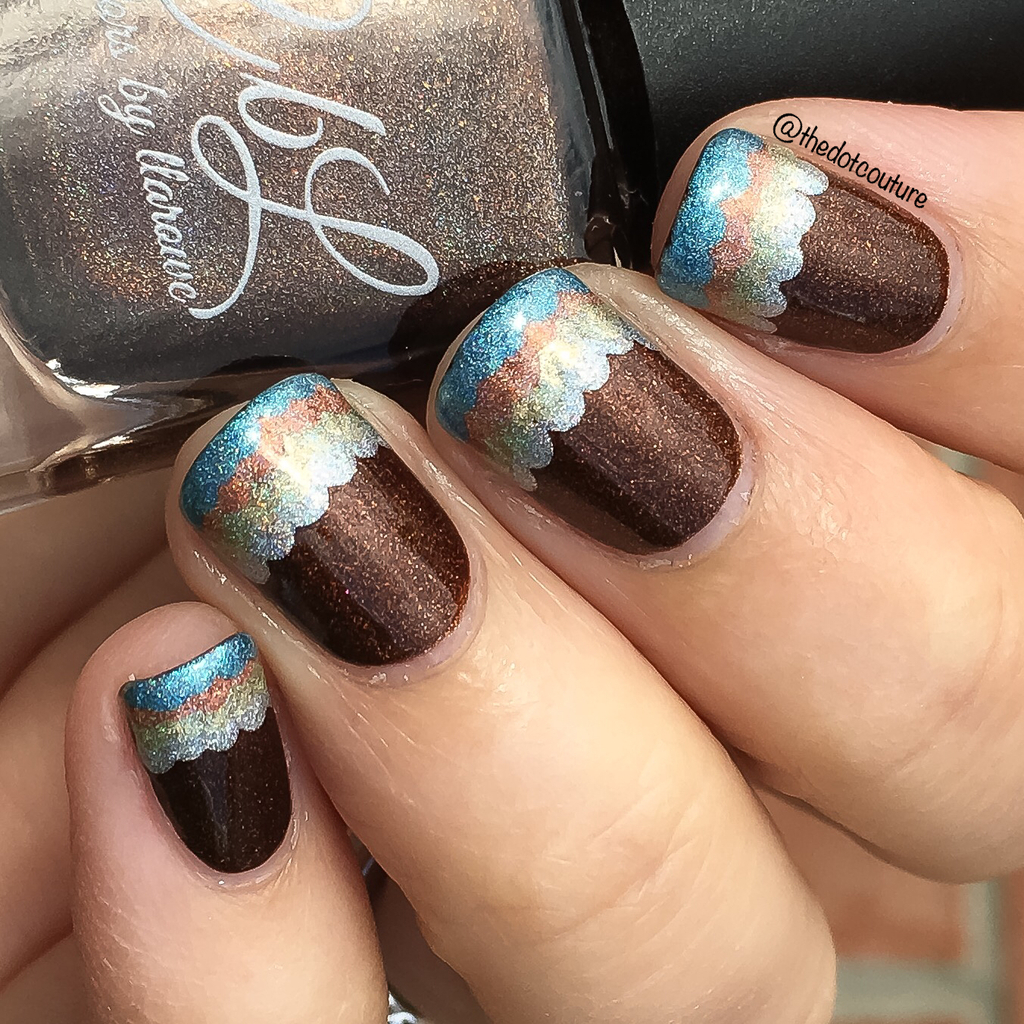
Stand Out With A Scalloped French Tip
Next up is a holographic rainbow layered French tip using a dotting tool or bobby pin. I painted a base of holographic brown on my nails and then used a complimentary holographic polish to create a curved dot along the bottom 2/3rds of my nail. I then took a different colour and did the same thing, but covering about half of the previous polka dots. You can see it gives a pretty scallop effect. TIP: use the lightest colour first to make sure you can cover it, if you start with your darkest you may not be able to cover the previous polka dots completely. This look can be done with any opaque polish, holo not necessary!!!
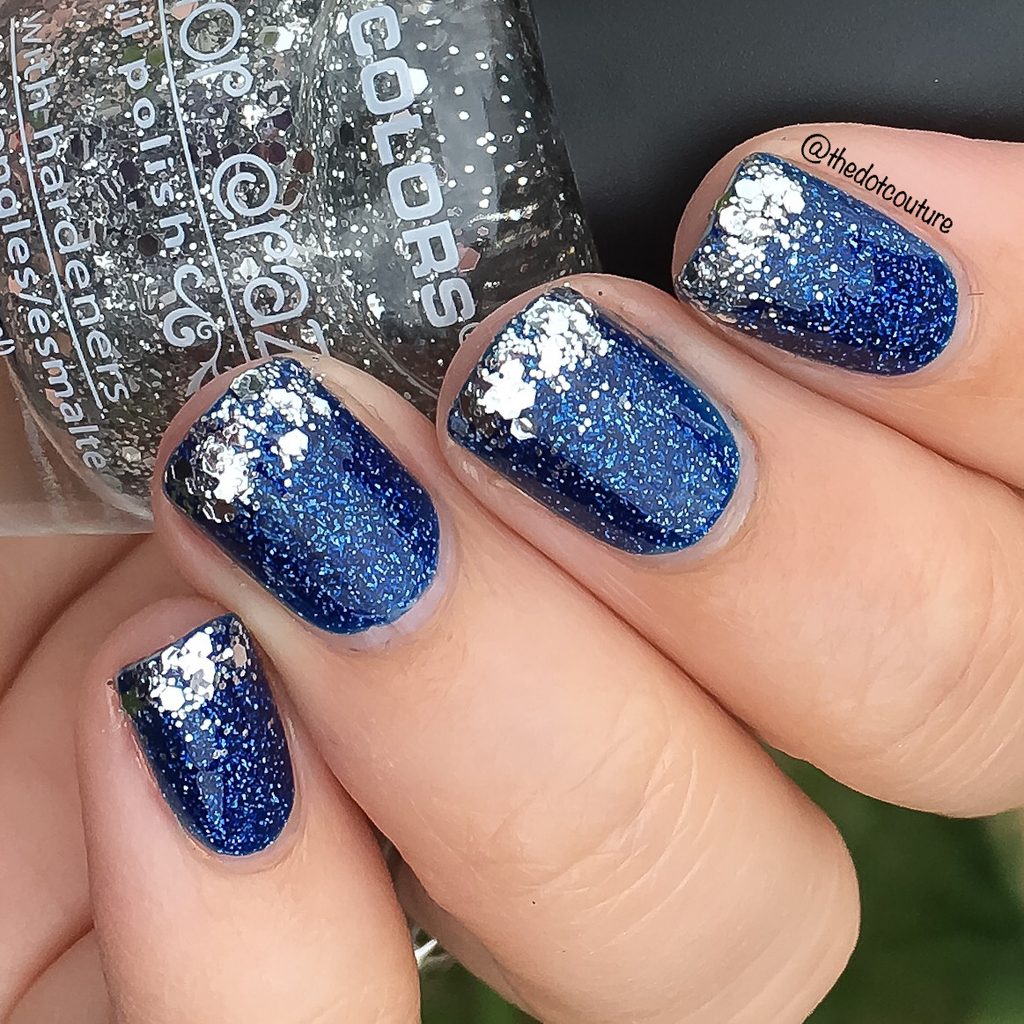
Bring On The Bling
Glitter also is a great way to put a unique spin on a French tip mani. All I did was use the polish brush to apply a silver glitter to the bottom third of my nail over top of a blue scattered holographic polish.
Dress Up Your Tips
If you want to get really advanced, you can combine a bunch of techniques. Here I painted my nails with top coat, then stamped a pretty swirly pattern over the entire nail. I then free-handed a black French tip using an opaque black nail polish. When that was dry I used some white acrylic paint and a paint brush to create a line where the black meets the stamping. Using the end of a bobby pin, I created a bow by making a centre polka dot, then two sets of polka dots on each side of the centre dot. I finished with a small nail gem and a nice glossy top coat!!!

Let me know which technique is your favorite! Remember you can check me out on Instagram, I post lots of pretty nails there!
Until next time, happy painting!
Cute! Love the last nailart!
That is so cute. The fisrt nailart is my favourite!!
I love the matte
that’s so cute 🙂
I really like the matte and shiny black manicure. I bet it’d be pretty done with other colors too.
Cute designs
Love these fun designs
I’m going funky!