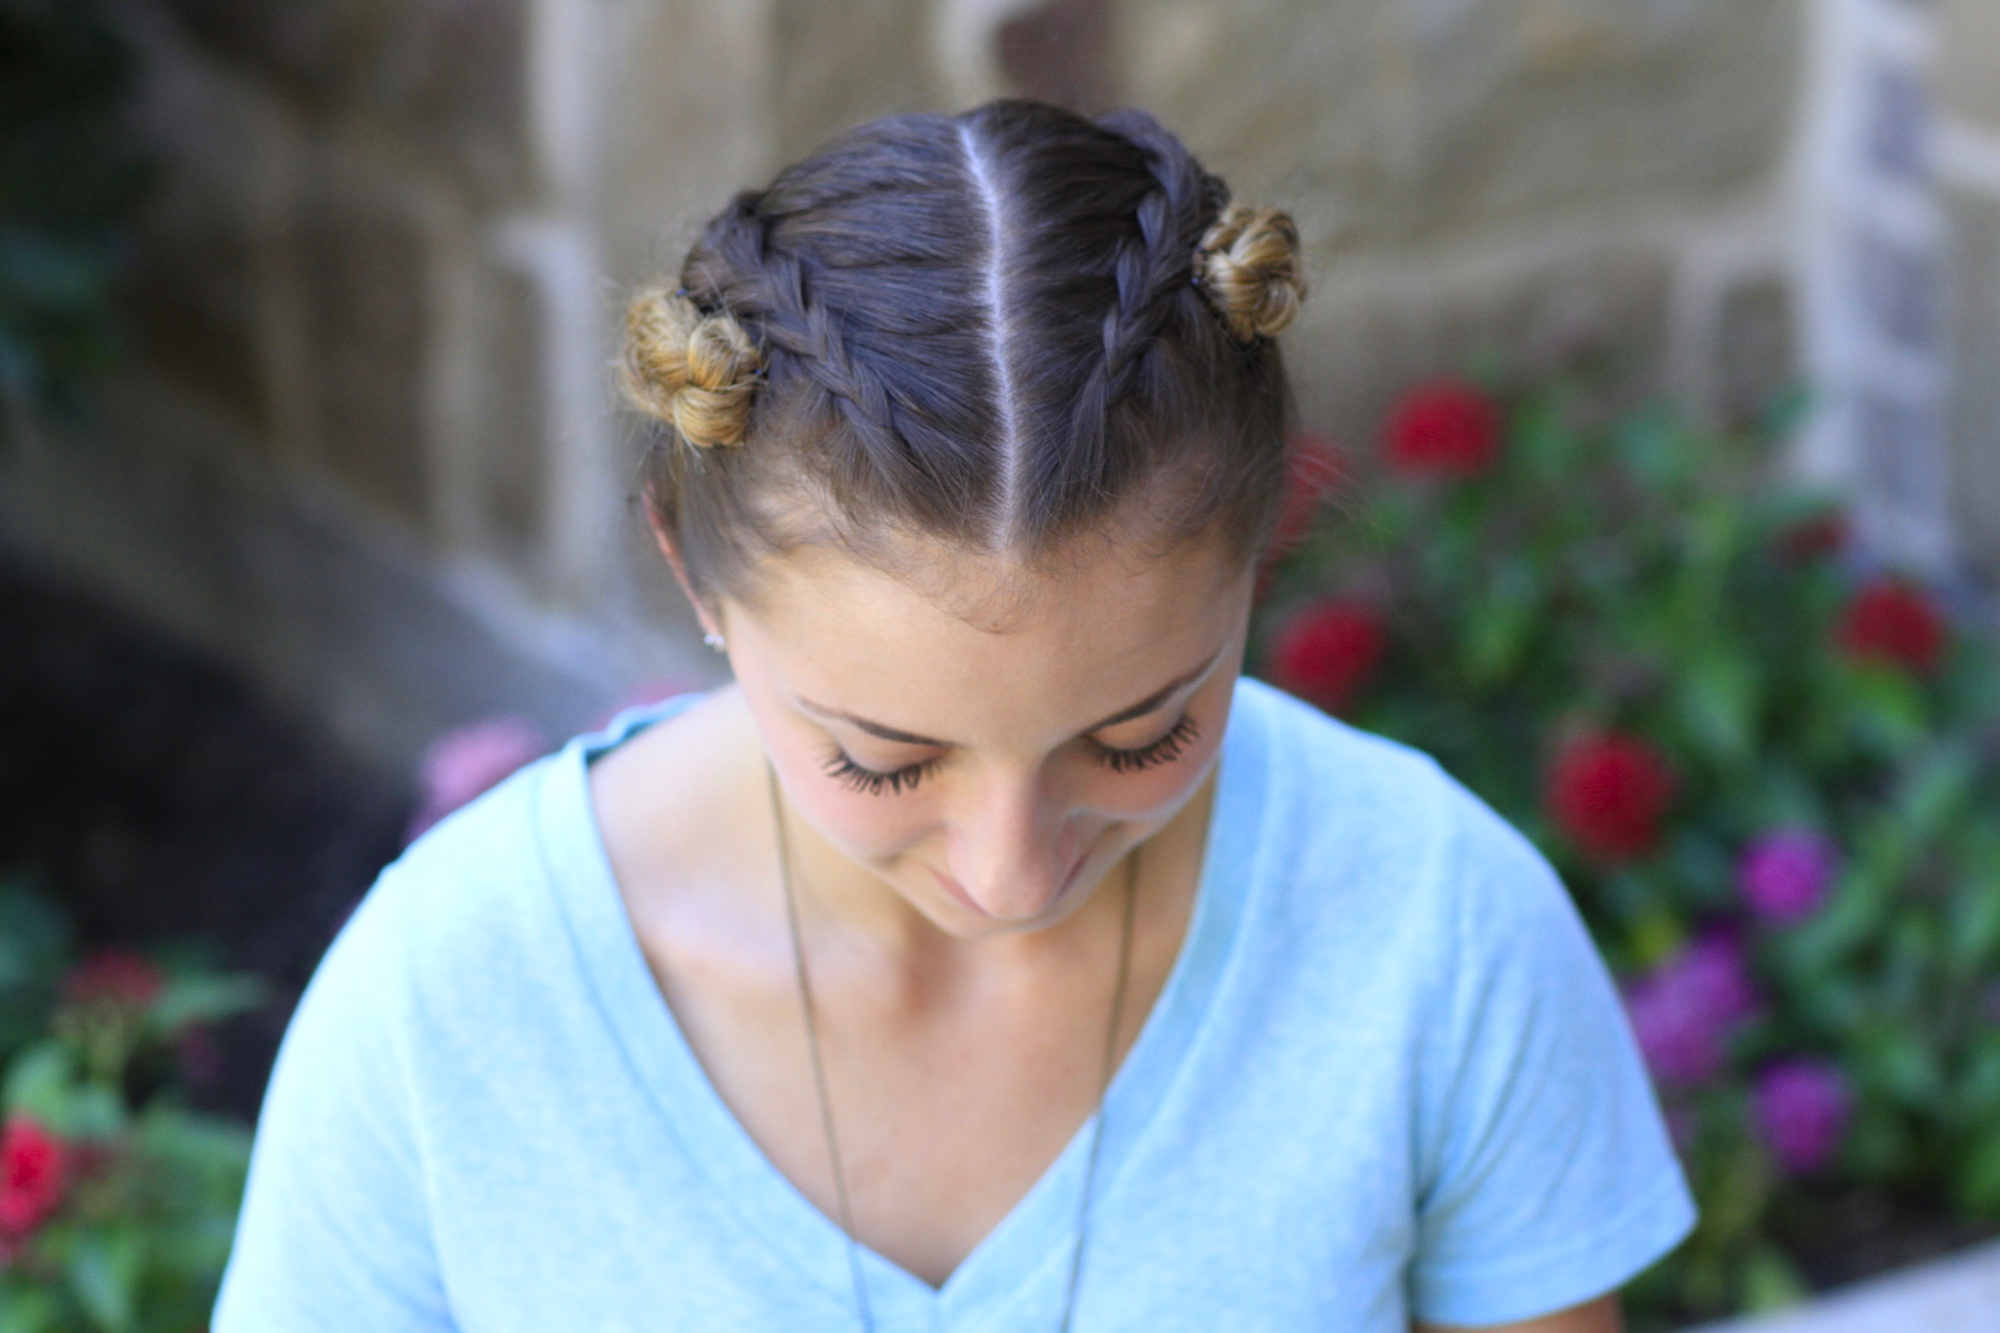
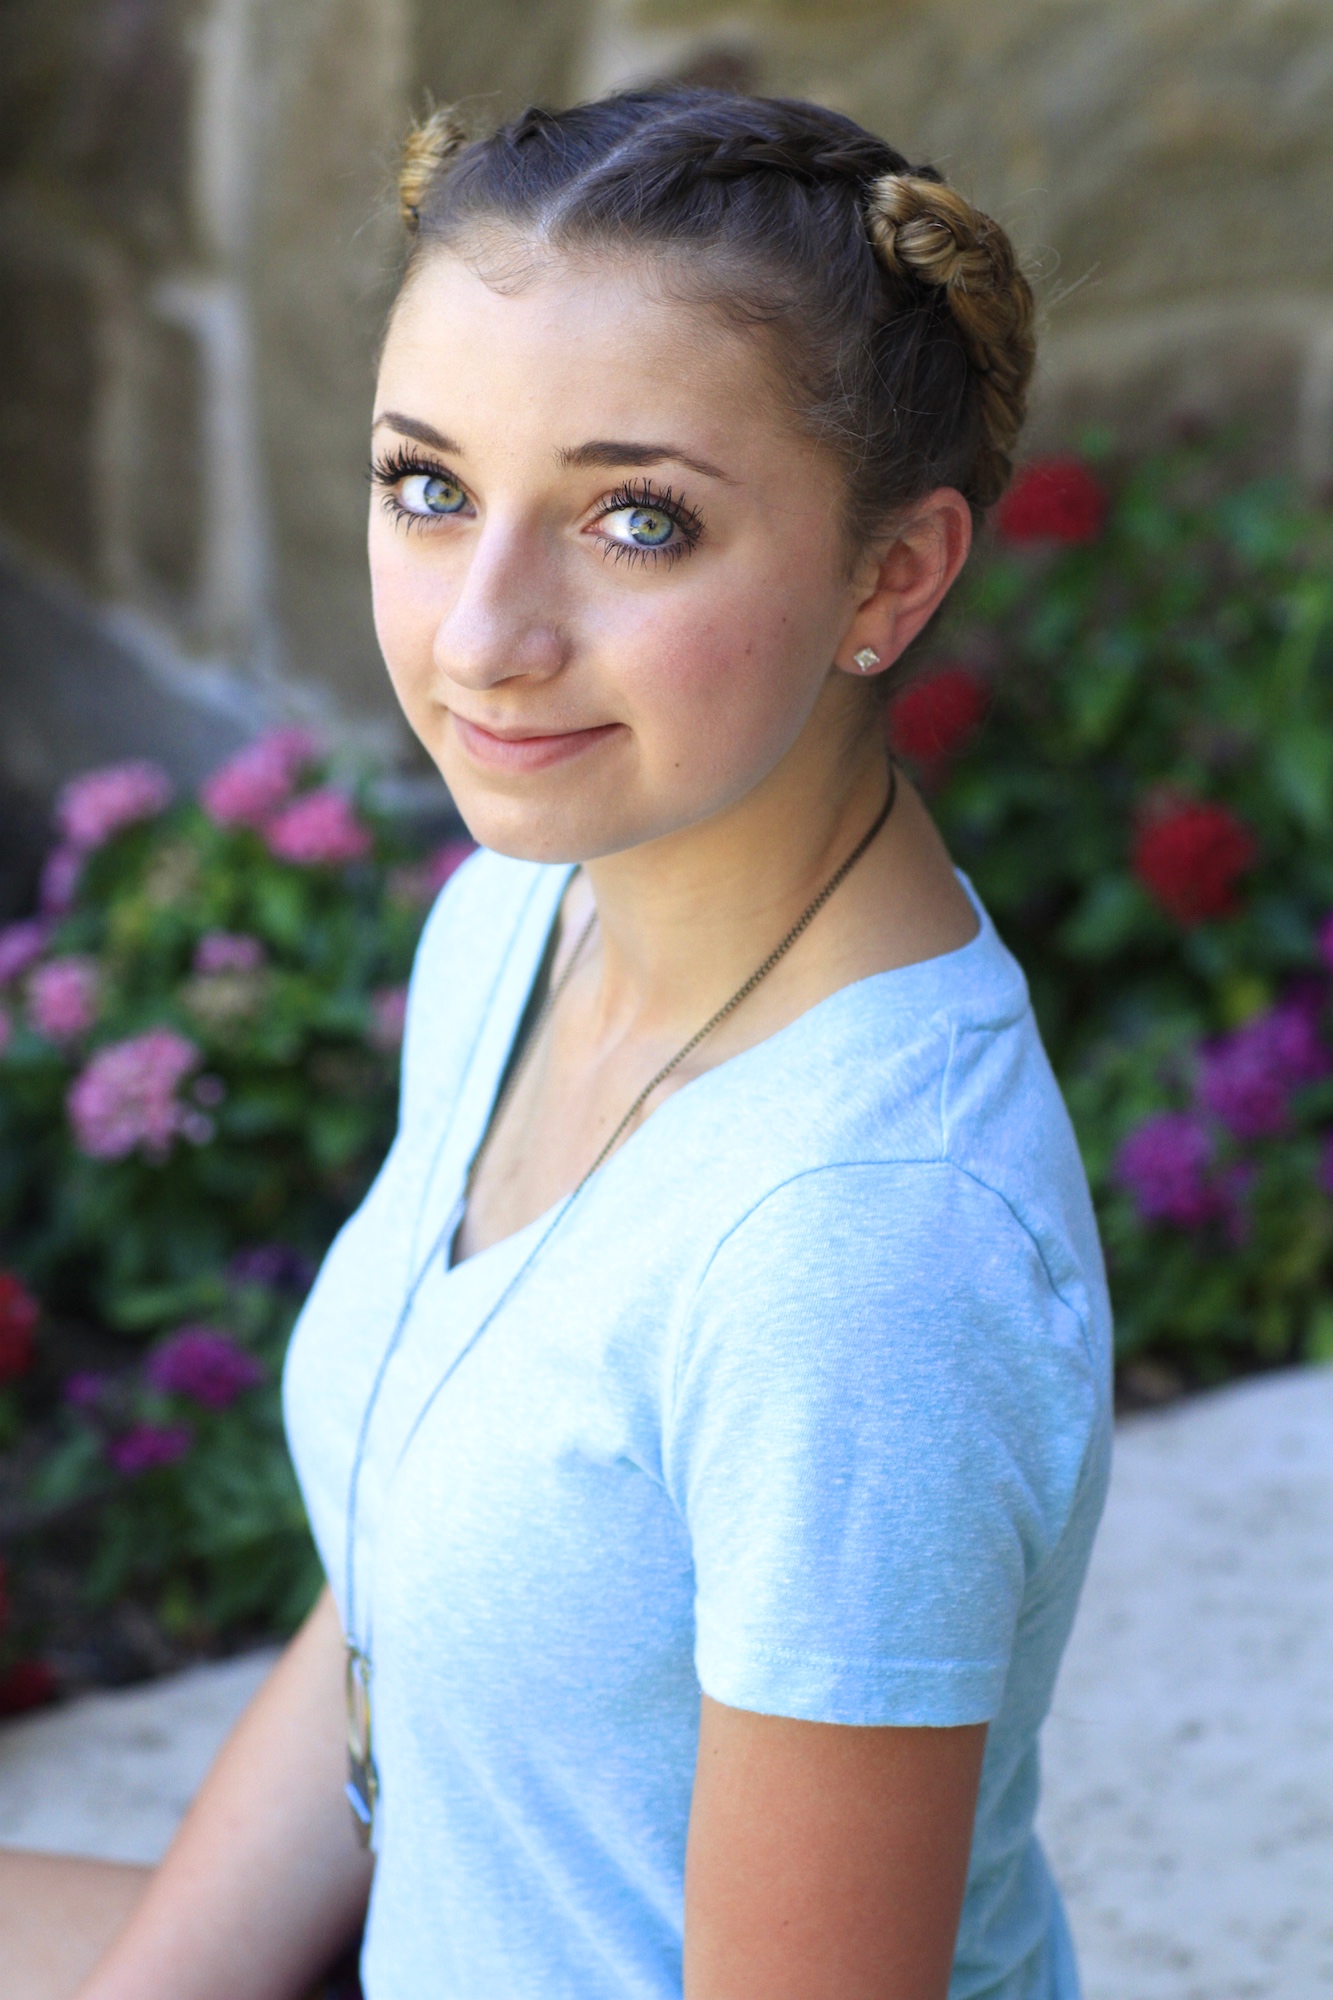
Want a perfect hairstyle for this Back-to-School season? It’s Bailey here today, showing y’all how to create these beautiful Fold-Up Braids on my twin sister, Brooklyn.
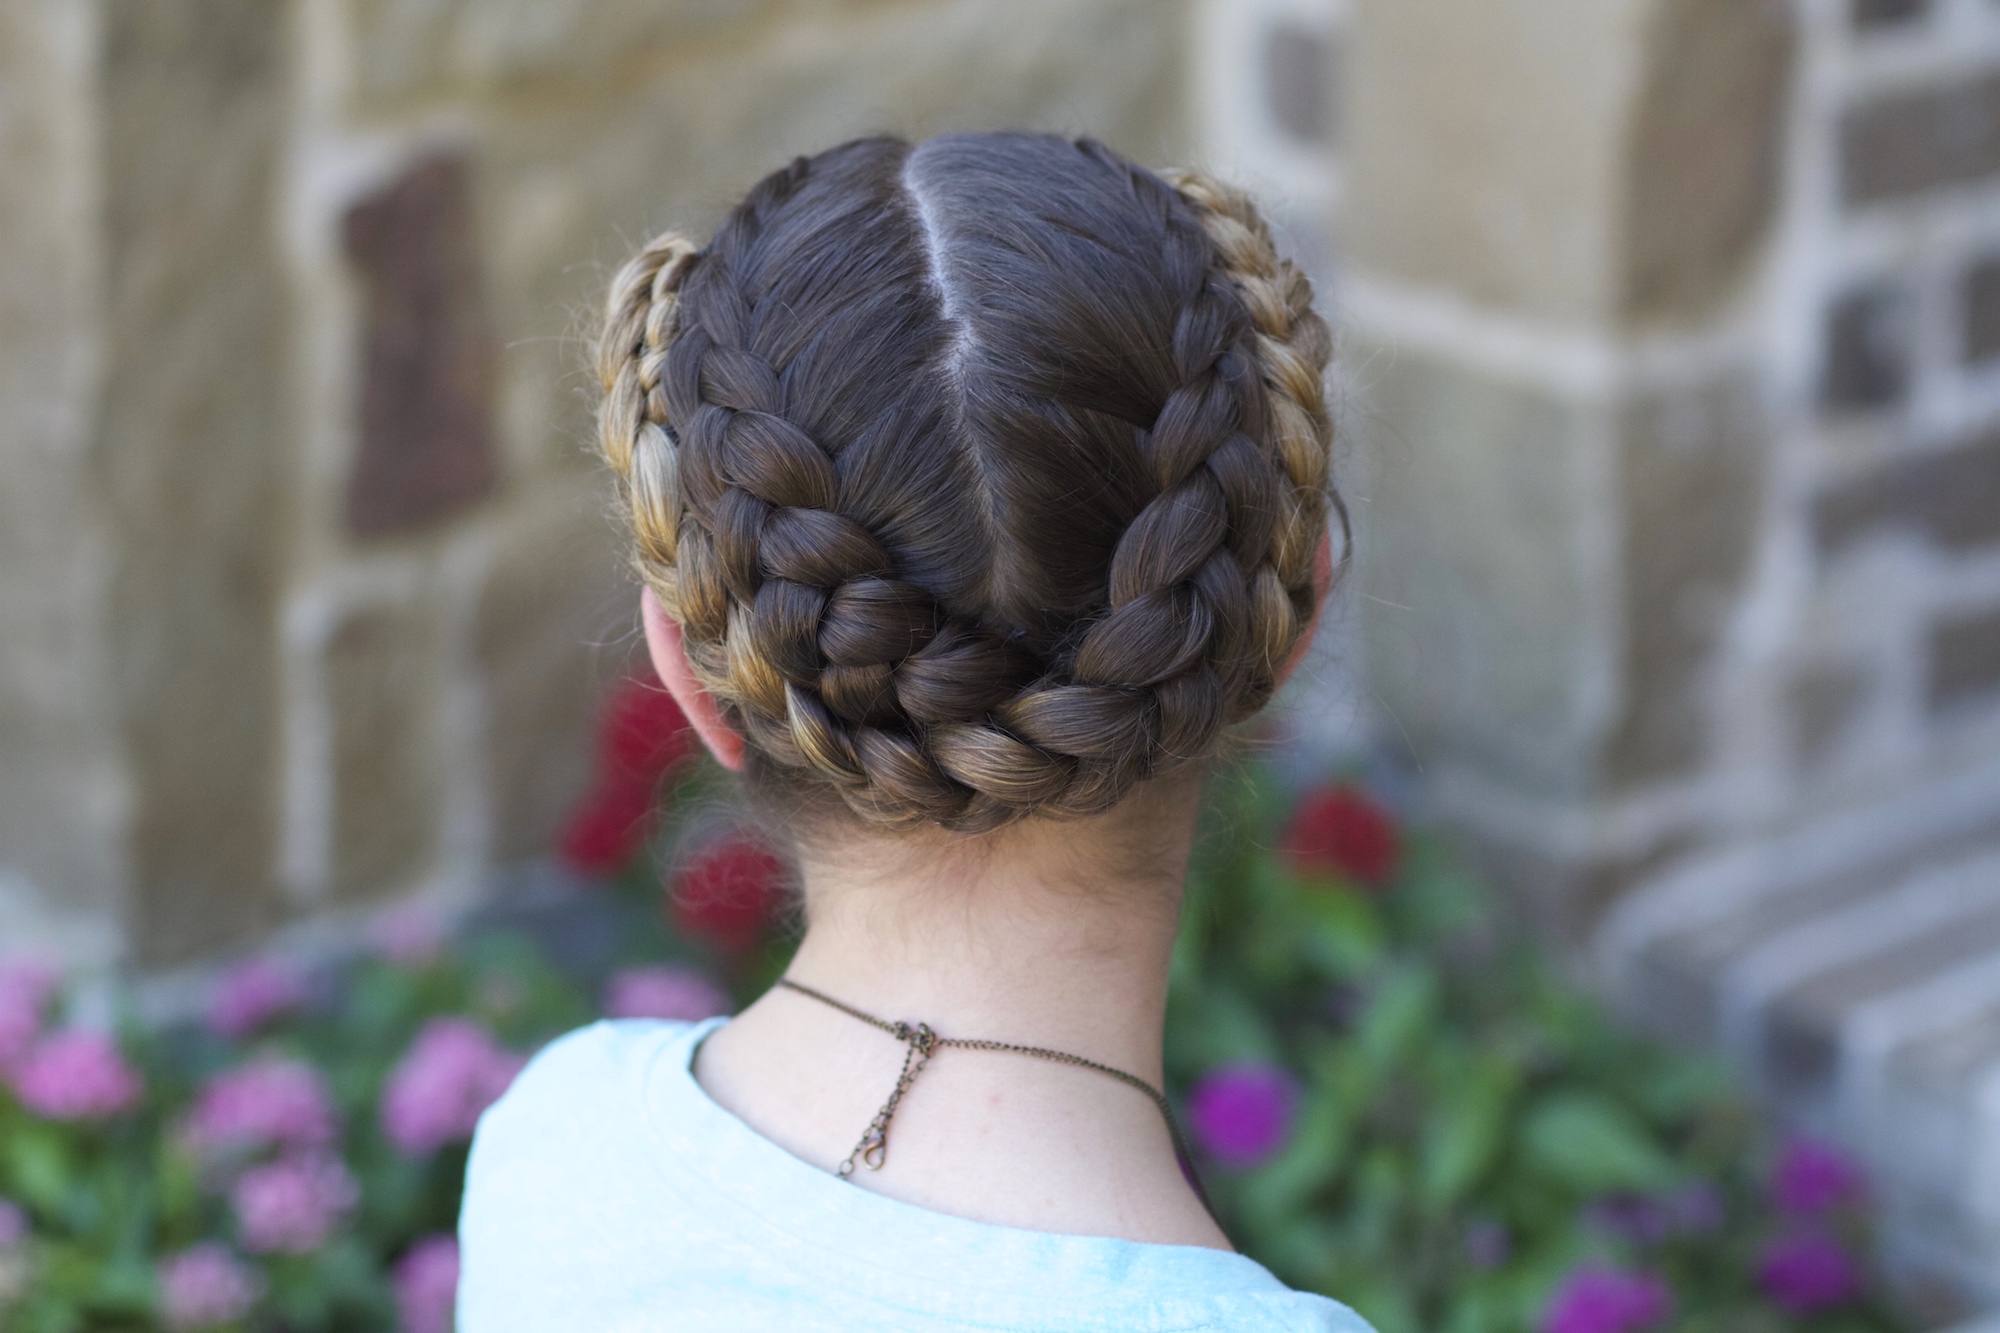
The basics are in a simple Dutch Braid, here we are using two side braids. So, if you already know how to create a basic Dutch Braid, then you can do this hairstyle! With the tails of your two Dutch Braids, you pretty much crossed them and then fold them up on the sides! This looks totally like something you would imagine Greek Goddesses wearing with their white togas!
To see your own photo recreations of this style featured in our CGH App, feel free to tag your photos on IG with: #CGHFoldUpBraids
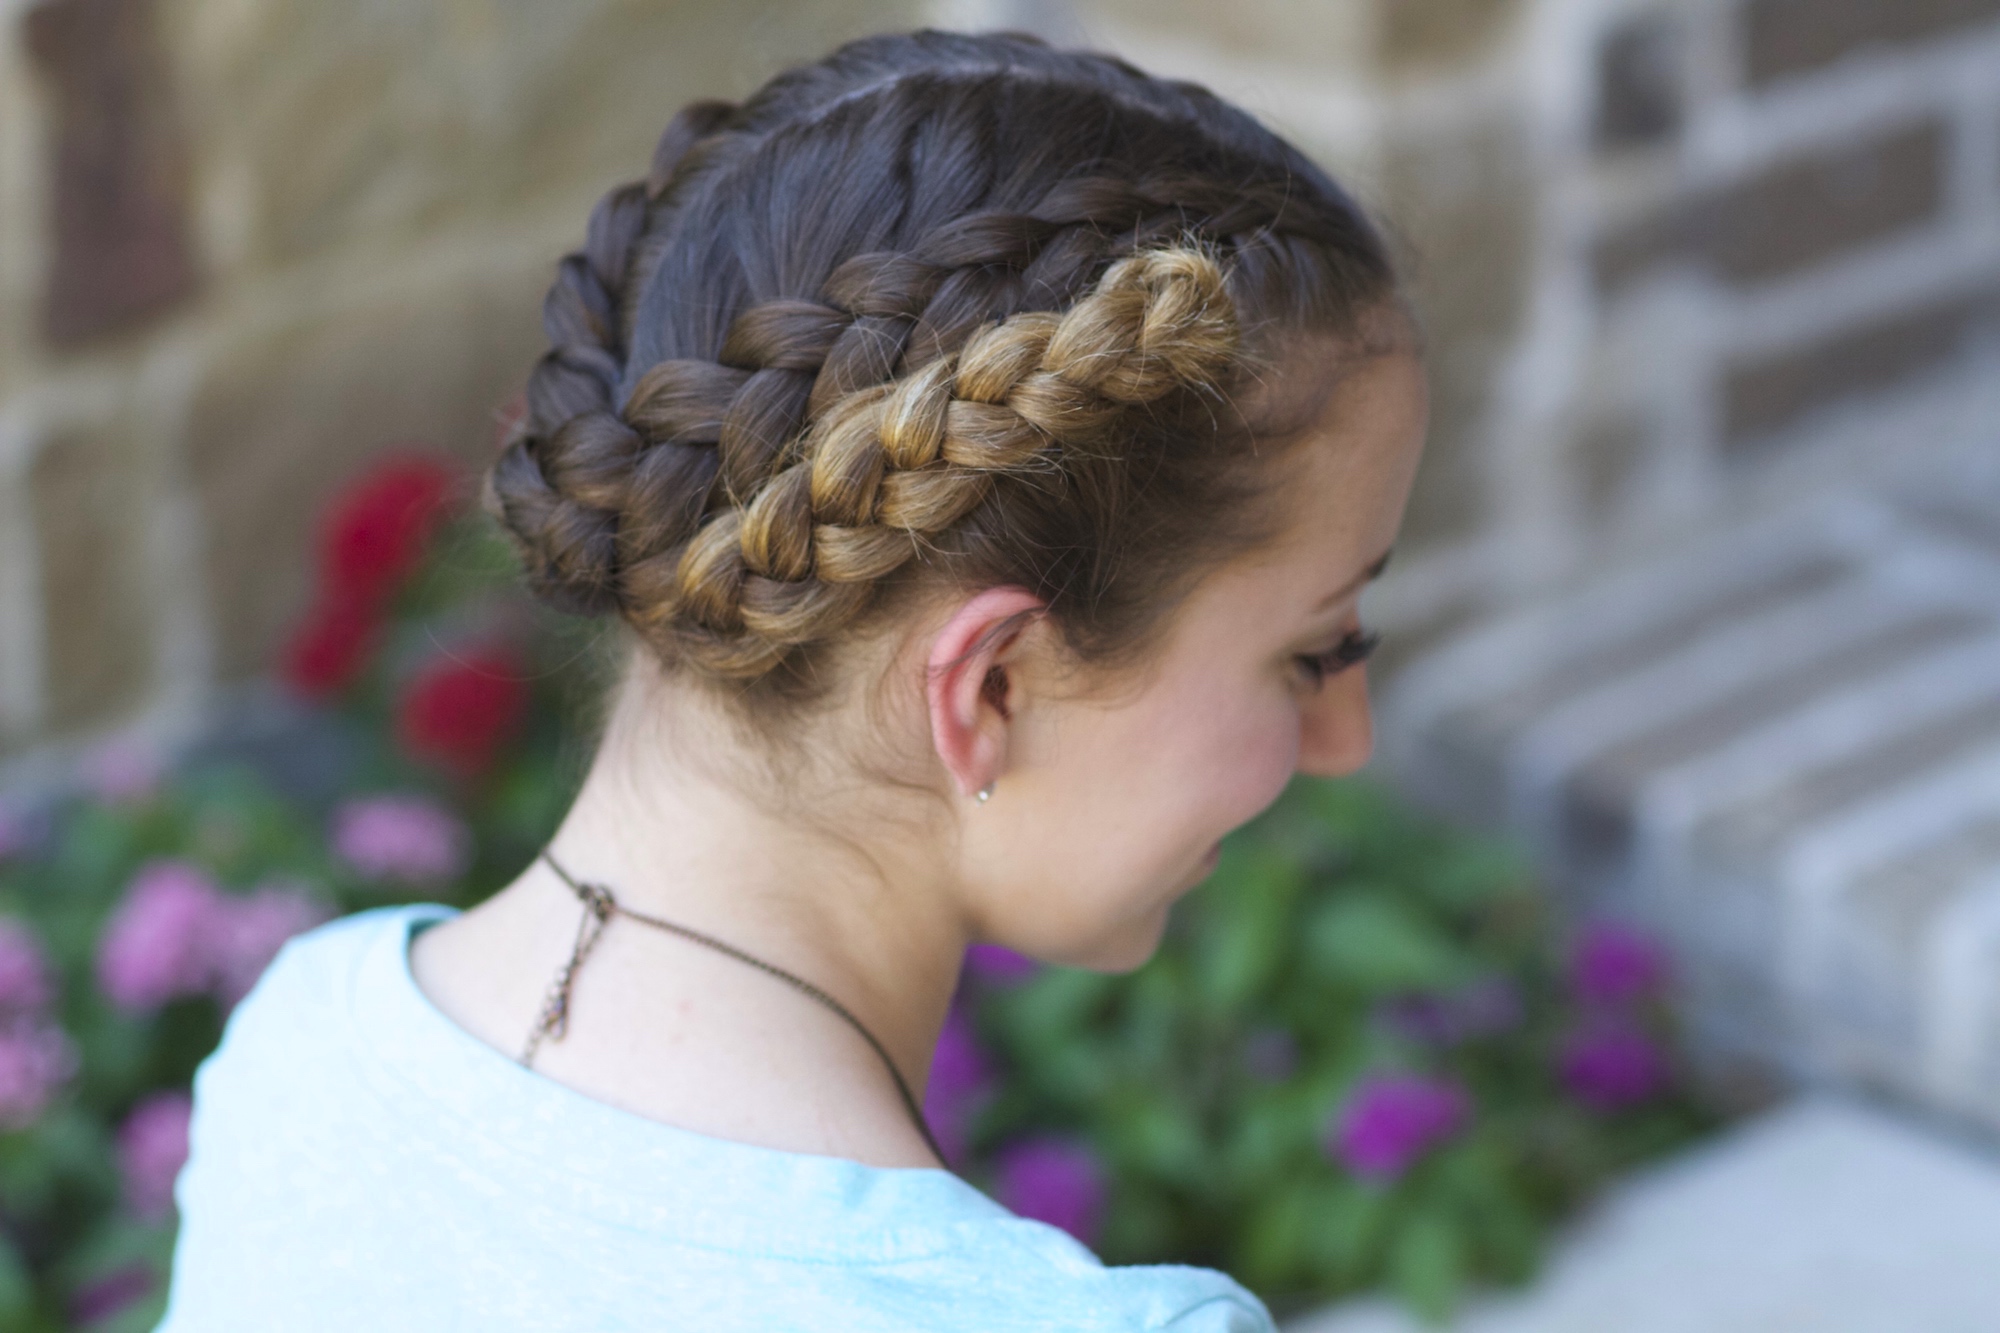
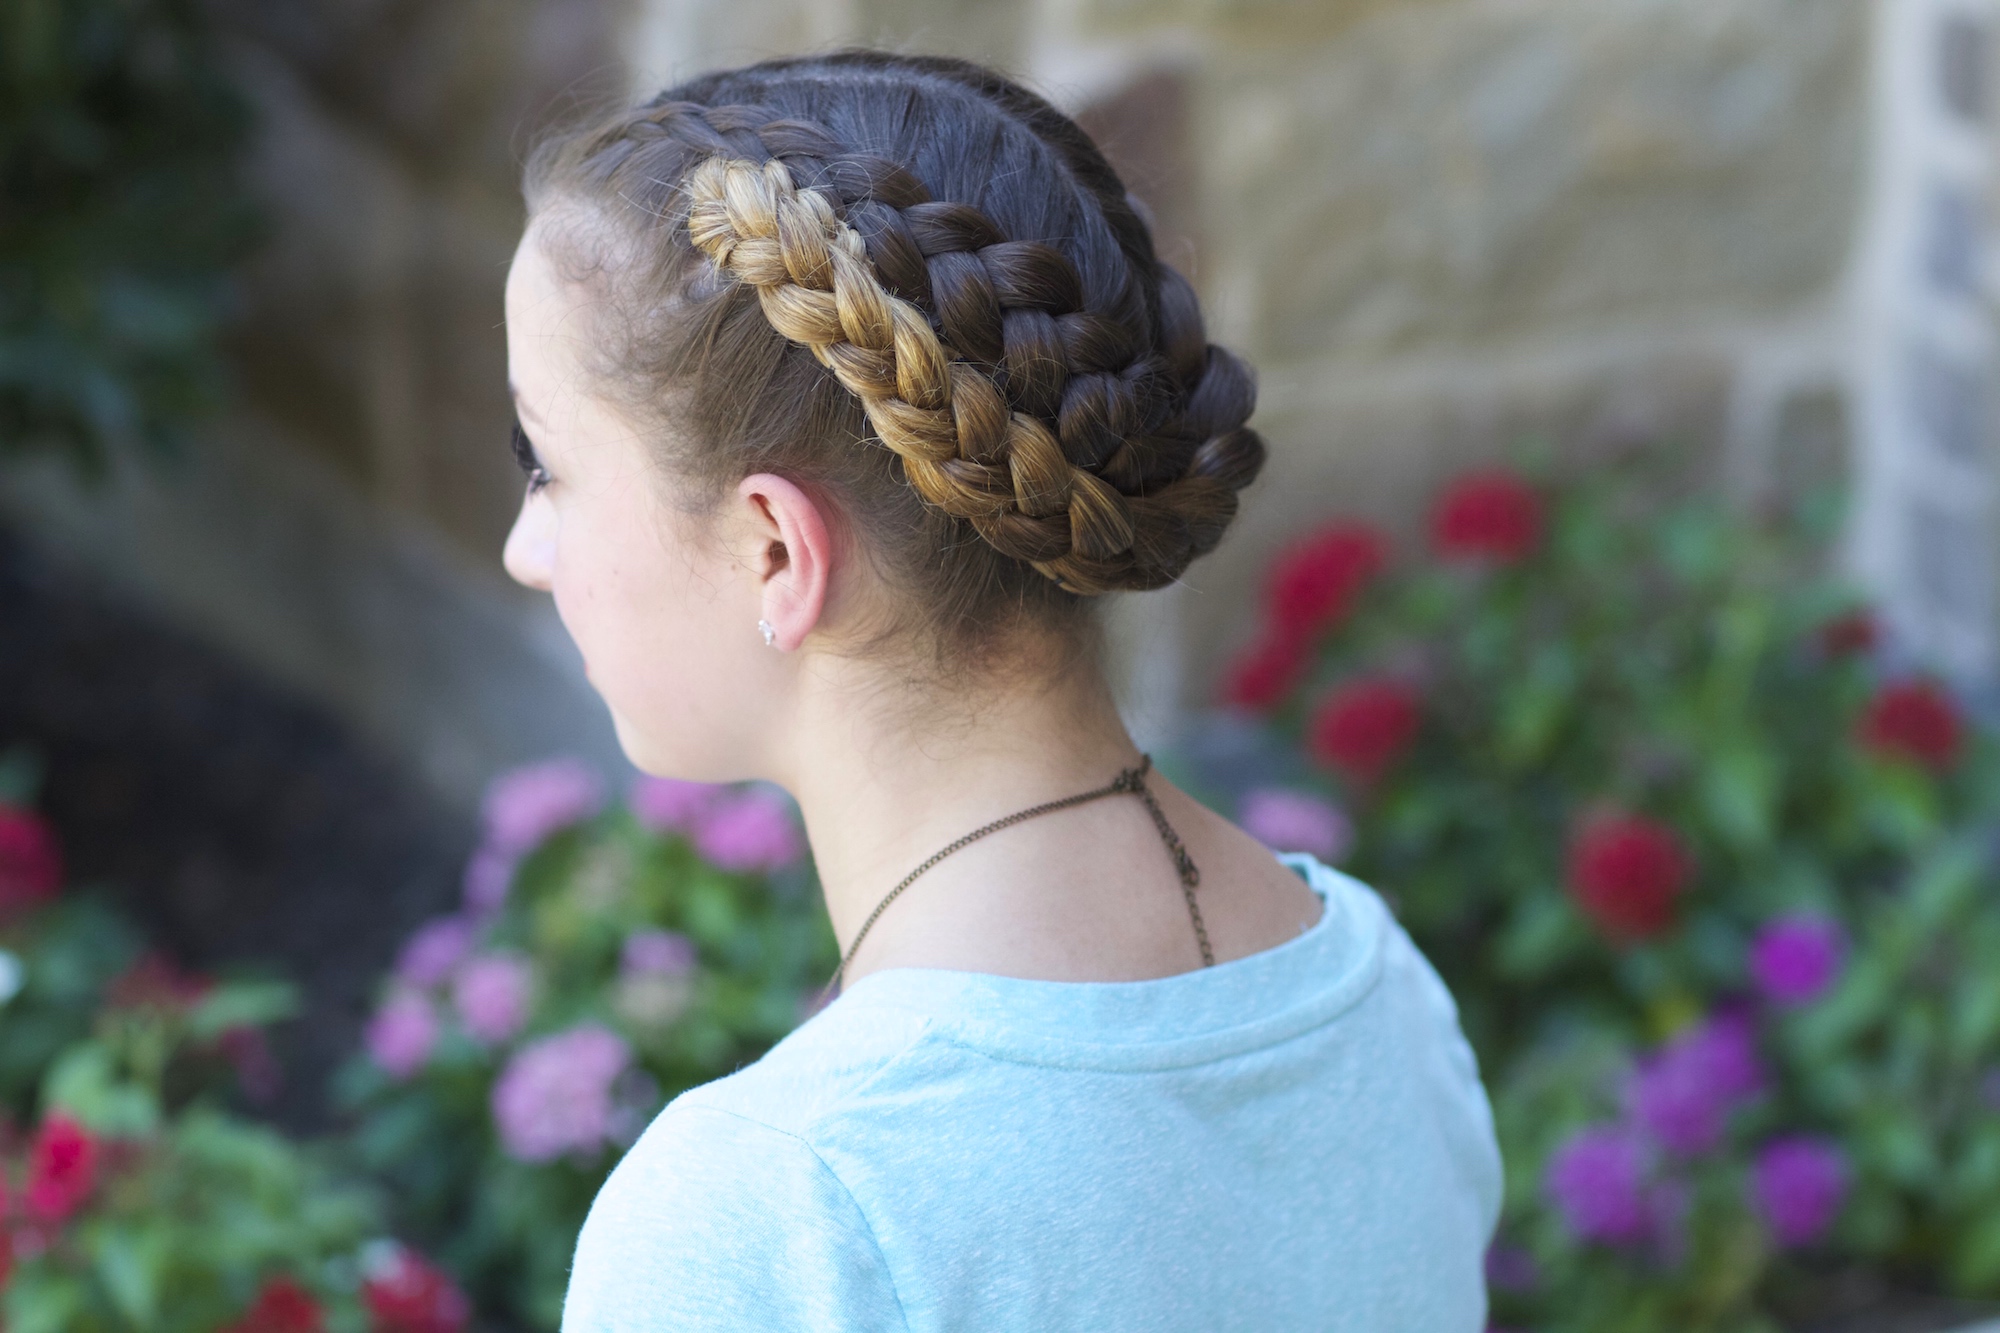
I have had my hair short for nearly a year now, so I really can’t wear these braids but Brooklyn has been wearing them a lot lately! What do you think? Anyone with medium-to-long hair can wear it and you can dress it up or down!
Items Needed: Brush, rat-tail comb, spray bottle, 2 small hair elastics, 10-15 bobby pins, hairspray {if desired}.
Time Requirement: 10-15 minutes
Skill Level: Medium
Video Tutorial:
Step-by-Step Instructions:
- Begin by parting the hair down the middle the head…
- On each side, create a side Dutch Braid and finish them off into simple braids, secured with hair elastics…
- Then take the two braid tails and cross the left one under the right, taking the left one up and laying it directly under the original Dutch Braid on that right side…
- Secure the braid into place using a few bobby pins…
- On your free simple braid tail now on that side, right below where the braid meets the beginning of the Dutch Braid, take the end and fold it under being careful to tuck the braid ends underneath, and secure with more bobby pins…
- Repeat Steps #3-5 on the other side, making sure that your folds are equal from the front…
- Add hairspray {if desired}.
If you have any hairstyle ideas you would love to see us post here, please feel free to comment below!
Happy Hairstyling!
Watch BrooklynAndBailey offer advice for kids entering their Freshman Year of High School, or those going to a new school, by clicking below!


I like this one its so pretty!
Omg This is So Much simpilar Than I thought it was when I seen it at first and omg it looks so Good on Brooklyn
It’s like a cool twist on the Milkmaid Braid… I love it!
Looks so cute on you too Brooklyn!
Great Job Bailey! xx
This hairstyle is adorable. I would definitely use it for dress up as a greek goddess for an event or costume party.
Daily Opulence | http://www.DailyOpulence.com
hi brooklyn and bailey