Today we are going to show you how to create Hair Pin Curls, a tutorial that we’ve been waiting nearly a year to show you. The curl set we use here isn’t likely one you would use every day, but it is PERFECT for Halloween!!!

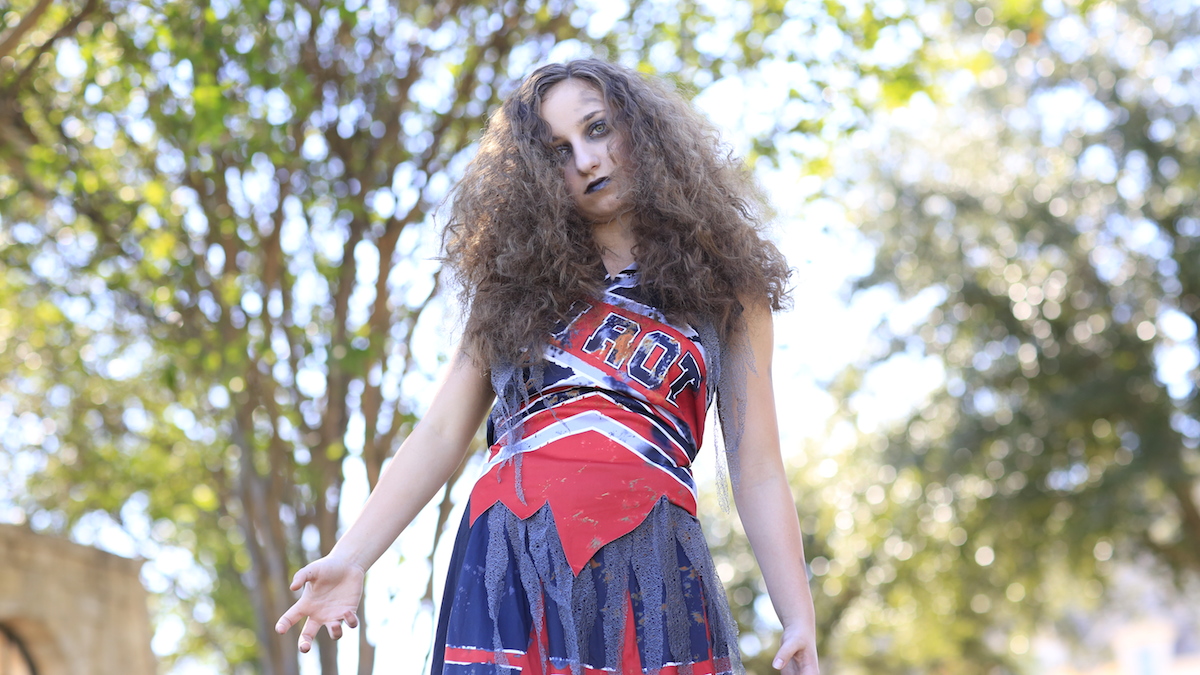
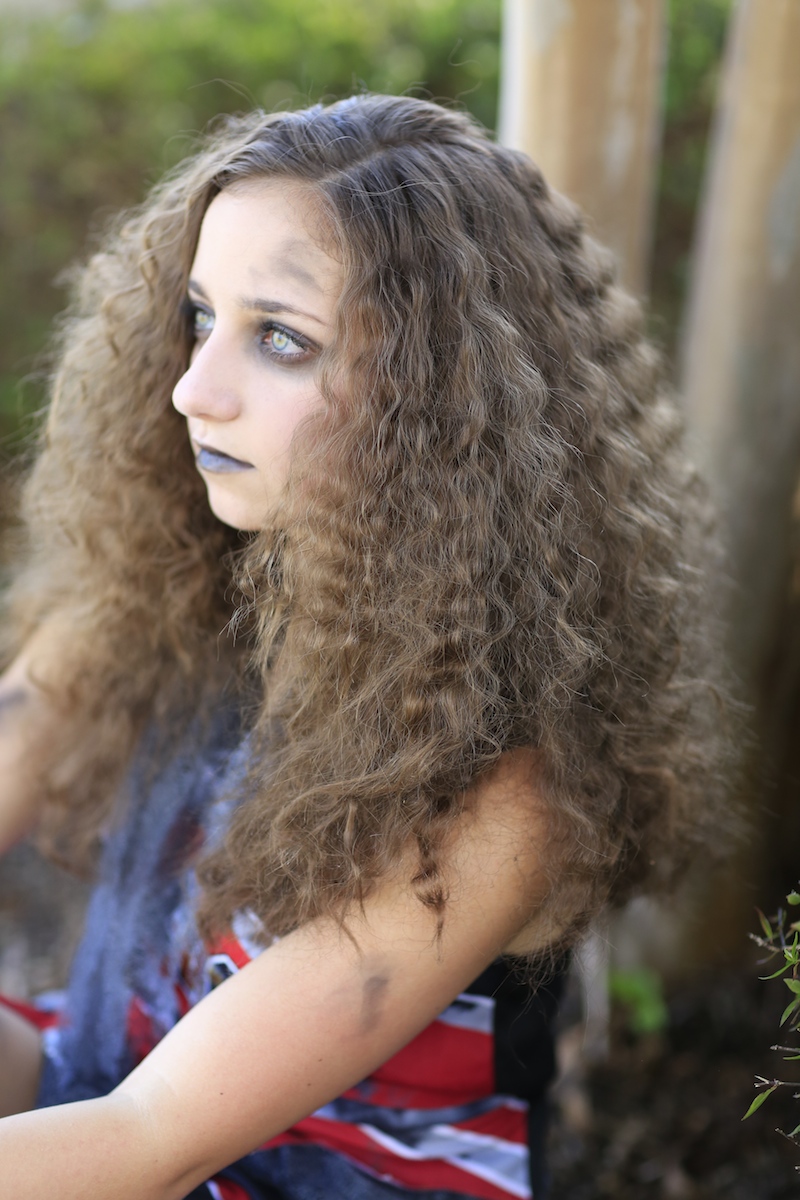
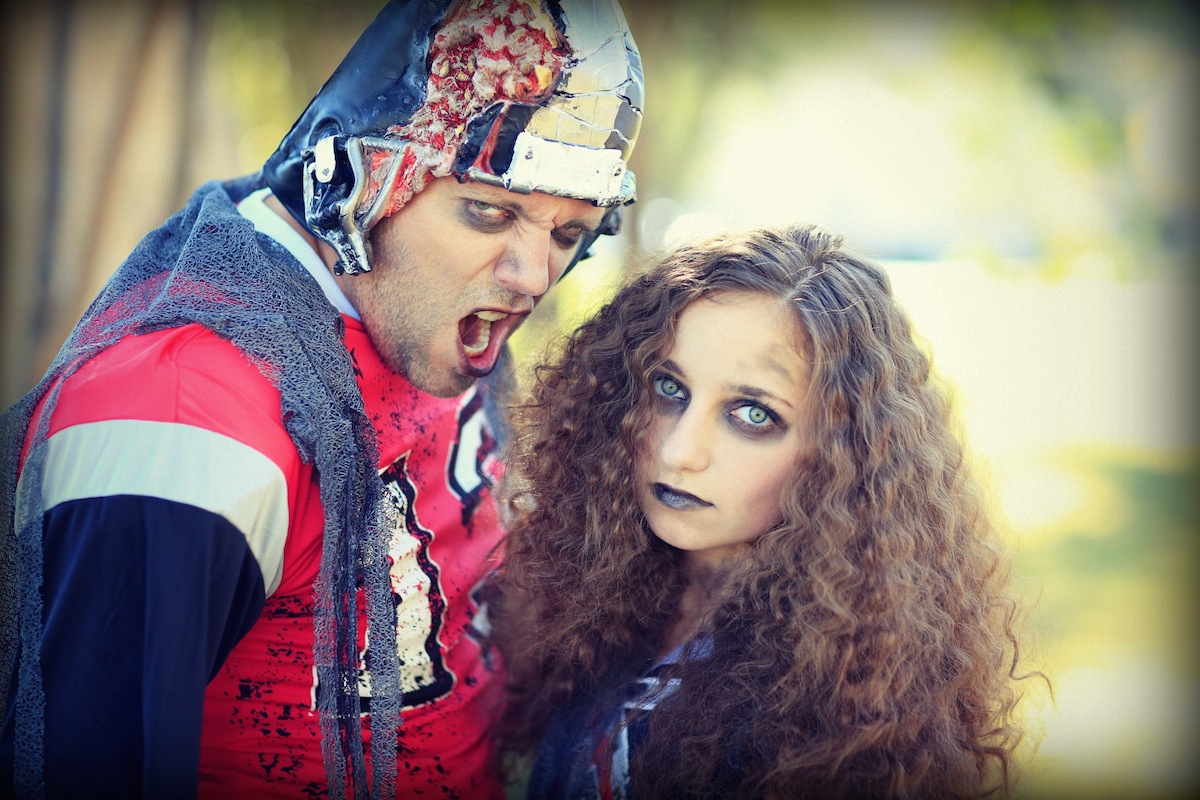
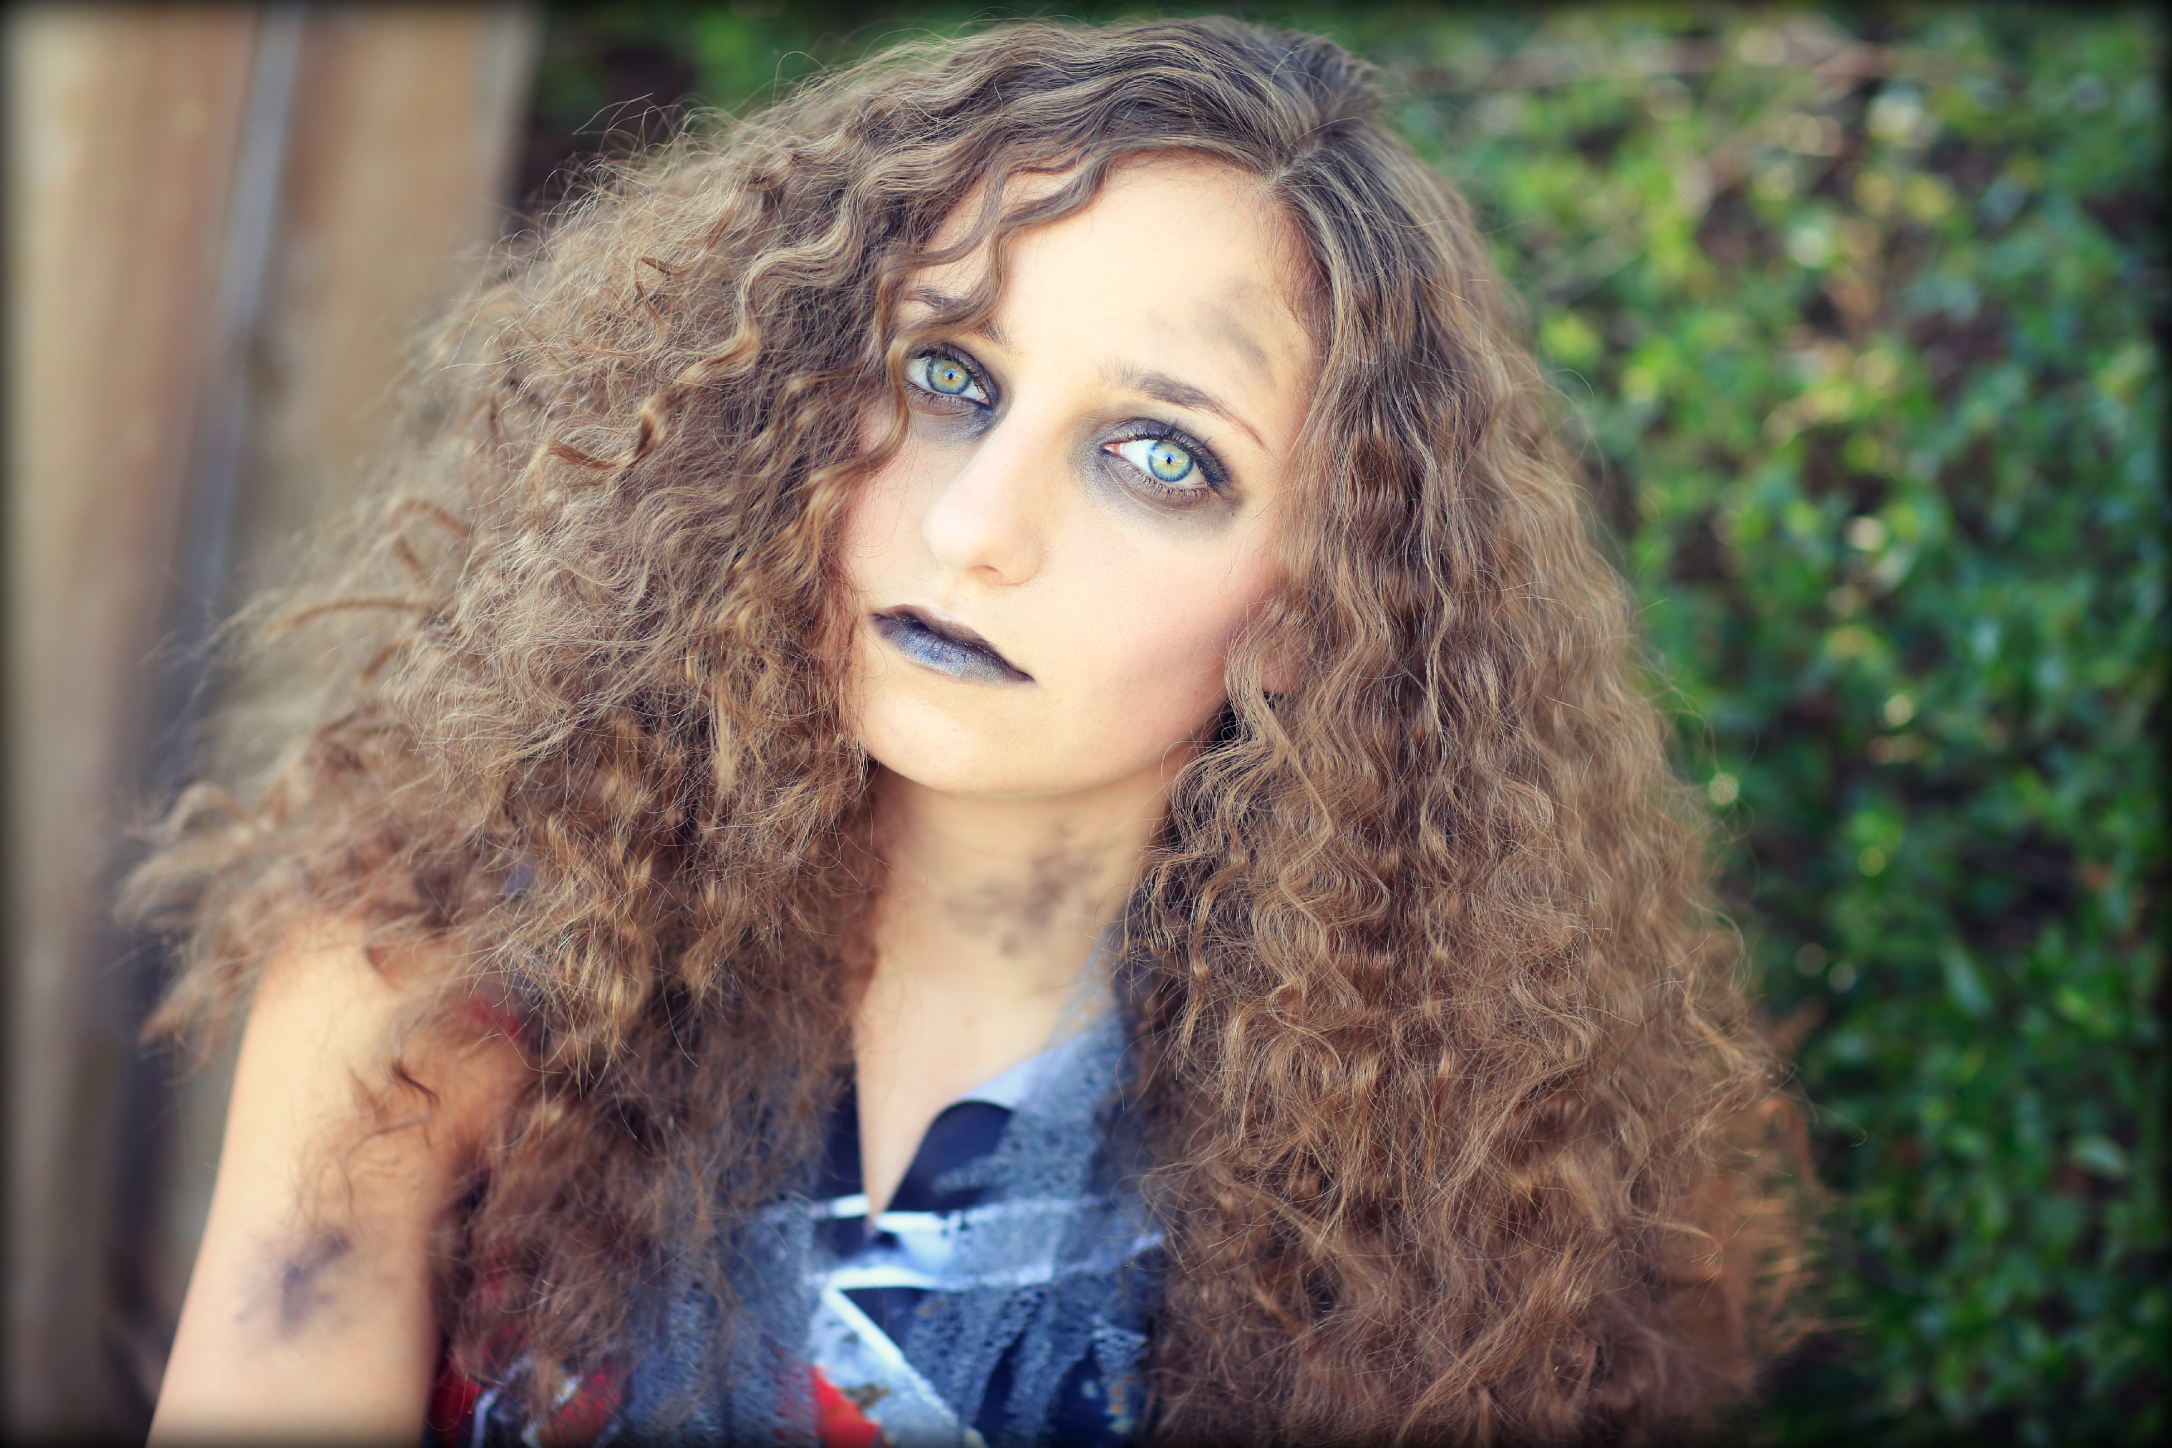
You can use this technique as a base-texture hairstyle for a witch, lion, mad scientist, Bride of Frankenstein, zombie, purple minion, Mad Hatter, etc! Bailey wanted to be a Zombie Cheerleader! Pretty much anything that requires frizzy hair!
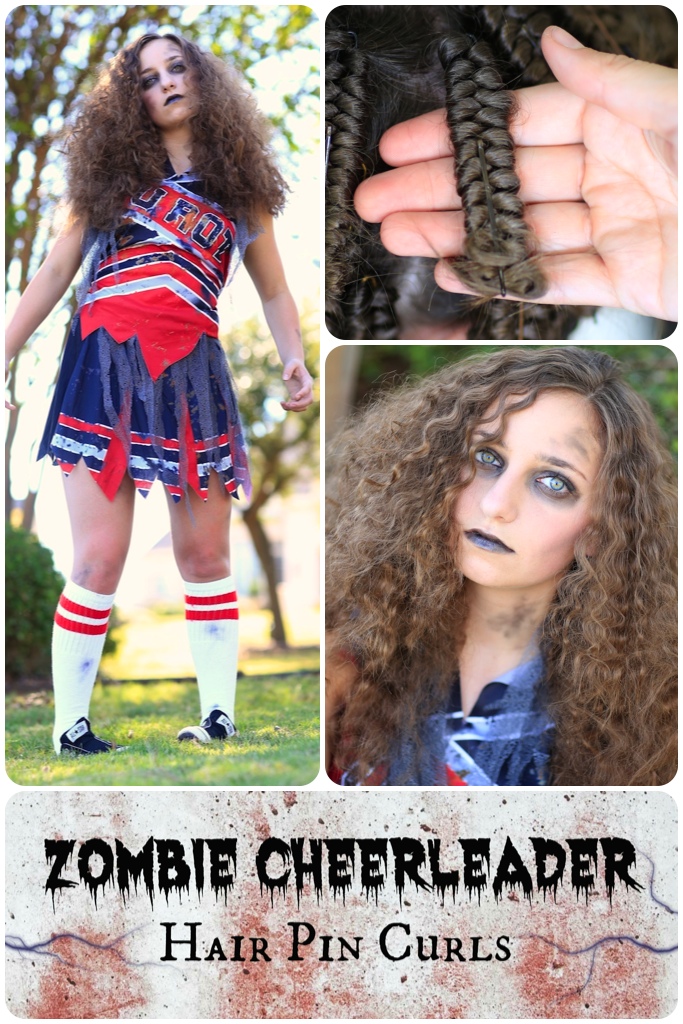
We sure turned a lot of heads this weekend as we filmed the intro for this video! Bailey loved it, and really delved into character! {Shaun was pretty much embarrassed the entire time!} Bailey found her Zombie Cheerleader costume at Chasing Fireflies.
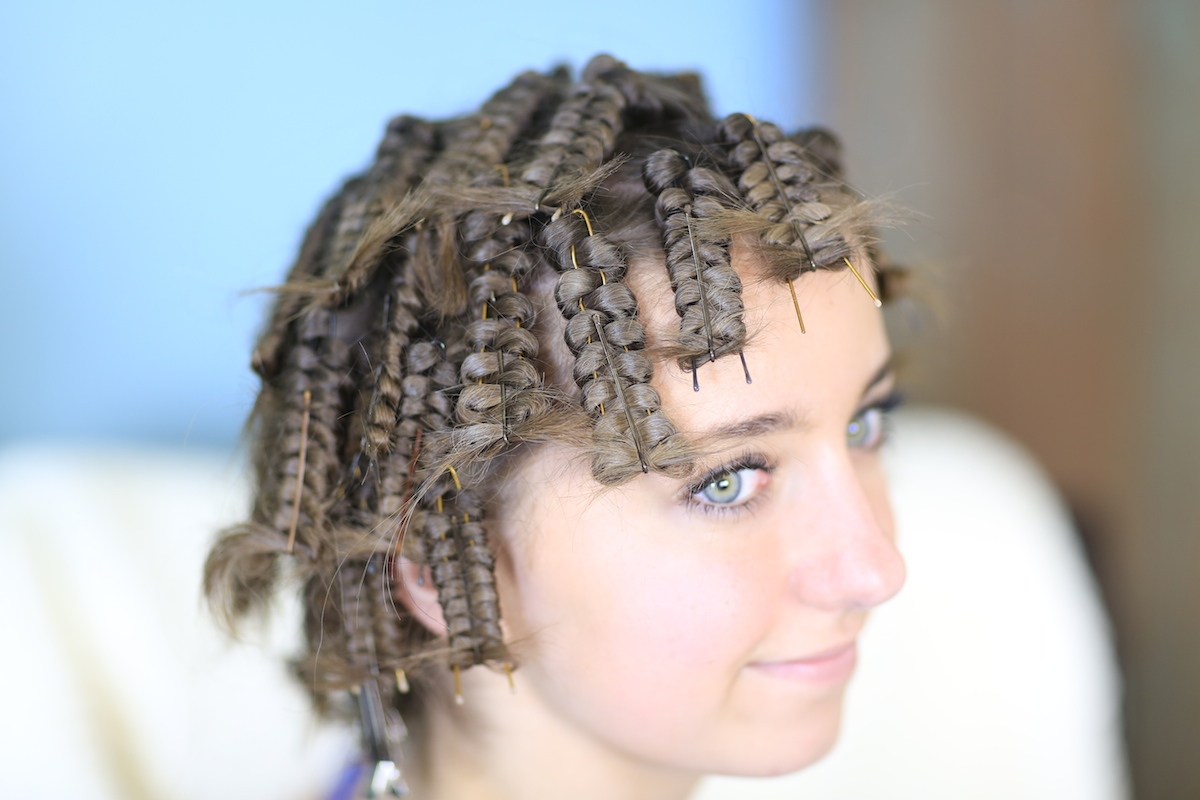
For this tutorial, I used hairpins to wrap the hair in a rick rack set {giving the resulting “rick rack” looking wave pattern, a classical sewing term}. I then secure the sets with bobby pins. This curling set isn’t new, as it’s been taught in styling schools for decades, and now several websites provide tutorials for them as well. {One of our favorites was done by the girls over at The Beauty Dept.}

To see your own photo recreations featured in our app, feel free to tag your own photos of this hairstyle on IG with: #CGHHairPinCurls
To get this look, be prepared to spend about an hour setting the hair {if you are doing this by yourself}. If you have a friend helping you, this process will go much faster.

To see the rest of our #CGHSpooktorials series, click here.
Items Needed: Brush, rat-tail comb, 40-50 hair pins, 40-50 bobby pins or alligator clips, heat protectant, flat iron, hairspray, leaves and grass {optional}.
Time Requirement: 60 minutes
Skill Level: Hard {only because of time}
Step-by-Step Instructions:
- Spritz hair with heat protectant…
- Begin by parting off a section of hair at the nape of the neck from ear to ear, securing the rest up in a temporary bun…
- Now take a 1″ section of hair nearest the ear and use a hair pin {not the same as bobby pin} to straddle it, next to the head…
- Wind the hair over and under the two hair pin prongs, in a figure 8 pattern, using your free hand to slide the sticking up the pin, until you reach the end of the hair strand…
- While pinching the end of the hair with your free thumb and index finger, use a flat iron and gently press the hair pin set…
- Now use a bobby pin, or alligator clip, to secure the hair by sliding it up the outside middle of the hair pin…
- Continue with Steps #2-5 across the rest of that hair section…
- Now release the hair bun on top and part off another section of hair on top of the one you just set…
- Continue the hair pin curls in this manner until the entire head is covered.
- Feel free to iron the sets one more time, just to be sure they take, and let them cool for about 10 minutes.
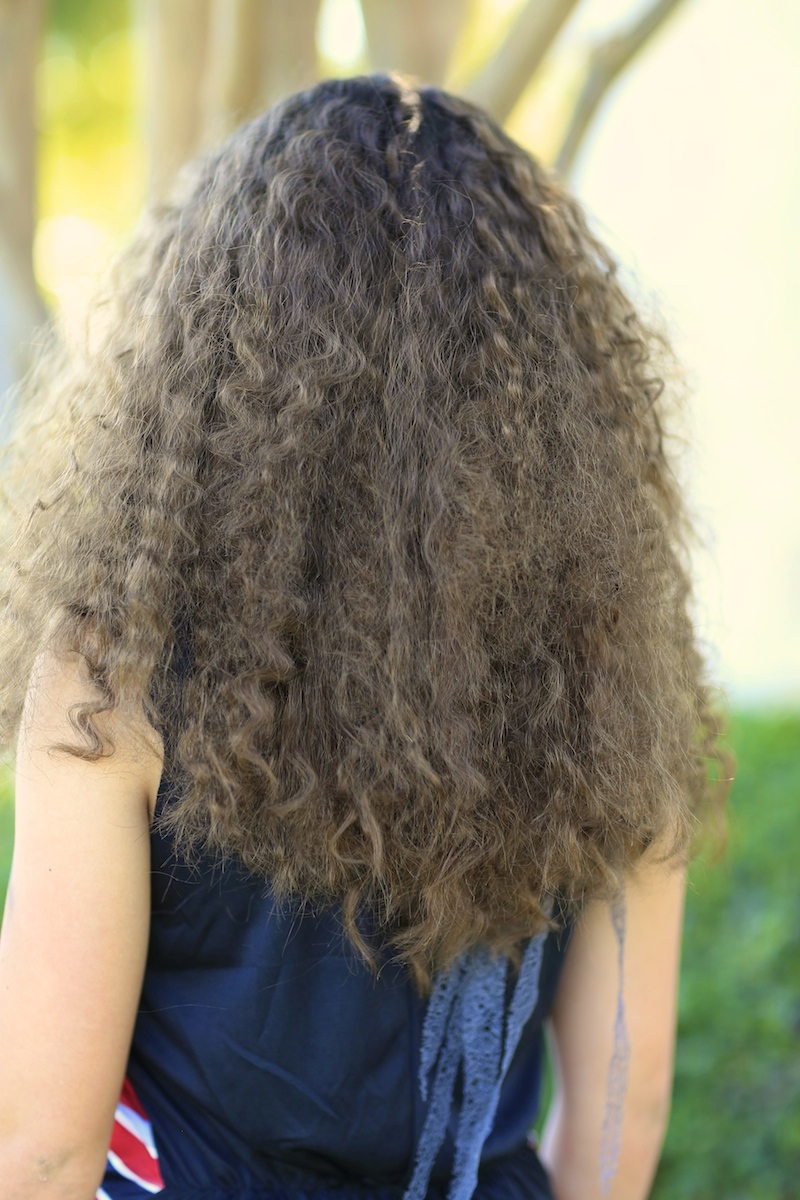
- Now remove any bobby pins or alligator clips, and then pull the hair pins out from the top of the set, which will realize the rick rack curls/waves.
- Lastly, gently separate the waves and finger comb them to your liking {do not to use a brush, as this will make the hair super frizzy}…
- Add hairspray, leaves, or grass {optional}.
- No-Heat Version: Set the Hair Pin Curls as above, only with slightly damp curls. Cover with a bandana or silk scarf and let set overnight. You can also sit under a hooded dryer, using a cool setting, or use a blowdryer on low to dry the curls.
Please be sure to leave a comment below letting me know what you thought of this Hair Pin Curls tutorial!
Happy Halloween!
My girls were on a DIY Last Minute Halloween costume kick this past week, and uploaded four new ones to thier BrooklynAndBailey YouTube channel! I think they are all going to be favorites! Click below to view!


Hey you guys are amazing ive learned so much from your guys website thank you!!!
it quite funny…. but beautiful hair style no doubt.
You’re the best!
Love You !!!
Great Halloween hairstyle!
Itresting teckneeque. Love the costume Bailey!
These would be good for Merida curls.
I think this one is awful
My… this is gonna be perfect for my Hatter costume!!! Love it guys… Thanks !;)
Just in case some don’t know…. the “hair pins”, when I was growing up were called “bun pins” as they are used to secure buns.
I will try this for my daughter’s halloween party next friday Im soo excited to surprise her