A few months ago, Alicia, my friend from high school shared a photo with me on Facebook of this hairstyle that she simply could not figure out. At first, I couldn’t either.
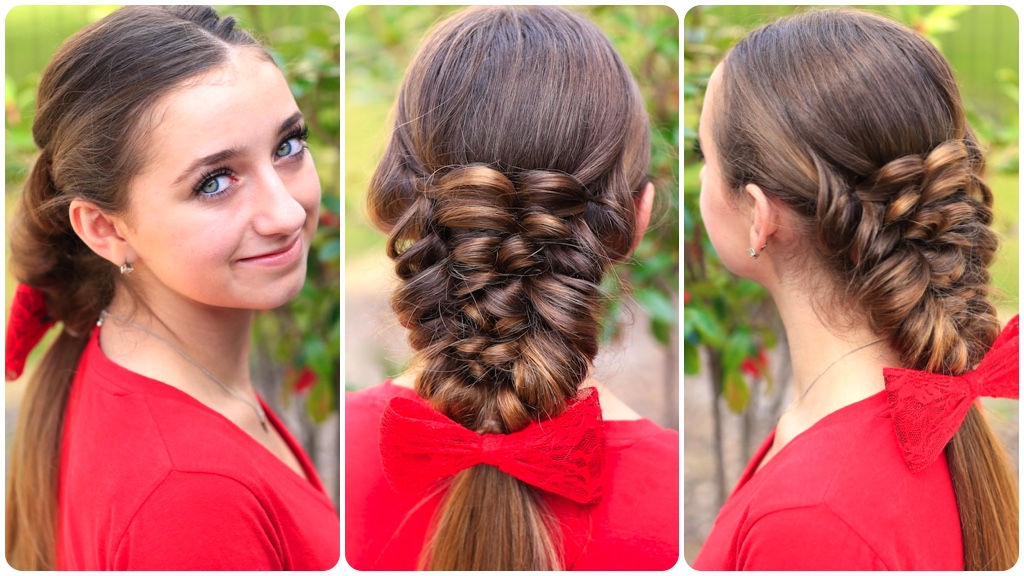
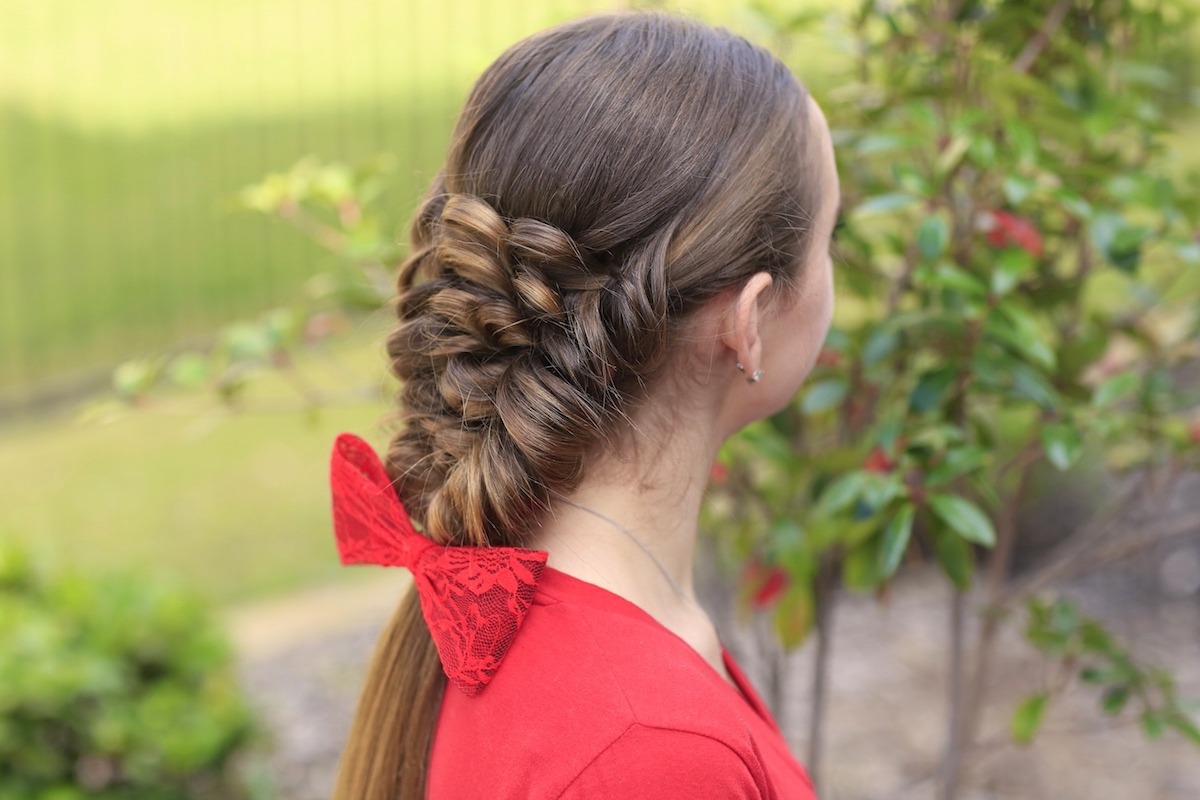
It took several weeks, trying to reverse engineer the style in the photo, but the girls and I finally cracked the code! Today, we will be showing you how to create a Banded Puff Braid – a beautiful faux braided hairstyle that we know you’ll love!
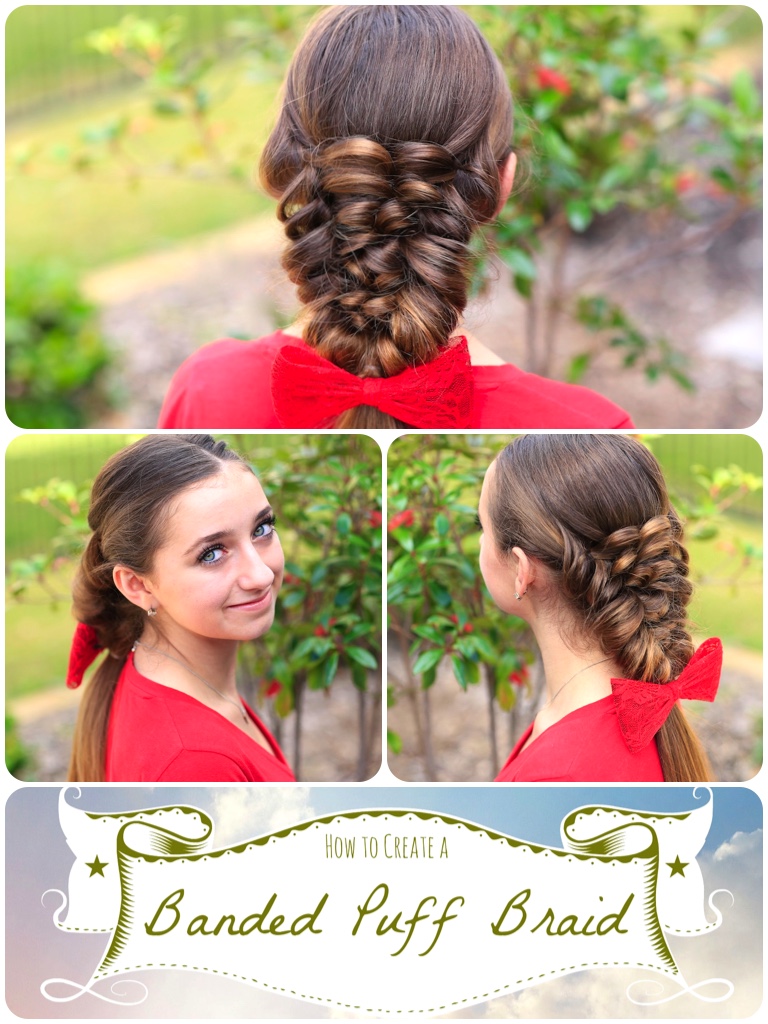
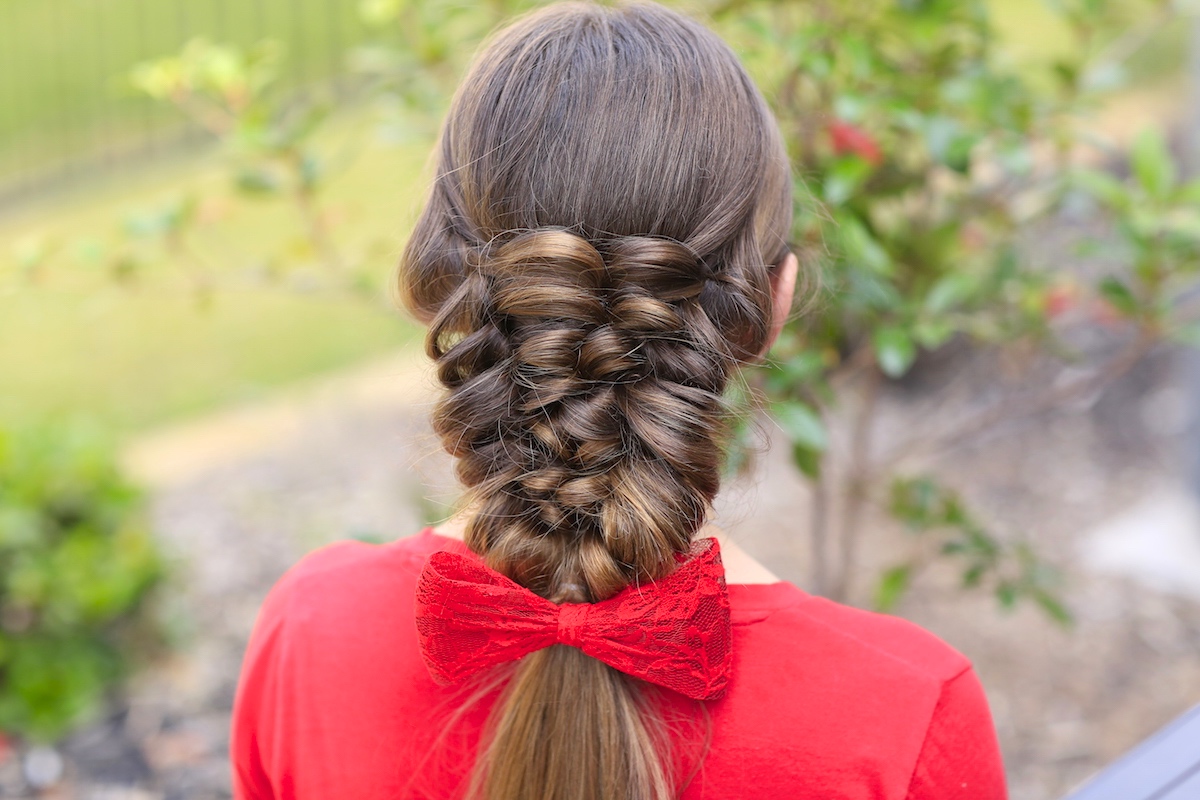
This technique involves the use of small banded tiebacks to create this style, threading your newest one under and up through the previous one. Then as you go, simply pancake the stitches to your liking. You can do as many, or few, stitches as you want… it’s entirely up to you!
The steps may seem confusing at first, especially in the beginning as it was for me. Then you will see that as you go along, the steps will go faster and the puff braid will take shape, and you will LOVE it!
To see your own photo recreations featured in our CGH App, feel free to tag your own photos of this hairstyle on IG with: #CGHBandedPuffBraid
We’ve stopped every time we go out wearing this braid! Women and girls will simply want to know how you created it!

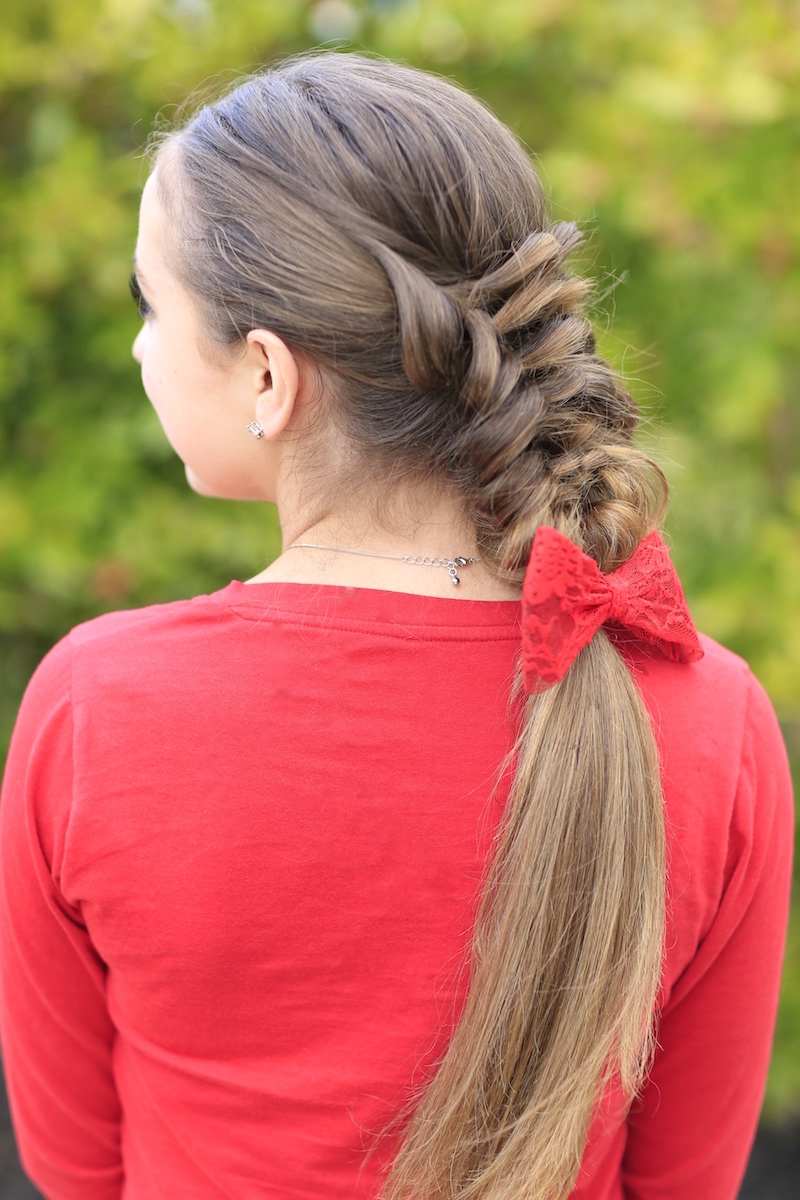
You can leave this braid as we have done, or finish the bottom ponytail into a braid, tucking and rolling it all up and underneath the puff braid for a gorgeous updo. Creating this on a base of curls, would make it super elegant as well! Your options really are limitless!
Items Needed: Brush, rat-tail comb, spray bottle, 10-12 small hair elastics, hairspray or hair wax, accessory {if desired}.
Time Requirement: 15-20 minutes
Skill Level: Medium
Step-by-Step Instructions:
- Start with a middle part…
- Next, begin by separating off the hair on each side of the head, from just behind the ears on up to the middle part line {make sure you don’t take too much hair from the top area, since the large strand will not look as nice pulled back and spread flat against the head}…
- Now, pull both sections to the back center of the head and secure with an elastic as a tieback…
- Then, create two more small strands from behind the ears, pulling them back and securing against the head with an elastic, however this tieback will lay right on top of the previous one…
- Now pull the bottom tieback up through and over the second tieback {effectively switching places}.
- Then gather two more small strands of hair from the sides of the head and tie them back with an elastic…
- Now thread the bottom tieback up through and over the top of your newest tieback so that it now lays on top {at this point, you should notice the hair beginning a twisting pattern}…
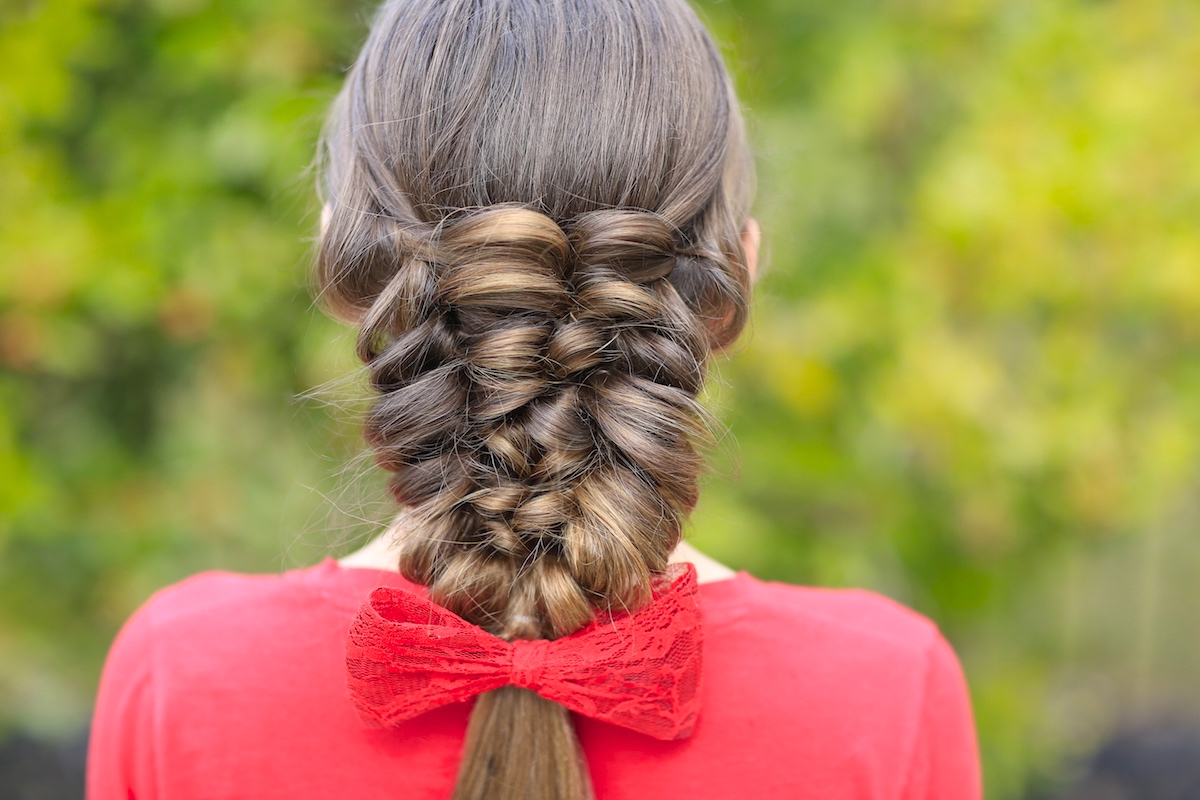
- Next, go back and gently tug on the elbows of the hair twists, the outside first, then the inside, to pancake them and begin creating the puffed texture…
- Repeat Steps #4-8 until you have gathered all the remaining hair into elastics, continuing to puff the braid after every stitch…
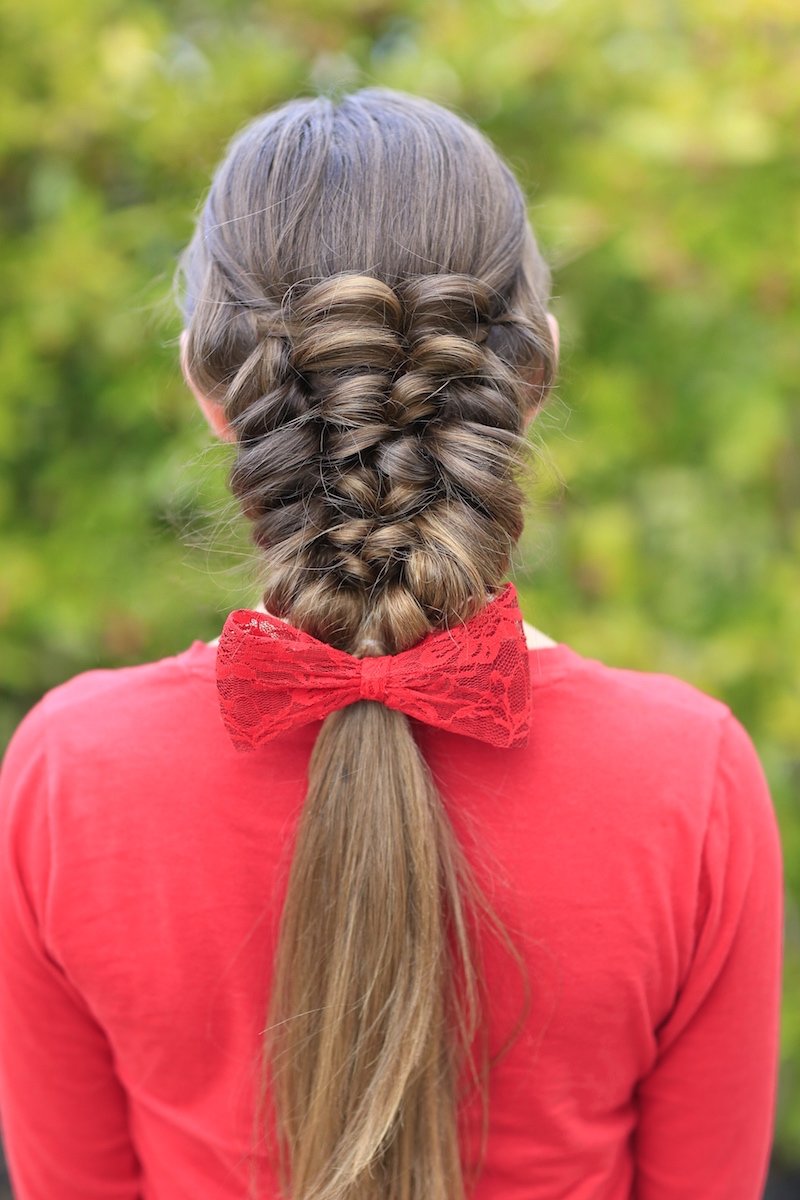
- Now that you’ve run out of hair, secure all remaining hair into a ponytail with an extra elastic…
- Add hairspray, hair wax, and an accessory {if desired}.
What do you think about this Banded Puff Braid? How many ways can you think of to incorporate this fun braid into a combo? Feel free to share this with a friend you want to learn this hairstyle with you!
Happy Hairdoing!
This week, Bailey gives us all a peek into her mornings {getting up at 4:45am}, as she goes to seminary/bible study and prepares for early AM cheer practice before school. Her Get Ready with Me – Cheer Edition video is now on their BrooklynAndBailey YouTube channel! To see the video, simply click below…


So pretty!
This hairstyle is so adorbs!!!!
Heya i’m for the first time here. I found this board and I to find It really helpful & it helped me out a lot. I’m hoping to provide something back and help others like you helped me.
I Love this hairstyle. I think it adds so Mutch texture to her hair when u pancake it.It would be nice at a wedding or a party.
This is sooo great! Good job!
awesome style! These you do in only 15-20 minutes! It would look Amazing!
Thanks for sharing
The hairstyle is awesome. And it brings charm with your long hair. Loved it 🙂
Thank you 🙂
Amazing how you can do that style in only 15-20 minutes! I think it would take me forever, but I’m going to try it anyway. I’m thinking of also doing the bottom into a ponytail and rolling it up underneath the puff braid, as you suggested. I think it would look awesome!Thanks for detailed the tutorial! 🙂
I really love this one because you don’t have to have super long hair to do it.
Hi bailey I take dance class any ideas on how to get ready?
I take dance class any tips on how to get ready?
Hi Mindy,
I know the time for Halloween has passed and the Monster High Tutorial’s have stopped but… I was wondering if you could do an Operetta Heat-less Curl tutorial because I adore the doll’s curls but I have no idea how to recreate them!http://i.ebayimg.com/00/s/MTAwMFgxMDAw/z/wugAAOxyrrpThWW4/$_35.JPG http://ecx.images-amazon.com/images/I/811zR1pJ5iL._AA1500_.jpg Thanks!
Bailey gets up at 4:45AM!!!!!!!!
i tried this on my sister today but its a bit hard and it turned out messy. but i will keep trying
any tips? 🙂
please reply mindy
I just found your blog today and really love it! I work with ytfhairextensions.com and will be recommending more of your posts to our social media followers. Really awesome blog! I’m always happy to find rockin’ chicks in the blog game!
This last one, I can finally do on myself. Most of the others is too hard. I don’t have any daughters that I can do these on, just myself. I really like the look of this and it’s easy. Thanks for sharing.
Love this! It’s a little hard for me, though. . . also a little over-elegant, if you know what I mean. I just can’t think of an occasion that I might wear this to! Maybe a wedding, I guess. Or a dance rehearsal or something. But I don’t have any of those. Well, anyway, thanks for the inspiration, and I love all the hairstyles! Keep it up, Mindy!!
I love this and will help me with dance befor and after school
Thanks
this is a really cool hairstyle,:)
Please could you do Astrid’s Hairstyle from how to train your dragon 2.
🙂
Astrid’s is like a braid, but a little uneven. I have done it before, but forgot how I did.
Yes, CGH, please do it! 🙂
if anyone wants CGH to do a tutorial on Astrid hair style from how to train you dragon 2.
Add your comment here
please CGH