We are back from Europe and had a wonderful time meeting many of you in Amsterdam, various stops in England, and in Edinburgh, Scotland! In all, we met and took photos with more that 1,500 of you! That seriously is the very best part of what we do… meeting you!
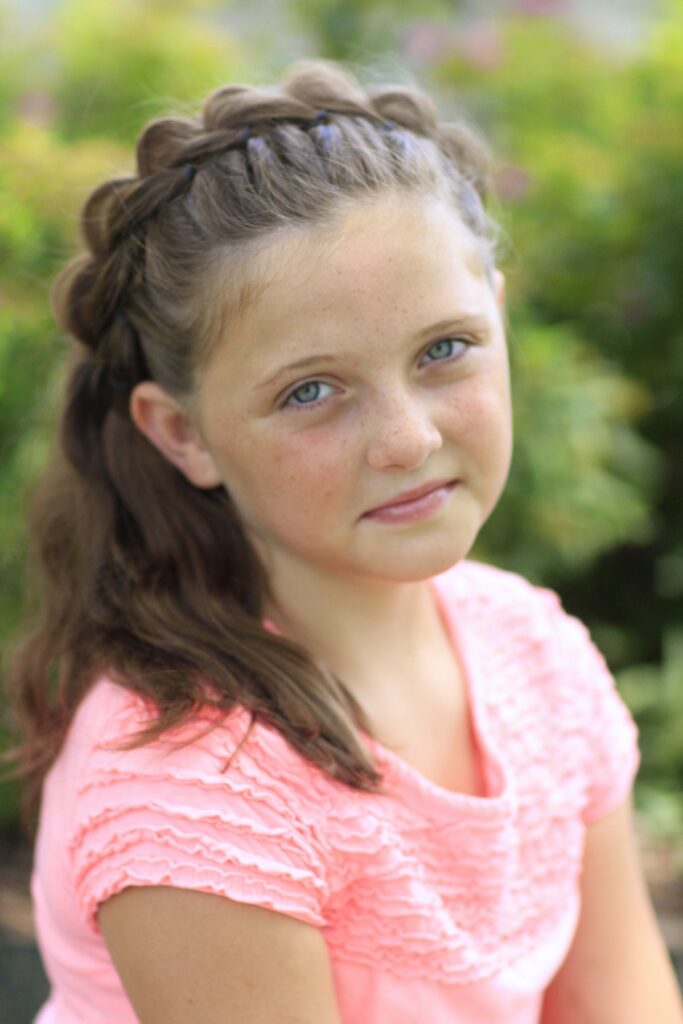
Yes, you all know that Rylan isn’t one to volunteer for filming hairstyles, which is why I have a shortage of shorty do’s on here. However, a few weeks ago, Rylan let me try this one on her and she loved it! So, today we will be teaching you how to create this beautiful Split Headband!
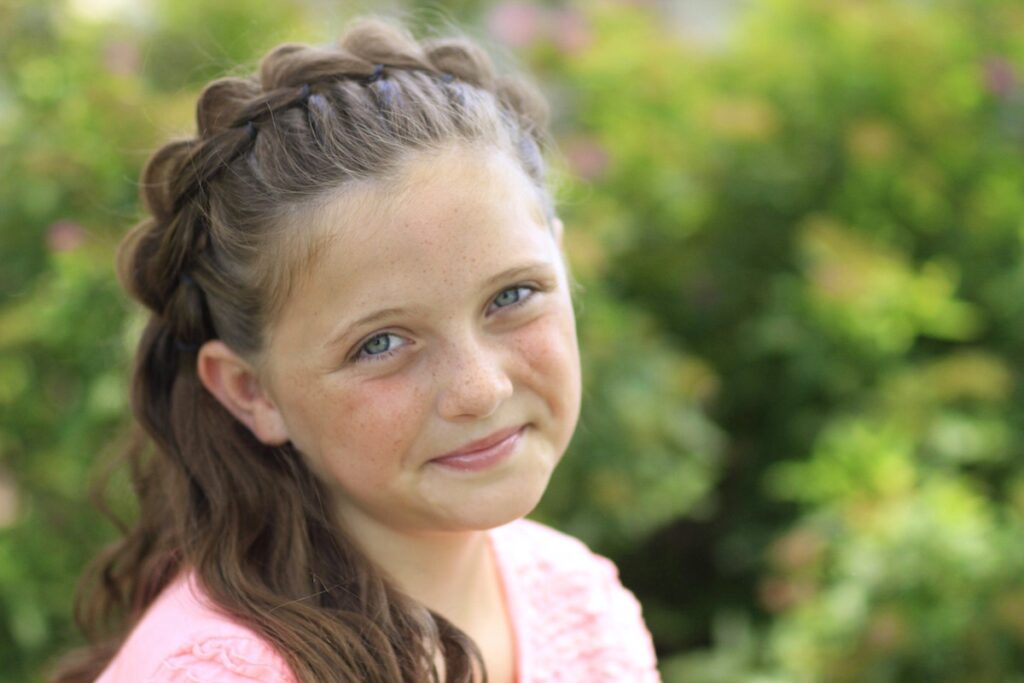
To see your own photo recreations of this style featured in our app, feel free to tag your photos on IG with: #CGHSplitHeadband
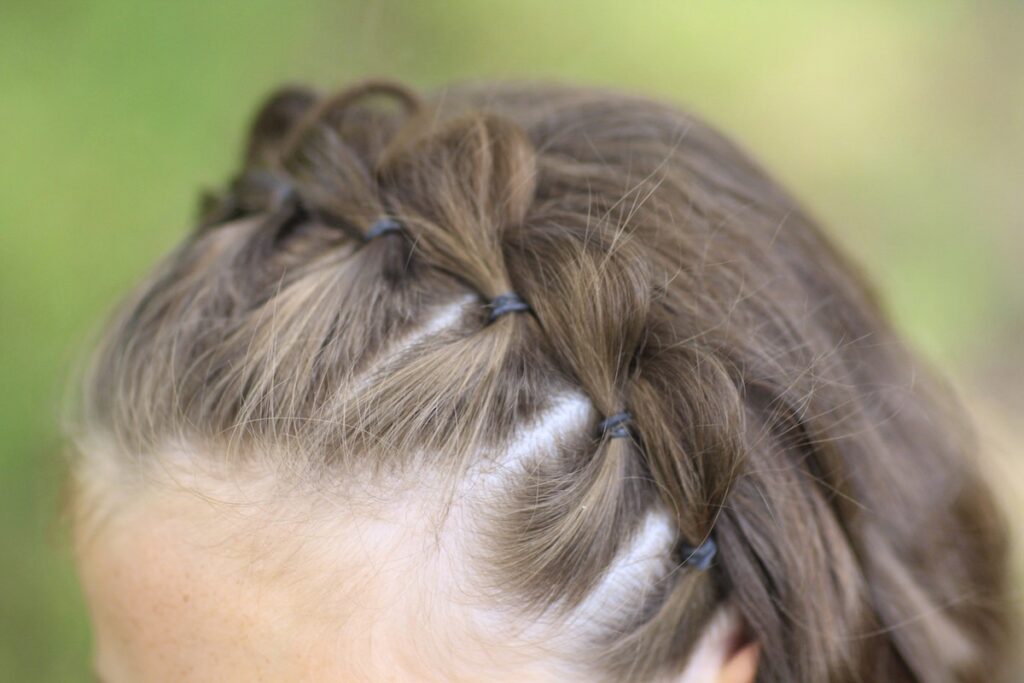
You could categorize this braid into the Pull-Thru family, since the technique is somewhat similar. When I was experimenting with it, I found that by pancaking only the back elbows of the braid… it left a cute tiara look to the braid. That was what Rylan loved so much about it.
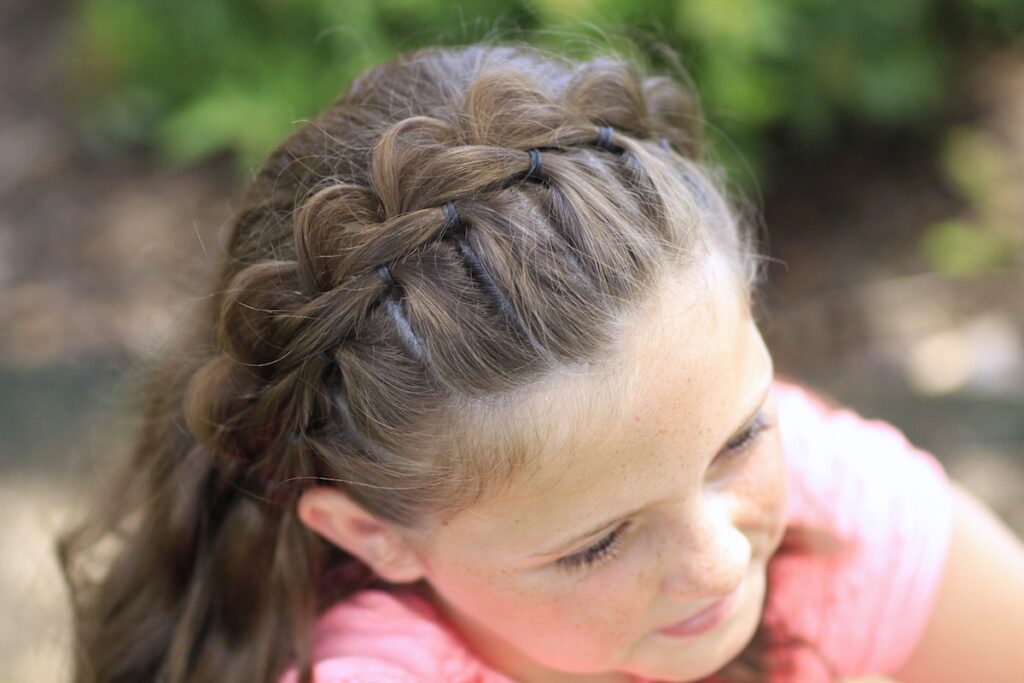
This hairstyle can be worn on short hair, medium hair, or long hair. We added waves as the base for this, but you could do it on straight hair as well. It is also suitable for women of all ages, even I have worn it.
Items Needed: Brush, rat-tail comb, spray bottle, 9-10 small hair elastics, 1 small bobby pin, hairspray {if desired}.
Time Requirement: 5-7 minutes
Skill Level: Easy
Video Tutorial:
- Begin by parting the hair from ear to ear, then use a hair elastic to keep the back half of hair out of the way…
- On the front, next to one ear, part out a small square section and use a matching elastic to create a very small ponytail…
- Now move up about 1.5 inches and create another parted section {do not add an elastic yet}…
- Divide this section of hair into two strands and pull the strands of the first ponytail of hair through the middle…
- Then, recombine the two strands of ponytail two and clip them back and out of the way for now…
- Next, move up another 1.5 inches and part out yet another small square section…
- This time, when you secure it with an elastic, make sure you include the ends of the first section ponytail…
- Now divide that newponytail into two strands.
- Pull the ends of the 2nd ponytail through the middle and recombine the pieces, clipping toward the back of the head out of the way for now.
- Repeat Steps #2-9 until you reach the other side of the head above the ear {giving you a pull-thru braid looking headband}..
- To finish off the braid, combine the last two sections together and secure them together with a hair elastic…
- Then use a small bobby pin to pin that end flat against the head…
- You may leave the hair like this, or add a little pop by going back and pancaking the backside edge of the braid {this will allow the braid elbows to stand up in a tiara-like fashion…
- Add hairspray {if desired}.
Please be sure to let us know what hairstyles you would like to see here next!
Happy Hairstyling!
To see a recap of our Europe trip from BrooklynAndBailey, please click below!



so cool ????????????❤????
I don’t understand why I haven’t found even one hairstyle shown using Paisley as the model? Am I just missing something here?
Wow. I am hoping the parents are just too busy to respond. Otherwise……
love this hairstyle,will definitely give it a try
could you please do a tutorial for this kind of hairstyle,soz if u have done something similar before
thanks