Yes, we are taking a trip back in time to add a feature to a hairstyle that we made near the very beginning of this website. Today we are going to show you how to add a 4th strand to the Waterfall Braid!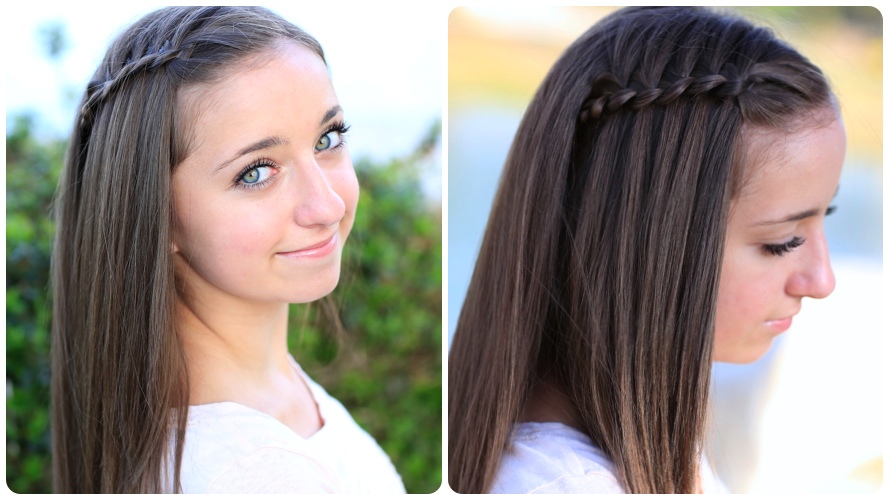 If you know the Dutch Braid stranding or stitching, then this braid will be a cinch for you! Feel free to tag your own photos of this hairstyle with: #CGH4StrandWaterfall
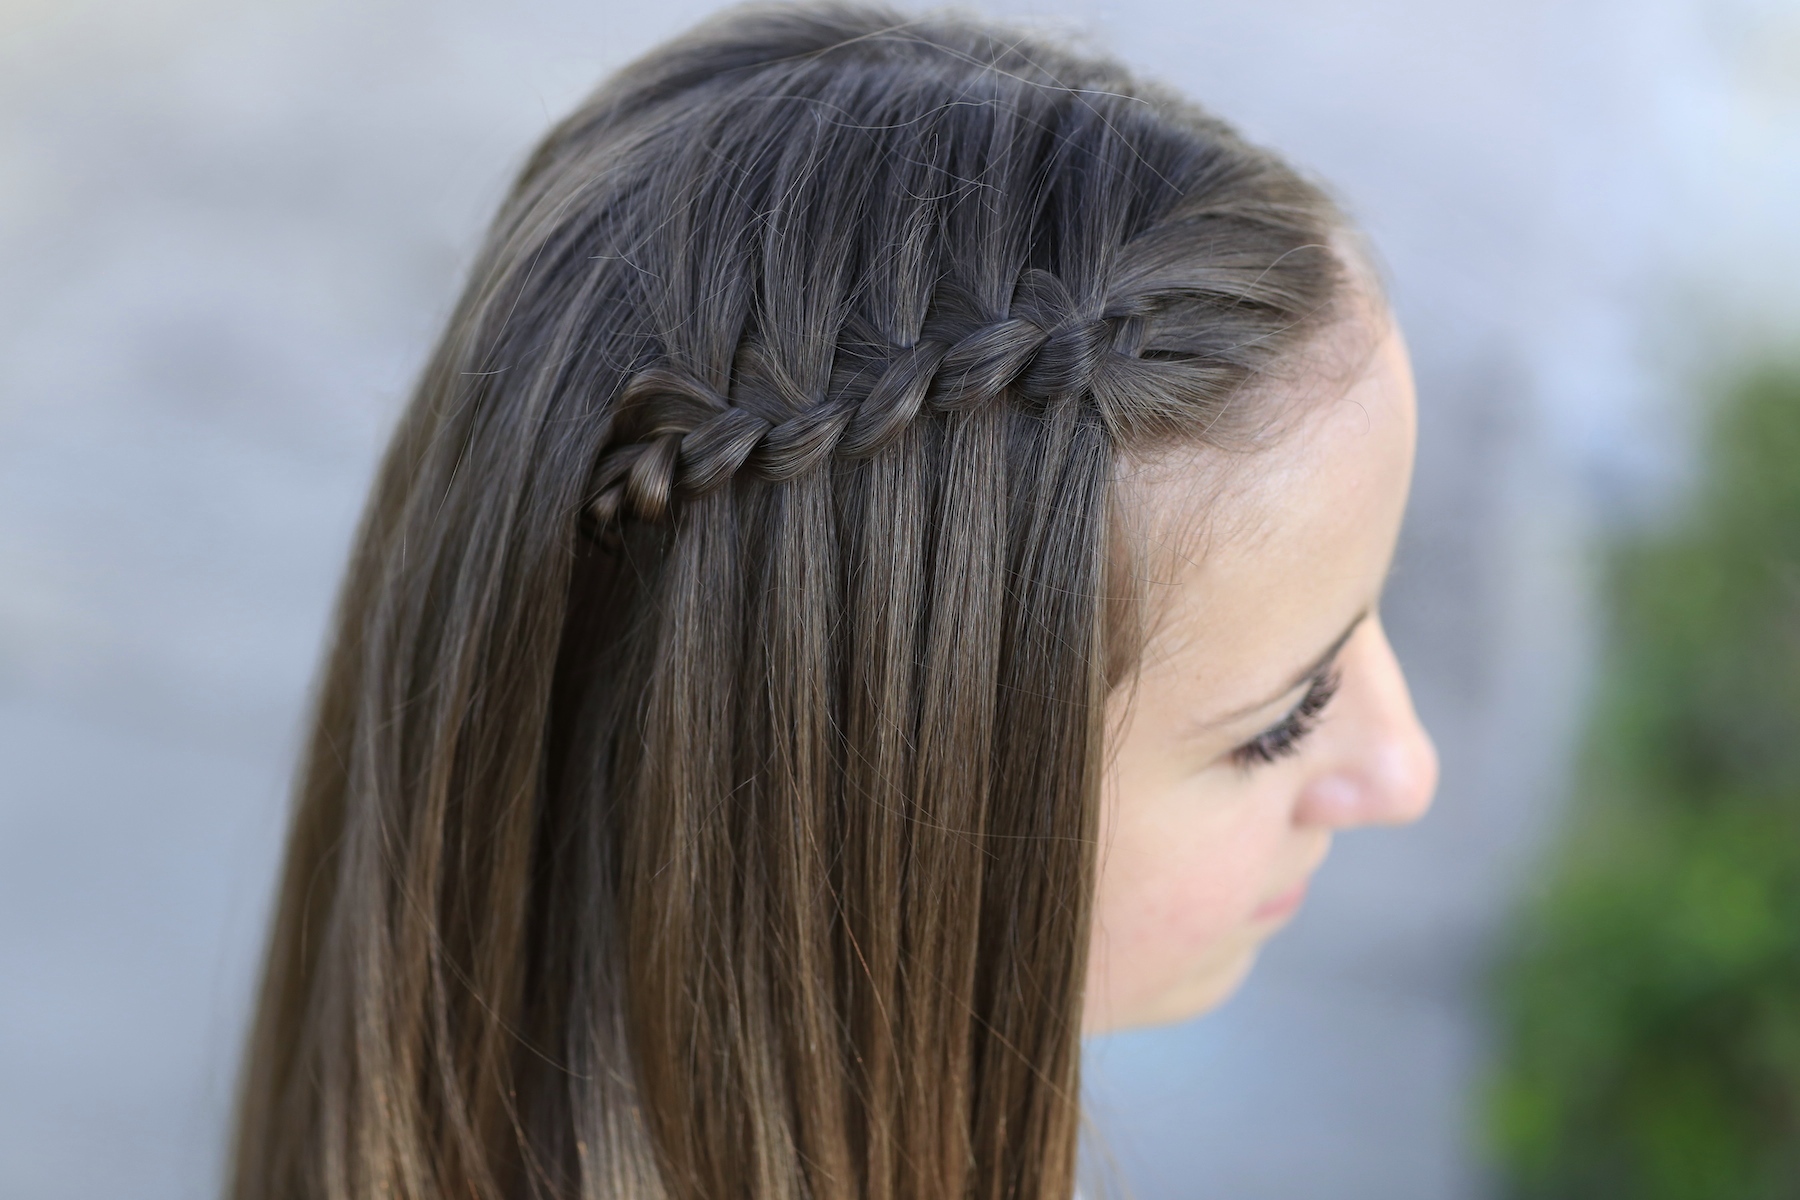
Bailey has loved our Waterfall Braids the most, out of all my girls, and wanted to be our model for today. In fact, it was Bailey’s idea to pancake the braid, which really makes it stand out!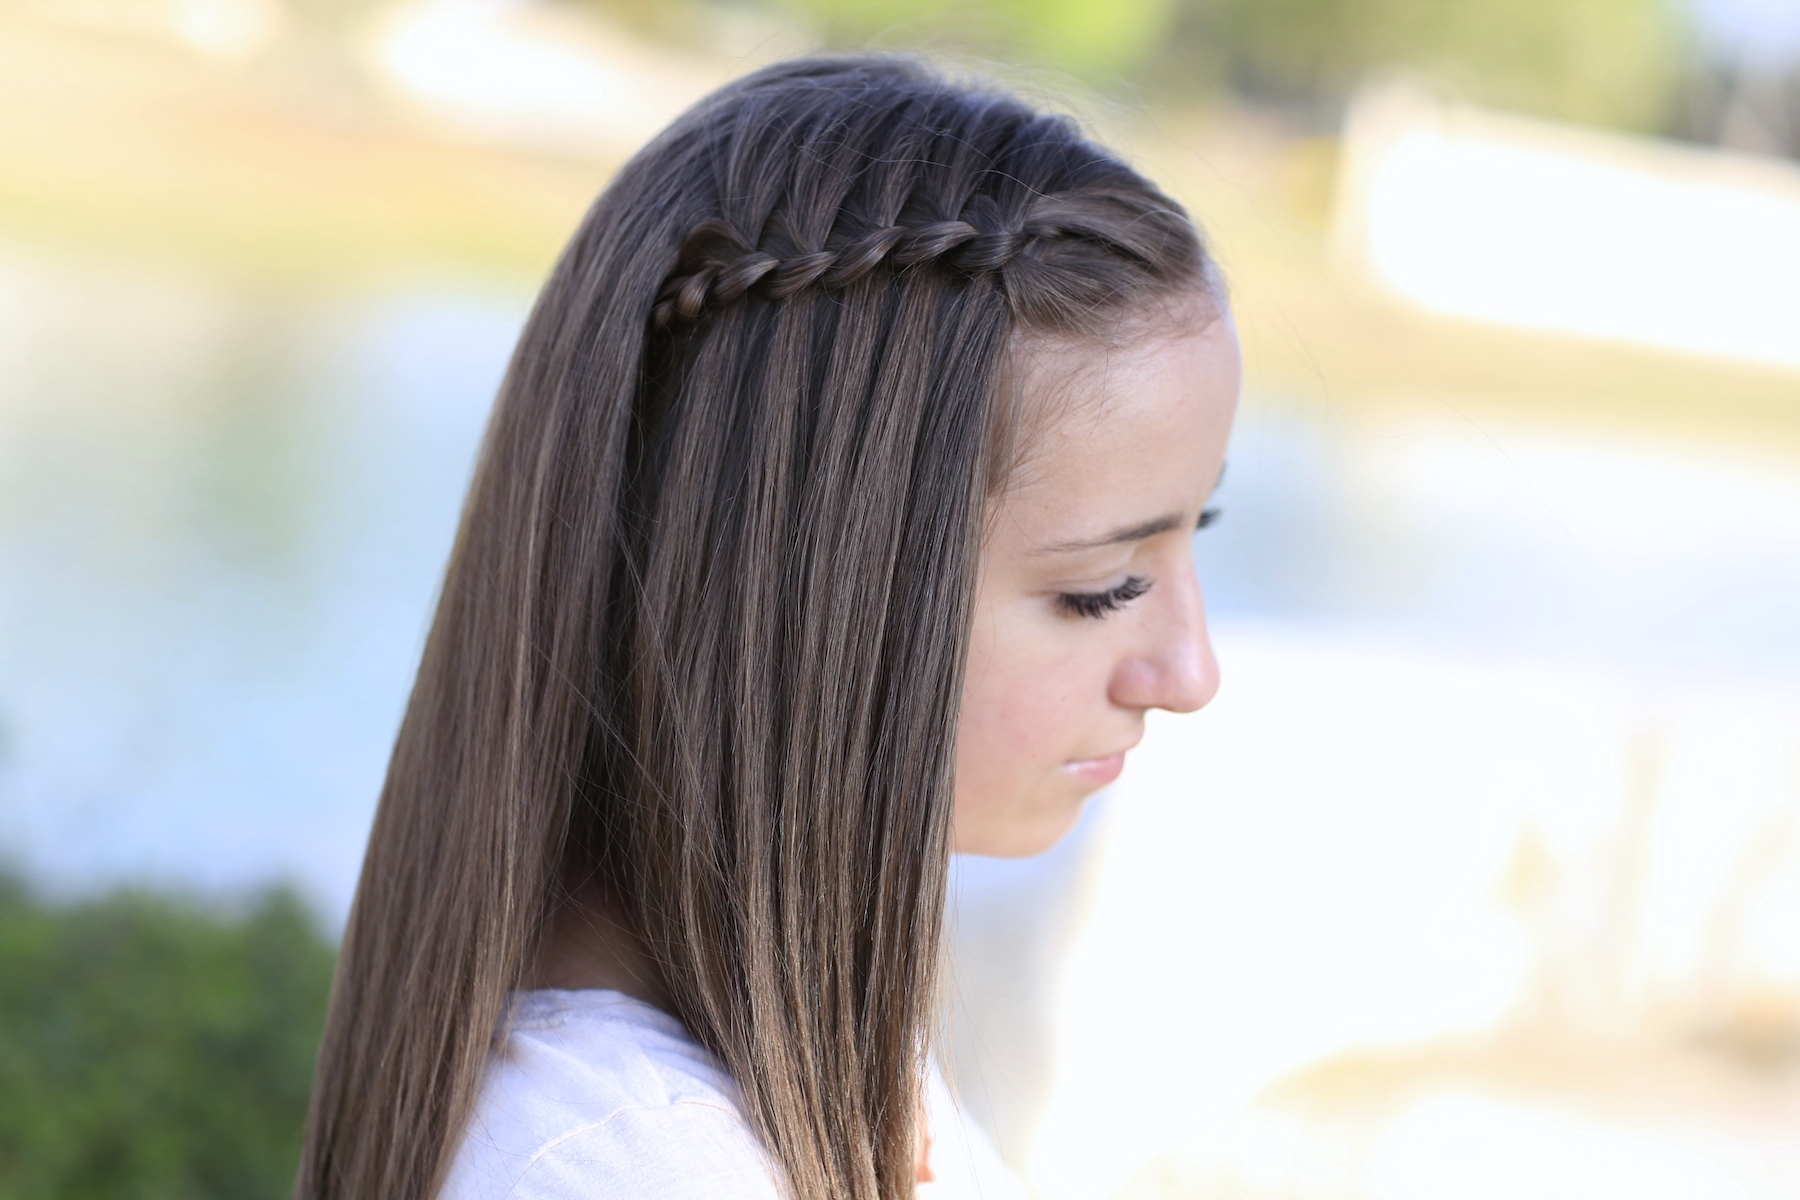 If you have longer hair, feel free to continue the braid around the back.
For shorter hair, you may create a braid on both sides of the head, and bring them back into a tieback, or simply what we have done here and have a single accent braid. The 4-Strand Waterfall Braids are beautiful any way to style them!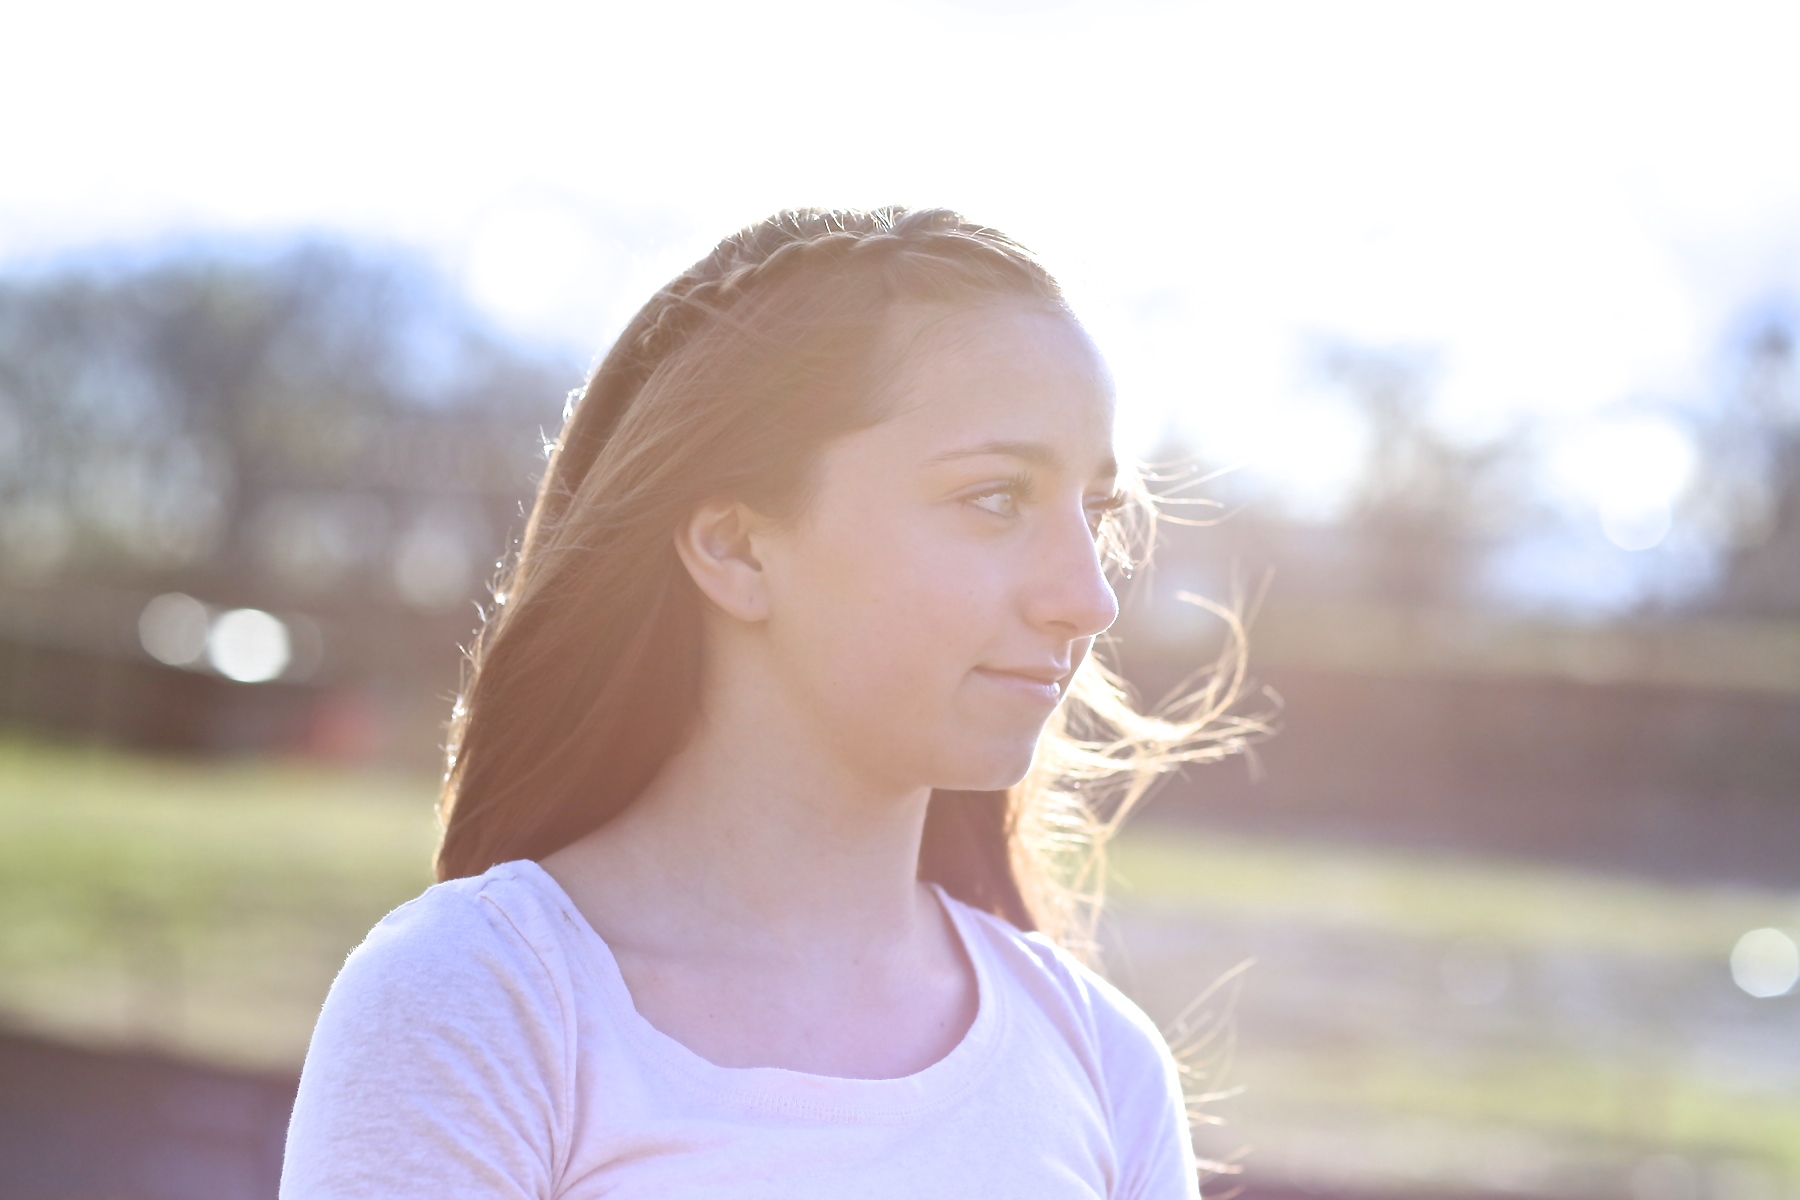

Bailey has worn this to school and had lots of compliments, and I’ve worn it several times over the past year or so, with the same result!
FYI… this hairstyle would not be recommended for younger girls who are active during PE or recess, unless you bring two braids back into a tieback.
Enjoy!
Items Needed: Brush, rat-tail comb, spray bottle, 2 small bobby pins, hairspray {if desired}.
Time Requirement: 3-5 minutes
Skill Level: Easy
Step-by-Step Instructions:
* Note: The hair you use in the initial stranding will be the hair that runs throughout the entire braid. If your hair is layered, or shorter in the front, it will be difficult to carry this braid all around the head without the layered ends sticking out.
- Begin by parting the hair on one side of the head…
- Next, pick up a good sized section of hair in the front next to the part line,and divide it into 4 equal strands…
- Take the top-most strand {closest to the part line} and take it under the 2nd strand, over the 3rd strand, and under the 4th strand…
- Now release that strand and allow it to fall {becoming the first waterfalling strand}…
- You should now be left with three strands to braid…
- Then, complete one simple 3-strand Dutch braid stitch by taking the middle strand over the right strand, and then taking the new middle strand over the left strand…
- Next, pick up a new small strand of hair next to the part line and use this as a new fourth strand of hair…
- Repeat Steps #3-7, always creating one simple 3-strand Dutch braid stitch in-between dropping through the 4th strand, and adding a new one.
- Braid until you are comfortable with the look…
- Now, lift a small section of hair on the side near the back, using crossed bobby pins to secure the end of the braid, and then let that hair fall to cover the bobby pins…
- To really make the braid POP, gently tug on the elbows of the braid to pancake it.
- Add hairspray {if desired}.
Please feel free to leave me a comment below letting us know what you think of this Pancaked Four-Strand Waterfall Braid! As always, if you loved the tutorial, please feel free to share it!
Happy Hairstyling!

Apparently “Room Tours” are all the rage for young teens on YouTube these days, giving other teens ideas on how to decorate their rooms. I think BrooklyAndBailey has a record for the oldest room tour on YouTube with their latest video, their reactions to their first bedroom when they were 3 1/2 years old! They will have you laughing for sure, simply click below to watch…


I love this
I have picture day tomorrow I need it to be perfect. This was my choice
I have my winter ball next week, and I think I’m gonna use this hairstyle. 🙂
You will look beautiful!
Looks so pretty wanna try it
I LOVE IT
It is so cute
LOVE! I did this on myself but I went over-under-over rather than under-over-under because I like the way the strands fall <3
Can you make a snap hat account for the people without twitter so I can snap chat a hairstyle to you
To: Mindy
I meant to say snap chat
yeeees that would be fabulous!!! 😀
no way it would!
Omg i love yall so much and i have one question my hair used er still has bangs but my hair is curly and my bangs poof and curl up and i cant use the straightener what should i do? I cant even do barely any hairstyles and if i try to there is a BUNCH of flyaways that even the trust y bobby pins cant handle help please no kidding. – poofy pluffy hair
This is soooo cute! Totally doing this for Easter on Sunday!
Me to definetly
Mindy!!!
Next week PLEASE teach us how to make a french fishtail!!!!!!!!!! PLEASE!!!
They already showed how to.Just look in their videos.:)
CuteGirlsHairstyles,
I’m Ella from Texas. I’m thirteen, a year younger than Brooklyn and Bailey. Your hairstyling website is the best I’ve found yet, not just because you explain well, but because your family seems to be a lot like mine. With 9 children in the family, a pair of twins & a pair of triplets as well, and me (13) being the oldest, Mom obviously doesn’t have a minute to spare for hairstyling.
I’m like Brooklyn… a not-so-girly girl and more of a ‘sporty’ girl. But still, I’m a girl just like Brooklyn is, and hairstyling’s my weakness. It’s tiring to go to school with the same hairstyle every morning.
Can you, after each hairstyle, write if the hairstyle you’re posting is DIY or not? I need to know which ones I can do myself and I don’t have a lot of time for trying to see if I can do it or not – or if it’s in the DIY category. You know, 8 siblings and identical twins and triplets makes a busy family.
By the way, I’ve a GIGANTIC family everywhere – twins go in my family. Another of my aunt (in Texas as well) has 13 children, and one of those is my best friend. Ava’s much Bailey.
Thanks, CGH, for your help – and say hi from me (Ella) and Ava to Brooklyn and Bailey! Ava and I are only a day younger/older than each other, and that sort of is like… Brooklyn and Bailey.
Oh and I heard ya’ll were making an app – and I can’t wait for it. But when do you hope it’ll be released? And can you make one compatible for Windows 8 as well?
Ella & Ava from Texas.
wow it must be really cool to have twin and triplet siblings
I am so glad that you posted the written instructions as I have only seen the videos and it’s not like I can take youtube everywhere I go–like into the bathroom to do hair! ( no smart phone here!).
Would it be possible to stick some photos in between the steps to show people like me a bit more detail? I am the kind of person who can only french braid the hair on the right side of my daughter’s head!!
Very dexterity challenged!
Would also love to see more cute hairstyles that a 10 year old can do on her own hair! Thanks!
Thanks so much for all the great hairstyle tutorials. I decided to do a 30 Days of Different Hairstyles Challenge with my daughter. I was a little concerned that it would be pretty hard with her fine hair. However, we created a lot of really cute hairstyles, the majority of which we gleaned from your site! Since the challenge ended a couple months ago, we have continued to do cute hairdos. Your tutorials made us realize that we really can do this! Now my daughter has been practicing her skills on my hair too. 🙂 Here is a webpage showcasing hairstyles we did: http://completeleefamily.com/30_Different_Hairstyles.html
did you make your app yet?
All your tutorials are great – I even tried to make this braid and it looks amazing!
http://fashion-soup.com/
EXCELLENT!!!!!! I have just practiced in my own hair..
Kisses from Argentina!