Many of you know that I started as a hairblogger before becoming a YouTuber. As such, I am very familiar with biggest beauty bloggers and those to make a viral splash on Pinterest.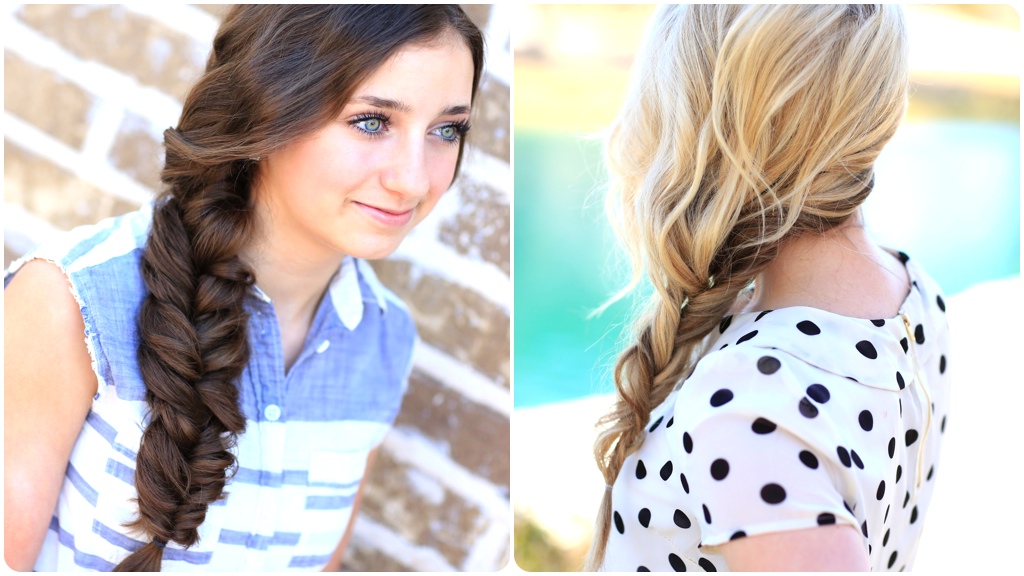 Abby Smith, from Twist Me Pretty, is one of those bloggers I have admired for a long time! I was caught a little off guard when she came up to me during a conference I was speaking at in Utah! I mean, I knew who Abby was, and she knew who I was.. but we had never met! We like literally ran across the crowded hall and hugged each other!
During the course of the conference, Abby said that she and he husband would be in Dallas this month, and wondered if they could stop by. While she was here, I thought it would be fun to introduce her to you all.
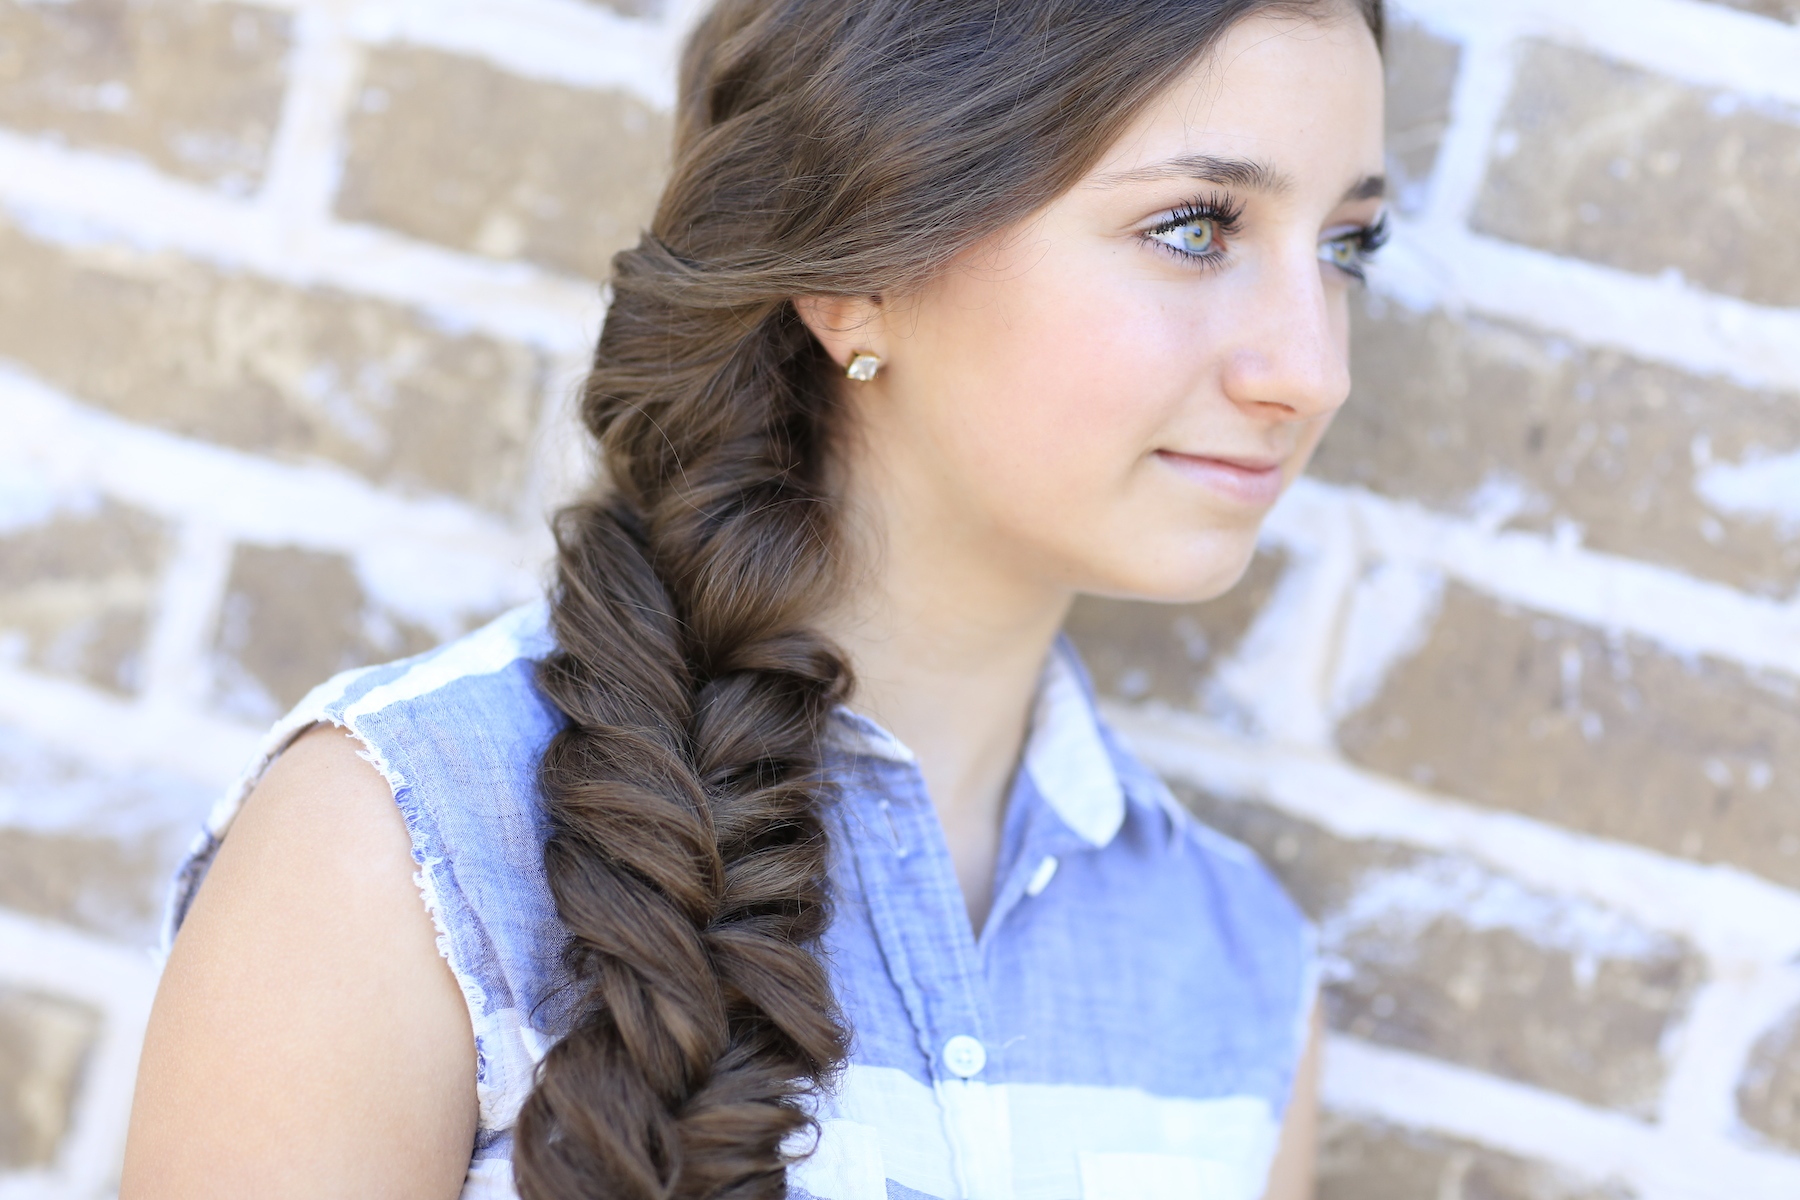
For today’s hairstyle, we are showing you how to create the Alternative Braid {one of her viral hairstyles on Pinterest}. This is a faux braid, one that looks like a braid but really is not. In fact, it’s really a series of knots using two twists. {Don’t worry, the knots come out easily!}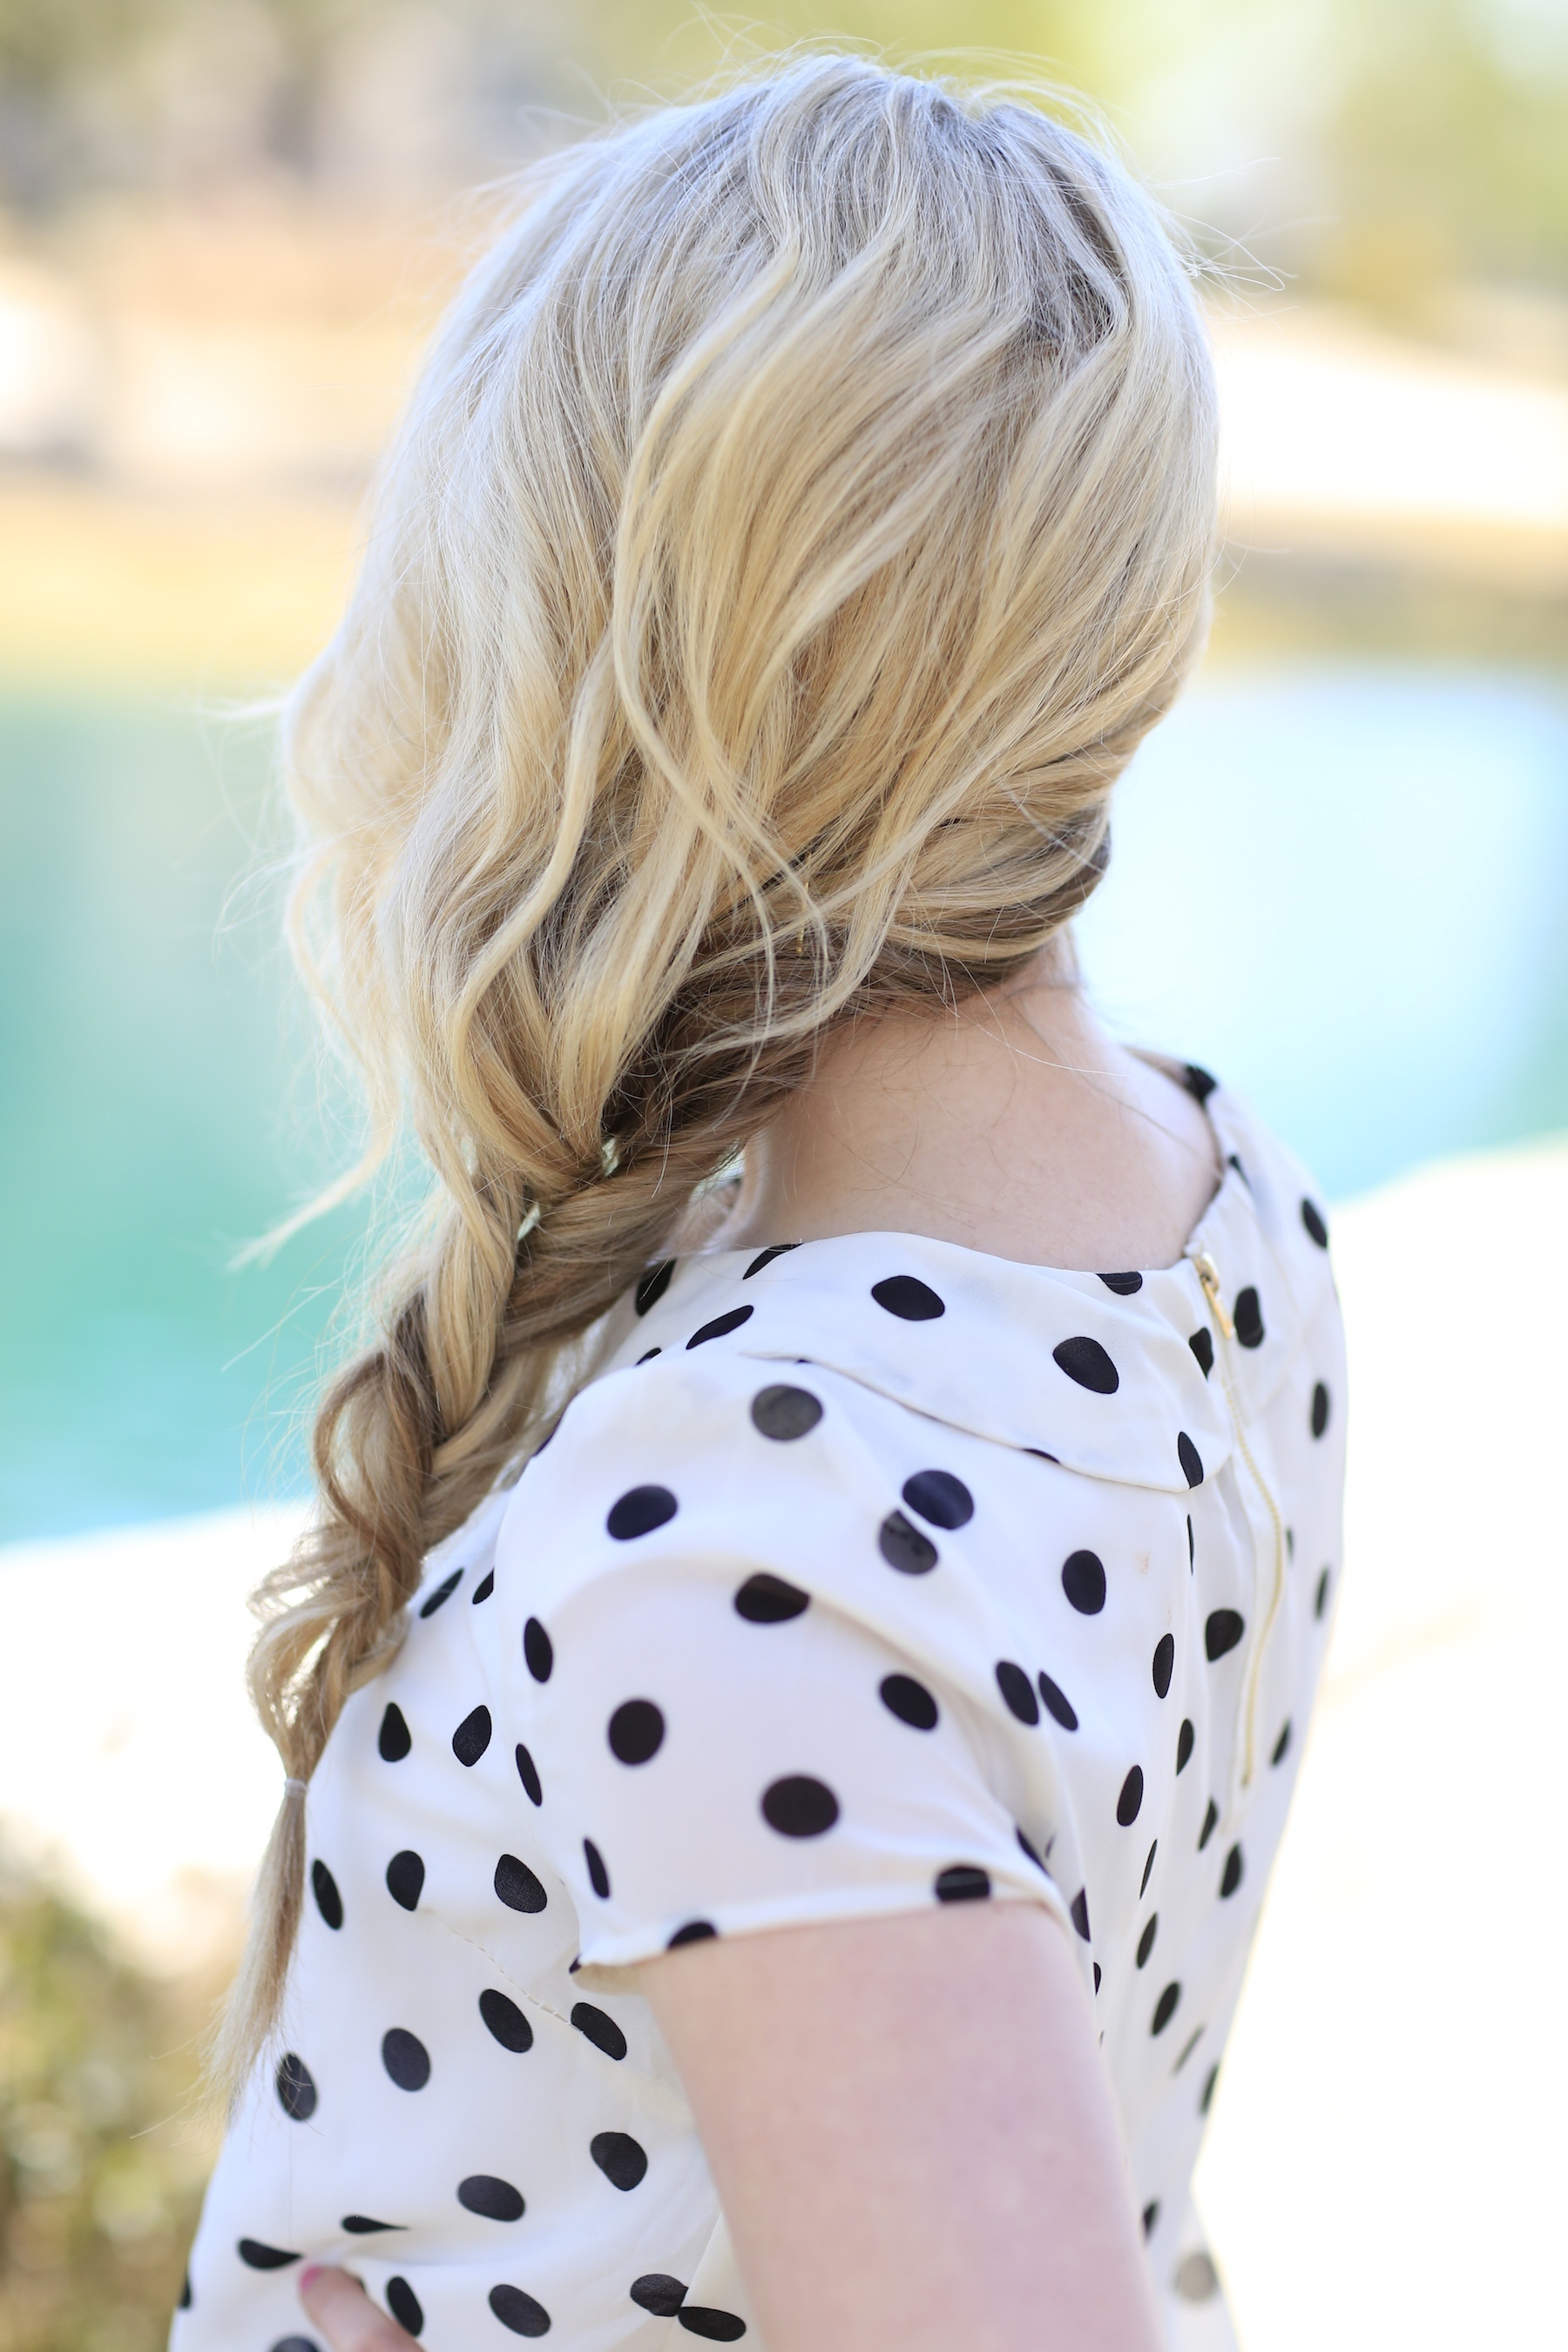
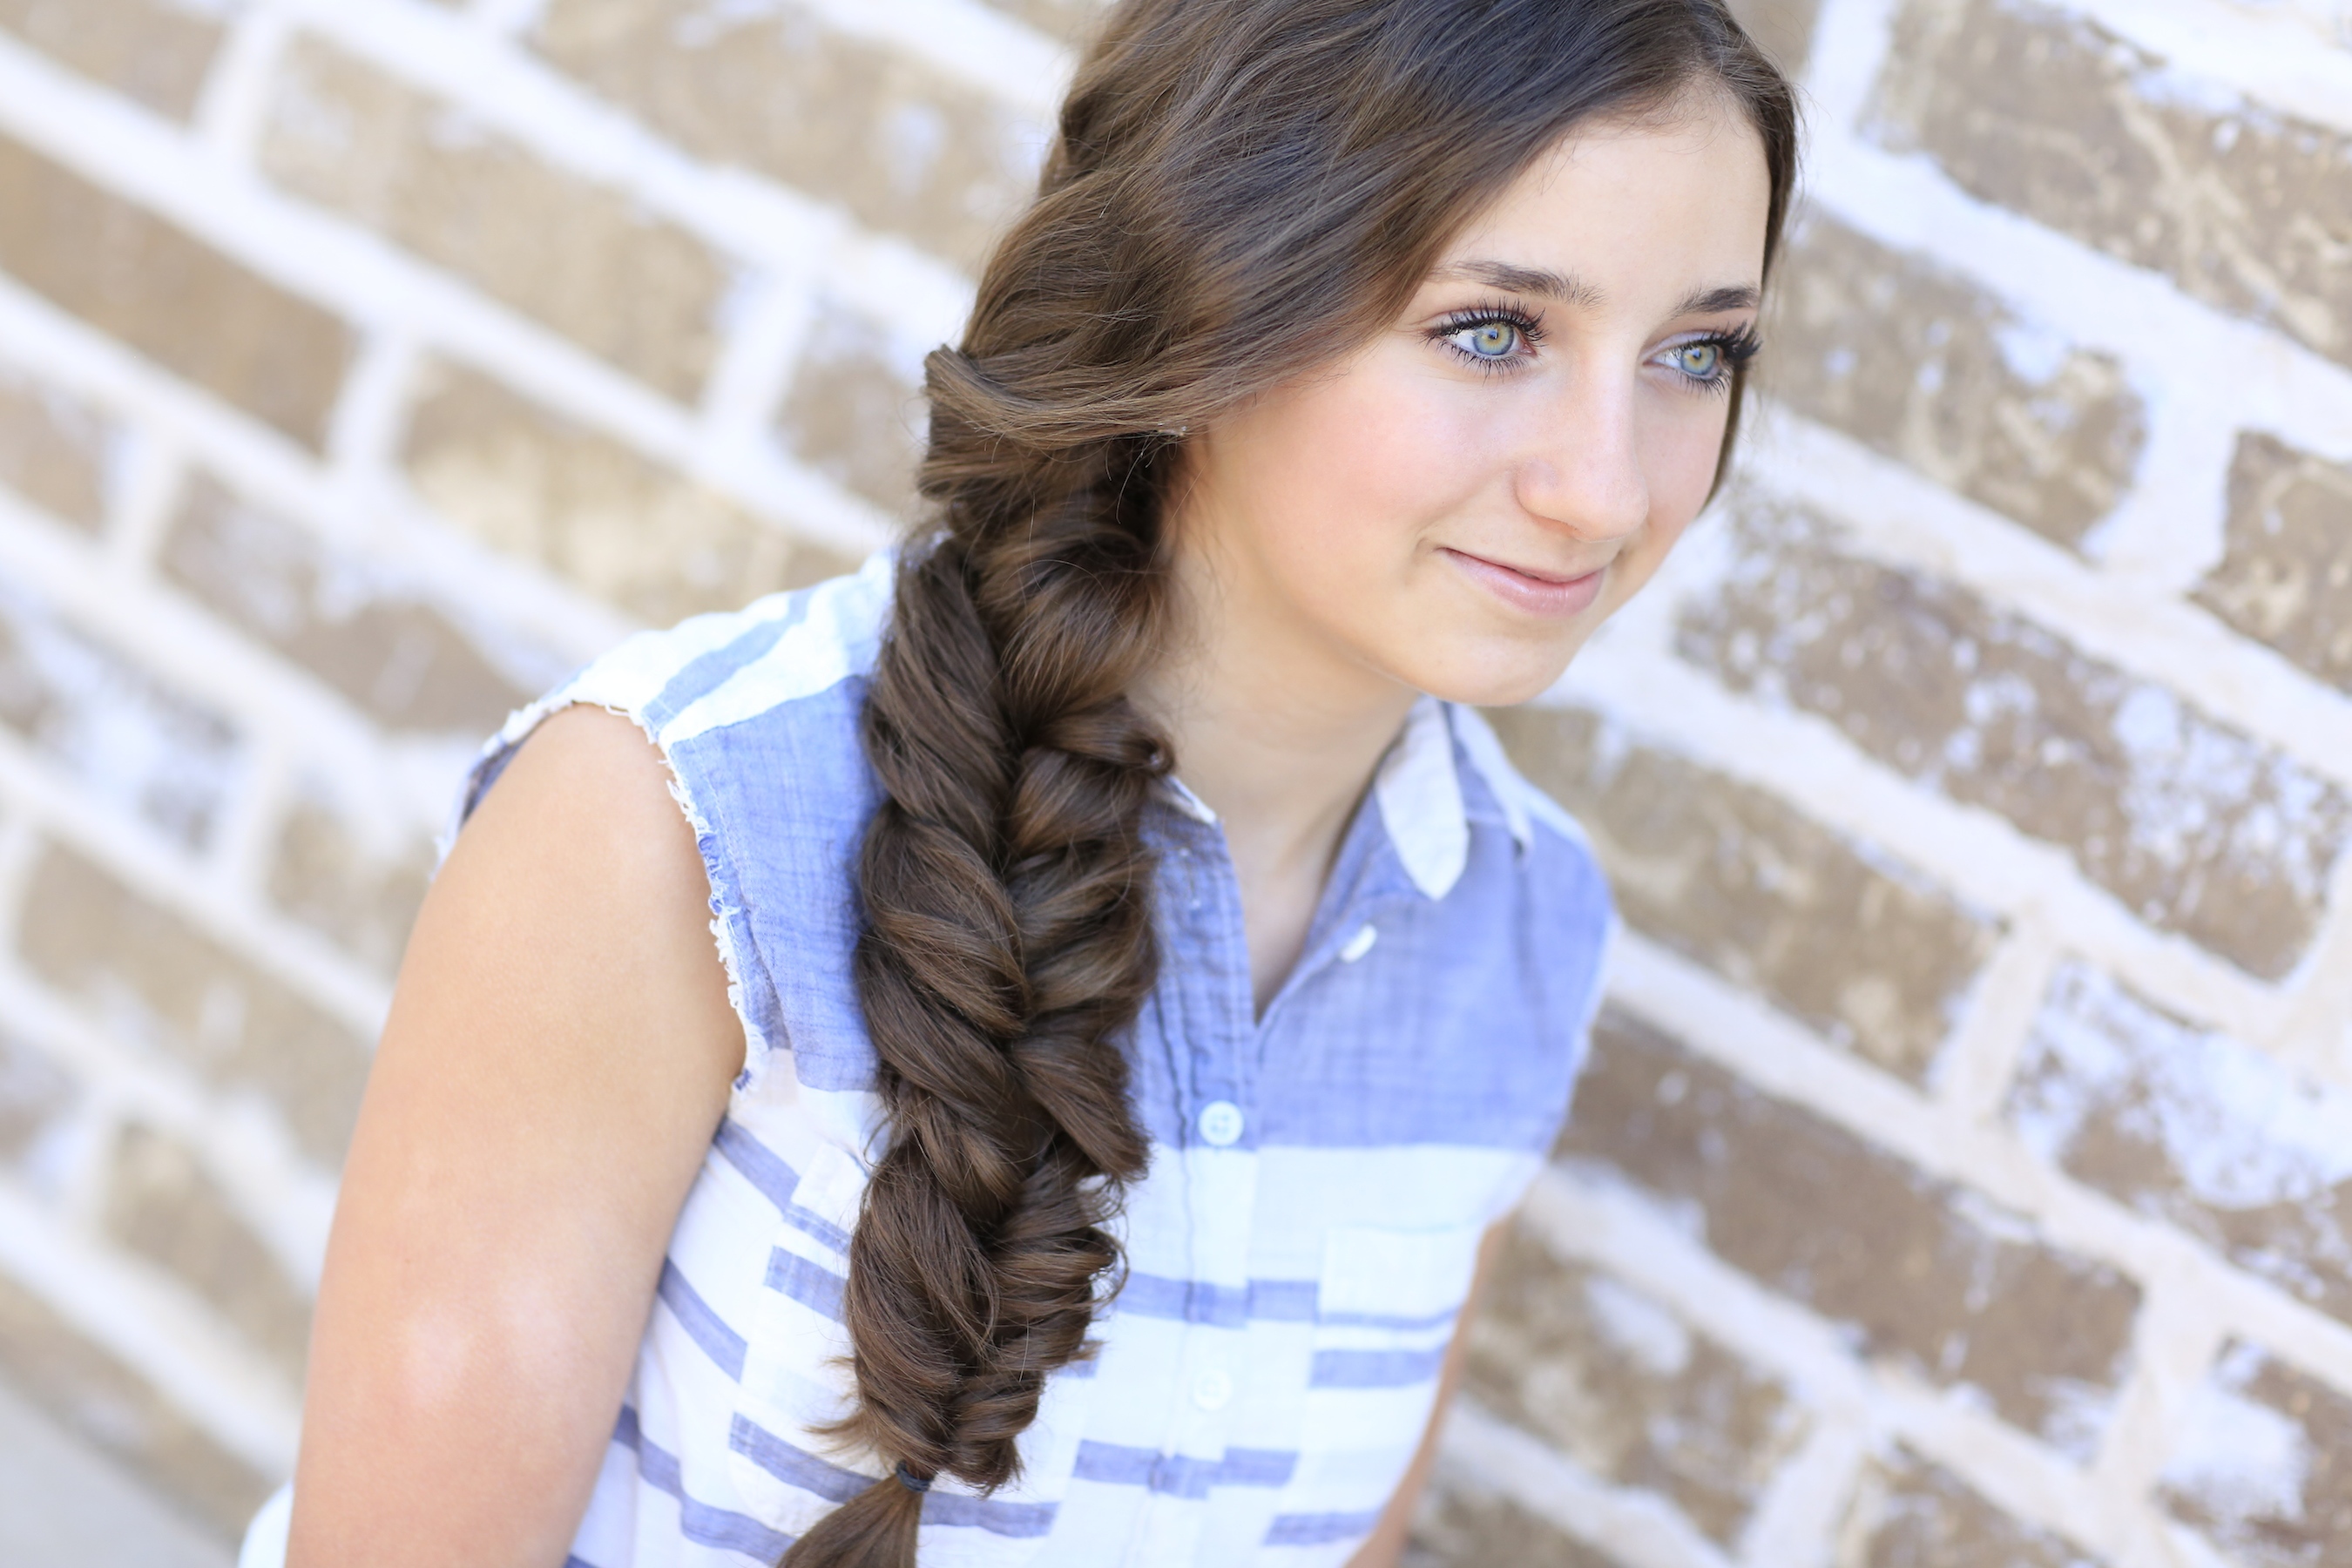
Brooklyn volunteered as our model, since she is always looking for great go-to styles for her thick wavy hair.
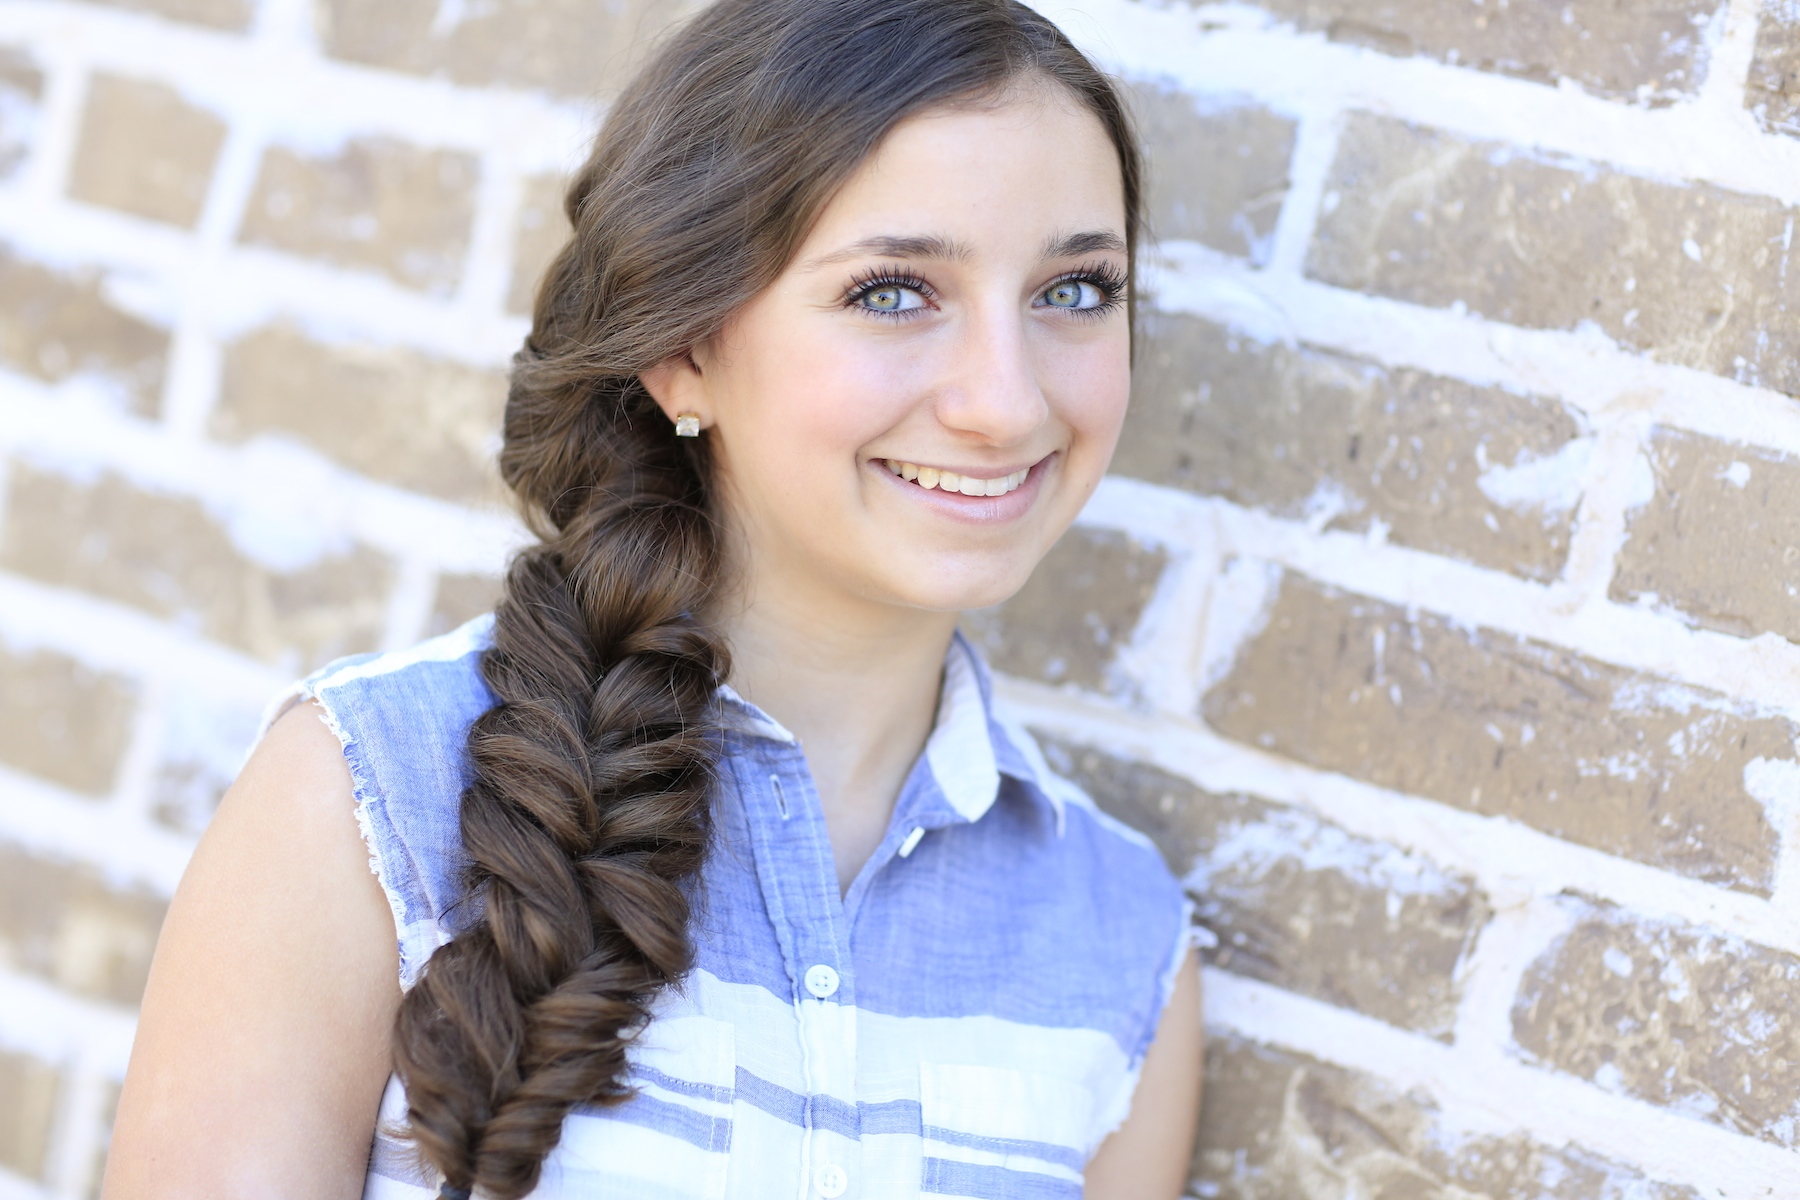
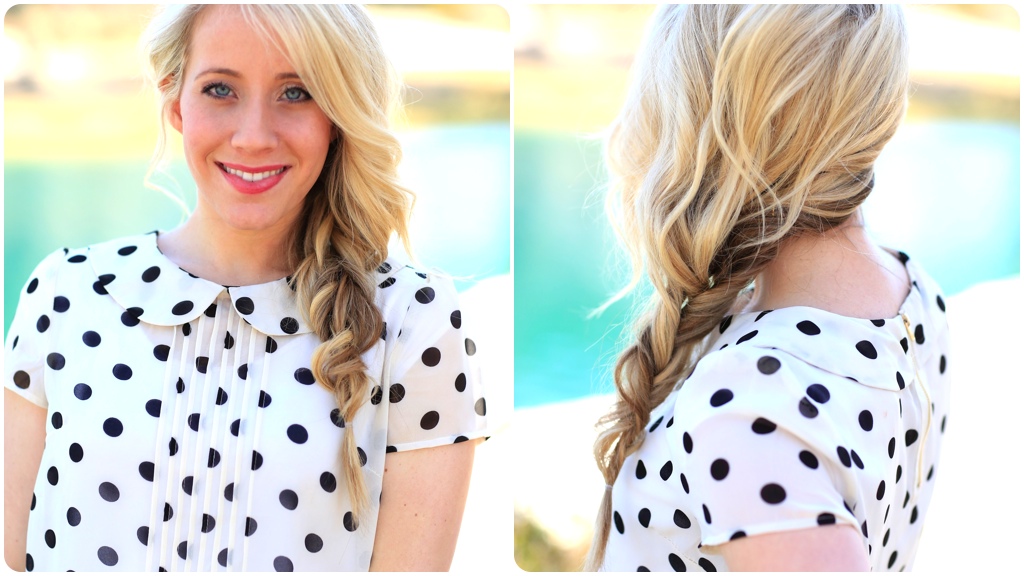
I personally think that this braid would look very elegant wrapped up into a bun, for more formal occasions as well!
Enjoy!
Items Needed: Brush, 1 small hair elastic, 1-2 bobby pins {if needed}, and hairspray {if desired}.
Time Requirement: 3-5 minutes
Skill Level: Easy
Step-by-Step Instructions:
- Begin by parting the hair on one side, and swooping all of the hair over one shoulder {I prefer the shoulder that the majority of the hair falls onto}…
- Now divide the hair into two equal sections…
- Twist both sections toward the middle {or toward each other} a few times…
- When you have about an inch of twisted hair, hold the two strands next to each other…
- Now, taking your index finger, push it directly through the stacked center of both twists, with your finger parallel to the face {this will divide the two twists into two even halves again, top to bottom}…
- You should now have once again two sections, leaving what looks like a braid stitch above them…
- Twist the pieces pieces again toward each other…
- When you have about an inch more of twisting, hold them together and once again push your index finger sideways through the center of both twists…
- After about 4 sections, hold the two twisted strands together and begin to pancake the top part of the braid {you want to pull out the hair quite a bit to really accent the messy, fullness of this braid, but do not pull them out to much to where you cannot secure the ends of the braid}…
- After pancaking the upper section, continue again with Steps #2-8 until the hair is finished.
- At the end of the braid, you will want to pancake the rest of the hair, again, being mindful of the hair ends…
- Secure with an elastic.
- Feel free to use bobby pins any hair strands that fall out in back, and hairspray any other smaller flyaways into place.
Please feel free to leave me a comment below letting us know what you think of this Alternative Braid! As always, if you loved the tutorial, please feel free to share it!
Happy Hairstyling!

Yes, last week we took all six kids on a Spring Break cruise to the Western Caribbean! To see a recap of our family fun, be sure to see the video BrooklyAndBailey uploaded on Wednesday to their YouTube channel! Click below to see the video…


Fun!
Amazing! so pretty. Wish I had long hair again.
Since I saw this tutorial I’ve been adicted to this braid and most of my friends have asked me to do this in their hair and teatch them 🙂 so thank you so much
Love this look! Using it in more photoshoots!
Awesome!
that hairstyle is so cute I will try it some time. that hairstyle is the cutest thing I ever saw. thanks for making a video.
That sounds AWESOME!!!!!!!!
Hey so could you you do back to school hairstyles for short hair because I tried to to do other hairstyles and June 6th is the big day for me reply back
i love the zig zag twist I’ve been watching for about a year
Love this and recommending it to our Hooligans! Thanks for the great tutorial!
love you tho teach emma watson’s messy side plait
I would probably wanna swim with the dolphins
I love this one! it looks so easy, but the results look amazing! Thanks!
Fabulous!
http://fashion-soup.com/