
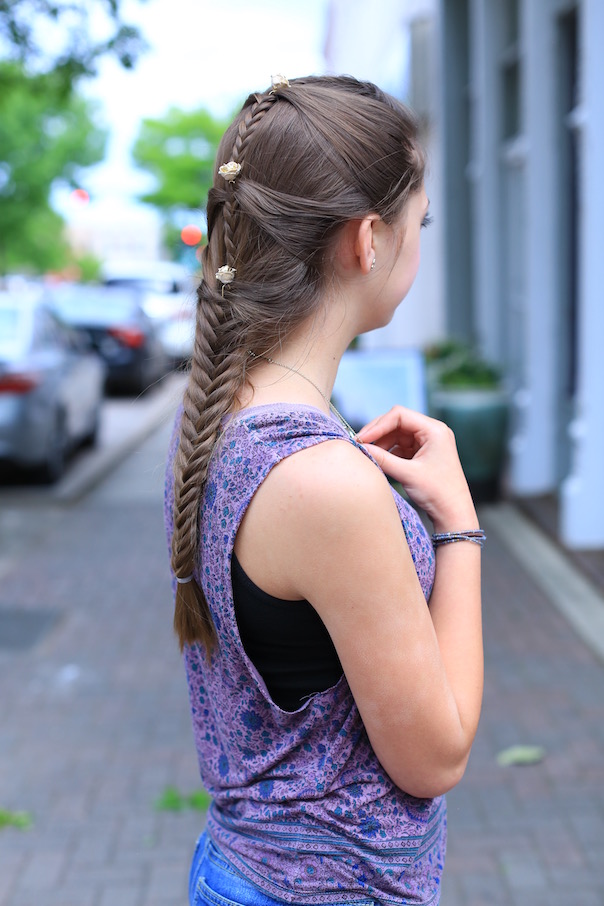

This week, Brooklyn is sharing how to create a Fishtail Mermaid Braid. Brooklyn has been practicing this on friends, but will use Kamri as her model today. This is a long hair tutorial that is easy and cute!This hairstyles is a combo using a fishtail and a mermaid braid. You can easily wear this everyday or dress it up with flowers for a special occasion. The Fishtail Mermaid is an option for women and teens of all ages. It works best with long hair but can be modified to work with medium hair as well. I don’t recommend it for high activity as it is a bit delicate.
To see your own photo recreations of this style featured in our app, feel free to tag your photos on IG with: #CGHFishtailMermaid
Items Needed: Brush, rat-tail comb, spray bottle, 1 clear hair elastic, spray wax or hairspray, rosette accessory pins {if desired}.
Time Requirement: 3-5 minutes
Skill Level: Medium
Step-By-Step Instructions:
- Start with straight hair freshly brushed.
- Pick up a small section of hair in the front/top of the head.
- Divide your section into two pieces and begin a fishtail braid. This is where take a small piece from the outside of one section and cross over adding to the other section. Then alternate back and forth.
- Once you have braided down about 6 stitches (roughly 3″), pick up a new piece of hair from the front and add into your braid. The new piece should be from the front just above the ear. Do this on both sides.
- Now continue your fishtail for a few inches. Try to do the same distance as you started with at the top before adding in new hair.
- This time as you are braiding, pick up two new pieces of hair (one on each side of the head) from right behind the ear.
- Again, continue your fishtail about the same distance as you created in the first two sections.
- Add in two new pieces (one on each side) about the nape of the neck.
- Continue your fishtail a few stitches.
- At this point you will add the remaining hair to create one large fishtail braid.
- Carefully holding your braid, divide all your remaining hair in half. Add it into your two pieces you are holding and using to braid. Now continue to fishtail all the way down.
- When you reach the bottom, secure with an elastic.
- Go back and pull and loosen your braid a bit. This will give you a soft full looking braid.
- If you want to dress up your braid you can add flowers. I chose these gold roses attached to hair pins and added to Kamri’s braid.
- Finish with hairspray or a bit of dry wax to maintain the fly aways {if desired}.
This week on Brooklyn & Bailey… “15 Unbelievably Weird Things on Amazon!”
This week on Kamri Noel… “Spring Room Decor!”


So fun to see the girls doing their own tutorials. I’ve been watching you guys since the twins had braces (or even before that) so this is so cool! Great hairstyle, too.
Thank you for the lovely tip! kiss Francesca
https://sweetcoccole.com/