A few weeks ago, we posted a video called the Ladder Braid Side Ponytail, and it received a lot of positive feedback!
In fact, one of our fans, Ceridwin, adapted the feather braid technique to create a new, beautiful “stacked” braid look, and sent us a photo on Twitter!
I loved it so much that asked her to tell me exactly how she did it so that I could teach you! She agreed, emailed me her instructions, and here you go!
You simply create a large feather braid, with tiny strands coming off each stitch from both sides of the braid. You then go back and Dutch braid the feathered strands on top of the regular braid, and then pancake the latter. Further instructions are below…
Items Needed: Brush, rat-tail comb, spray bottle, 1 small hair elastic, hairspray {if desired}.
Time Requirement: 5-8 minutes
Skill Level: Medium
Step-by-Step Instructions:
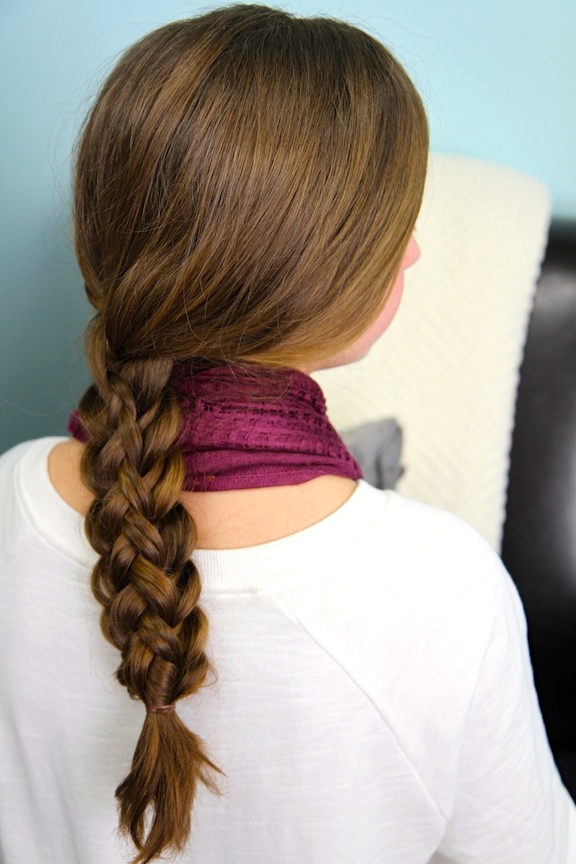
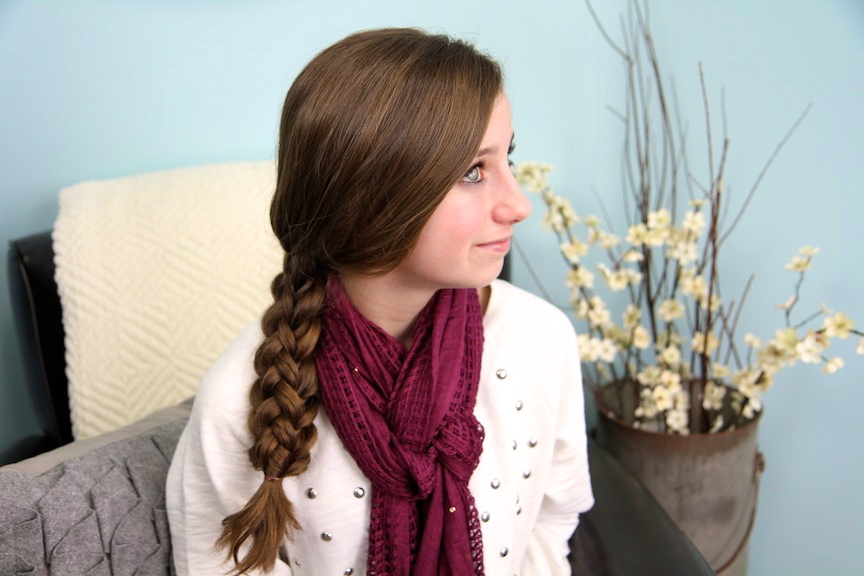
- Begin by brushing the hair and pulling it to wherever you want the braid to lay. {In the video, I did the hair straight down the back, but a side braid would also be very cute.}
- Using all of your hair, section it into three strands and create the first “stitch” of a simple braid…
- After the first stitch, on every outside edge, you will begin creating a Feather Braid… {On the left-most strand of hair, pull out a sliver of hair off the top and lay it to the side. For a DIY, you can use a clip, teeth, or extra hands to hold the strands out of the way.} Also, for this braid, I chose to feather off larger strands at the top and smaller feathers as we worked our way down…
- Now cross that outside strand over the middle to become the middle strand….
- Then, go to the right-most section of hair and pull out a sliver of hair off the top and lay it to the side, and cross the remaining strand over into the middle…
- Repeat these alternating steps until you run out of hair.
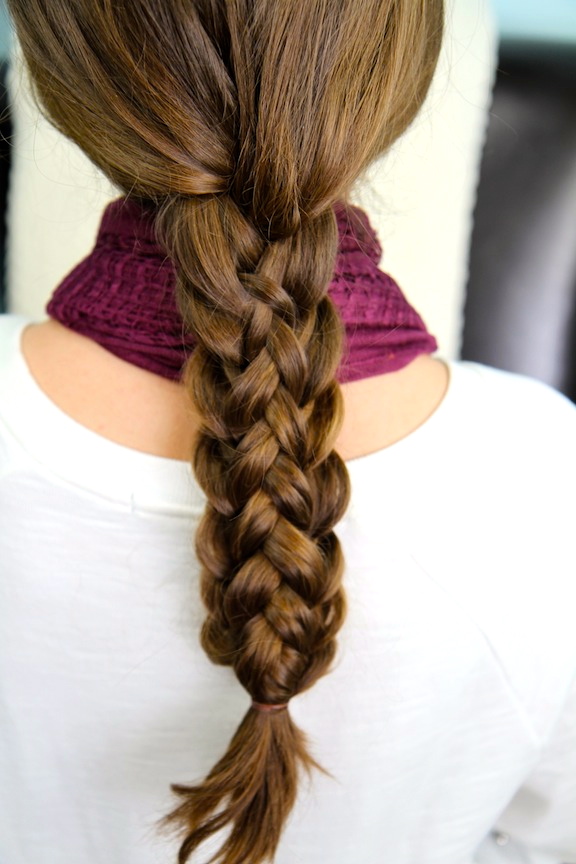
- Secure with an elastic. You should have a normal-looking braid with feather strands of hair coming off both sides of the braid all the way down. {Kind of looks like a feather, huh? LOL! That’s why we call it a Feather Braid!}
- Now, pick up the top two feather strands of the left and the top feather strand on the right.
- Begin a Dutch braid using those strands. {When you need to add hair into the braid, use ONLY the other feather strands of hair on both sides of the braid.}
- When you run out of feather strands, finish off with 2-3 stitches of a regular braid….
- Then, undo the original hair elastic and secure both braids together with that same elastic.
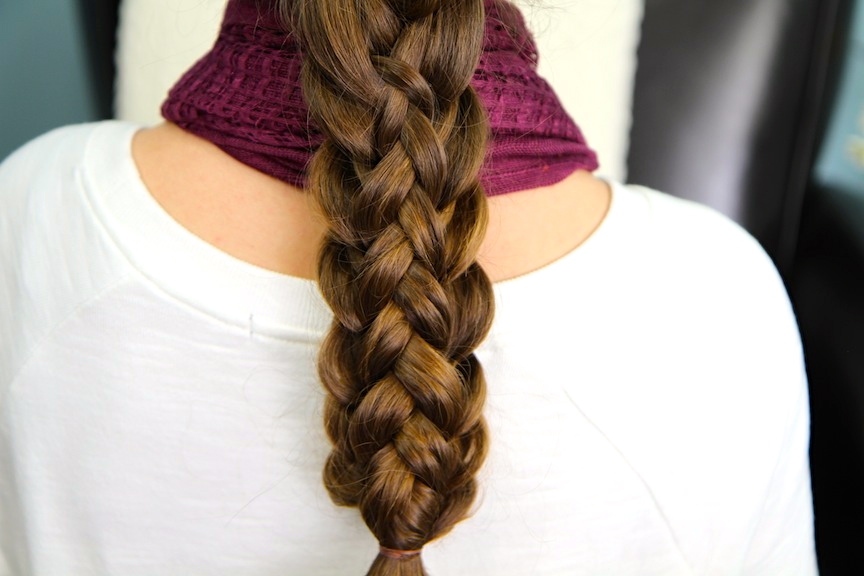
- You should now have two braids right on top of each other, the Stacked Braids.
- To help the Dutch braid stand out just a bit more, you may choose to “pancake” the bottom braid edges, as I did, by gently tugging on the elbows to make them a little more puffy. {This helps add to the overall illusion of braid awesomeness!}
Enjoy!
If you liked this hairstyle, please do feel free to share! Happy Hairdoing!

* Note from Mindy: Don’t forget to follow us on BlogLovin, a new easy-to-use blog reader!


ik vind jullie haarmodellen heel mooi
I love ol ur hairstyles:****
It looks like several braids put together to form like a box of some sort.
Does this work on short hair
i lke it when you half it up ,fishtail and bow ponytail it would be so amazing
loved it
I think its a cool braid but i would have loved it if you could explain the top braid because maybe some of us dont know how to do it other than that great video!!! -im going to tell my friends to check it out!!
i don’t really understand the second part with the dutch braid. I’d really like to get this right it looks super cute!
Love this braid! I had to look up the “dutch” braid but understood when I heard you say on another tutorial that it’s an outie braid 🙂
I did the starburst with some crazy pipe cleaner sticking out for my daughter’s crazy hair day at school (kindergartener) she wanted it cute but slightly crazy and it was great! thanks for your site!!
This looked tricky, it i did it quite easily on myself. What do you recommend for incredibly thick hair?
I love love love love this hairstyle!! It looks like it would take 30 minutes to do
I just tried to do the hairstyle, but it didn’t really work. Guess my hair isn’t long enough yet.
I also tried the latter braid thing, but it didn’t work either.
Love your blog!
Christina
Hi could you or your daughter do a tutorial on how she puts the curls in her hair?
really cute!!!
Luuuuuv the hair style!!!! And I keep hearing that song in ur videos and I luv it spool much but don’t know wut it’s called!!!! Please tell in ur next video!!!!!!!! I can’t stop listening!!!!!
i love this video and the song in the beginning and end
Hey Mindy! Sorry this comment is irrelevant to this particular hairstyle. In regards to your most recent youtube video with you new addition, I would like to suggest a name here (because I do not have a youtube account). Anyway, my idea for a name is Hairball, because you have a hair blog and well that puppy is absolutely fluffy! Sorry for the inconvenience of not posting this on youtube. Thanks for all your great videos and such. Btw, what type of dog is he?
This is about your new puppy video, i just couldn’t get my comment on there for some reason, but i think you should name it Bobby! Like a bobby pin 🙂 Btw i love the way the stacked braids look 🙂 Thanks for all these fun tutorial, i always LOVE them 🙂
LOL great name
Hey mindy!! I think ur hairstyles rock! Ive seen them alll! All the hairstyles luk hard but when you explain them they r easy!! Ill defo b doin this hairstyle!! Anyways luv u xoxoxo
I get the first steep,but the second step is a little tricky.
Soo cool! I can’t wait to try it!
MUY ORIGINAL 😉
Hello Mindy. I was wondering I have lots of hair bands, but I can’t keep track of them. Do you have a special way of organizing them? Thanks!! <3
LOOOOVE this one cant wait to do it… thanks for sharing.
O my Goodness! was that rue 21? at the very end? with the girls in the store?
I love this hairstyle it looks so tricky when you look at it but when you explained the process it was super easy!!
It looks really good but complicated. Could you please do another hairstyle on yourself or get your daughters to do one please. Thanks xx
love this hairstyle! thanks for sharing! 😀