Click HERE to enter for several chances to win 1 of 2 BrooklynAndBailey’s backpacks, w/ supplies, and a MacBook Air!
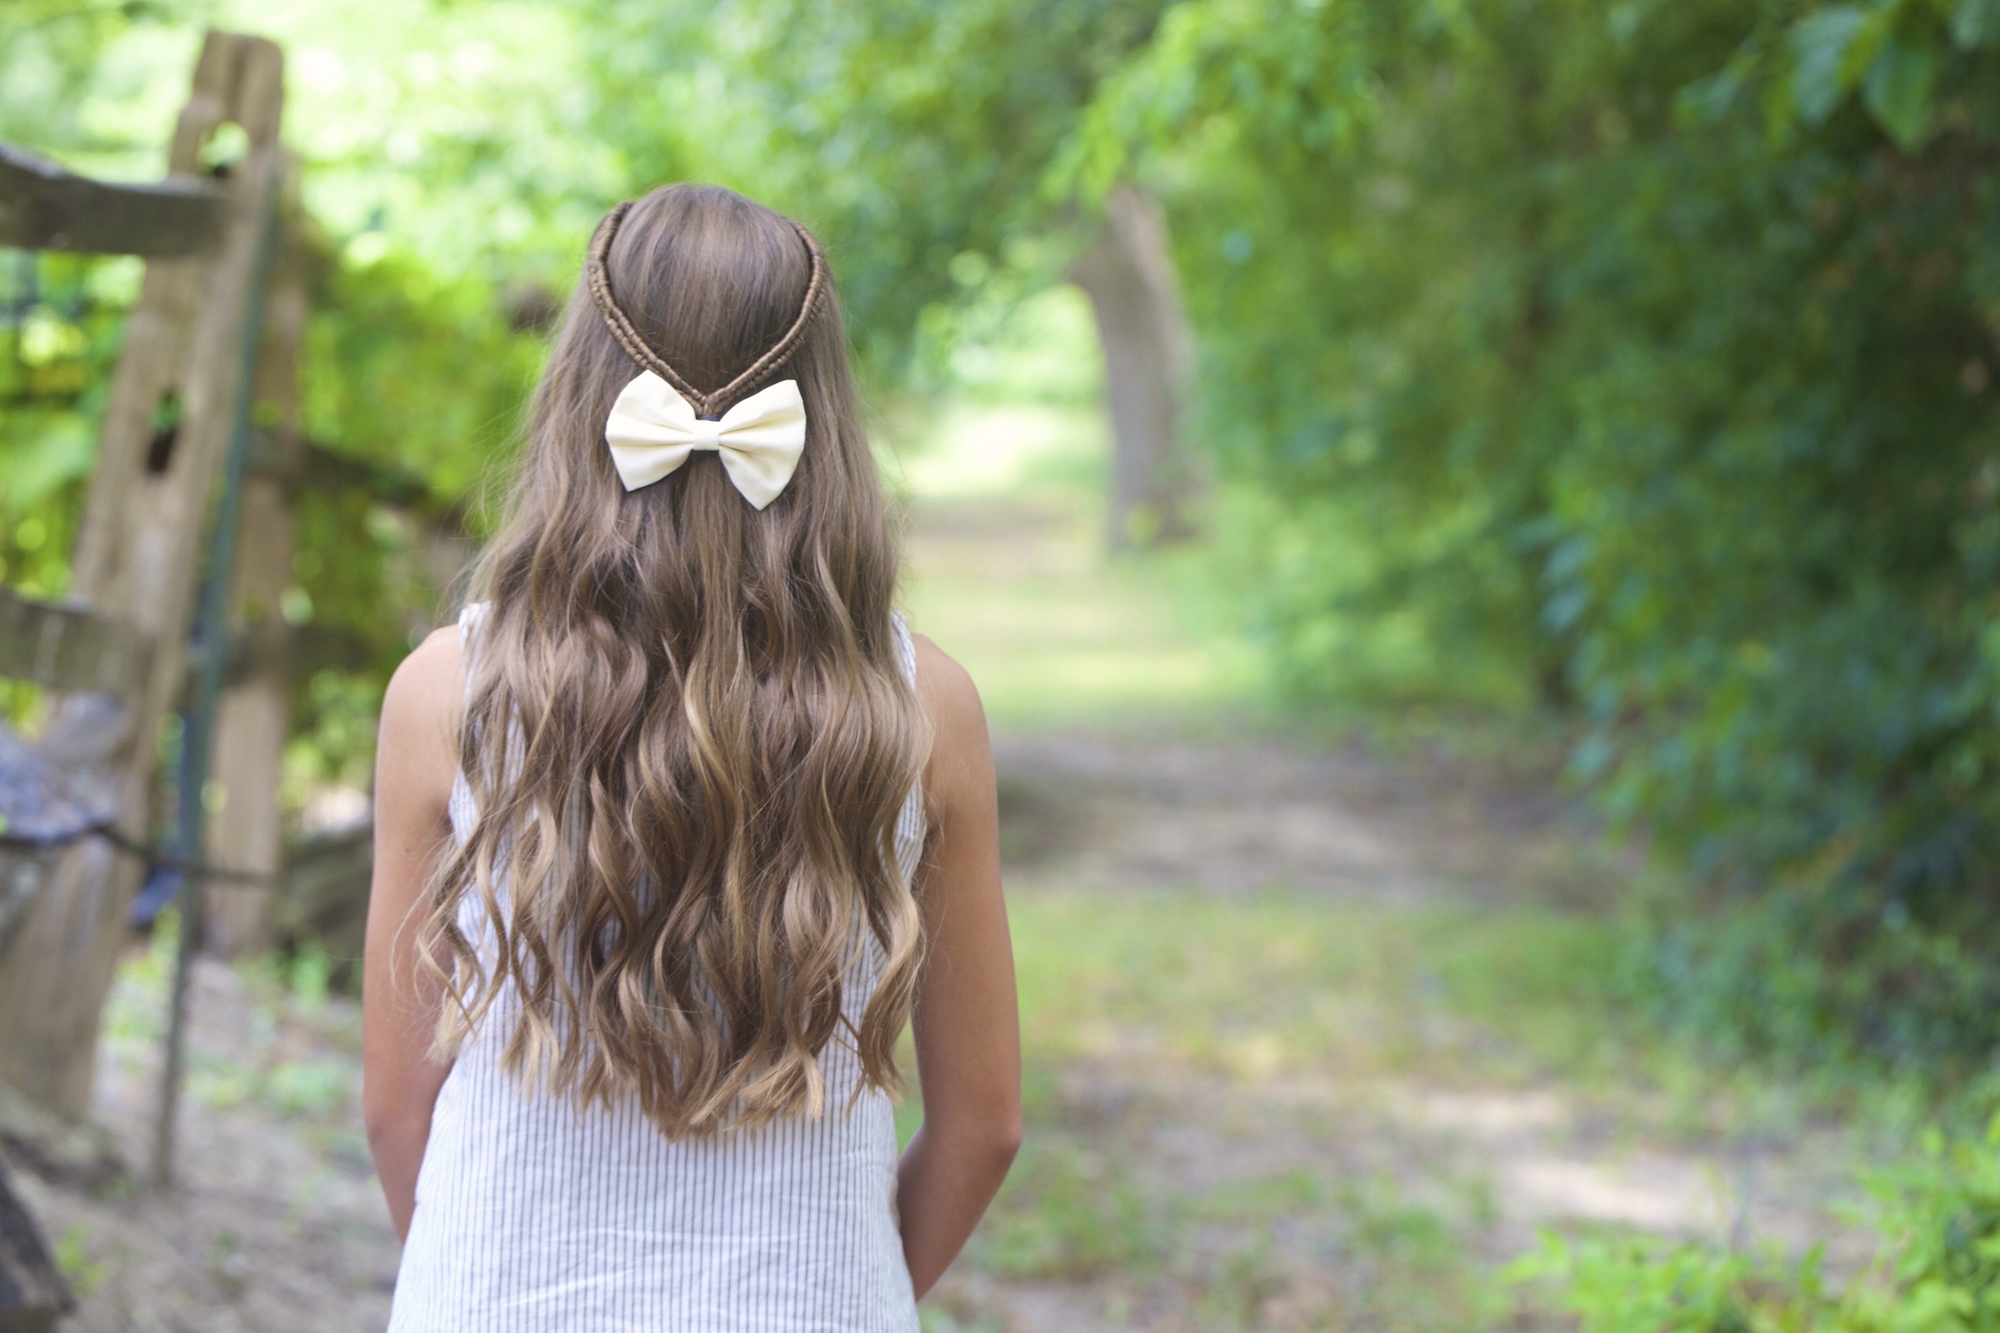
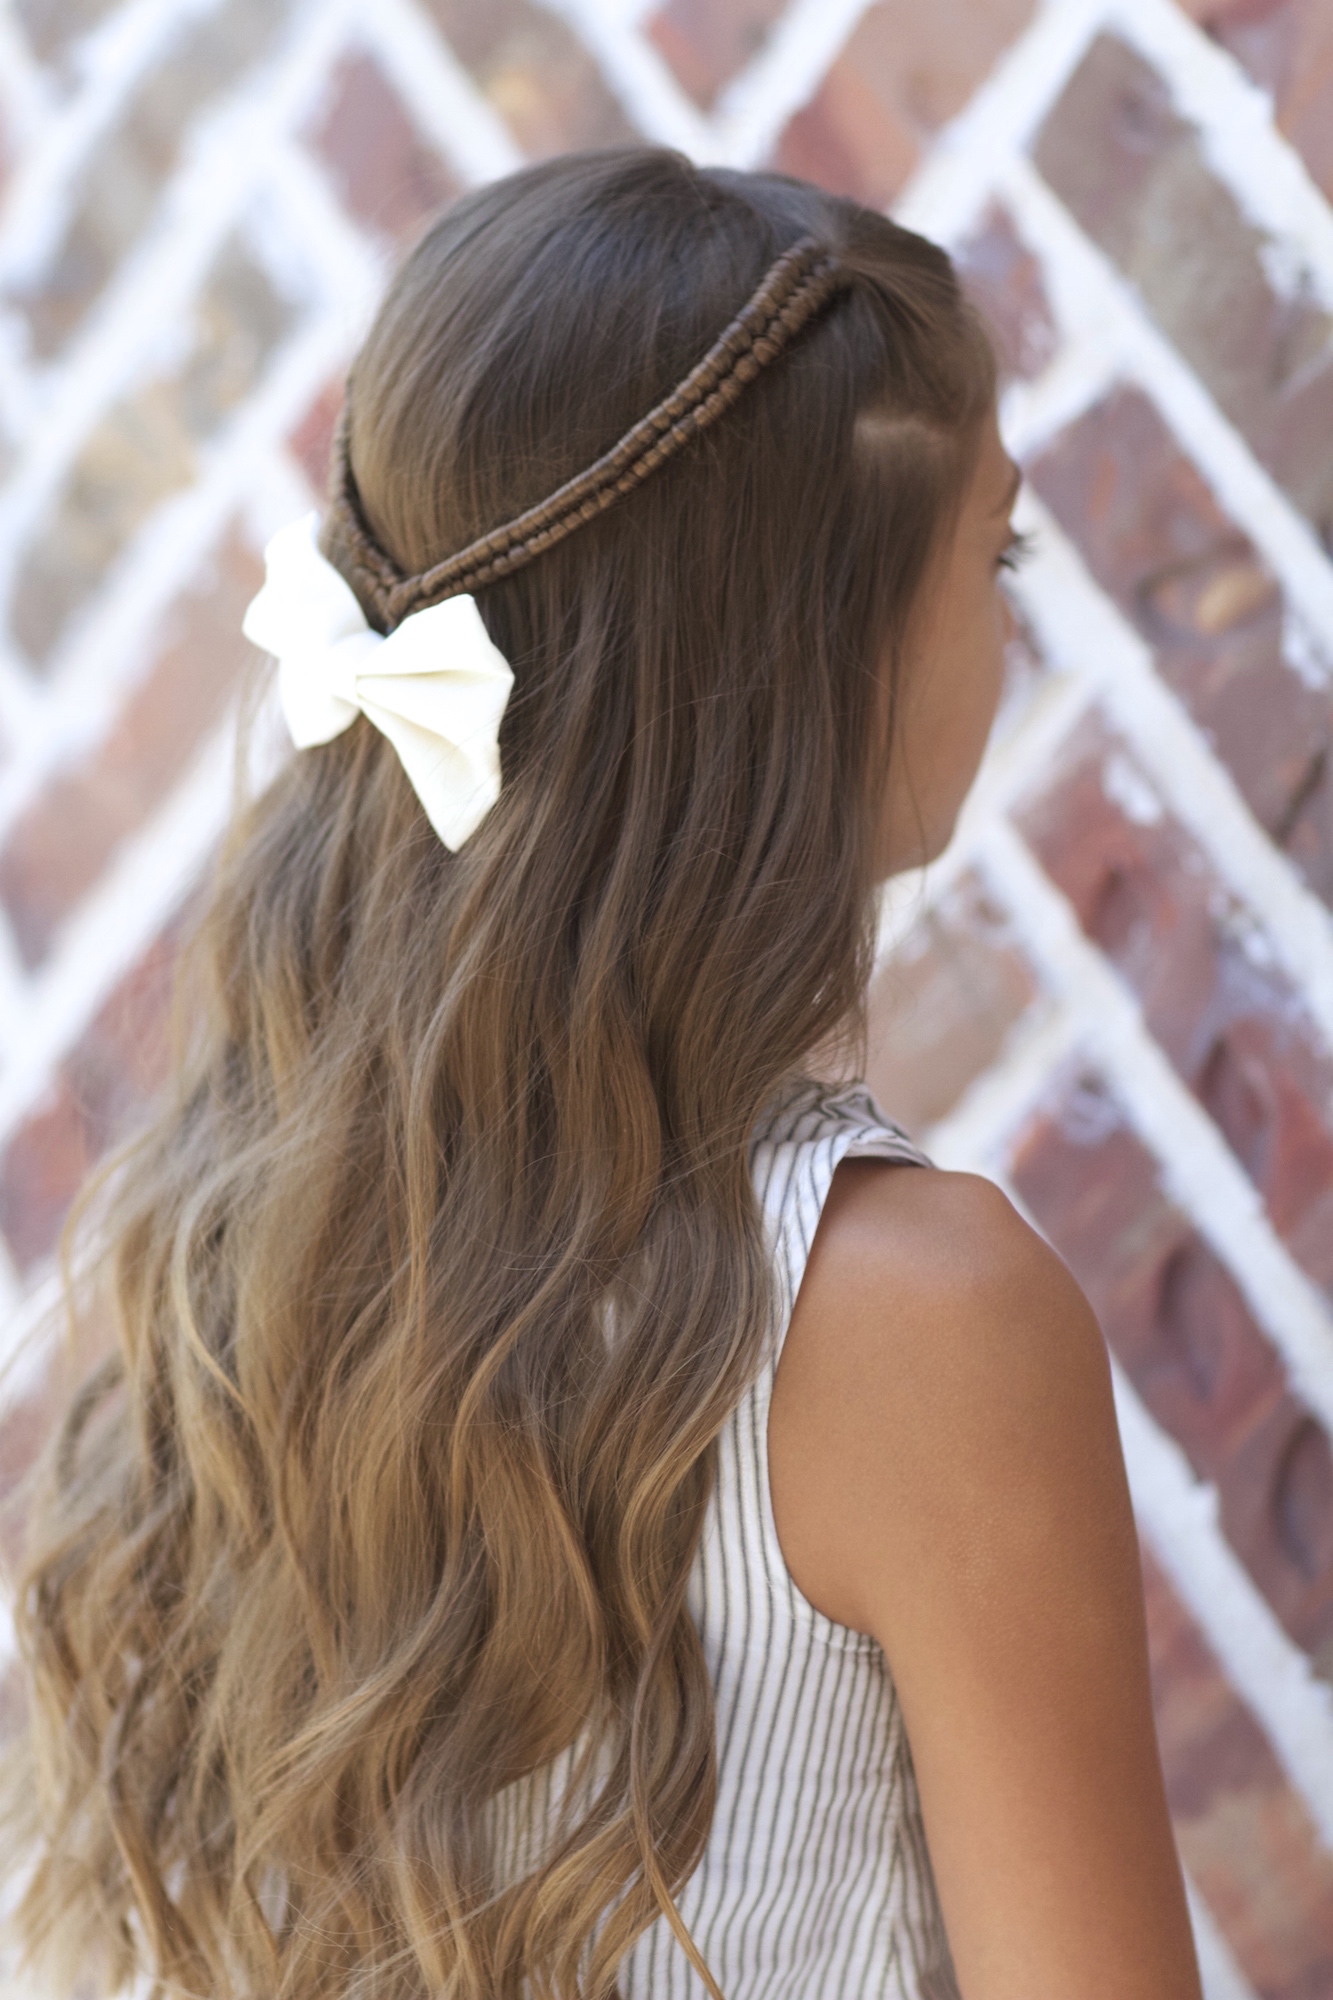
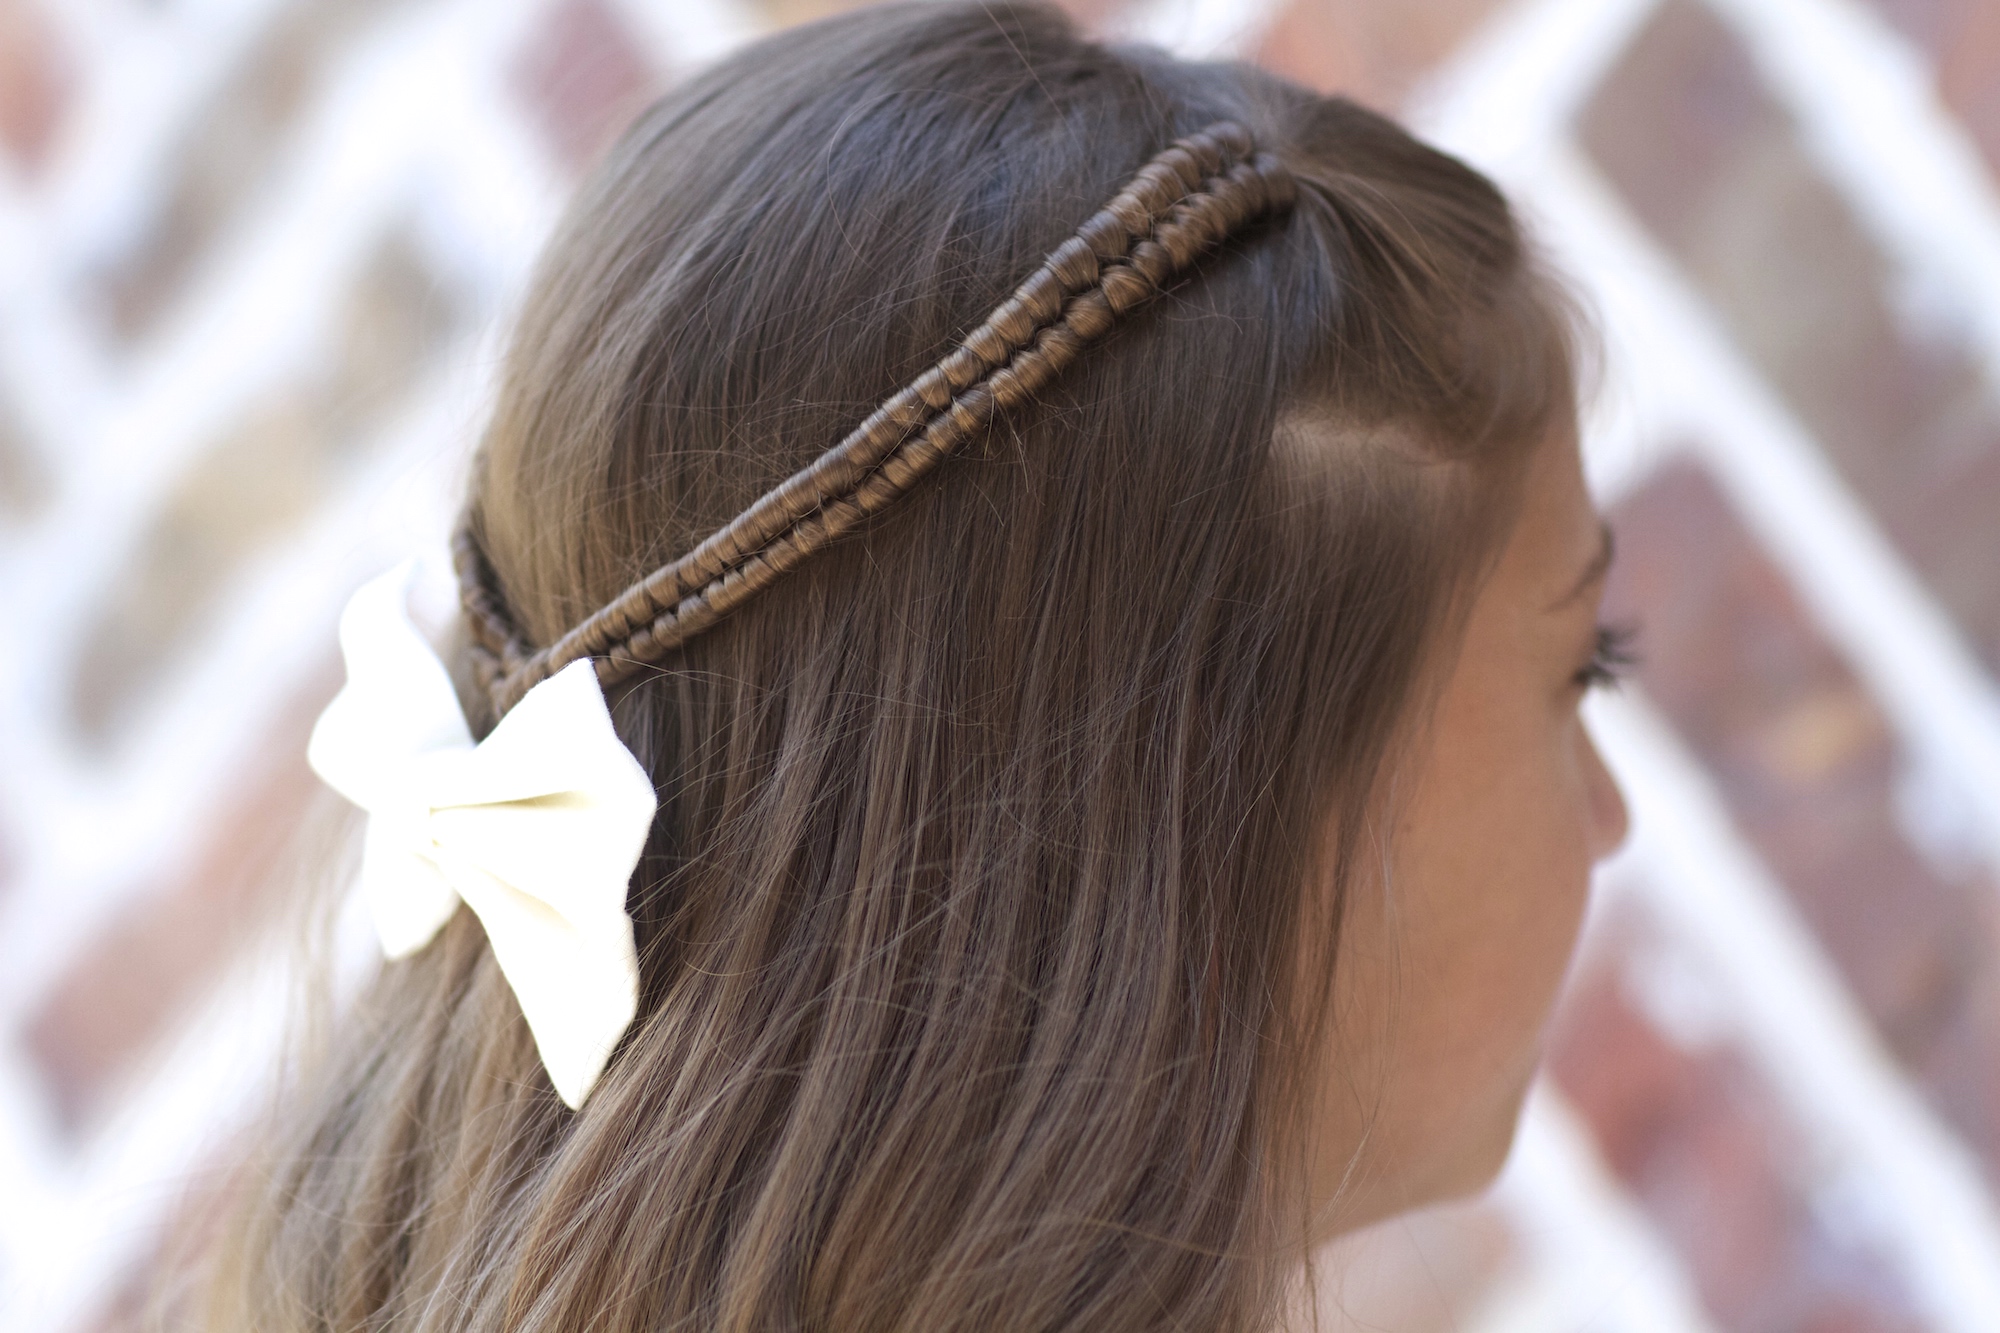
We started this week’s tutorial with a base of curls, and then used a braid you’ve all heard of before, the Infinity Braid. We created two of them, and pulled them back into an adorable tieback.
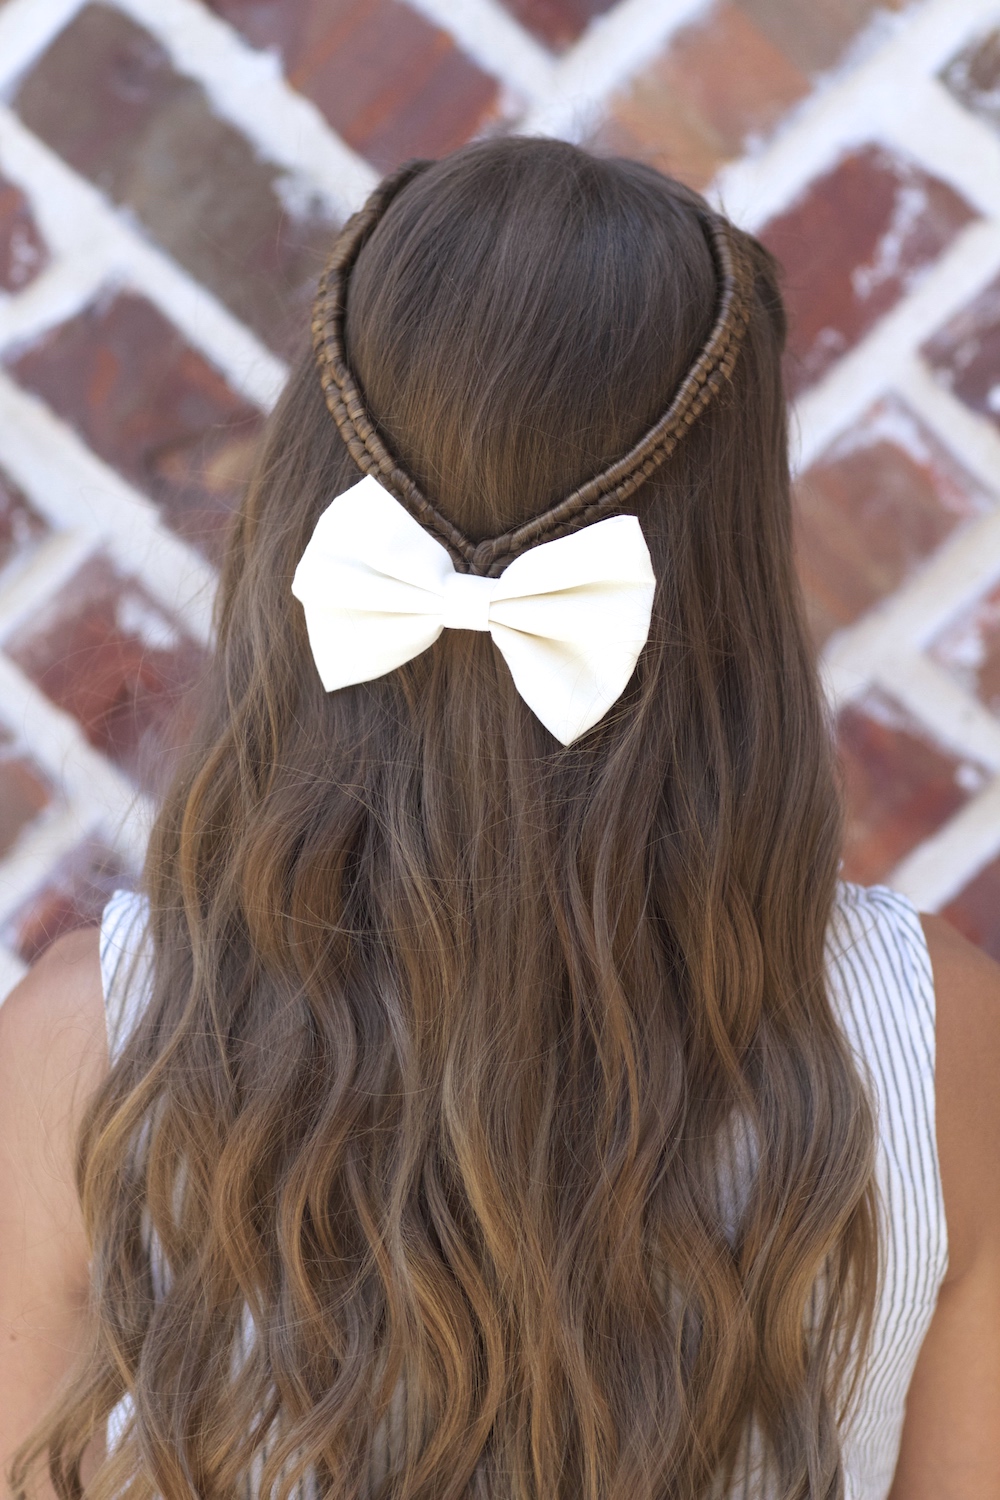
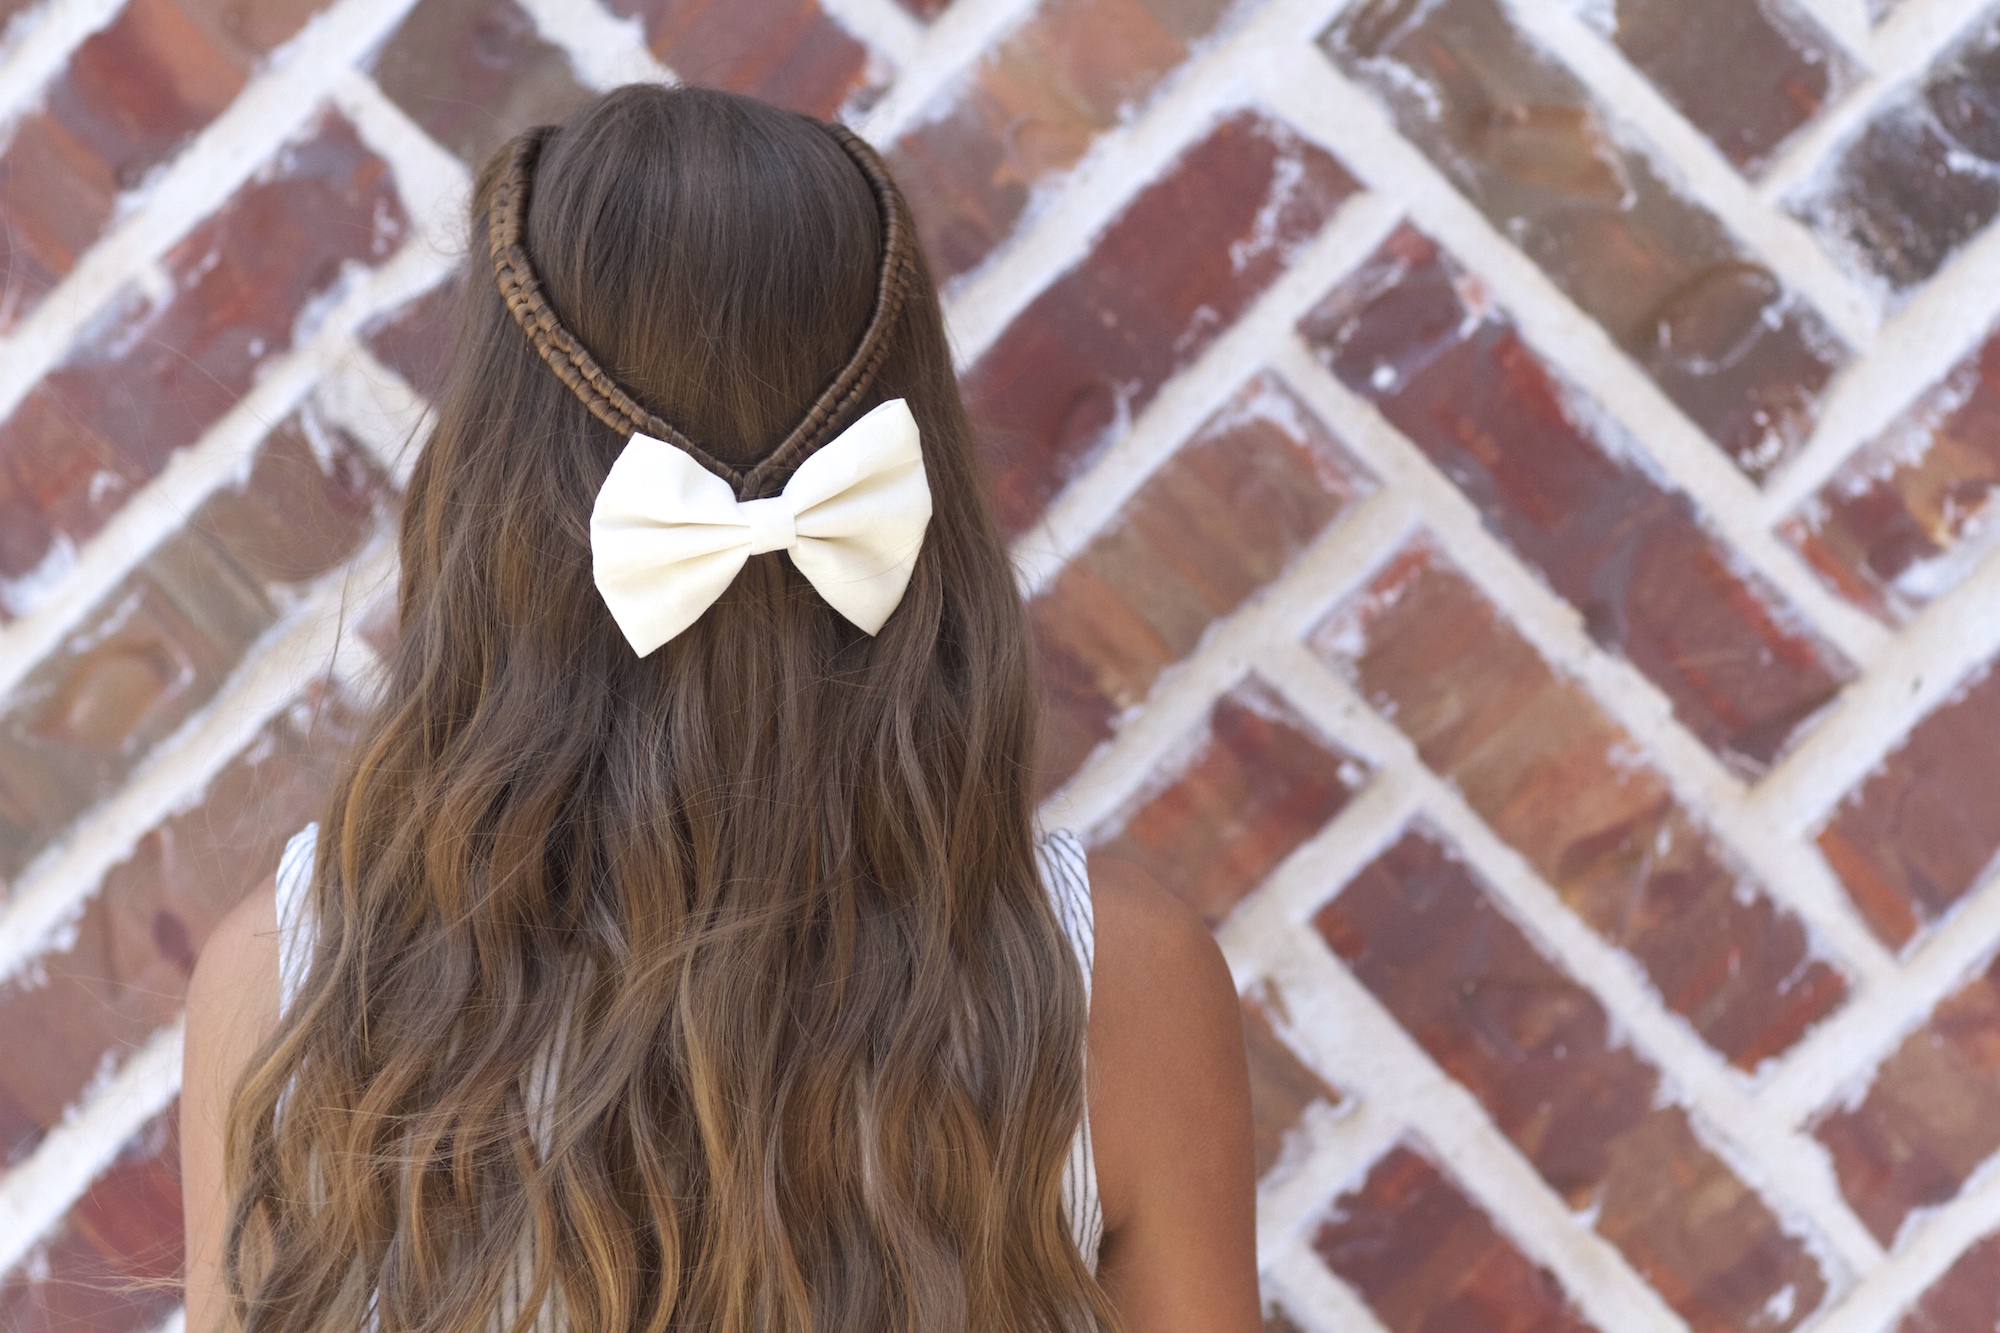
If you’ve been here with us for awhile, you’ll know that Tiebacks have been some our most favorite hairstyles over the years. They just have such a beautiful yet subtle look, as they pull the hair out of your face and add that perfect accent to straight, wavy, or curly hair.
To see your own photo recreations of this hairstyle featured in our CGH App, feel free to tag your photos on IG with: #CGHInfinityTieback
As you watch the video, pay particular attention to a few of the tips we give you to getting the braid to look right. I also show you how I use this technique as a cute side braid.
The Infinity Braid Tieback is perfect for women and girls of all ages. It can also be worn in any number of hairstyle combinations. Because the braid itself uses quite a bit of hair length to get the infinity stitching, I would recommend that you have long to medium hair for this hair style.
Items Needed: Brush, rat-tail comb, spray bottle, 2 small hair elastics, hairspray and accessory {if desired}.
Time Requirement: 7-10 minutes
Skill Level: Medium
Video Tutorial:
- Begin by parting hair in the middle…
- Part out a rectangle shape on either side of the center line {I leave about 1-1.5 inches of hair down above the ear, the rest can go into the newly parted section}…
- Divide the rectangle hair section into two strands…
- Then divide off another small strand of hair off the top section nearest to part line {this is now your wrapping strand}…
- Now take that 3rd strand of hair, and bring it over the section next to it and down through the middle of the two strands {if you take the strand under first, it will not look correct in the end}..
- Then bring that same strand of hair under the lower section of hair, and wrap it up and over and thru the middle again.
- Continue Steps #5-6, winding in essentially a figure eight pattern, over and over again…
- As you move down the braid, be sure to cinch each stitch up tightly against the stitch before it {you don’t want any spacing between your stitches}…
- When you begin to run out of hair, or the strand begins to visually look thinner, pull out another small strand of hair from the bottom section and add it into the wrapping strand {this will not only add fullness back to the strand, but it will also add more length to it as well}…
- Continue Steps #5-9, over and over again until you complete the length of hair you want in the braid…
- Repeat the Infinity Braid on the other side of the head…
- Then, flatten out the braids and secure them at the back of the head with an elastic…
- Lastly, loosen any leftover braid from below the elastic, add hairspray and an accessory {if desired}.
- OPTIONAL: Add curls as a base to the hairstyle.
You can also do this as a side braid on yourself or in a ponytail, which holds up super well for dance, gymnastics, and other sports. This is a hearty braid! Please also be sure to leave a comment below telling us when your kids go back to school!
Happy Hairstyling!
The twins uploaded their annual “What’s in my Backpack” Back-to-School video to YouTube last week! To see what they are giving away, click below and let us know which one was your favorite!


so cute!!!
So cute for summer
So beautiful!
One of my MANY favorites!
Omg luv it your hairstyles are amazing
Ilove this hairstyle so simple and cute the bow add touch♥♥♥♥♥
Love this braid for soft waves, the bow is such a cute detail!
ISA Professional
I love you guys, both so funny!!! And your editing is amazing! just keep doing what your doing as you are both so inspirational!