A few months ago we showed you how to create the Stacked Braid, and it has been very popular!
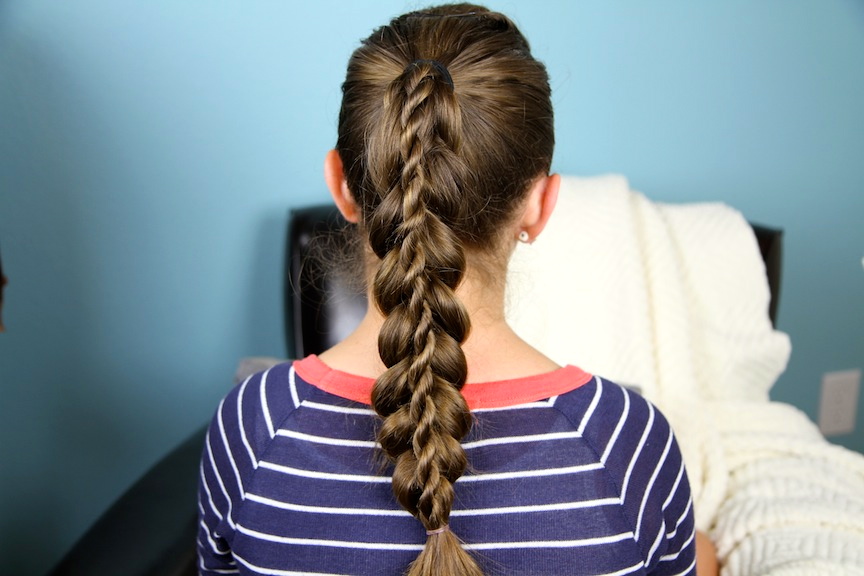
At the same time, we experimented by stacking the base braid with a rope braid twist on top and it is equally as cute! You simply use the same technique in stacking the braid, only that you only pull out strands from the inside of the right-most strand as you go down {to later incorporate in your stacked twist}, rather than strands from both sides as in the stacked braids. The video below will make this much more clear.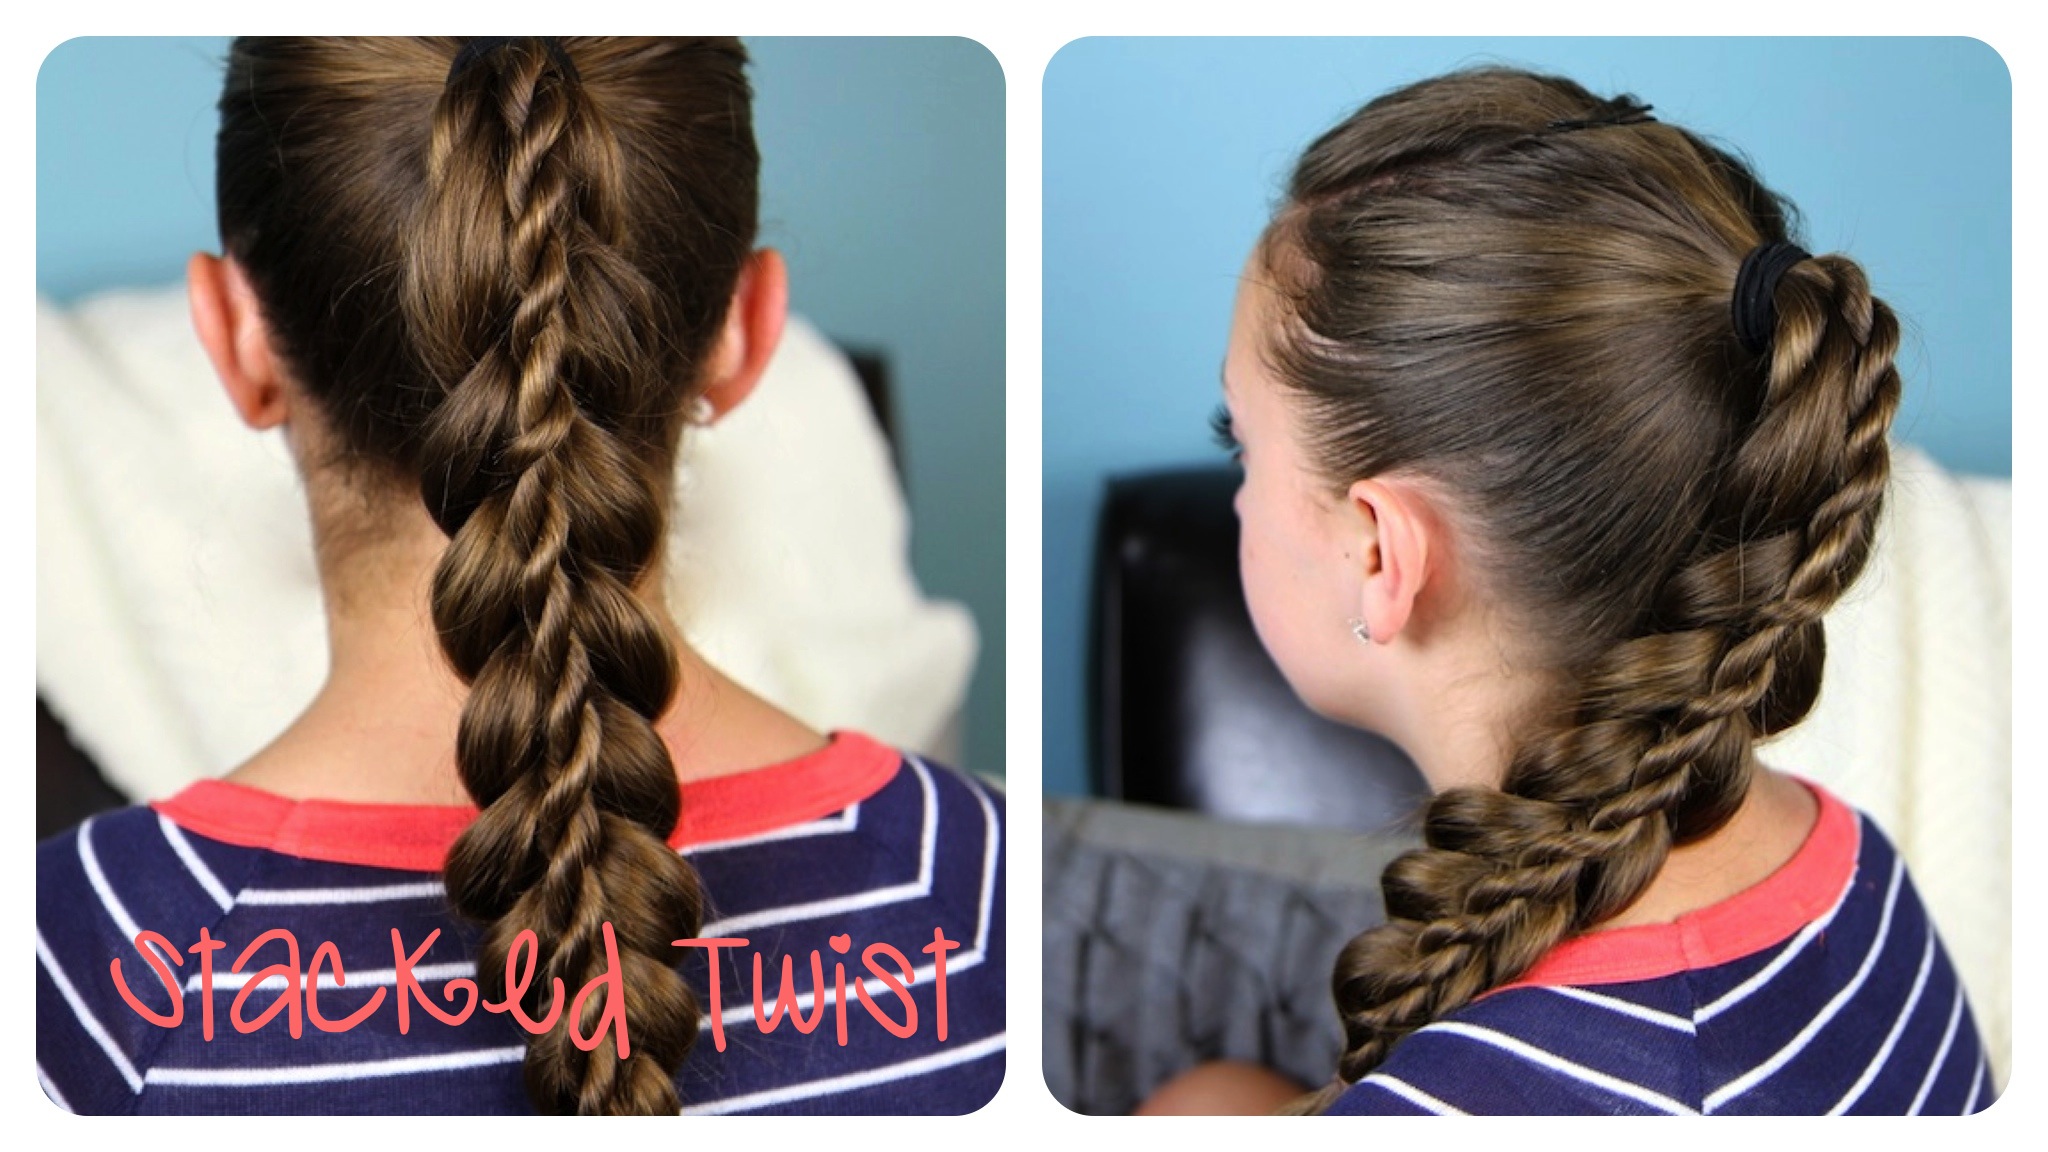 My girls have worn this braid for several months and it gets just as many compliments as the Stacked Braids, only people are more curious at how the twist stays on top!
Try it, and see what your friends think!
Items Needed: Brush, rat-tail comb, spray bottle, 1 small hair elastic, 1 hairband, 2-3 bobby pins, and hairspray {if desired}.
Time Requirement: 5-8 minutes
Step-by-Step Instructions:
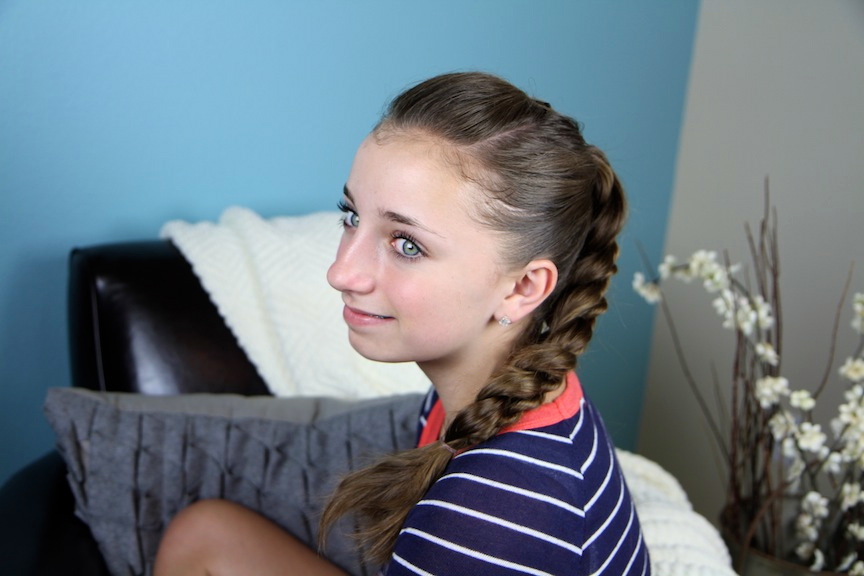
- Begin by pulling front of hair {bangs} into a pompadour, and use bobby pins to secure. {Optional: Instead of a pompadour, simply throw long hair over one shoulder and use this same technique as a side braid.}
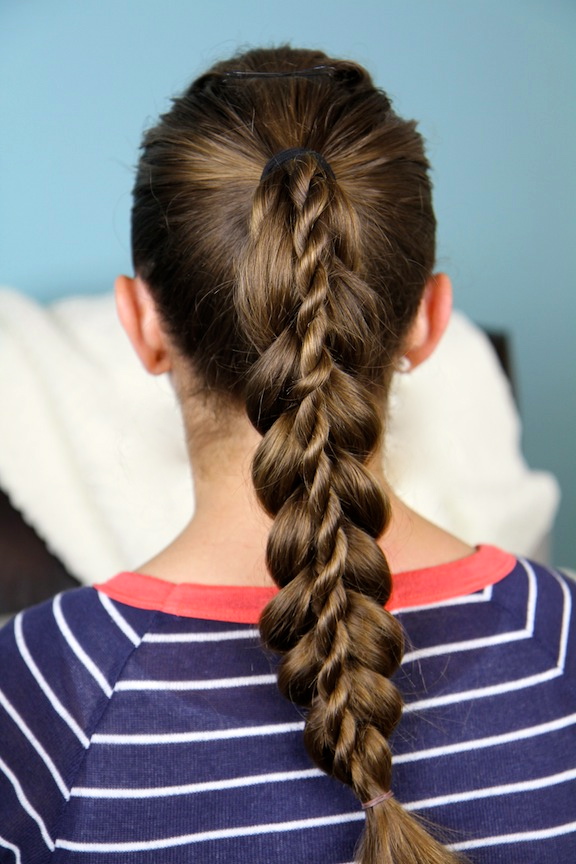
- Pull up all hair into a ponytail and secure with a hair band…
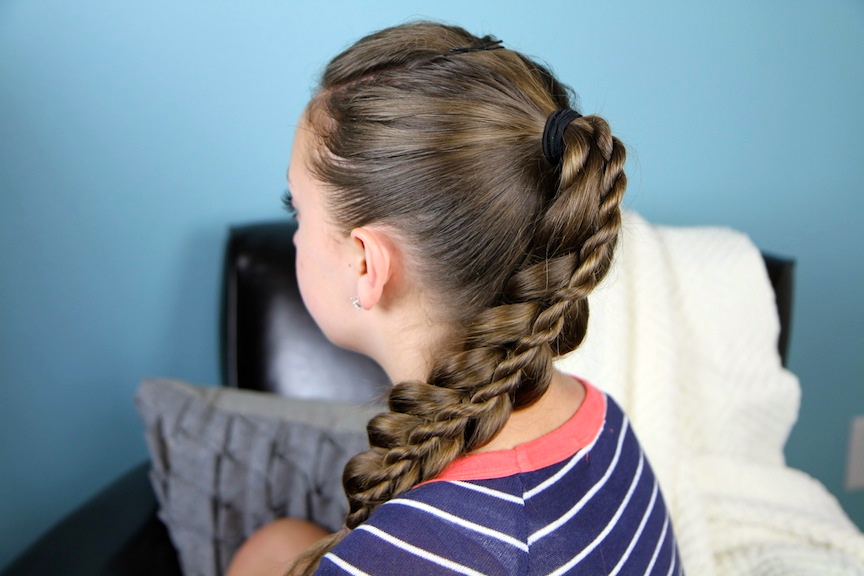
- Separate off a small section of hair at the top of the rubber band and keep out of the way for now…
- With the remainder of the hair, begin a Simple Braid {three stranded regular braid. Make sure you are taking the middle strand over the outside edges as you braid {you may also create a three strand braid reversing this, but it will not work nearly as well for this specific hairstyle}…
- Once you have created the first stitch of a simple braid, pull a tiny section off of the inside of the right-most strand, and hold it out of the way. This is very similar to creating a feather braid…
- Continue by creating another stitch of the braid, and again, pull out a tiny section off the inside of the right-most strand, and hold out of the way…
- Continue this pattern until you run out of hair, and secure the simple braid with an elastic {you will now have one large simple braid with many little “feathers” of hair coming out of the braid}…
- Now, go back up to the top of the hair to the first section of hair was separated off from the ponytail. Separate this section into two strands and begin a rope braid. {To create a rope braid, simply twist each strand of hair in the clockwise direction and then twist them over each other in a counter-clockwise direction. This will keep the twists from unraveling when you let them go}…
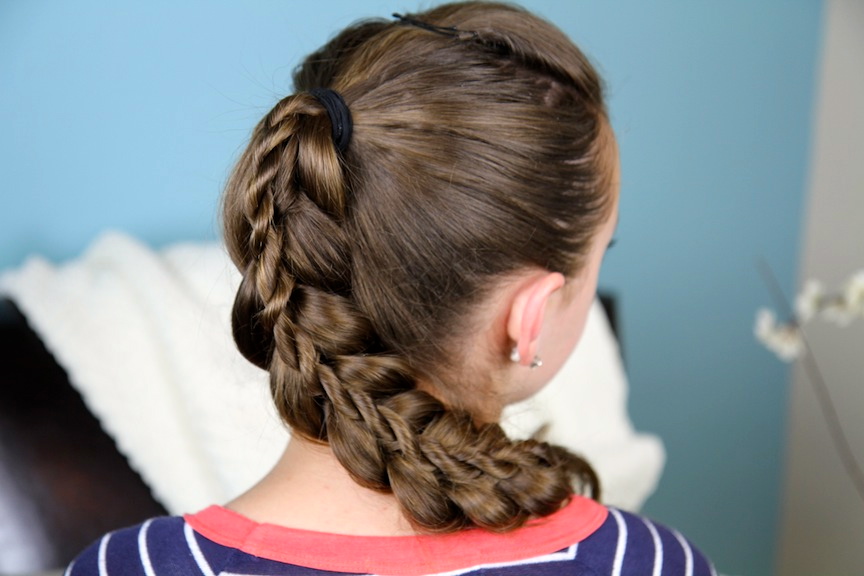
- As you twist down the rope braid, simply add in the feather strands you pulled out of the simple braid, as you reach them. Pulling these pieces into the twists will tighten the twist down against the braid and keep it running right down the middle of the simple braid… essentially stacking the twist on top of the braid.
- When you run out of hair and finish the twist, remove the hair elastic from the original simple braid and use it to secure both the simple braid and the stacked rope braid together.
- Optional: Go back and pancake the edges of the simple braid to create a wider base for the twist.
Happy Hairdoing!

* Note from Mindy: Google Reader will be shutting down on July 1st, so if you want to follow our blog… you can do so at BlogLovin, a new easy-to-use blog reader for women!
Also, feel free to watch Bailey’s night-time teenage skincare routine that she uploaded to the girls’ YouTube channel BrooklynAndBailey this week!


I tried this style today and it looked really cute when I put it in but the braid twisted sideways when I let it go so you can’t see the pretty front. Any tips?
I love your blog btw, the wrap-around prim braid is one of our favorites, it looks so elegant and can be done on shorter and longer hair
The plat was fabulous I loved it and In my school the students also said that the plat is great
love it so much!!!!!!!!!!1
Super cute!!! you should do some summer hairstyles!!!
I really luv ur hair style they are really too cute just like ur website name
That is a really cute hair style
http://callinamarie.buzznet.com/photos/28amazinghairbraids/?id=68465724.
Could you please do a tutorial on this hair..i tried to do this and i just cant figure it out
I love this one!
Sweat Pea and Braidy are too cute at the end. I ♥ your super cool trampoline! What an awesome idea to put it in the ground.
it pretty and easy to do <3
i Love it