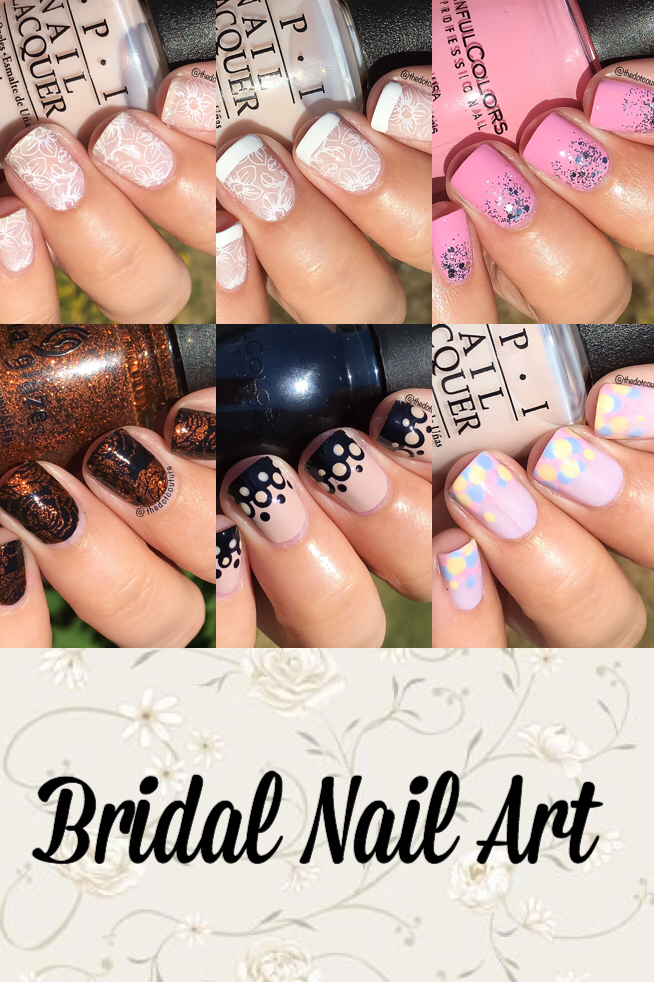
 Hi everyone!!! With July upon us, ’tis the season for all things wedding! And with weddings comes….nail art! Whether you are attending a wedding, standing up for your bestie, or the star of the show, there’s no need for plain nails come the big day. You can do these looks at home or bring them to your local salon to do for you.
Delicate stamping over a very sheer base is a great way to have interesting nails that don’t distract. For this look you need a very sheer, almost white polish (this is OPI Act Your Beige). Do 2-3 coats and then stamp a delicate floral or lace pattern on top, using a white stamping polish.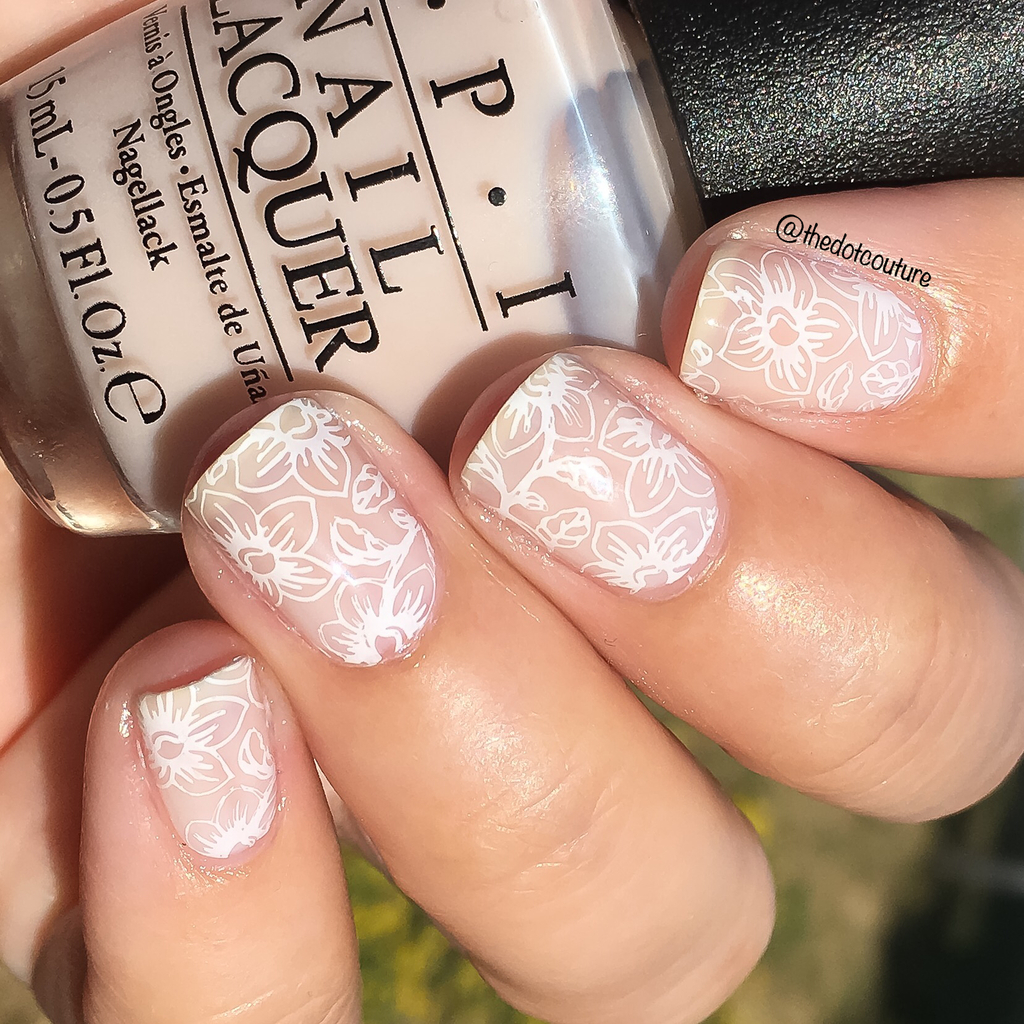 To mix this up a bit you could use a sheer polish that has more of a pink tint to it. Or you could add a French tip to the bottom portion of your nail (I did this just using the brush of my stamping polish in a sweeping motion from left to right across the bottom third of my nail).
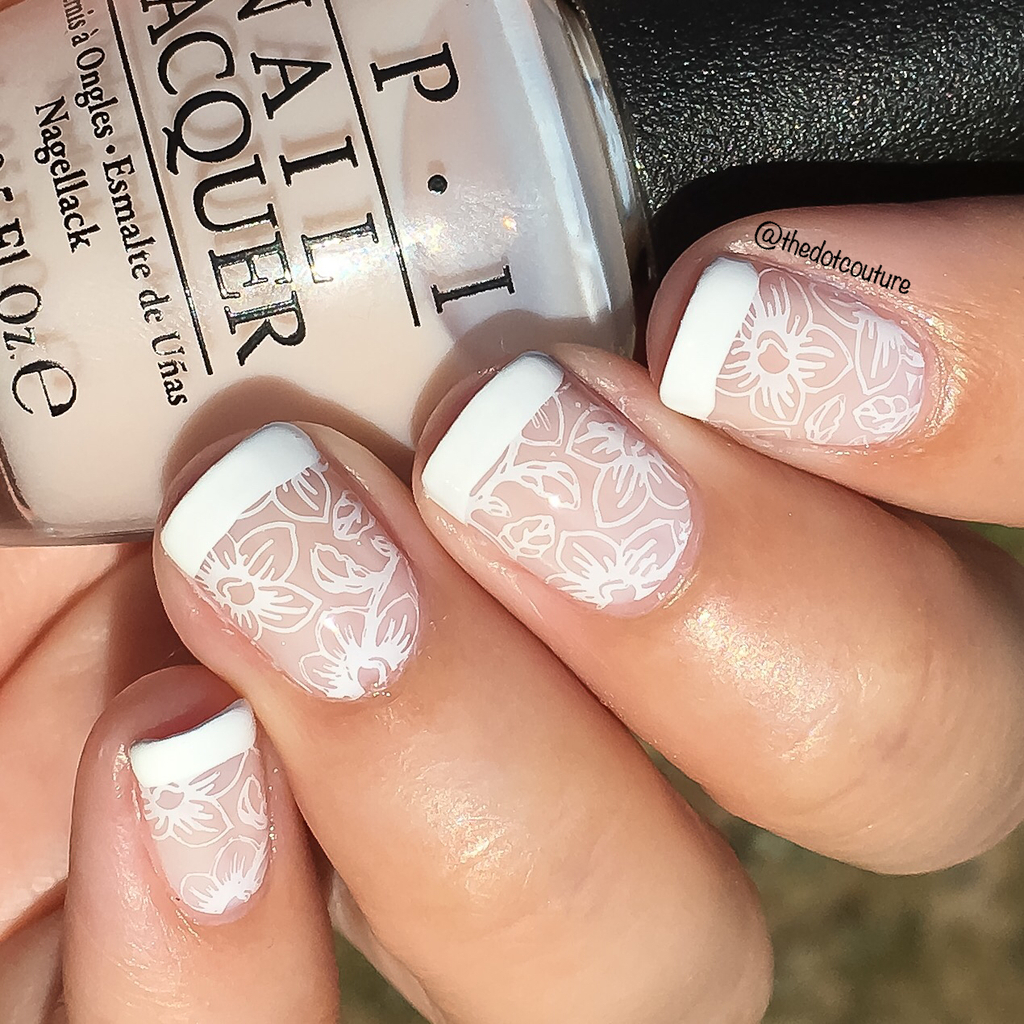 These nails would compliment any dress (colour and style), and would look timeless in photos.
If you want your nails to pop more, these ultra girly pink nails with a silver glitter gradient would fit the bill perfectly: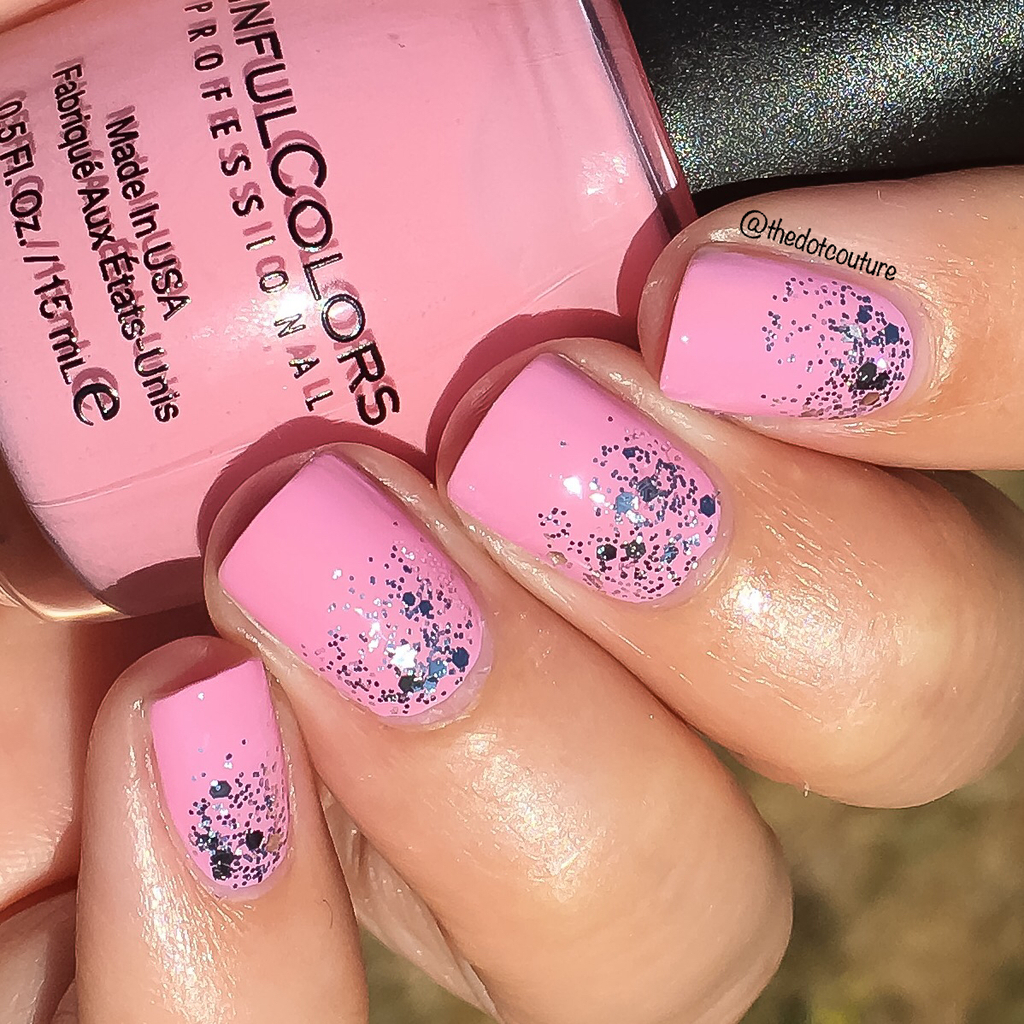 You could use a lighter pink for a more subtle look, a white nail with a complimentary coloured glitter – the combinations are truly endless. For this look I painted my nails two coats of Sinful Colors Pink Smart, and then dabbed on some silver glitter to the top half of my nail, focusing more up near my cuticles. Truly easy and eye-catching!
I always think of weddings when I see nude and black together. I guess because the combo is so striking yet incredibly classy. This is sort of a faux lace look I created with just the end of a bobby-pin.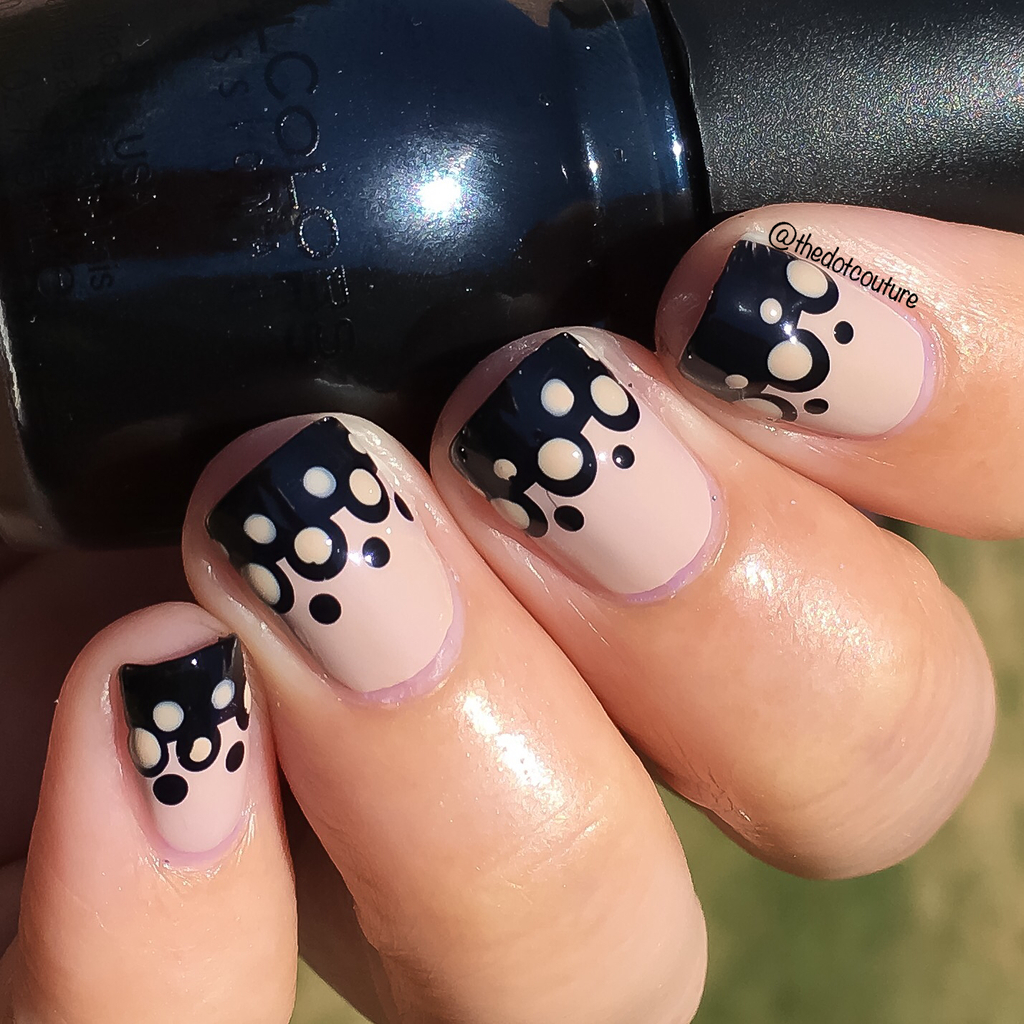 I painted my nails a nude base, and then painted the bottom third of my nail towards the tip a solid black using a left to right sweeping motion. Using the end of a bobby pin, I did three black dots where the black meets the nude. I added a couple of smaller black dots above that. After that dried, I used the nude polish to dot inside the black dots. Again, I added a couple of smaller nude dots in the black bottom part of my nail. You could mix this up and do black and white, red and black, whatever would work with your wedding scheme/dress.
Next we have this fun and whimsical look. I used two coats of the sheer white polish and then did dots with various polish colours (pink, blue, and yellow) on the bottom half of my nail, overlapping them somewhat. When they were dry I did one more coat of the sheer polish creating what is known as a “jelly sandwich” – the sheer jelly polish sandwiches the polka dots. This makes the look softer and more feminine by toning down the intensity of the polka dots and blending them all together.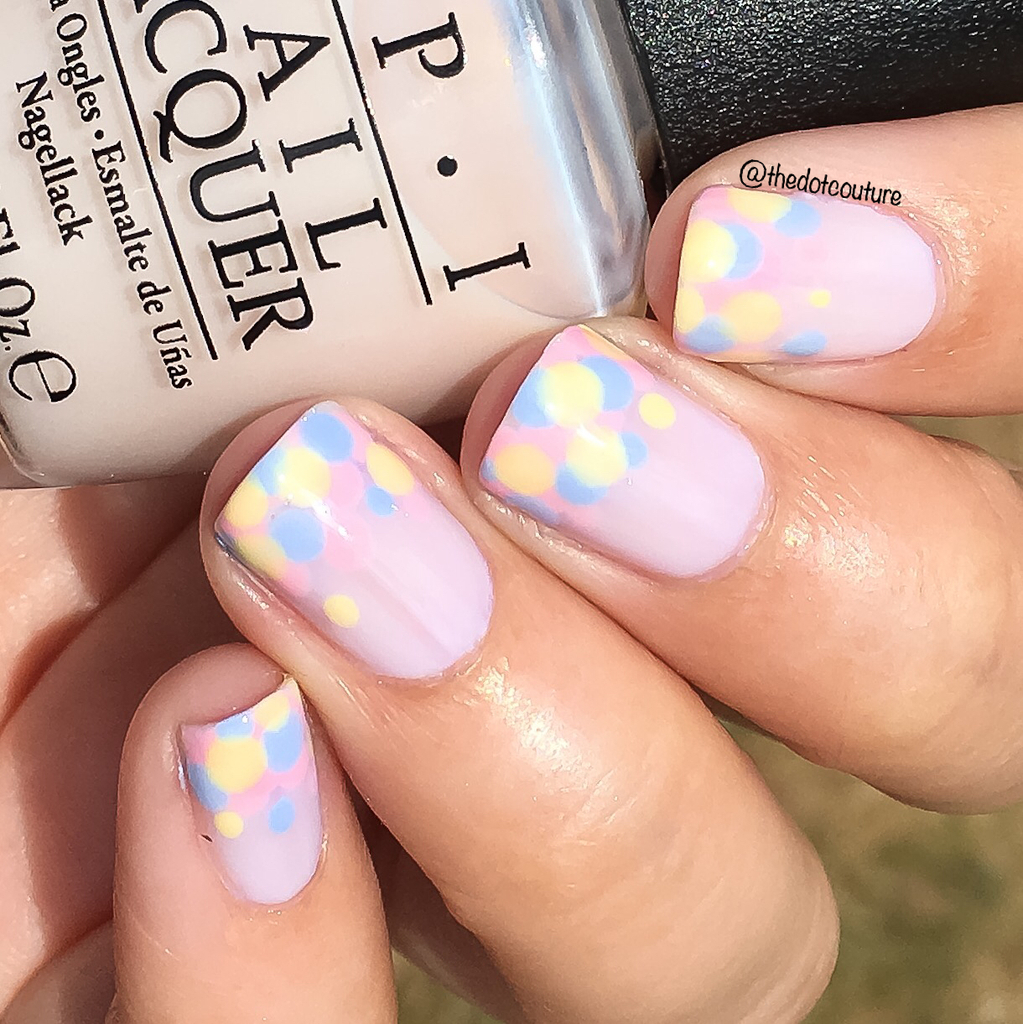 And for the bride (or party guest) who wants to get noticed – here is a spin on a floral mani (and roses no less!).
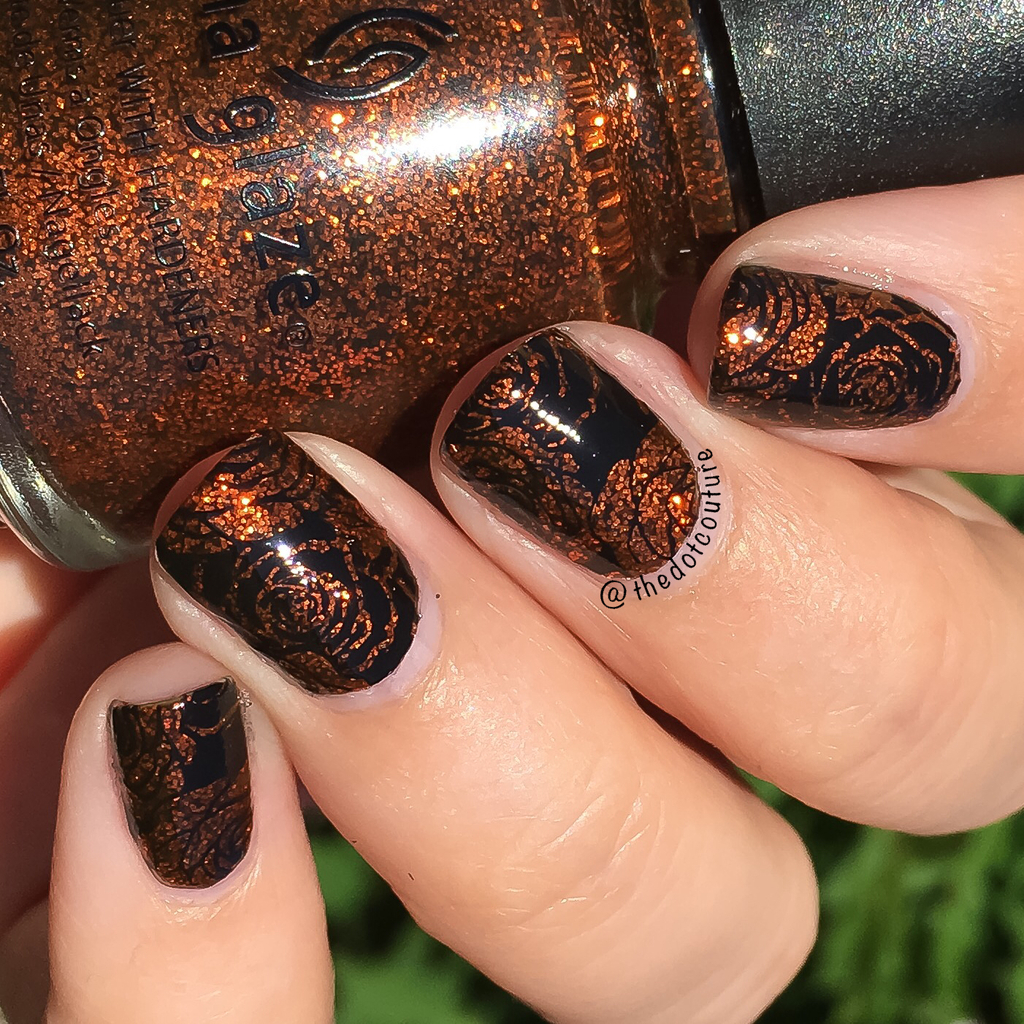 I painted my nails a base of this orange/copper micro glitter and then stamped a negative space rose image using a black stamping polish. I LOVE these so much! They are unique and eye-catching without being too flashy. You could use ANY base colour for this and it would look fabulous. I like the low contrast between the darker micro glitter and the black.
Which nails would you pick for your wedding? I think I’m a micro glitter and roses gal myself!
I like to hang out on Instagram and post pretty nails so please feel free to come visit me at @thedotcouture. Until next time, happy painting!

So beautiful!????
wow
They are really cute!!
Cool nails
Very nice ideas!
Beautiful !
omg these????????????
cute!
Love it
Do cute
So pretty
awesome!
lovely nail art
I’m definitely gonna try these they are so cute!
I tried these nails designs out and I’m in love with them.
Love the nail polish!
THAT IS COOL
Pretty!! I would try but I’m not an artist
They’re all so pretty!
They’re all so gorgeous I need to try this
I wish I was able to do those! They are all so pretty!!
this is gorgeous!
So cute
Love the nails
So cute!
I definently will try one of these nail styles they are beautiful!
Ooooohhh so cute!!!!!! Definitely going to try it out!!!❤️❤️❤️
I love these.
I love the buff colour with the black circles ant tips looks great!
I like this
so many different options!
cutee
cute
These are really cute!
The nail designs are pretty
The white with french is really beautiful <3
..
There is so much flexibility!
How adorable are these?! Definitely gotta try th se out sometime
These nail designs are so beautiful, especially the third one.
cute idea!
I love doing nail art and this such an amazing nail at design to do!
Beautiful????
Love it!
Beautiful
Its good to go to school with that nail art
I’m going to try all the designs
I love the black/copper one. I’d rock that all year round
So pretty!!
So beautiful I will try it!!!
It’s probably gonna look good with white
This is beautiful!
I really wanna try some of these
❤❤❤
These are really cute
awesome!
Cute
This is so cute!!!
love it! so pretty
Love love love!!!! So pretty.
So cute love it
All I do in my free time is watch nail and makeup videos. So cute ????
That’s so pretty ❤❤❤????????????????????????????????????????
Love the first one! So elegant and simple with the lace!
So great, 🙂
Super cute!????????
Love this????
Even though it’s a bridal nail art I’ll wear it like on a casual day.
The nails are SOOO cool
Love.
They all look nice
i love it i bite my nails tho so there not long enough
So pretty I love the first x
I want to try the pink with yellow style !
These all look so pretty and elegant.
Love the nails! Can’t wait to try them out. ????
Thank you for such great ideas!
so so pretty
This is amazing! I always am looking for cool ways to do my nails at my own house but at the same time making my nails look professional
these are so pretty!
Omg I love these! There so pretty and cute
I love the French tips!
Cute
I love all the nail arts especially the one with lace stamp on top of the cream color nail polish.
I absolutely love all of the designs! Definitely gonna recreate them!
i really like the copper black one!! all of them are really cute!!!
Absolutely GORGEOUS
so cute
so cute!! love it!
so pretty
They are so pretty and beautiful!????
So cute but I’m bad at doing my nails
That’s so cool
Woo cute, I wish I was good at nails!
These nails are so pretty!
Wow
That’s so cute
I will use this for a party
I love these designs, their so cute!
Amazing!!!
these are all so cute!
Love the nail design!!!
I love the designs on the nails
All styles are so beautiful
Yikes, if I was better at doing nails, I’d definitely do this!! Looks like I’m going to have to go to the nail salon asap, these are all so so cute wow
All so simple but beautiful!
These are amazing????Wish I had that skill!!
they’re gorgeous!!
i love these designs!????
Very pretty nail’s!
I definitely want to try one of these designs or all of them ???????????? this is amazing seriously!!!
Loveee those designnnn
These are all so pretty!
So have to book mark this for my friend!
????????????????
So pretty!
I love them !!
Love????????????
OMG I love those designssss!!
Cute
Love anything to do with nails!! ????
Flawless ????????
The designs are so pretty I love them
Wow
the floral design! ????
This is so cute, but idk where to get stamps unless it’s online.
Absolutely in love with the pink nails!!
They look great and ont only for a bride
So beautiful.
I love the white flower design!!! ????????????
The floral with French tips is my favorite ❤️
These look great!!
So I tried the first floral design and oh my it looked nothing like it lol
The first design is so pretty!
this is amazing!
So pretty
Lovely designs
Beautiful nails!! I wish I could make mine look this good!
cute nail styles
I love the second design ❤
the white one is lovely
Will be trying his out for my sisters wedding in September!
This is so amazing! ????
Beautiful!
Awesome!
I juste love the one with the flowers and the manucure 🙂 it’s very chic and elegant 🙂
Omg I wish I had the ability to do this!!
wow fast and easy to do
So pretty
Cute ❤️
Love them
Love these designs! I’m going to try all of them
Ooooooooo I like all of them!!!
Can’t wait to try this. 😀
These are so pretty! I would love to try these!
Gorgeous!!!
SO BEAUUTIFUL
So pretty.
Fun!!
I wish I could do that
Those are nice????
Awesome!
That’s o’ so coo!
Cool
Fancy
This is so cute but I’ll probably mess up ????
This is so pretty definitely trying this on my nails
If only I could do my nails on my left hand
If only I was good at nails
So beautiful
So pretty! I love doing my nails.
So pretty!????
Glamorous
so cute
Really cute! But I won’t be able to do that with my handiness
Cool!
I wish I could do my own nails like you but I’m too clumsy !
It all looks awesome but i think its hard to do though
Wow I really liked the spoty tip one, I am really looking forward to doing this on my nails! It seems really simple and really easy to do! Thank you for that nail design ????????????????
I can’t even pain my nails a solid color without getting polish all over my fingers
Cant wait to try these
Cute!
so cute
So cool
They’re all sooo cute???????? really gonna need to go get my nails done????????
Looks so cute ! You can change some of the colors to go with seasons.
I love this it’s so cute
nice
I love the polka dots one the most!!!
So cute!!!
Cool
So cute
Such cool designs!
My fingers r too short for it ????????
I love the french tip and flowers. wow
Gorgeous nails!
AWESOMEEEEE I MIGHT TRY IT
lovee it
love these!
gorgeous!
Love
Cute!
That moment when you realize you don’t have the steady hand for these
So cute. Have to try
this is AMAZING!!!!
This is beauty!!
This is so cool
These are all so cute and stylish, love them!
Very Pretty! Love them!
If only I could do these
I like the third one its really summerish
So cute???????????? I wish I could do my nails like that.
I wish i was that good!!
All of them are so pretty
Cute
they look so cool
So pretty and so easy to get ????
All of these are so pretty
nice !!
Nice!!!
Need to have one of these done soon omg
all of these are amazing
🙂
I love the fun and whimsical look!
Wow , everything look so awsome here ♥️
Awesome! I’m always looking for new nail designs so thanks!
they are all so pretty
Perfectt
In love ????????????
I have so many new things I can try not!
in love with these nails!!
The pink and nude nails are so cool and cute
Wow????????
????????
So nice
woah
awesome!
awesome wish i could do that thats real talent right there
So pretty!
Pretty!!
Cute everyday nails
So pretty and look so original, and other so elegant for a wedding
These are very cute ????
Sooooo pretty!
????????????????
Awesome
So pretty????????????
soo cool
So cute
thats really neat
Beautiful
So cute
First and second are my faves!!
The second to last ones are cute!
These are the cutest thing I’ve ever seen ❤️
Pretty!
Artistic
Love it .
Wow
So cool!!
Beautiful!
This looks incredible, I’m in love????❤️
These are amazing I can’t wait to try them out as I’m getting bored with the same designs because I didn’t have any new ones to try now I do.
Loving the copper one ????
Love it.????
Love these!! Super pretty and creative!!????????
I wish I could do things like this but I don’t have the tools to do it
LOVE this!❤️????
Pretty!
First one’s so pretty!
so amazing
Omg I loved the second one ????????????
Can you make a tutorial on how can we make these art in nails ?
so pretty i loved all of them
Soooo cute and natural
All the designs are very elegant and beautiful. Thanks for sharing
That’s so awesome how u can do such amazing art with nail polish. Now-a-days, there isn’t just plain ones. there’s glittery one and so much more!
I really love the hot pink nails! All designs are unique & cute!
Love!!
these are very pretty ????
Fancy
pretty!!
Awesome ❤️
pretty
loving all of these ????
Need to try . #wishmeluck????
These are all so pretty ????????
????????
Pretty
These nails are so pretty!!????
Such cute nails! Love them!
Wish i was as talented as you guys
so pretty!!!
They are all SOOOOO amazing. I am definitely trying them.????????????
I ❤️ ALL OF THESE.
Omg I can use these for my next nail appointment!!!
Amazing
The pink glitter is my favorite. I might do it
Cute
WOOOOOOOW
Love the nail designs supper pretty ❤️ Can’t decide which one I should try 🙂
WOW!! So pretty
Amazing!! Took my breath away
Amazing channel Brooklyn and bailey
I would paint then like that whether it was for a wedding or not
These are so pretty and simple! I love them. Can’t wait to try these nails that are PERFECT for a wedding. 🙂
pretty!
it’s so beautifull! I need this for my bestfriend’s weeding. I’m so excited! 😀
so preetttttyyyy<3
Love love love the first one!
I love the French tip with the lace style ????
Love them!!!
OMG I loved the first style!
i love all of these nail art designs! cant wait to try some of these on myself.
Love it….I can’t decide which nail design is my favorite”…..I really want to try them all.
Perfect
So pretty
Gorg!
I love these designs!
I love all of them they are so pretty!!!!!!
Omg they are all so pretty.
They are so beautiful!!
Awesome!
stunning
I love ALL of them!! x
Love these
The pink and sparkle ones are my favorite
I like the polka dot ones!
The floral pattern looks amazing. ????✨
Now I know what to do with my nails next time I have to go to a wedding these are perfect!
Love them!
pretty
Very nice!
so pretty!
This so pretty and elegant for a wedding or even a special event and its so much cheaper too:)
These are cute and I am sure much cheaper then getting a manicure. Plus they would be super fun to do the night before your wedding!
All so pretty!!
so cute
the first one????
So cute????
Woah
Makes me want to paint my nails
So cute
I like that shade of pink????
so cute!!!
That’s so cute
These are so pretty
These will be perfect for my sister’s wedding!
These are so beautiful!
Beautiful ????????
These are gorg especially the pink nails!!
Nice and very elegant
Those nails are so different and unique and pretty
these nails are SO Beautiful
I love these nails. They’re so pretty & feminine. I’ve always wanted to try doing a stamped design on my nails, but I’m not sure I could do as good a job as you did.
How cute!
Love these nails. So adorable
Love these nails even though I’m not getting married anytime soon :p
These are stunning!
looks nice !
so gorgeous!
so gorgeous I wish I was that good ❤️
So pretty! I wish I were this talented!
so cute!
Beautiful!
Love love love
????????????
????????????
These are all so pretty
All super cute!!
I love the more subtle designs.
Love the pink nails. I have a wedding to attend in about a week & my dress will go perfect with it!
They are so cute!! Love the design!
I love them all
These are so dang gorgeous ???? Wish I knew how to do nail art ????????
They’re all so cute!
so creative!
Very intricate nail designs
They are all pretty simply, but really pretty
beautiful nailarts
i absoulutely love the lace one
Wow!
I love them all
Love the first one!
Nice
I am absolutely in love with the pink and ombré sparkly nails!
So cute
the first,is my favorite :)))
These are so beautiful, but my favorite ones are the first three. They’re so gorgeous
Cute!
The designs are beautiful
very simple but elegant!
Love you guys so much
Love this !!!
Love them all!!!!
Cute
So beautiful! Totally going to try these
So chic so simple!!????
I LOVE the second one!
I LOVE the first one!
Love these ideas have to try them out and eapicially love the pink and glitter, so I’m going to try that out!
thts is so cute i have to try it
Beautiful
adorable!!
Cute????????????
Very pretty
so cute
Oh my ????????
Super cute! I like them all but my favorite is definitely the white flower design ????
Wow! These nails are amazing! Thanks for all you help!