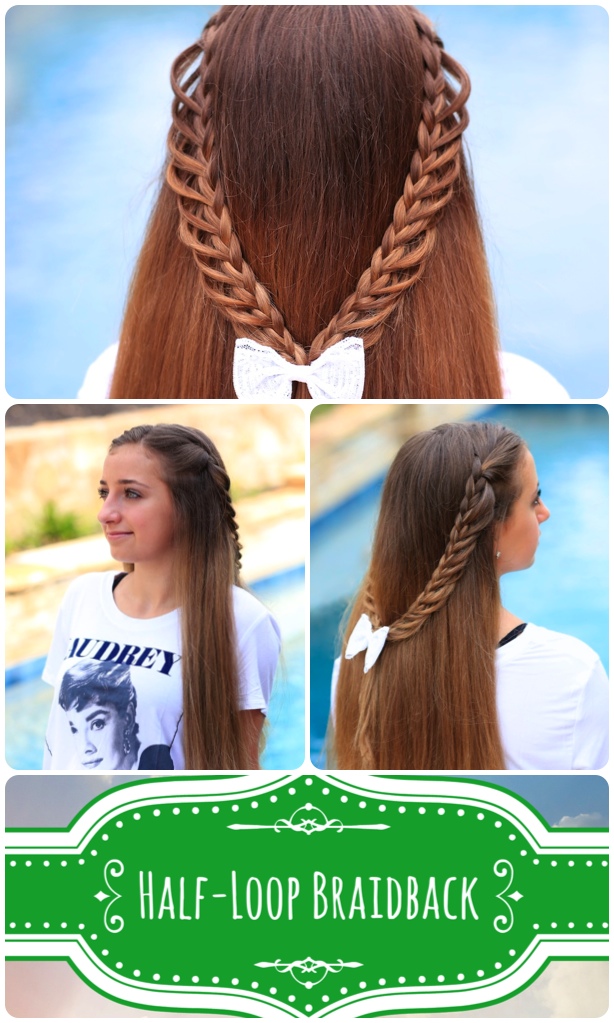
We love tiebacks because they are very mature looking, and can be worn with straight, wavy, or curly hair as the base. I promise, you will receive so many compliments on this one!

Today we are teaching you how to create a Half-Loop Braidback, using the Feather Braid stranding we’ve shown you before. To create the loops in this braid, you “skip-stitch” the feathered strands from the braid, and then pancake them to your liking.
This tutorial is inspired by a few shots I saw on Instagram, one from a viewer named Sophia who posted a photo of this after being inspired by our French Loop Braid a few weeks ago, and another by hairstyling momma, Annie.
To see your recreations featured in our CGH App, feel free to tag your own photos of this hairstyle with: #CGHHalfLoopBraidback


We categorized this style as “Medium” in skill level, only because the skip-stitching can be confusing. Be sure to watch the video closely to know exactly when to bring back in a previously-feathered strand.
Adding the Loop Braiding technique, to any French, Dutch, Simple, or Lace Braids, you can definitely dress up any braid! I can imagine this being used in any number of wedding hairstyles, or Prom and Homecoming hairstyle combos.

Don’t you think this braid is beautiful? On what occasions would you wear this? Perfect for Back-to-School, right?
Items Needed: Brush, rat-tail comb, spray bottle, 1 small hair elastic, hairspray and accessory{if desired}.
Time Requirement: 5 minutes
Skill Level: Medium
Step-by-Step Instructions:
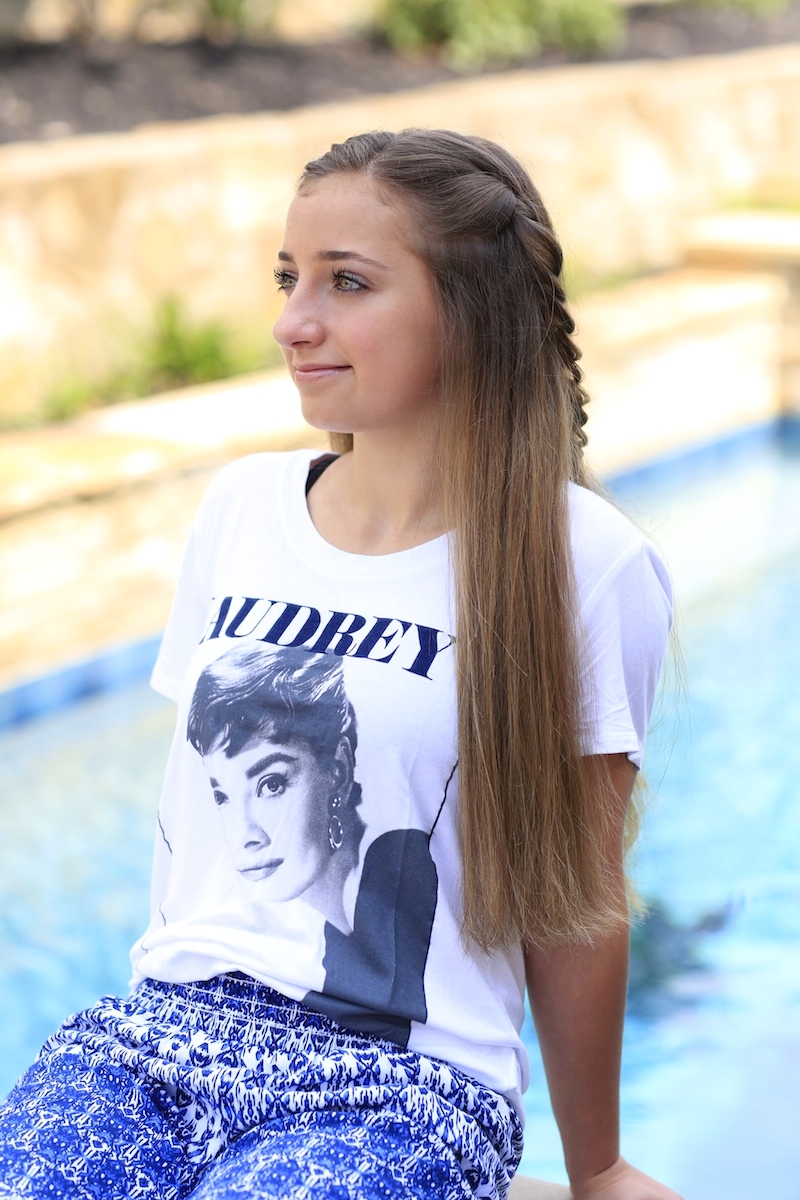
- Begin by parting the hair slightly off center {you don’t want the part to be too deep, or the braids will be uneven}…
- Next, create a section from that part line down to about an inch above the ear, as leaving some hair to cover the ear creates a more mature look to the style {you can also pull all the hair back above the ear for a younger look}…
- Now divide that section into three even strands, and begin one simple braid stitch…
- In the next stitch, on the elbow of hair closest to the ear, remove a tiny little strand and let it fall {we call this technique “feather braiding”}…
- Now, create a 3rd braid stitch, and, again, on the lower piece, create a falling feathered strand {this will be the 2nd feather strand you drop}…
- Create a 4th braid stitch, and, again, on the lower strand, create a falling feathered strand {this will be the 3rd feather strand you drop}…
- However, on this stitch, after you drop the 3rd feathered strand, go back and pick up the first feathered strand and add it back into the lower right-most strand {you essentially trade strands…you drop the 3rd feathered strand, and then pick up the first and add it into that same strand of hair}…
- Now create a 5th braid stitch, and, again, drop the feathered strand and then add back into the braid the 2nd feathered strand…
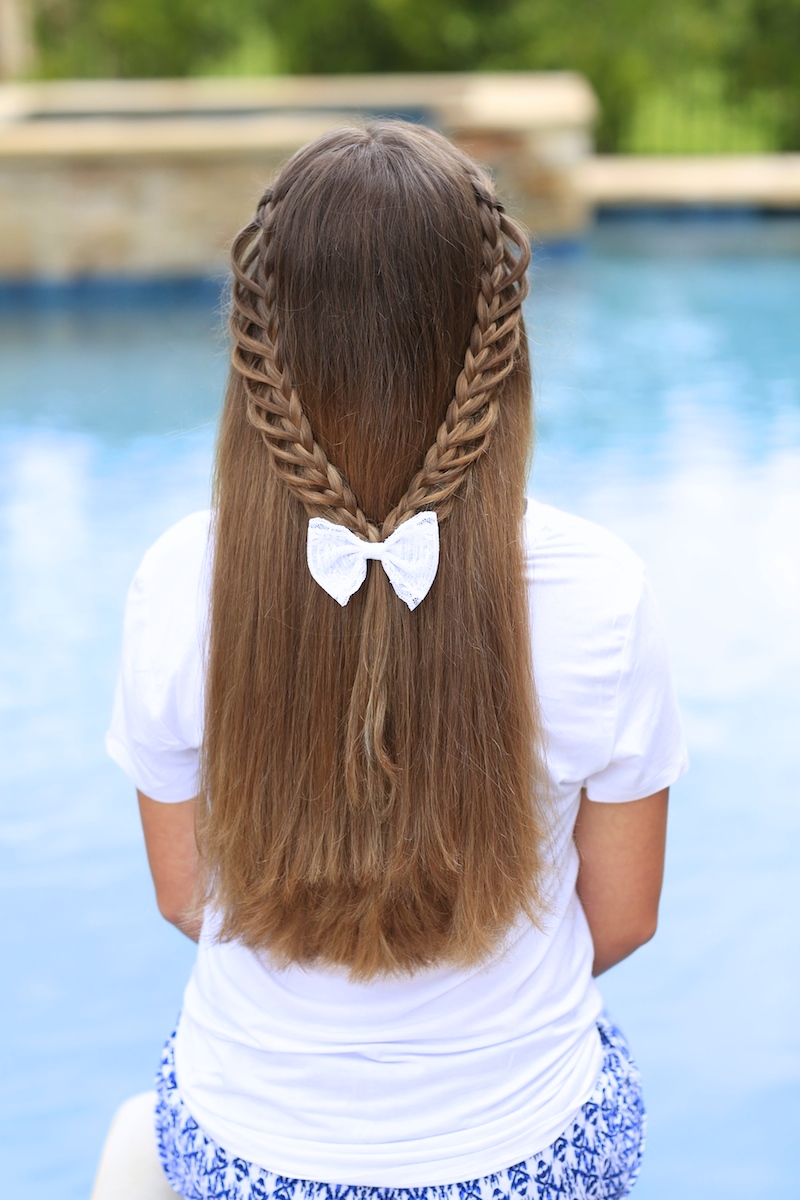
- After about 3-4 stitches, go back and gently tug on the feathered elbows so that they pop out from the braid, creating the integral “looping” in the braid {if you braid all the way down first, it will become much harder to pull the loops out}…
- Continue Steps #3-9 until you near the end of the hair, or have created a long enough braid to reach the back of the head {the desired length of the braidback is entirely up to you}…
- When you near the end of the braid, stop dropping new feathered strands and simply add in the last two previously feathered strands {this gives a nice finishing point to the braid}…
- Repeat Steps #3-11 on the other side of the head.
- When both sides are braided, secure them together in the back of the head, adjusting the length to your liking…
- Add hairspray and accessory {if desired}.
Please feel free to leave a comment below letting us know what you think of this Half-Loop Braidback!
Happy Hairstyling!

My twins, BrooklynAndBailey, just returned from a summer trip to Utah and EFY Summer Camp. Feel free to click below and see their recap of the trip!


This is one of my favorite hairstyles you created. I wish it were more noticeable on my black hair.
Stunning! It has such a delicate, mature look.
i love this I can do this stuff on my daughters.
hi!! i have no idea and nextto no hope that you will read this, but might as well ask. i would love to feature this hair style in a wikihow article!! but i really need your permission first. also, i would love to use the pictures you have taken, because your daughters are just so beautiful. thanks again!! i love this site!!
saty awesome!!
Emily
p.s. if you would like to check out the website i’m taking about, please enter in your hot bar, http://www.wkikhow.com
thank you.
Hi Emily! Please proceed, just as long as you credit with a link to our website, that is fine! xoxo
EFY???? I saw this site just for hairstyles and happens to be a web site lds members and I’m from Chile (south america) XD. You are fantastic, keep showing beautiful hairstyles
Hi, I loved this half loop braidback hairstyle. It is very beautiful to look. The pictures are very good. Thank you and i hope u will give many more hairstyles.
I want to learn to do beaded on my long hair and other styles of Braden’s too
I don’t know if you will ever read this far down but I need to ask you something.I have a blog and I am wondering if I can mention this web site in it and say that it has all the best hair styles and secrets? Thanks bye!
Hi,
I don’t know if you will ever read this far down but I need to ask you something.I have a blog and I am wondering if I can mention this web site in it and say that it has all the best hair styles and secrets? Thanks bye!
Great post but,I don’t know about putting a pencil in my hair though LOL
Wtf
Defintely going to be trying these out! Have a look at some more great ways to bring style to school through this season’s hair trends http://issaandblake.com/2014/08/10/updating-your-ponytail/
wow thats amazing i wish i was pretty like them
dear Mindy,
my family recently lost a sibling. I am so sad. I don’t know what to do. can you help me?
Thank you.
i love it 🙂
This is Beautiful Braidback Hairstyle and Perfectly ok for every girls who is going for Schools
OK. Since you are the hairstylist queen, I come to you when I want to do every and any hairstyle. But……. I came to for the tris bun on divergent… And you didn’t have it… So I searched Pinterest…. And there was only 1 thing that was ridiculous….so I finally tried google…. AND THERE WAS NOTHING. So could you be a doll and do it for me? I know if anyone could do it right you could. 😉
Hi, im brazilian and i love your tutorials.
Can you learn how we can do the btaid that Kate Bosworth use at July 16 in LA ?
Its an elegant braided updo.
Thanks