We are gaining quite the extensive list of Valentine’s Day Hairstyles, with some from as far back as 2009. Feel free to click the link to view them all!
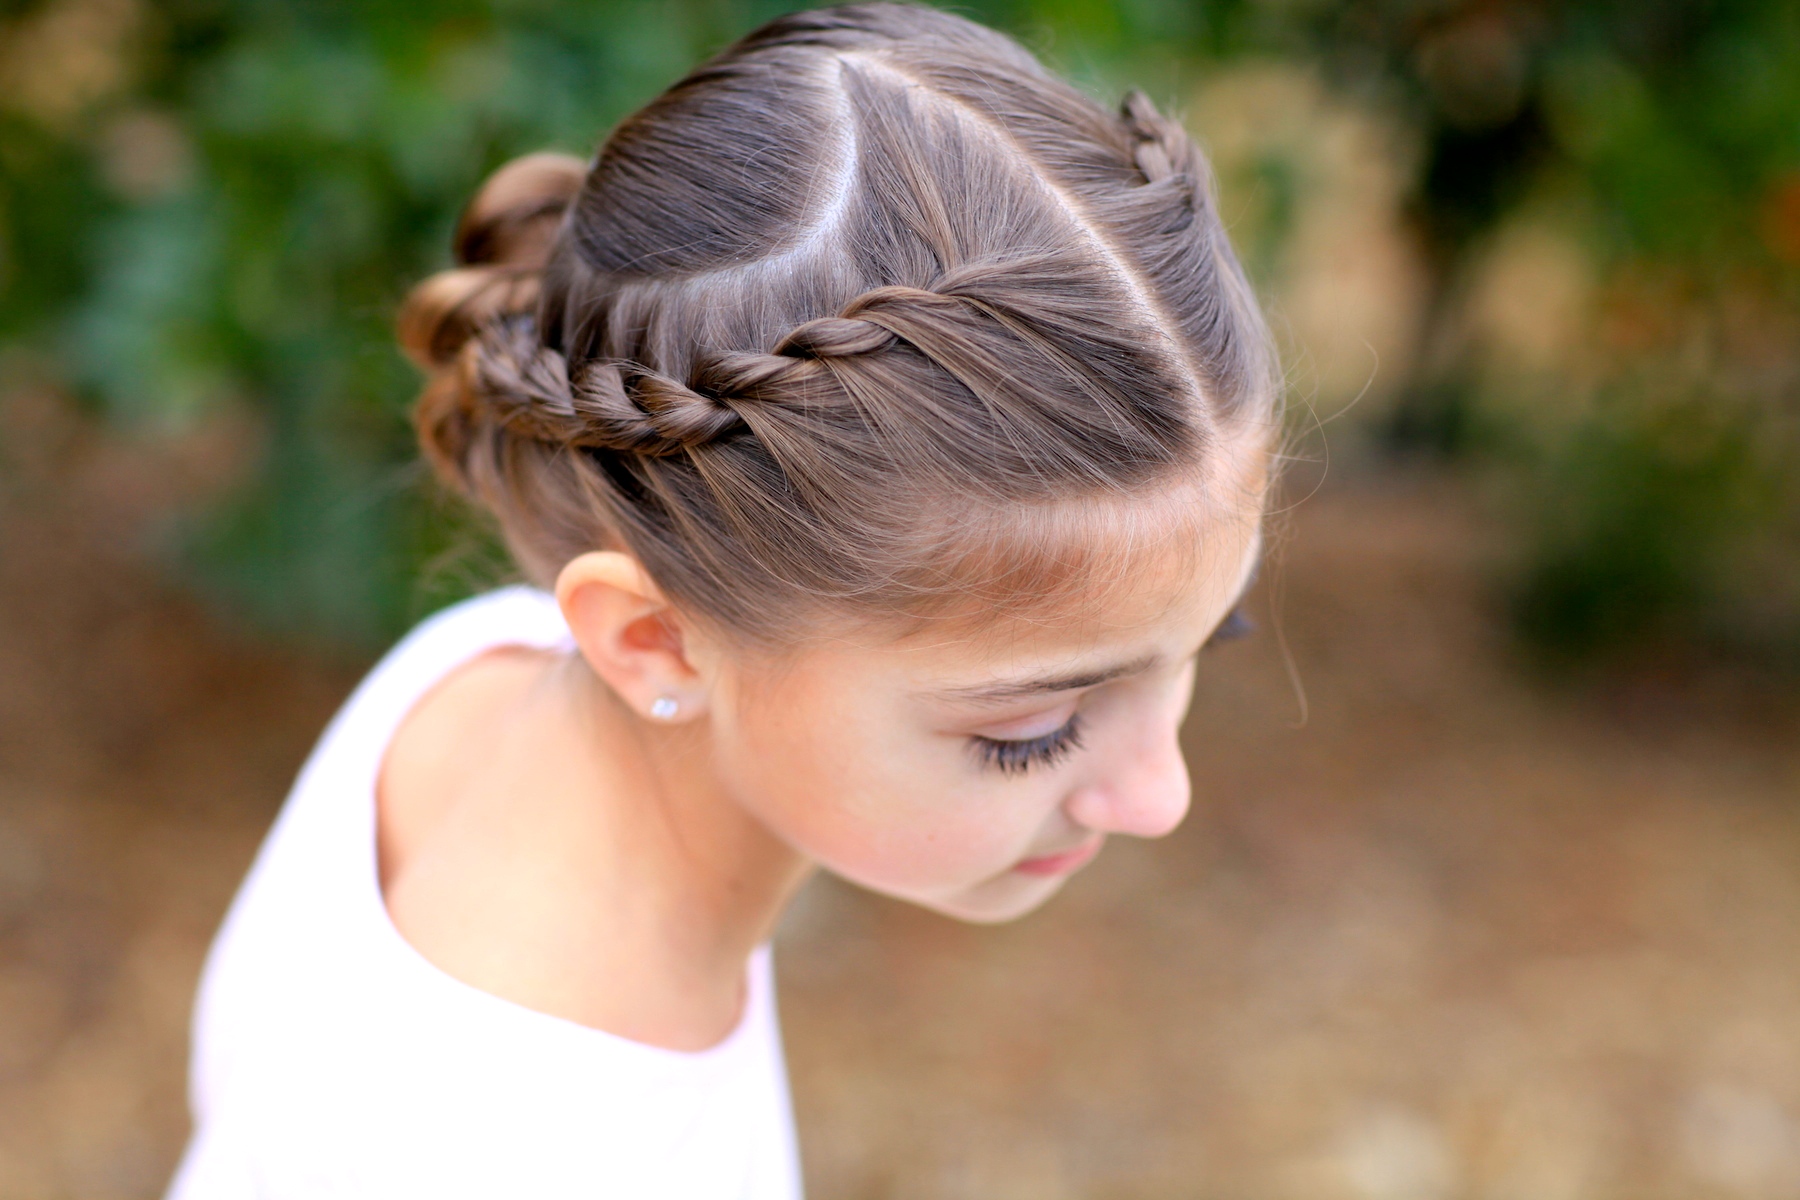
Today we are going to teach you how to create a Rope-Braided Heart updo. This tutorial uses aspects from a few of our past Valentine’s Day tutorials, and combines them with a rope braid to bring you this beautiful updo.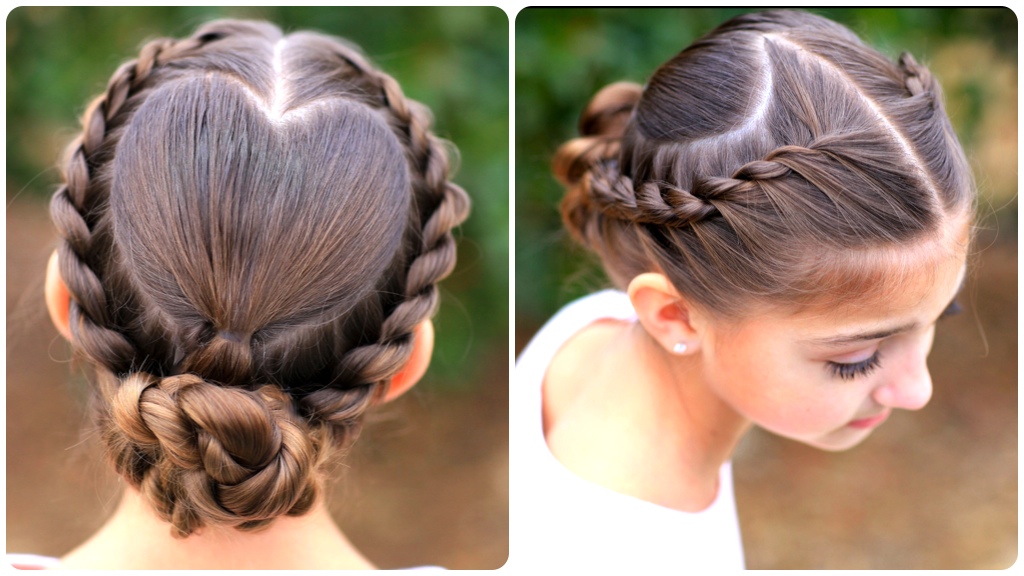 Be sure to tag your own photos of this hairstyle with: #CGHRopeTwistedHeart
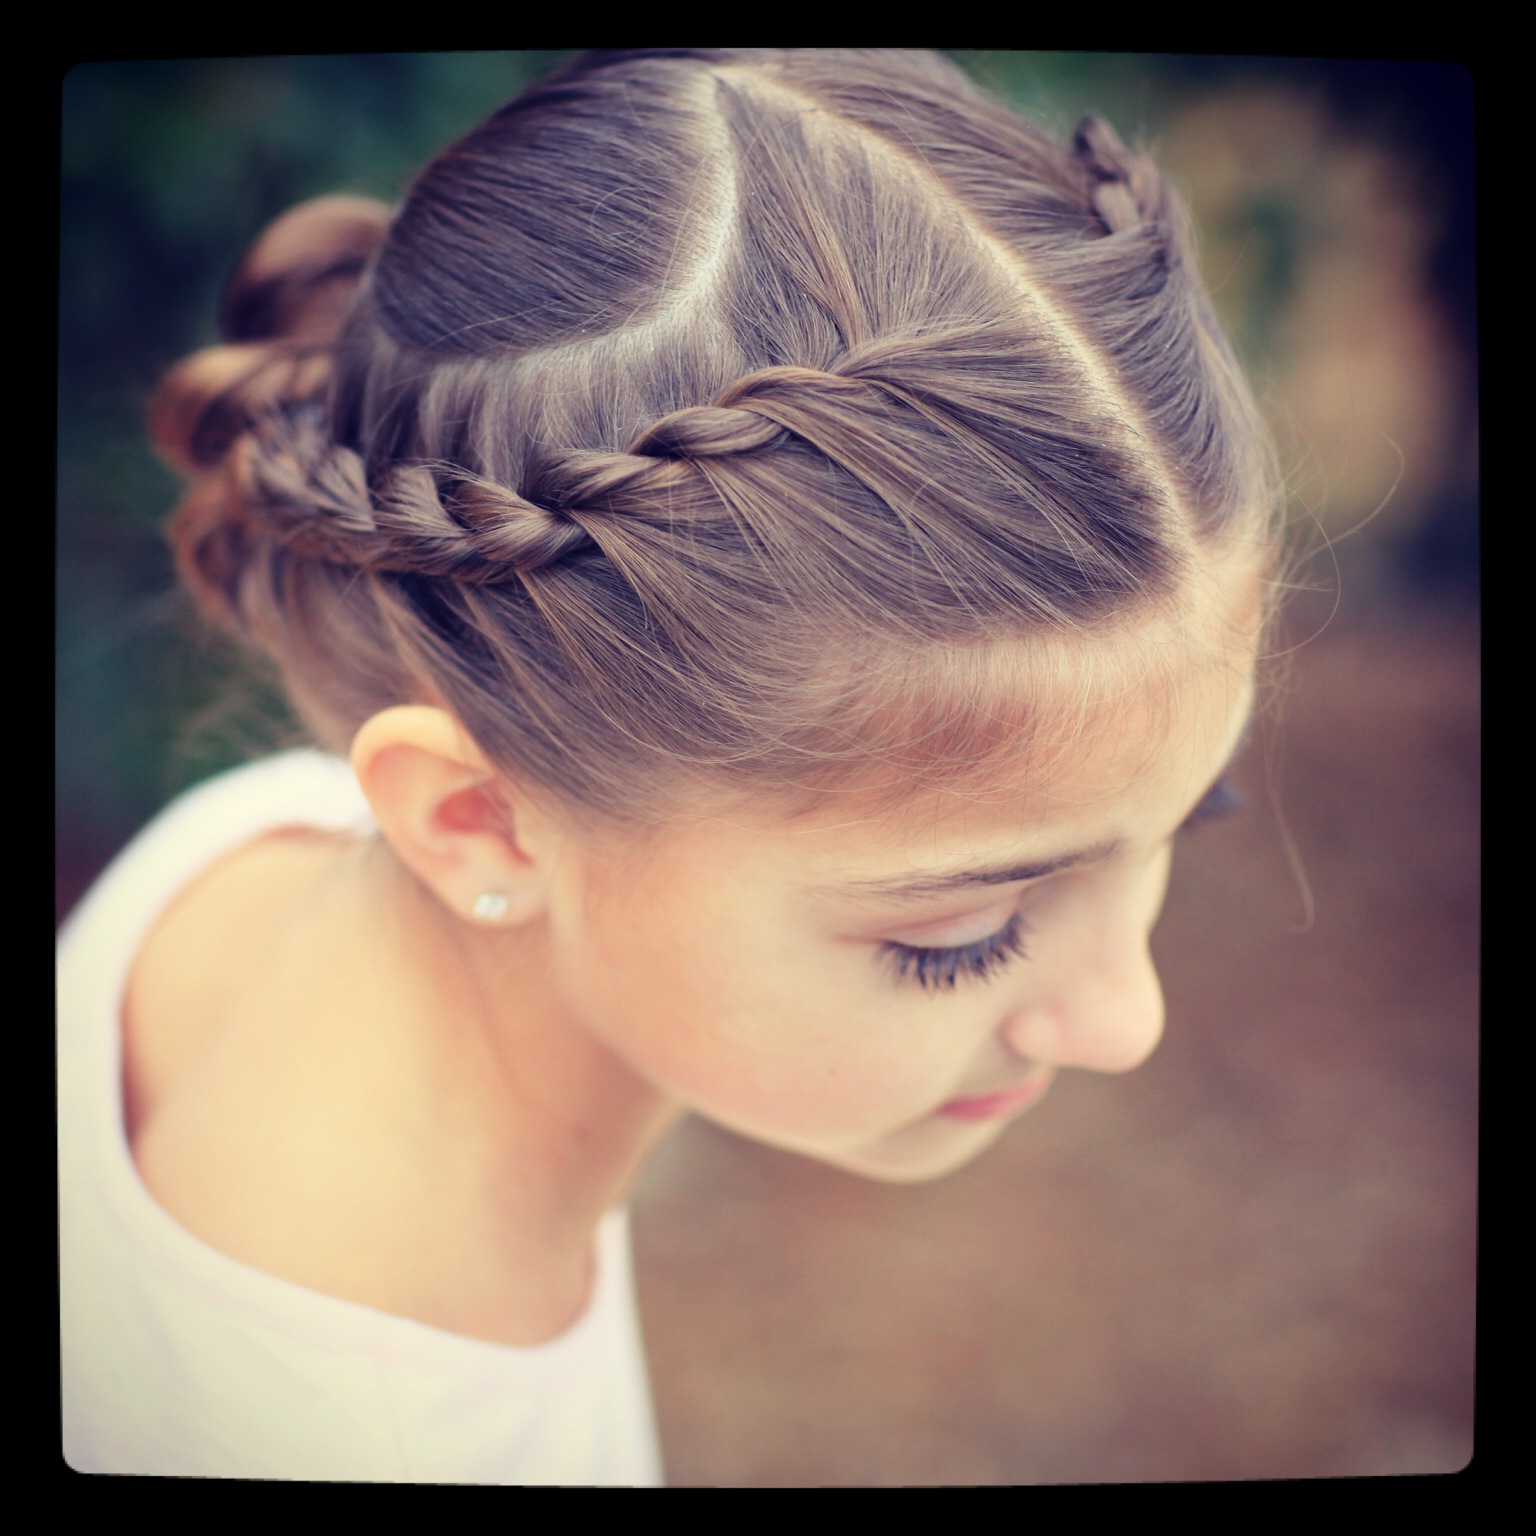
We chose a rope braid specifically because of how perfectly it accents and frames the parted heart ponytail, without overpowering it.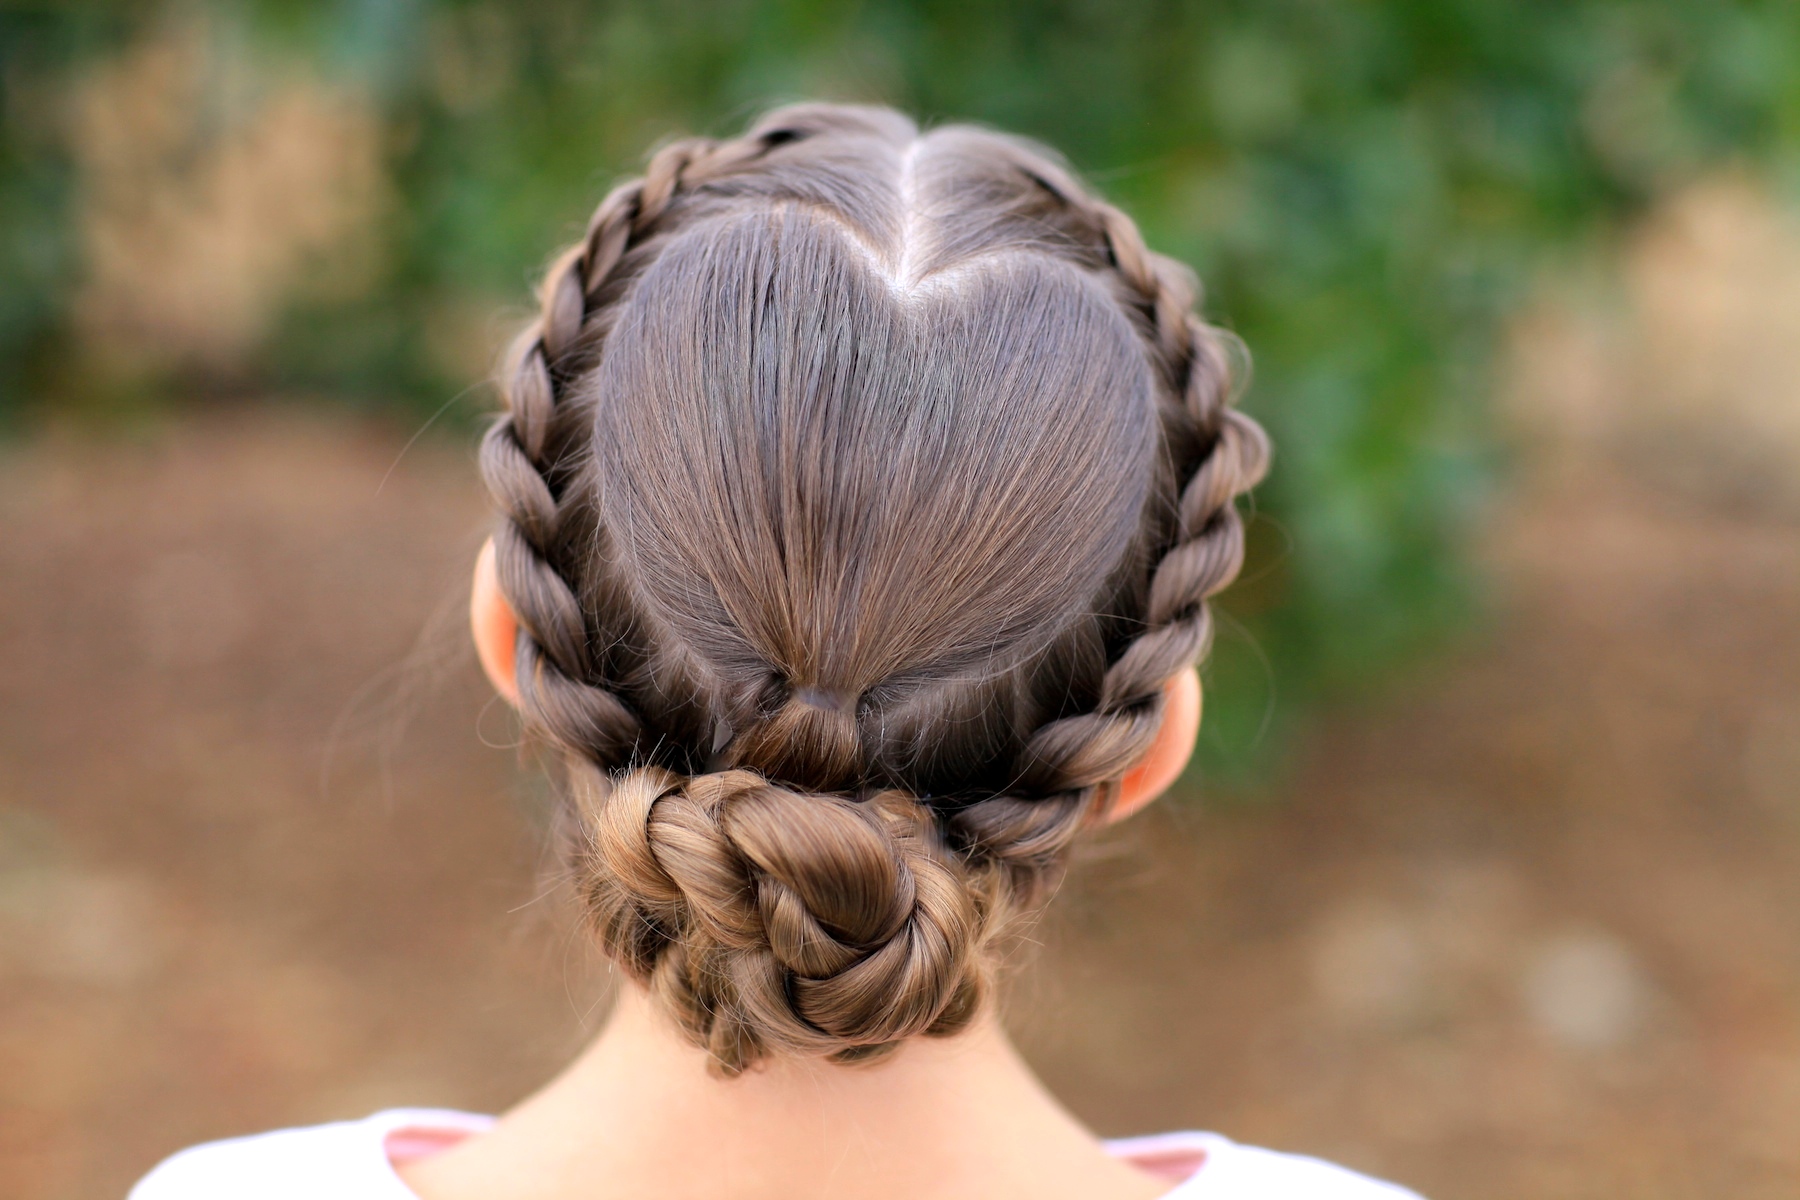
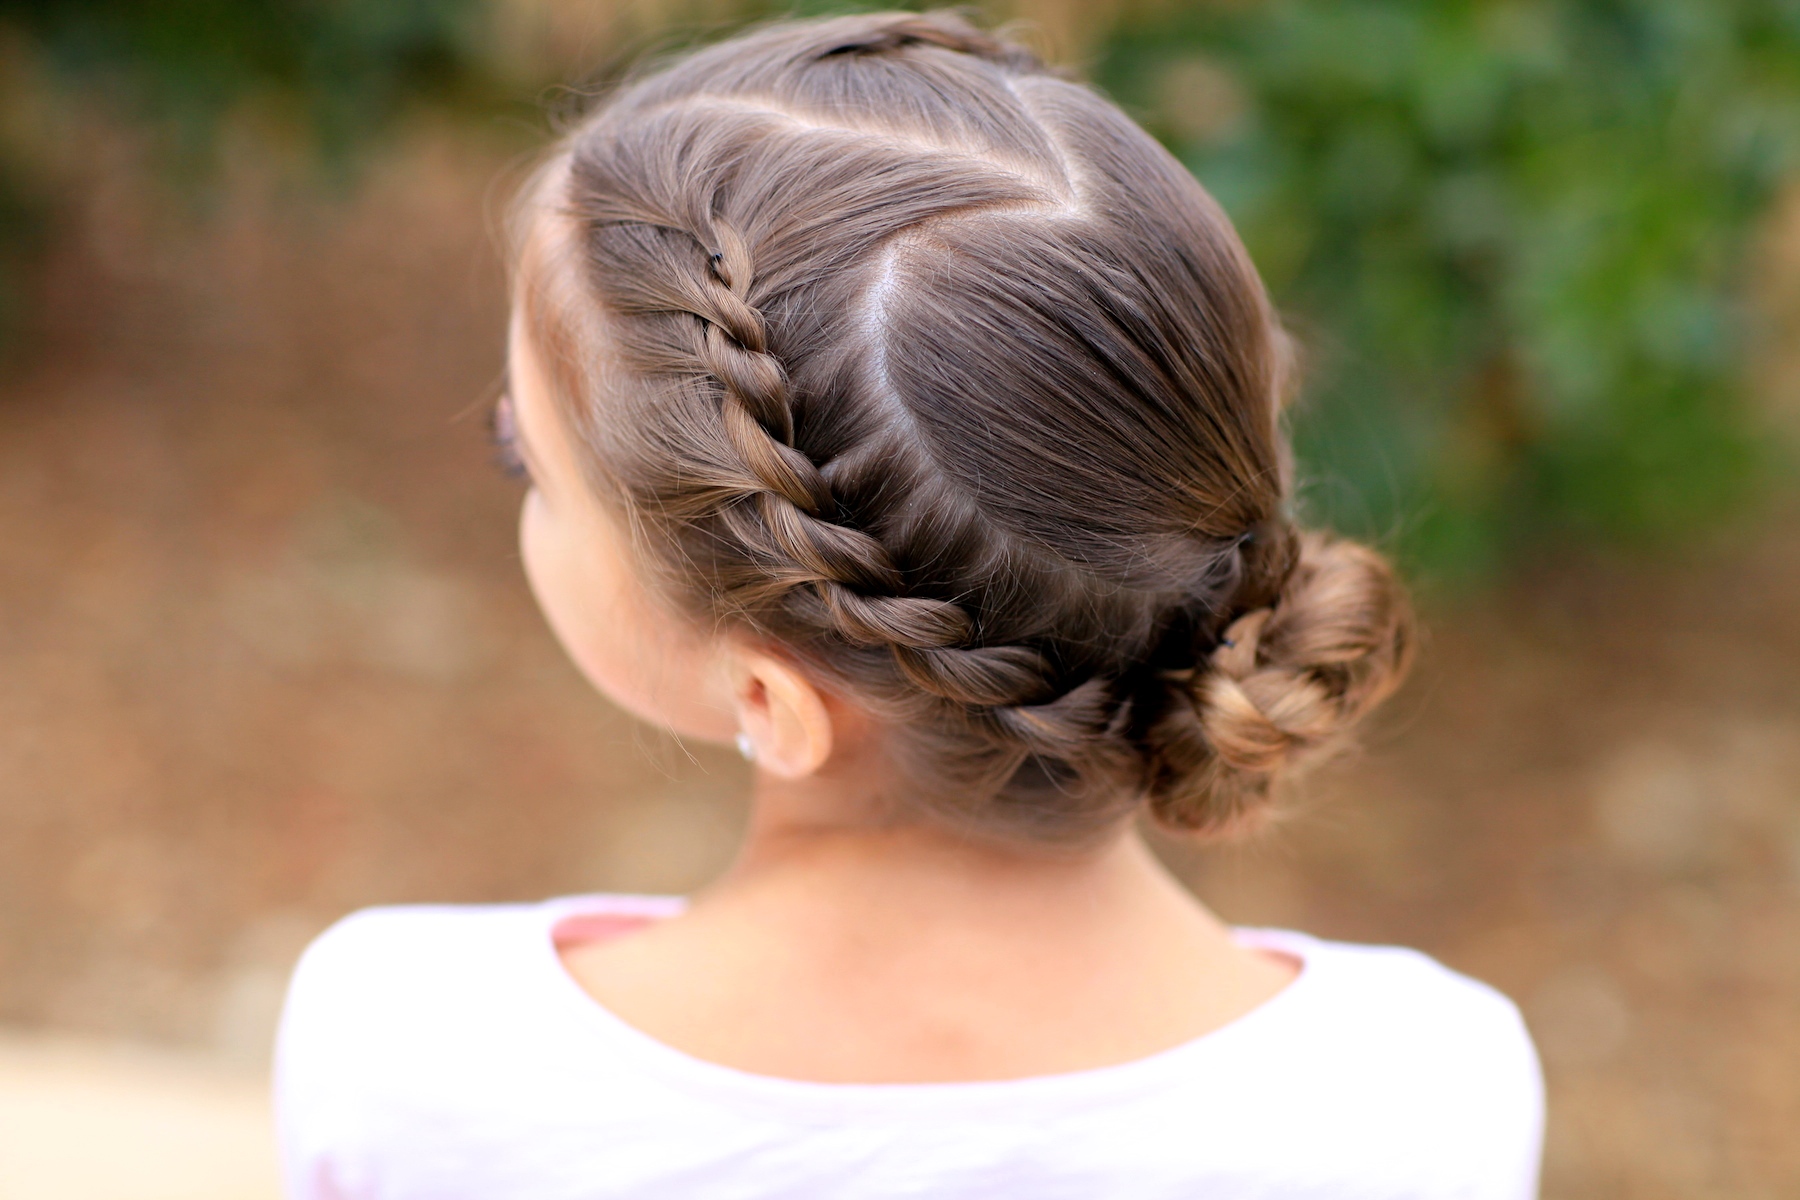
 To finish off the elegant Valentine’s Day updo, we decided to add a cute rope-twisted bun at the base of the heart and at the nape of the neck.
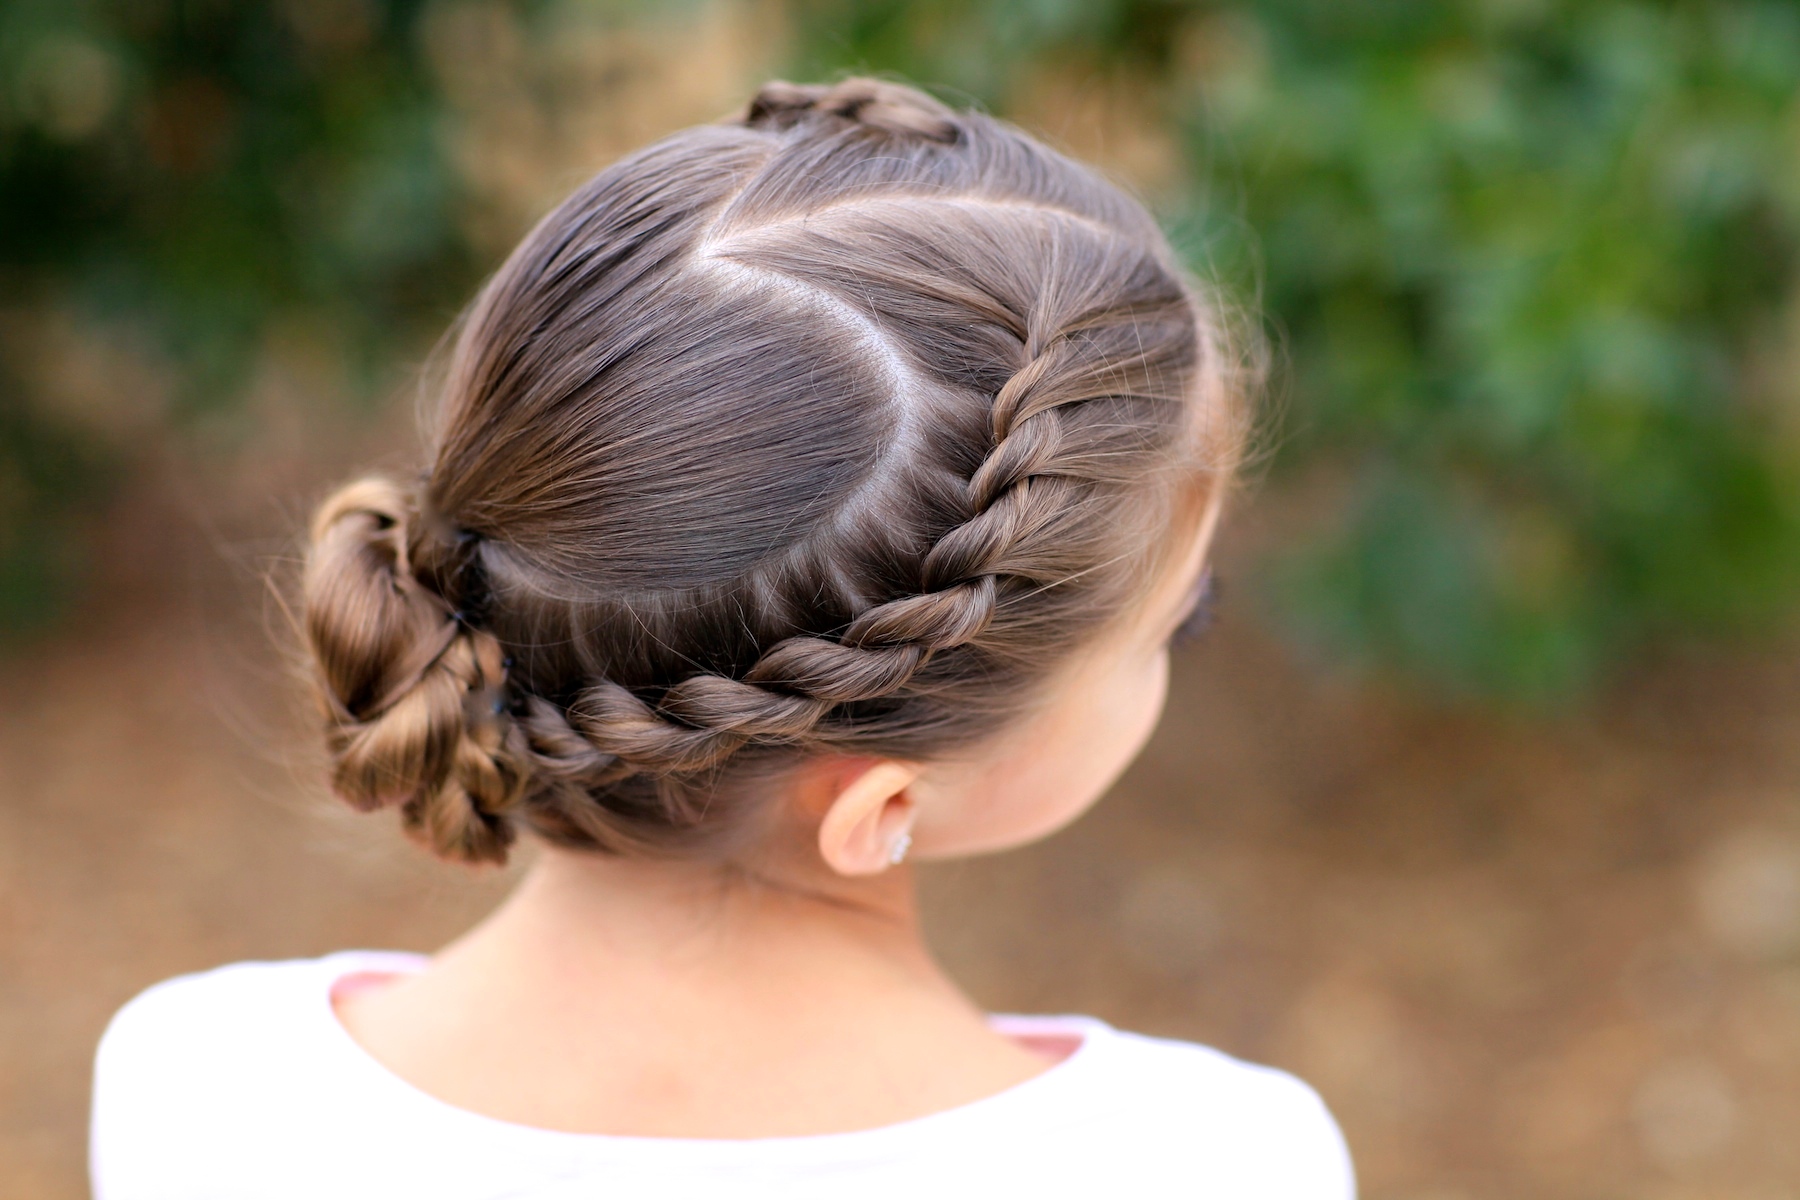
 Clearly we were going more for an older look with this updo, especially for those who do not feel comfortable wearing LuvPiggies this week! Brooklyn and Bailey love this one!
I can’t even begin to tell you how much attention this hairstyle garnered as we wore it around this past week! I promise you will love this one!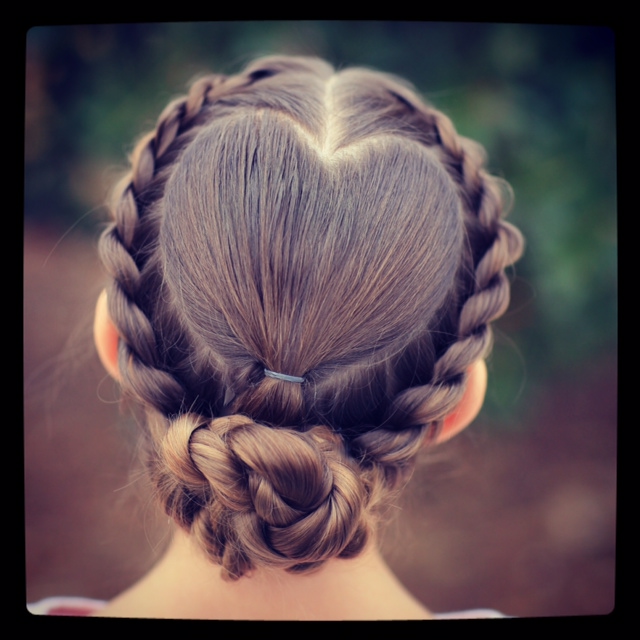
 Enjoy!
Items Needed: Brush, rat-tail comb, spray bottle, 3 small hair elastics, hairspray and accessory {if desired}.
Time Requirement: 8-10 minutes
Skill Level: Medium
Step-by-Step Instructions:
- Begin by parting the hair straight down the middle of the head…
- Next, starting on the top/back of the head, begin parting a half heart using the rat-tail comb end and using straight line as a middle of the heart…
- Now part the second half of the heart on the other side of the part line…
- Tightly gather all hair from the heart part, secure it with an elastic near the bottom at the point of the heart, and leave alone for now…
- Now, take all remaining ungathered hair on the left side of the part line and secure it out of the way…
- On the right side, beginning at the top of the head near the inner eye, begin a rope twist and continue this twist along the hairline, near the ear, around the head and down to the nape of the neck…
- To do this, you create a rope twist by taking only two strands, twisting both sections in the same direction {either direction is fine as long as both strands are the same}…
- Then take those two strands and twist them around each other in the OPPOSITE direction than the one the individual strands were twisted…
- Now add in hair into both strands, twist them both in the same direction, and then twist the two strands over each other in the opposite direction {continue until you run out of hair to add into the twist}…
- Secure with an elastic.
- Repeat Steps 6-10 on the left side of the head.
- Lastly, take both rope braid ends, and create another rope twist with them
- Then wrap the rope braid up around itself into a bun at the base of the heart, and secure with bobby pins..
- Add hairspray or accessory {as desired}.
Please feel free to leave me a comment below letting us know what you think of this Rope-Braided Heart updo! As always, if you loved this hairstyle, please feel free to share it!
Happy Valentine’s Day!

Be sure to check out Bailey’s new tutorial for “Simple Valentine’s Day Makeup” on her BrooklyAndBailey YouTube channel. Simply click below to watch…


hhhhhhhhhhhhhhhhhhhhhhhhhhhhhhhhhhhhhhhhhhhhhhhhhhhhhh
Is this hard? I have a play coming up and as wondering how easy it is…
OMG! I love the vidio about the Rope Twisted Heart! Its my favorite
Brooklyn you lokking so pretty……………
Awesome gift for girl this is best post for romantic girls
Hi mindy I love all your videos and I keep watching all Brooklyn and baileys vids too. I love them all and I can’t wait for more. I don’t know how you do the hairstyles and you make so easy, but you are so great at them no matter how hard they are. ” enjoy hair doing mindy.”
It was better if the hair elastic had other color ( black , or invisible color)
Thank you , and please post more videos ….
OMg this hairstyle is SOOO awesome!!!!! my hair is too short for it and for lots of cool hairstyles actually, so im growing it out!!! 😀 this hairstyle is so cute i’d wear it everyday!!!!!!!!!!!!!!
and i LOVE Bailey’s makeup tutorial!!! im still only 13 so i might do something even simpler but next year i’ll definitely try that!!! actually next year maybe ill do this hairstyle AND the makeup in Bailey’s tutorial!!!
Hi Mindy:) just LOVED this hairstyle soo much!! Did it on my 6yr old little girl this morning for Valentines Day today ( in Australia) and WOW WOW the compliments have been mind BLOWINGLY nice.
Thanks so much for all you do:)
MINDY, YOU NEED TO GET RID OF THAT AUTOMATIC VIDEO PLAY WHEN YOU FIRST OPEN THE WEBSITE. IT IS VERY ANNOYING AND NEEDS TO GO. I’M SORRY, I JUST DO NOT APRECIATE IT.
simplemente divino yo los copio y se los hago mi hija gracias por esas ideas
Helo Mam 🙂 …You are superb ..i was trying to do rope braid from a long time but was stuck with i was not able to make it up …it used to look like front twist braid …but this video helped me alot ..Thank sooo soo soo much ….i admire you alot …i m a 16 yr girl ..i m watching your videos from years i love them all …the way u teach nd ur innvation nd creativity is awesome …u hv such a lovely nd supportive family ..stay blessed …may all ur dreams come true ..u go high nd high nd touch skies …loads of luv to u nd ur lovely daughters …hats off to u 🙂 ^_^