Hello there beautiful friends! 🙂 Since we’re approaching Halloween soon, I thought I’d do a tutorial on how to do vintage glamorous waves on yourself. It’s a very elegant look, inspired by Hollywood icons from the 40’s and 50’s. You can not only dress up as your favorite Hollywood star, but this style will fit great with many other types of looks and costumes. Are you ready to get started?
DIY Vintage Waves using a curling wand
You’ll need a curling wand or iron of your choice. The key to achieving this uniform wave look is to curl all of the hair in one direction. That is the opposite of what we would do for a modern look (alternating direction and separating the curls in a messy manner). You’ll want to adjust the size of the wand to your hair thickness and hair length. These curls, even though they might appear tight in the beginning, loosen up significantly after you brush them out, so I would recommend going for a smaller size wand. Especially if your hair is longer and weighs more.
Step-By-Step Instructions:
- Start by separating a rectangular shaped section on the top of your head. Separate the side sections from the top of your head, down to your ears.
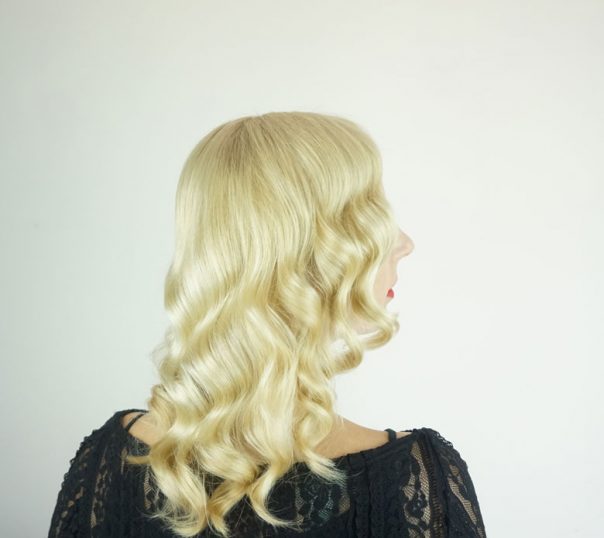
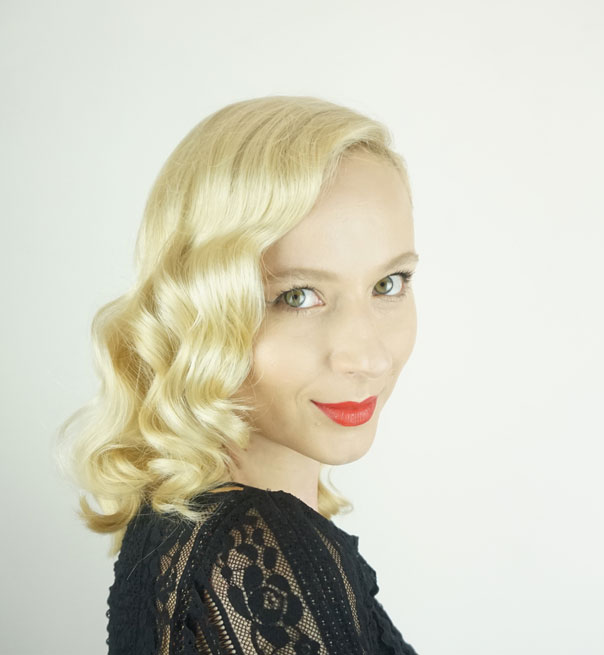
- This style requires a deep side part. Determine which side you’ll part your hair to – that will determine which way you’ll curl your hair. (If you want to do a part on the left side, that means your right side will be the heavier side.) On the heavier side you’ll curl your hair in the direction towards your face. To the contrary, on you lighter side you’ll curl the hair in the direction away from your face. In the back you’ll also curl all of the sections towards your face on the heavier side.
- Separate the hair in the back into smaller, horizontal sections (about an inch wide). Now divide again into smaller, manageable sections (adjust the size to your hair thickness and the size of the wand). Wrap the hair flat around the wand in the direction you’ve determined. The wand should always be pointing downwards. Start at the bottom and continue all the way up until you’ve curled the entire back section. Use some hairspray to set it.
- Do the exact same thing to the side sections. Wrap the hair flat against the iron and be mindful of the direction (one side curled away from the face and the other, towards the face).
- Last, you’ll move on to the top section. A good tip here is to hold the wand horizontally, with the tip pointing to your heavier side. That means that if you have a heavier right side, you’ll hold the wand horizontally in your left hand with the tip pointing to the right. You’ll wrap the hair with your right hand in the direction to the front (towards the face).
- After the curls have cooled down, use a paddle brush or a bristle brush to brush all of the hair out thoroughly to form a more unified wave pattern.
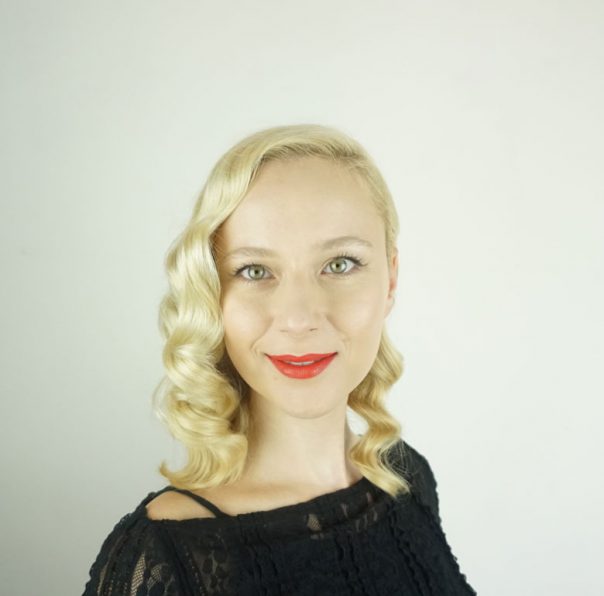
- On the heavier side you can use small clips to help enhance the waves into more of a retro finger wave look. To make sure you don’t make an indentation in the hair, fold a piece of toilet paper and place it between the clip and the hair.
- On the lighter side the hair will swoop to the back and you can place it behind your ear to enhance that effect. Finish by setting everything with hairspray.
Now just do your makeup, put on your costume and you’re all set for the night! 😉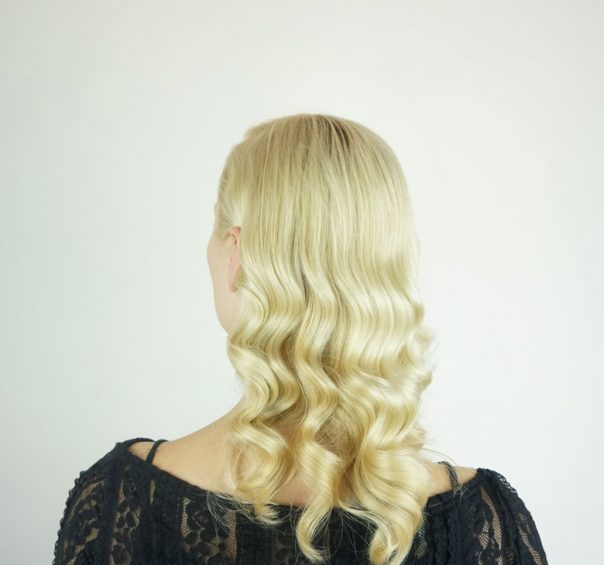
 Be sure to visit Hairs Affairs for more great hair inspiration, tutorials and tips.

