For this hairstyle tutorial, we will be showing you how to create a Dutch Starburst Braid. This is a variation of a braid that has been around for awhile. In fact, in March 2013 we showed you how to do a French Starburst Braid with a very similar look.
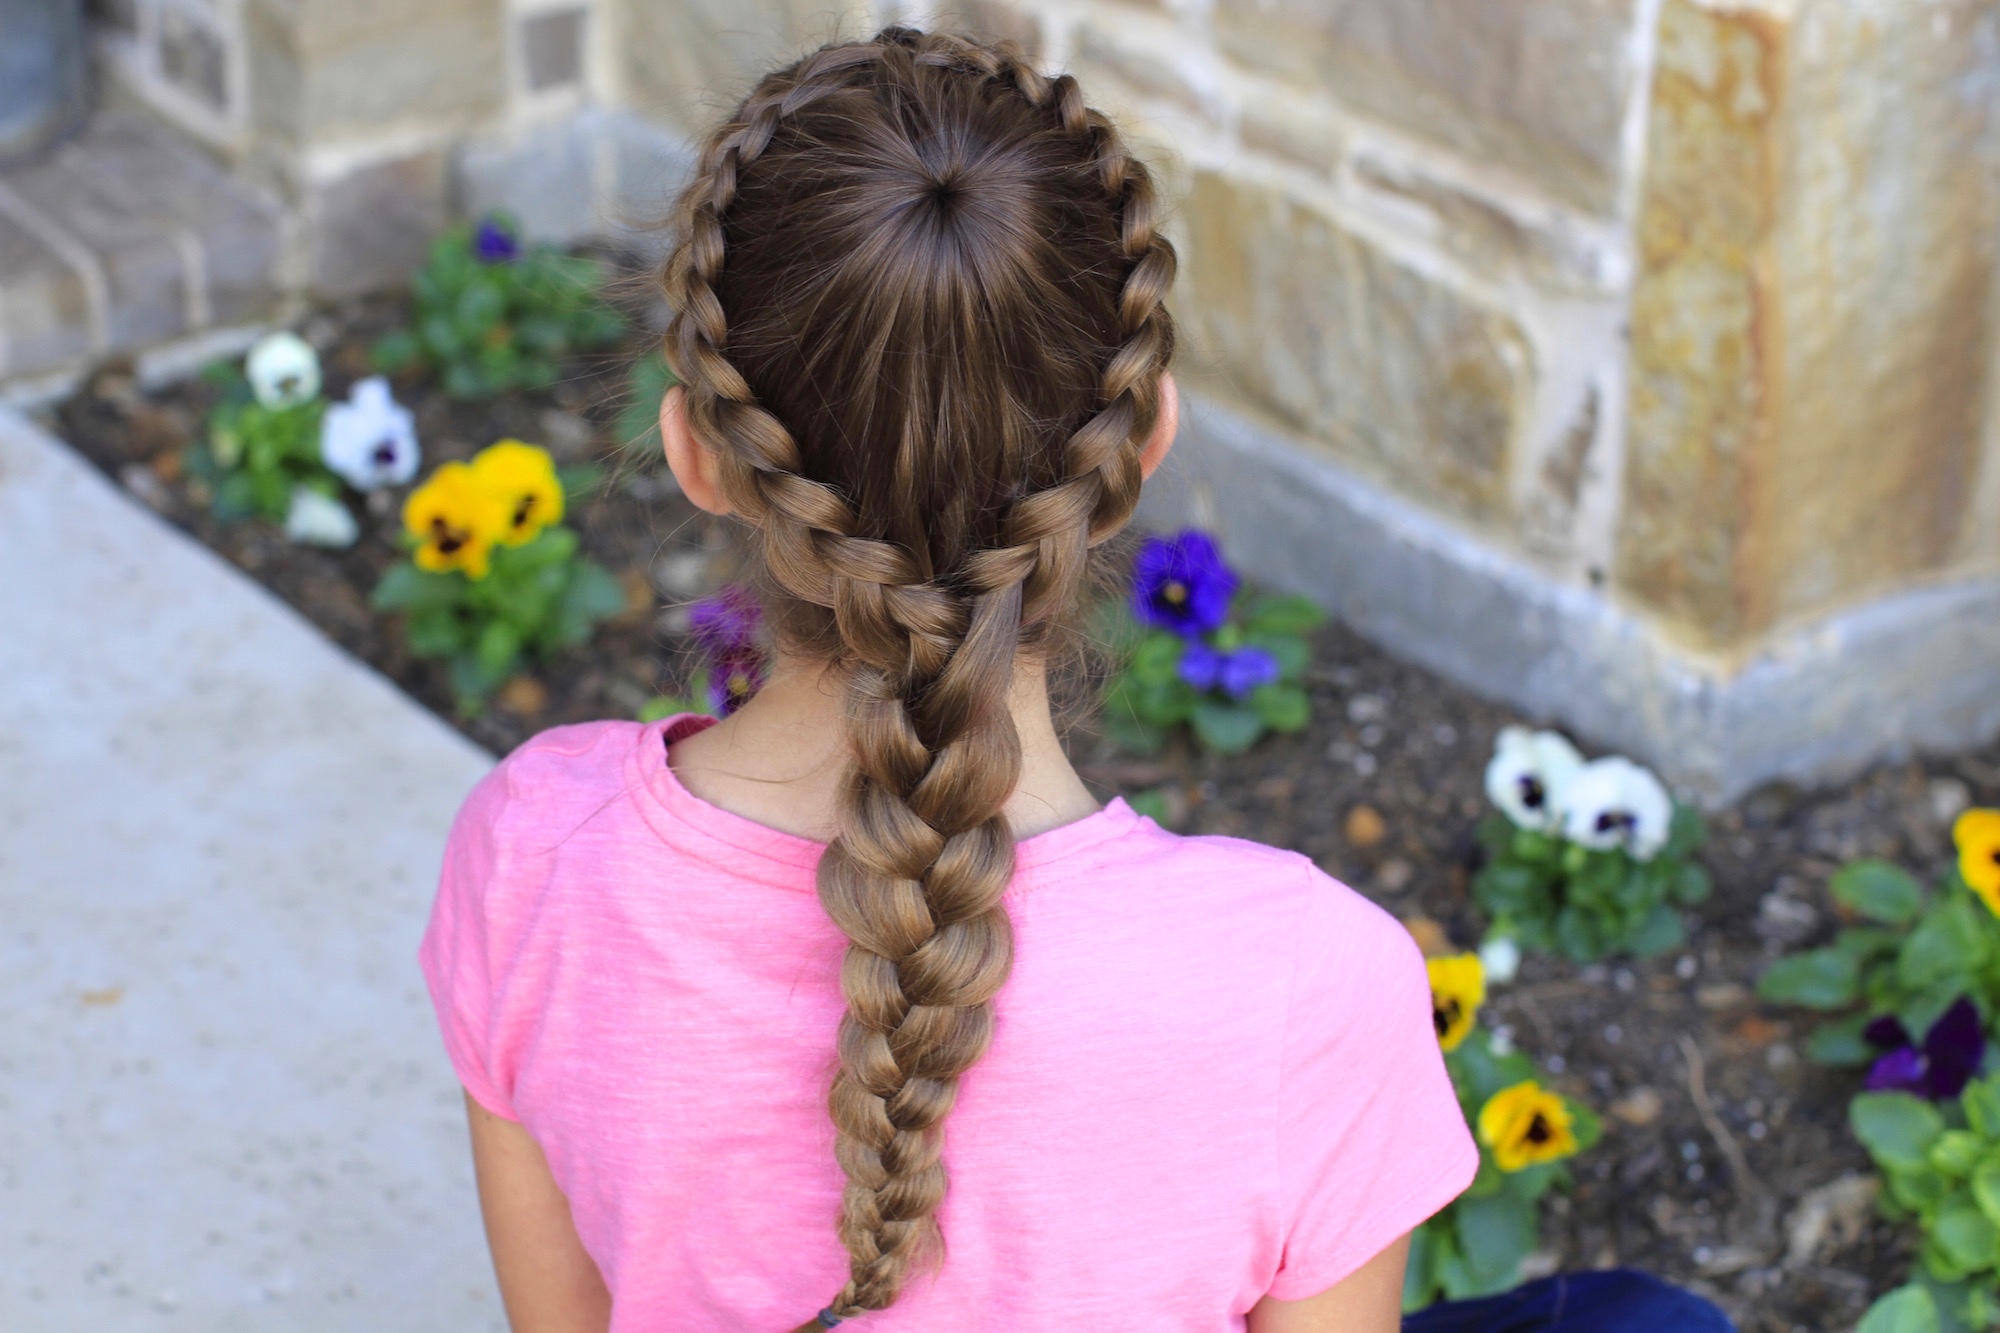
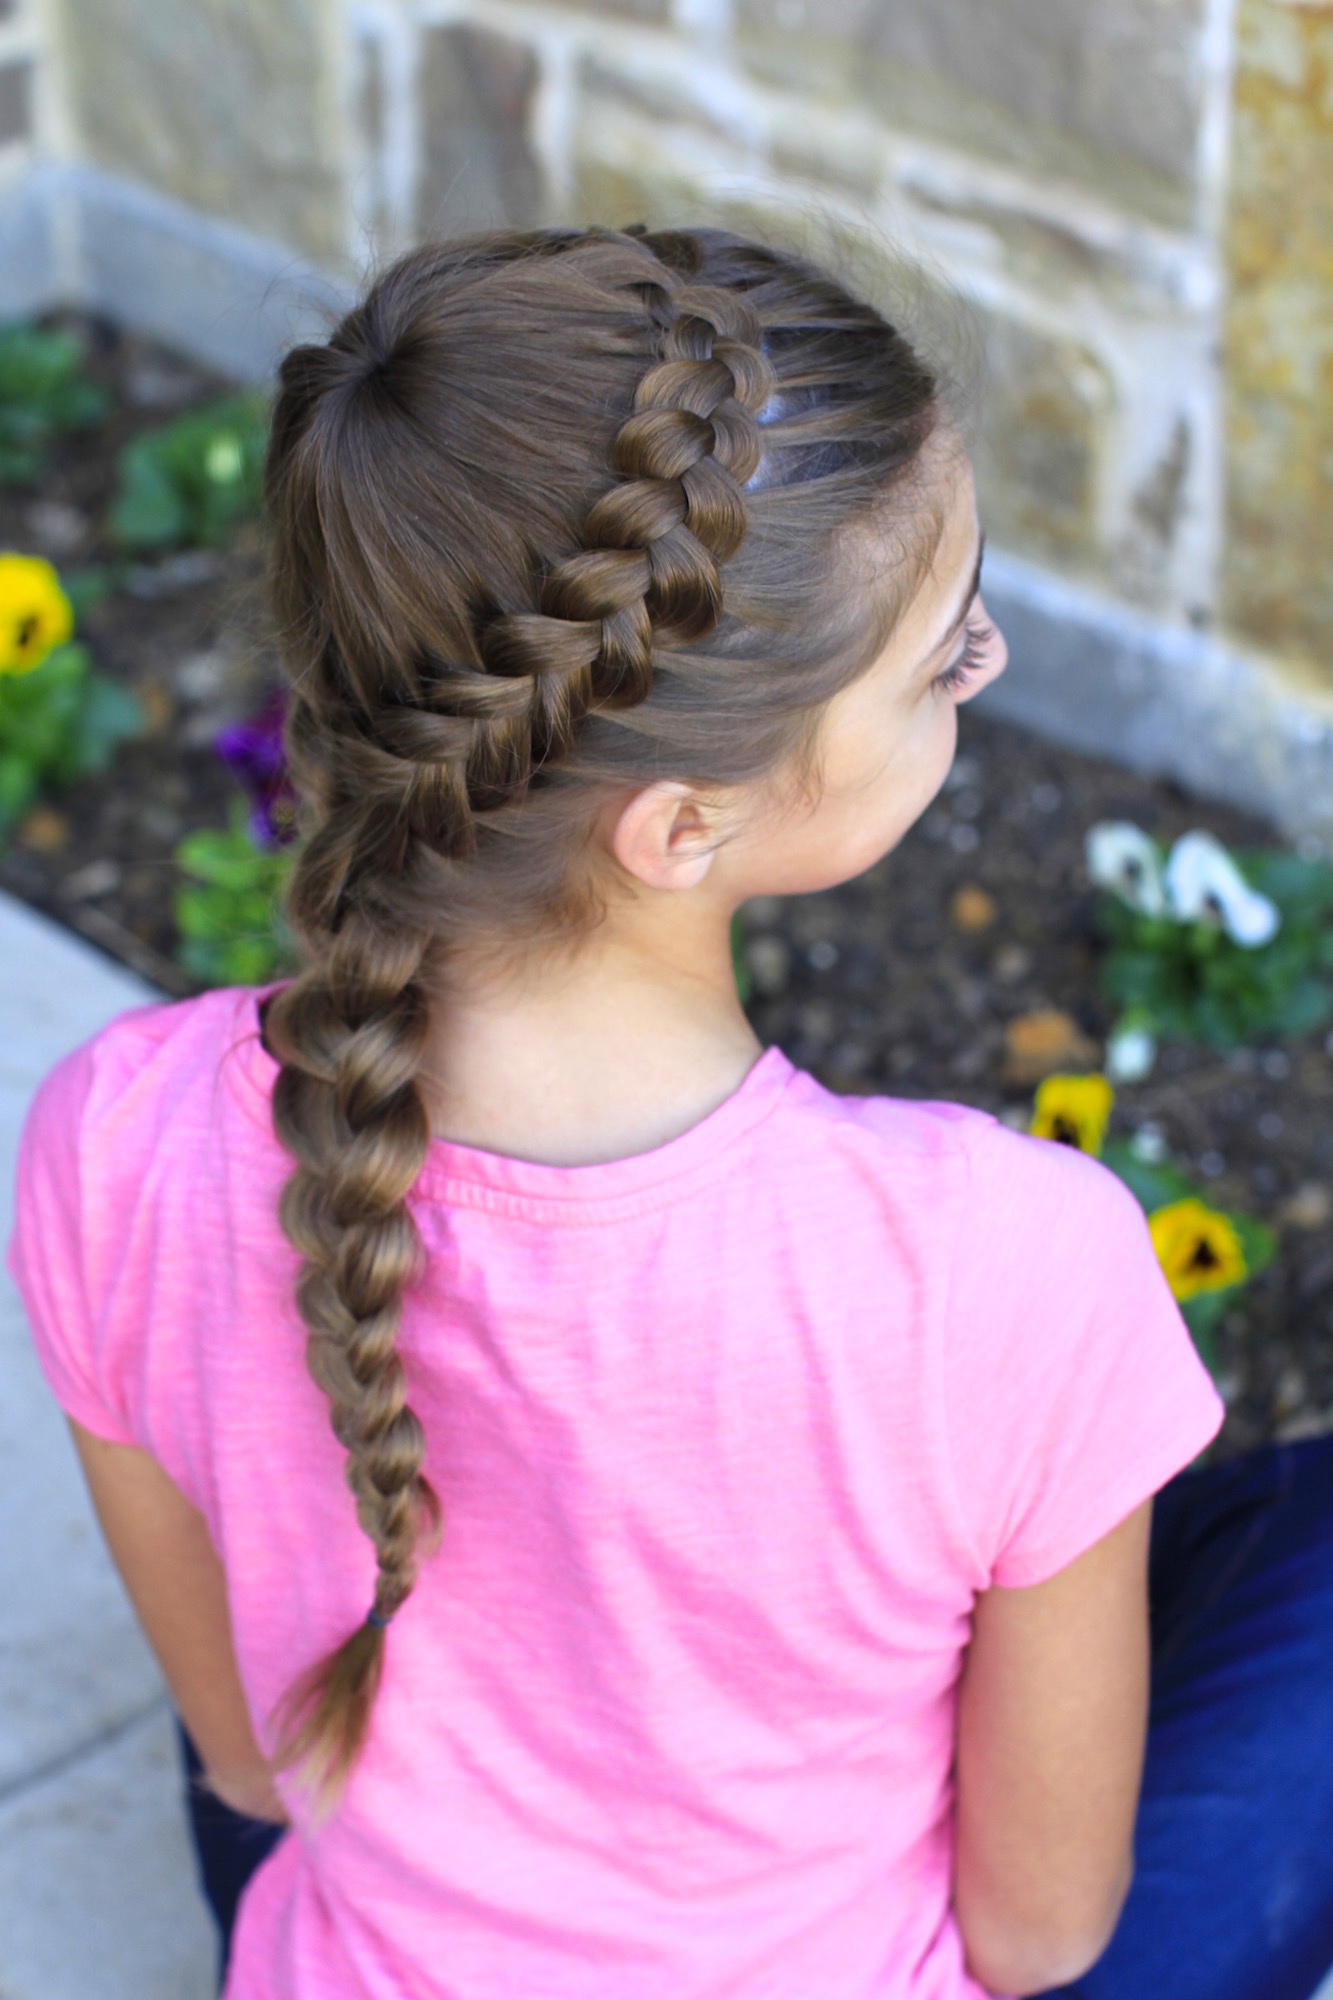
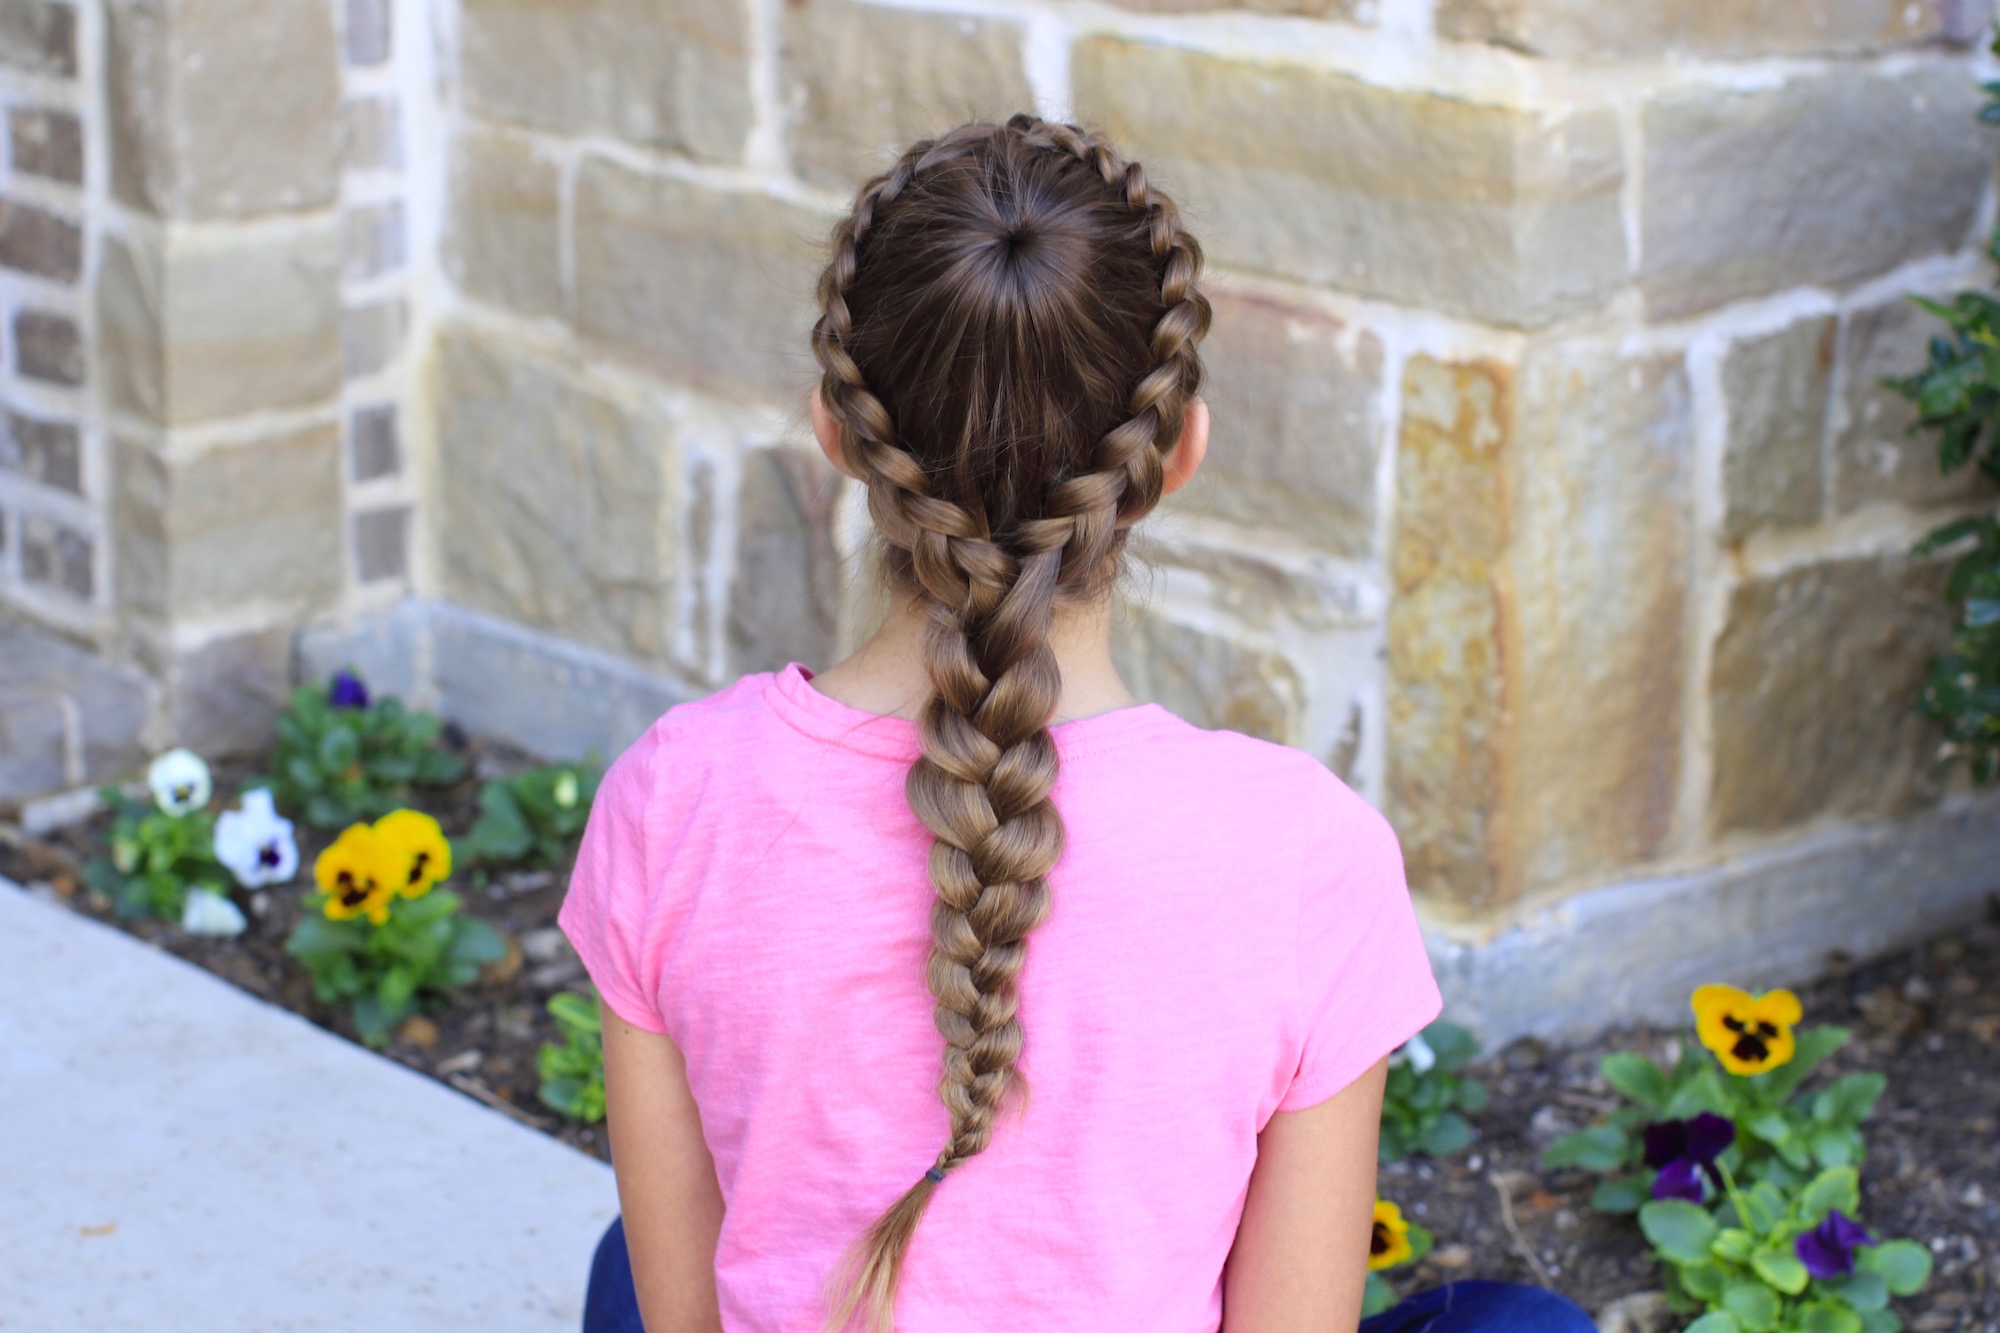 We opted for Dutch Braids just to give the starburst a little more pop. Getting the two braids to look like they connect in front can be often difficult. Don’t worry, if you watch how I start the second braid, I will show you a stitching trick to help combine the two braids seamlessly.
 To see your own photo recreations of this style featured in our app, feel free to tag your photos on IG with: #CGHDutchStarburstBraid
Kamri was my model today, and she wore this braid during her soccer game and it held up very well.
Items Needed: Brush, rat-tail comb, spray bottle, 1 ponytail holder, 1 small hair elastic, hairspray {if desired}.
Time Requirement: 5-7 minutes
Skill Level: Medium
Video Tutorial:
Step-by-Step Instructions:
- Begin with the hair slightly parted off to one side, then part out a circle around the crown of the head {about 1 inch from the hairline}, and secure with a ponytail holder…
- Evenly spread the hair from the ponytail over the elastic so that it lays evenly all around the head…
- Now, go back to your offset part and pick up two small sections of hair from the ponytail, and then one section from the bang hair, outside ponytail {these effectively become your 3 strands for the Dutch braid}…
- Now begin a regular Dutch braid by adding in ponytail hair to the top strand, and base hair into the bottom strand for each stitch…
- Work your way back around the crown of the head until you reach the rear center, then temporarily finish off that hair into a regular 3-strand braid with a hair elastic.
- Go back to the initial front part line, and begin the same Dutch braid on the opposite side of the head, but take your top strand and thread it through the first stitch of your first Dutch braid {this helps anchor the braid and helps give a seamless stitch…
- Repeat Steps #4-5 on the this opposite side…
- Now with both temporary 3-strand braids in your hand, pull off the elastics and combine them by making either a fishtail or a regular 3-strand braid…
- Secure with a hair elastic, and add hairspray {if desired}.
If you loved this braid, please leave a comment below telling us what hairstyle you would like to see next!
Happy Hairstyling!
See Brooklyn and Bailey‘s Fall 2015 Favorites, including some surprising gift ideas by clicking below!


Ugh I wish crown braids would suit me.
Cool!