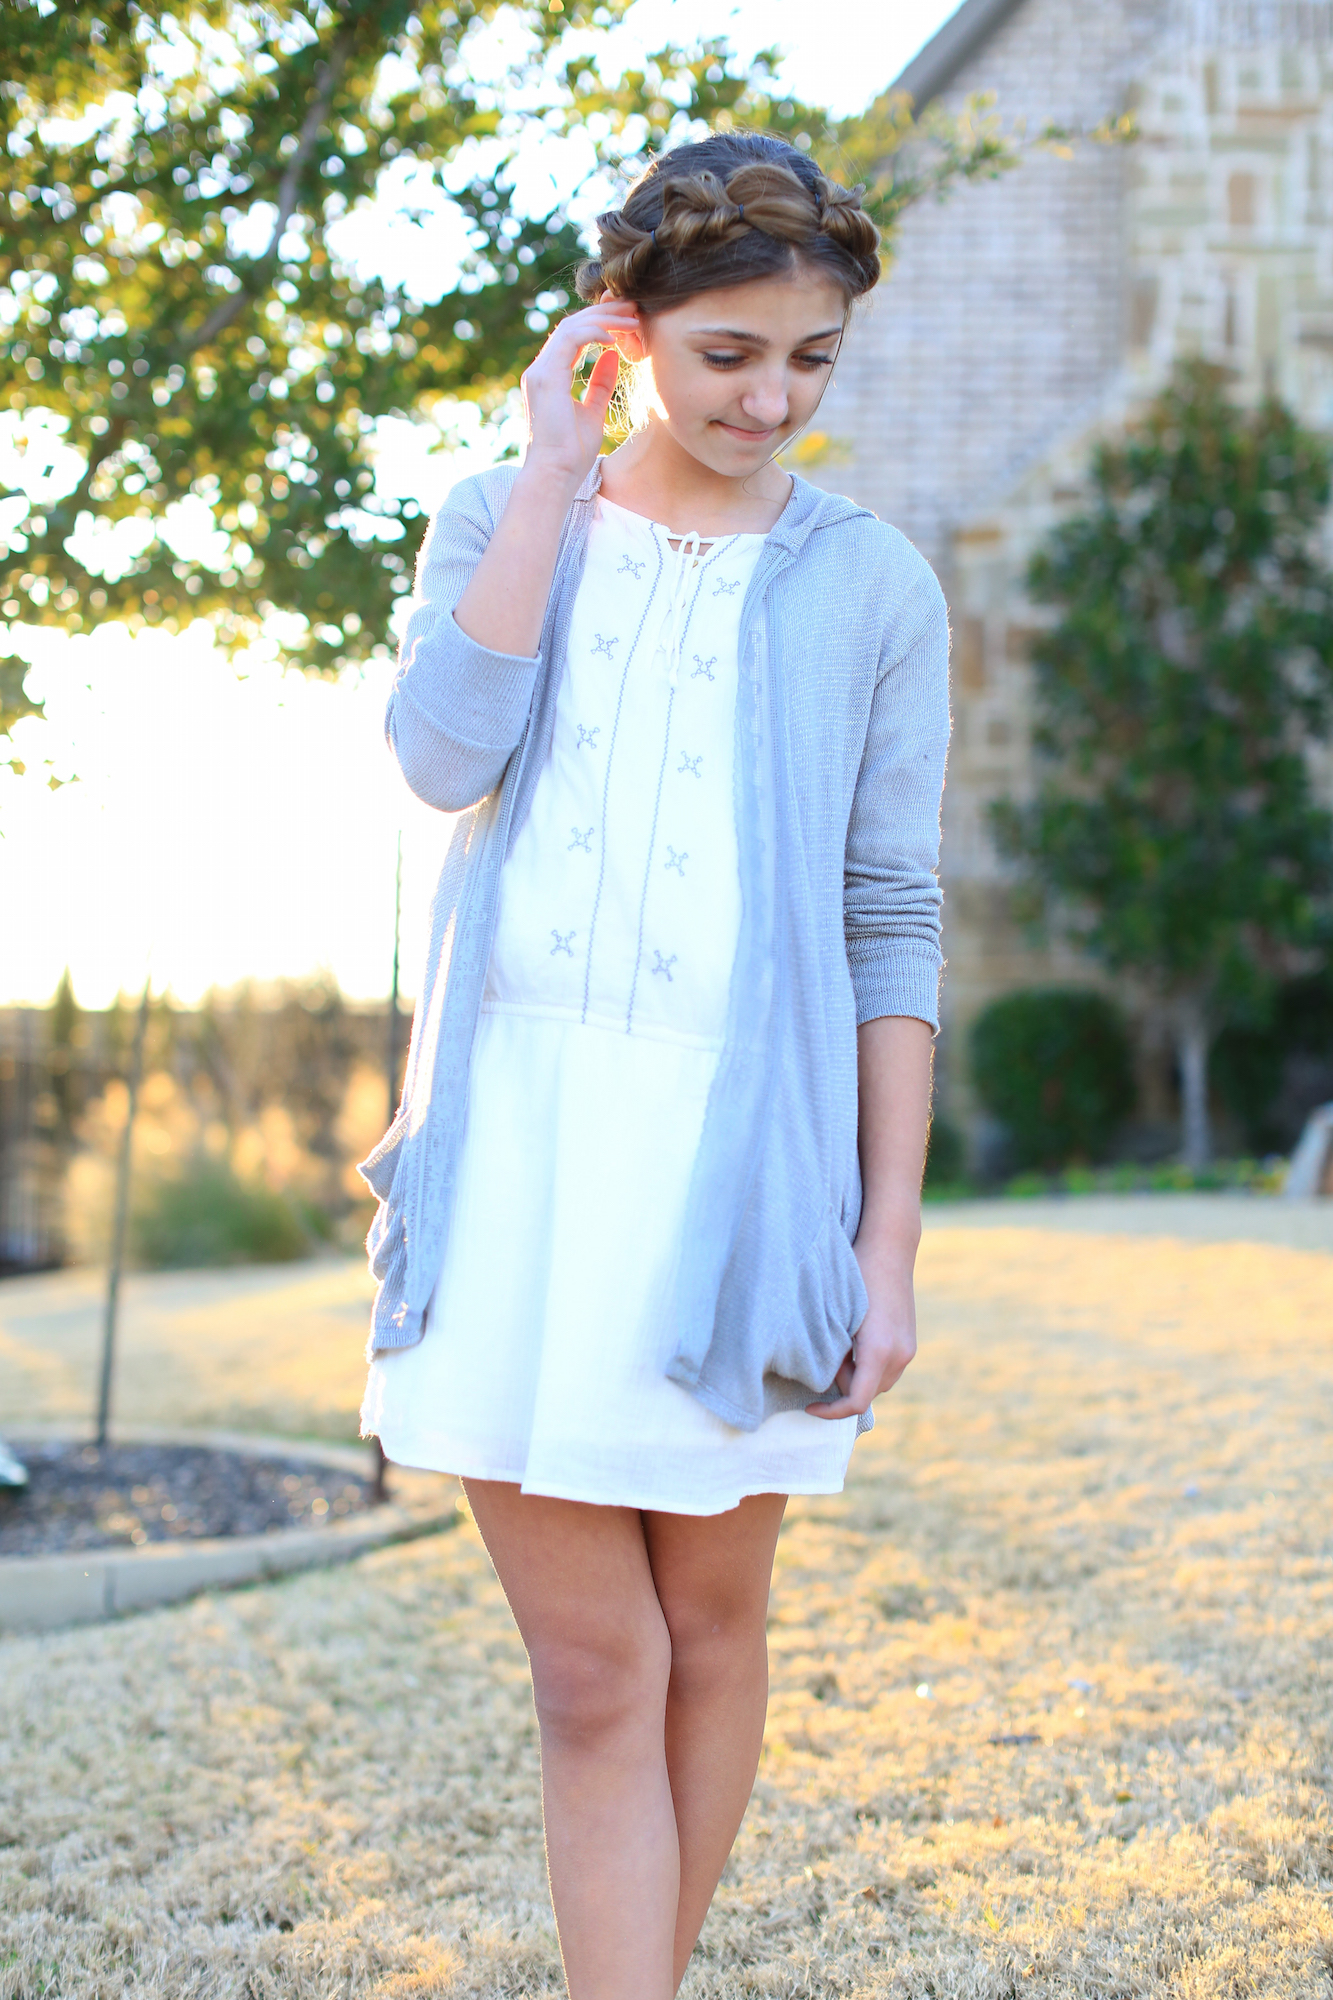
I think that this Faux Fishtail Braid Crown is absolutely stunning! We’ve shown you how to use this faux braiding technique in one of our very first hairstyle tutorials from six years ago, as part of our Daddy ‘Do series where Shaun does the hair.
The point is, this type of faux braiding is so easy even a daddy can do it! Click here to see that tutorial from 2010!
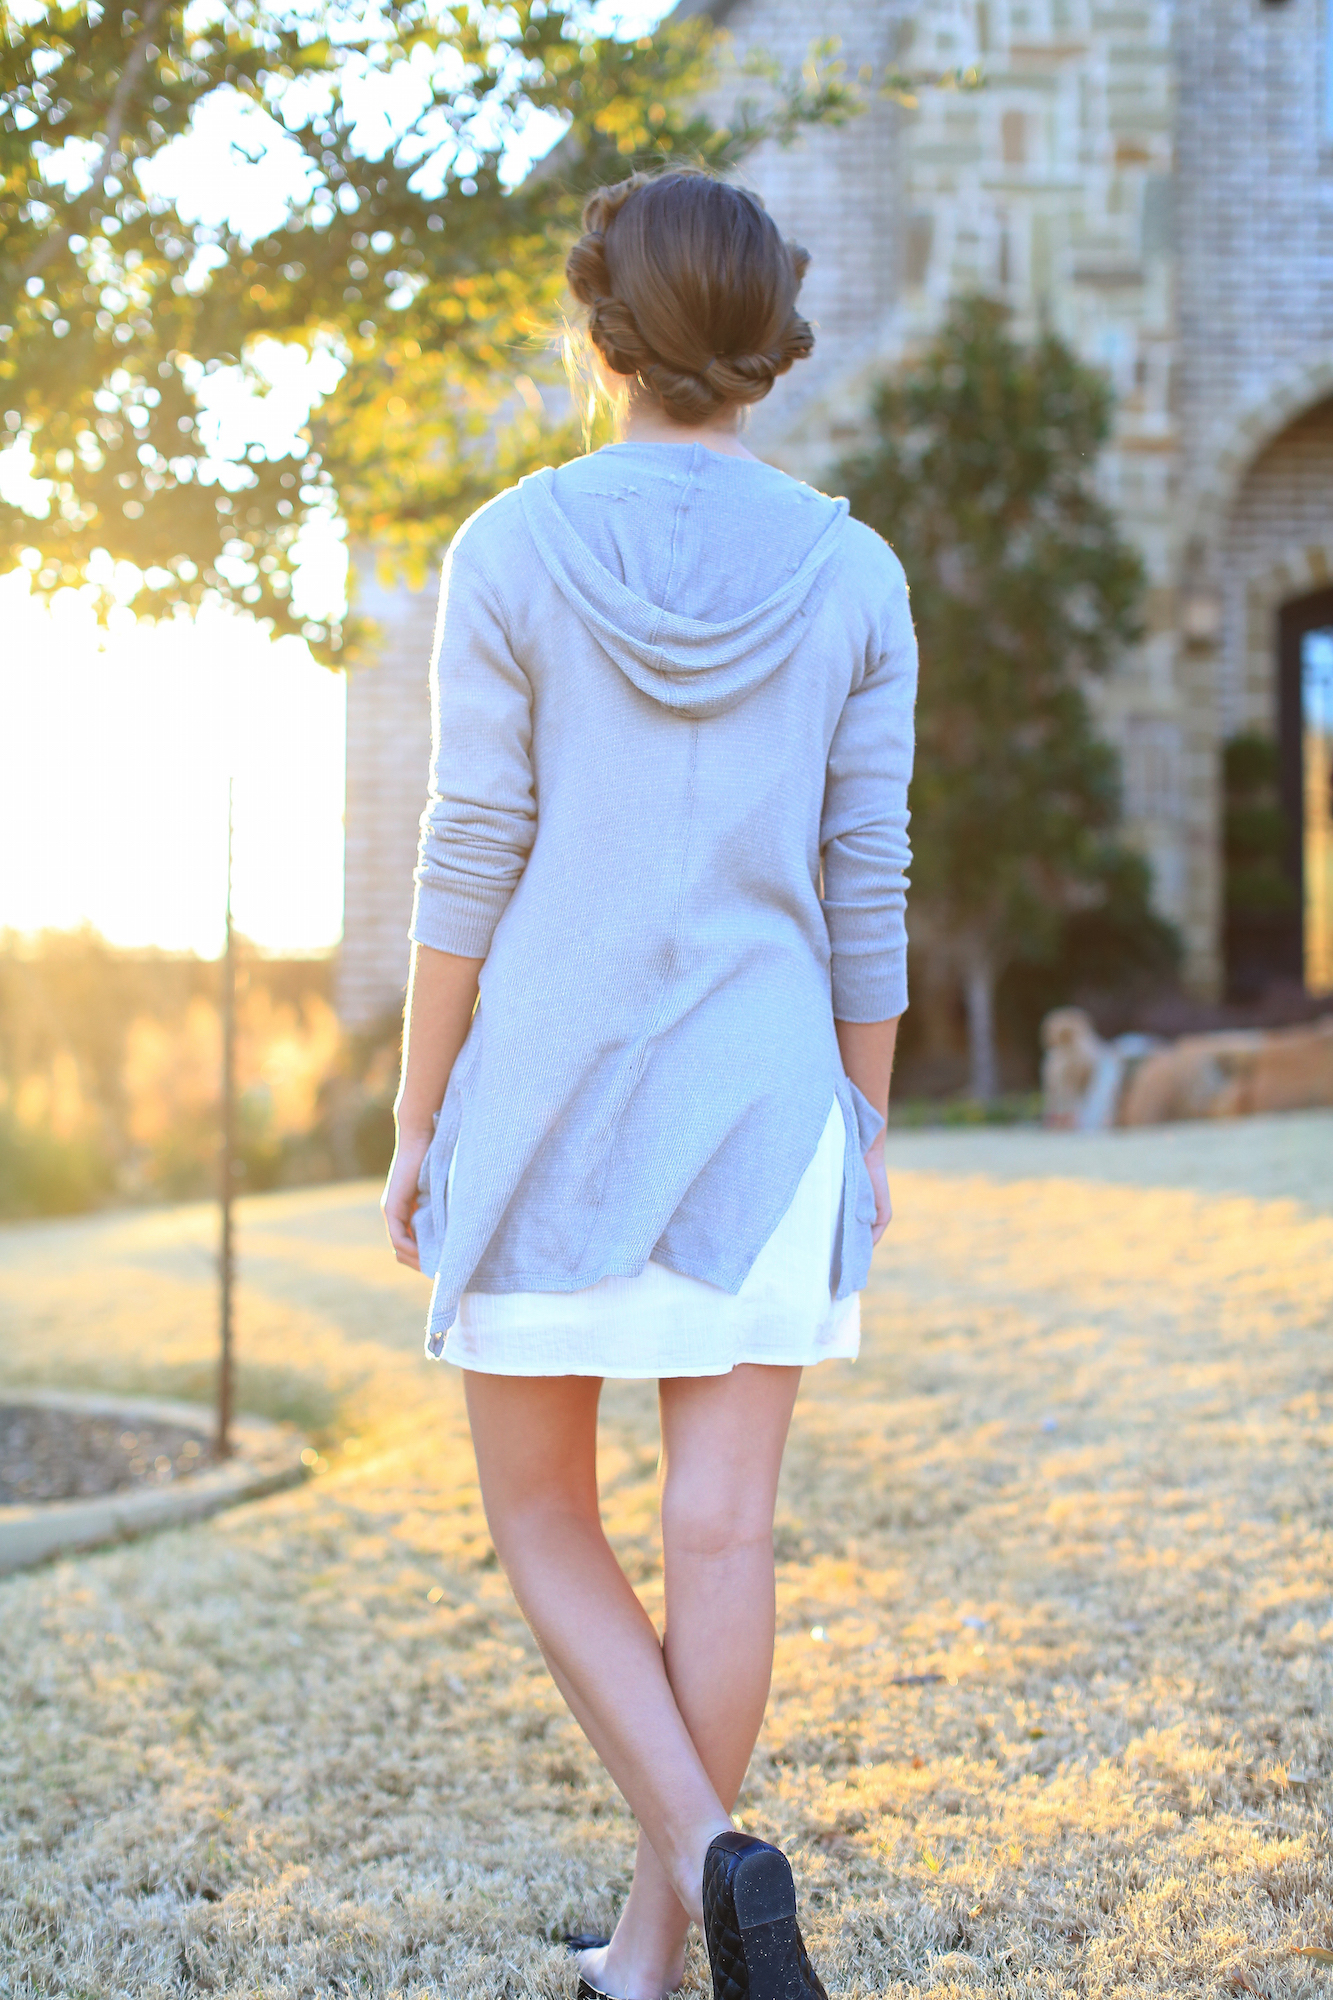
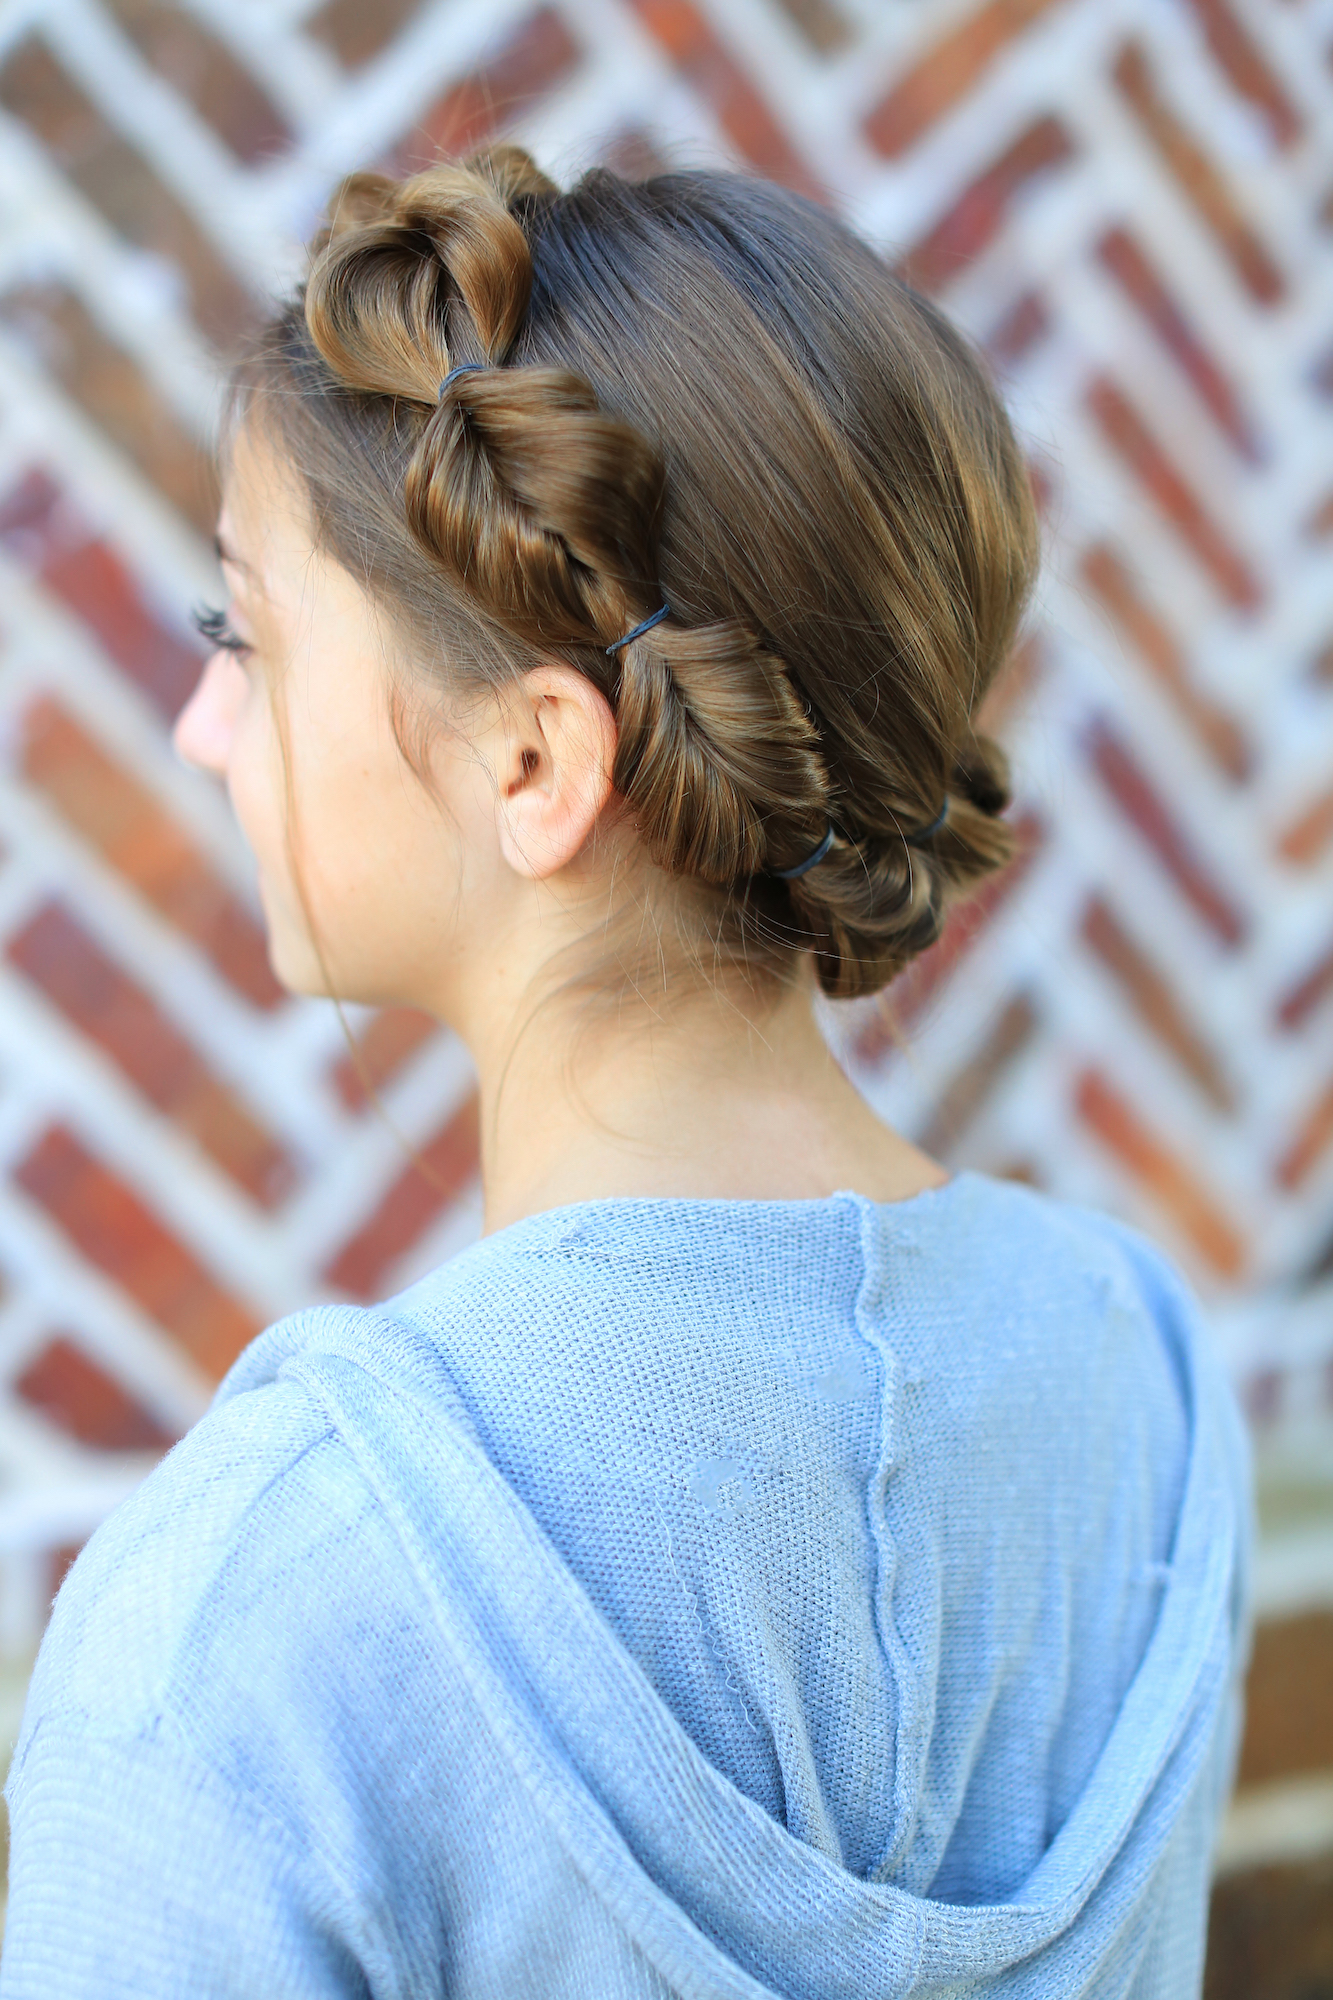 Using the same technique Shaun showed you, only this time with two braids in back, we’ll show you how to wrap the braids around the head and pin them up into a beautiful crown! {Be careful not to set the crown to low on the forehead, as you’ll want it to sit back a bit, kind of like a headband would naturally sit.}

To see your own photo recreations of this style featured in our app, feel free to tag your photos on IG with: #CGHFishtailCrown
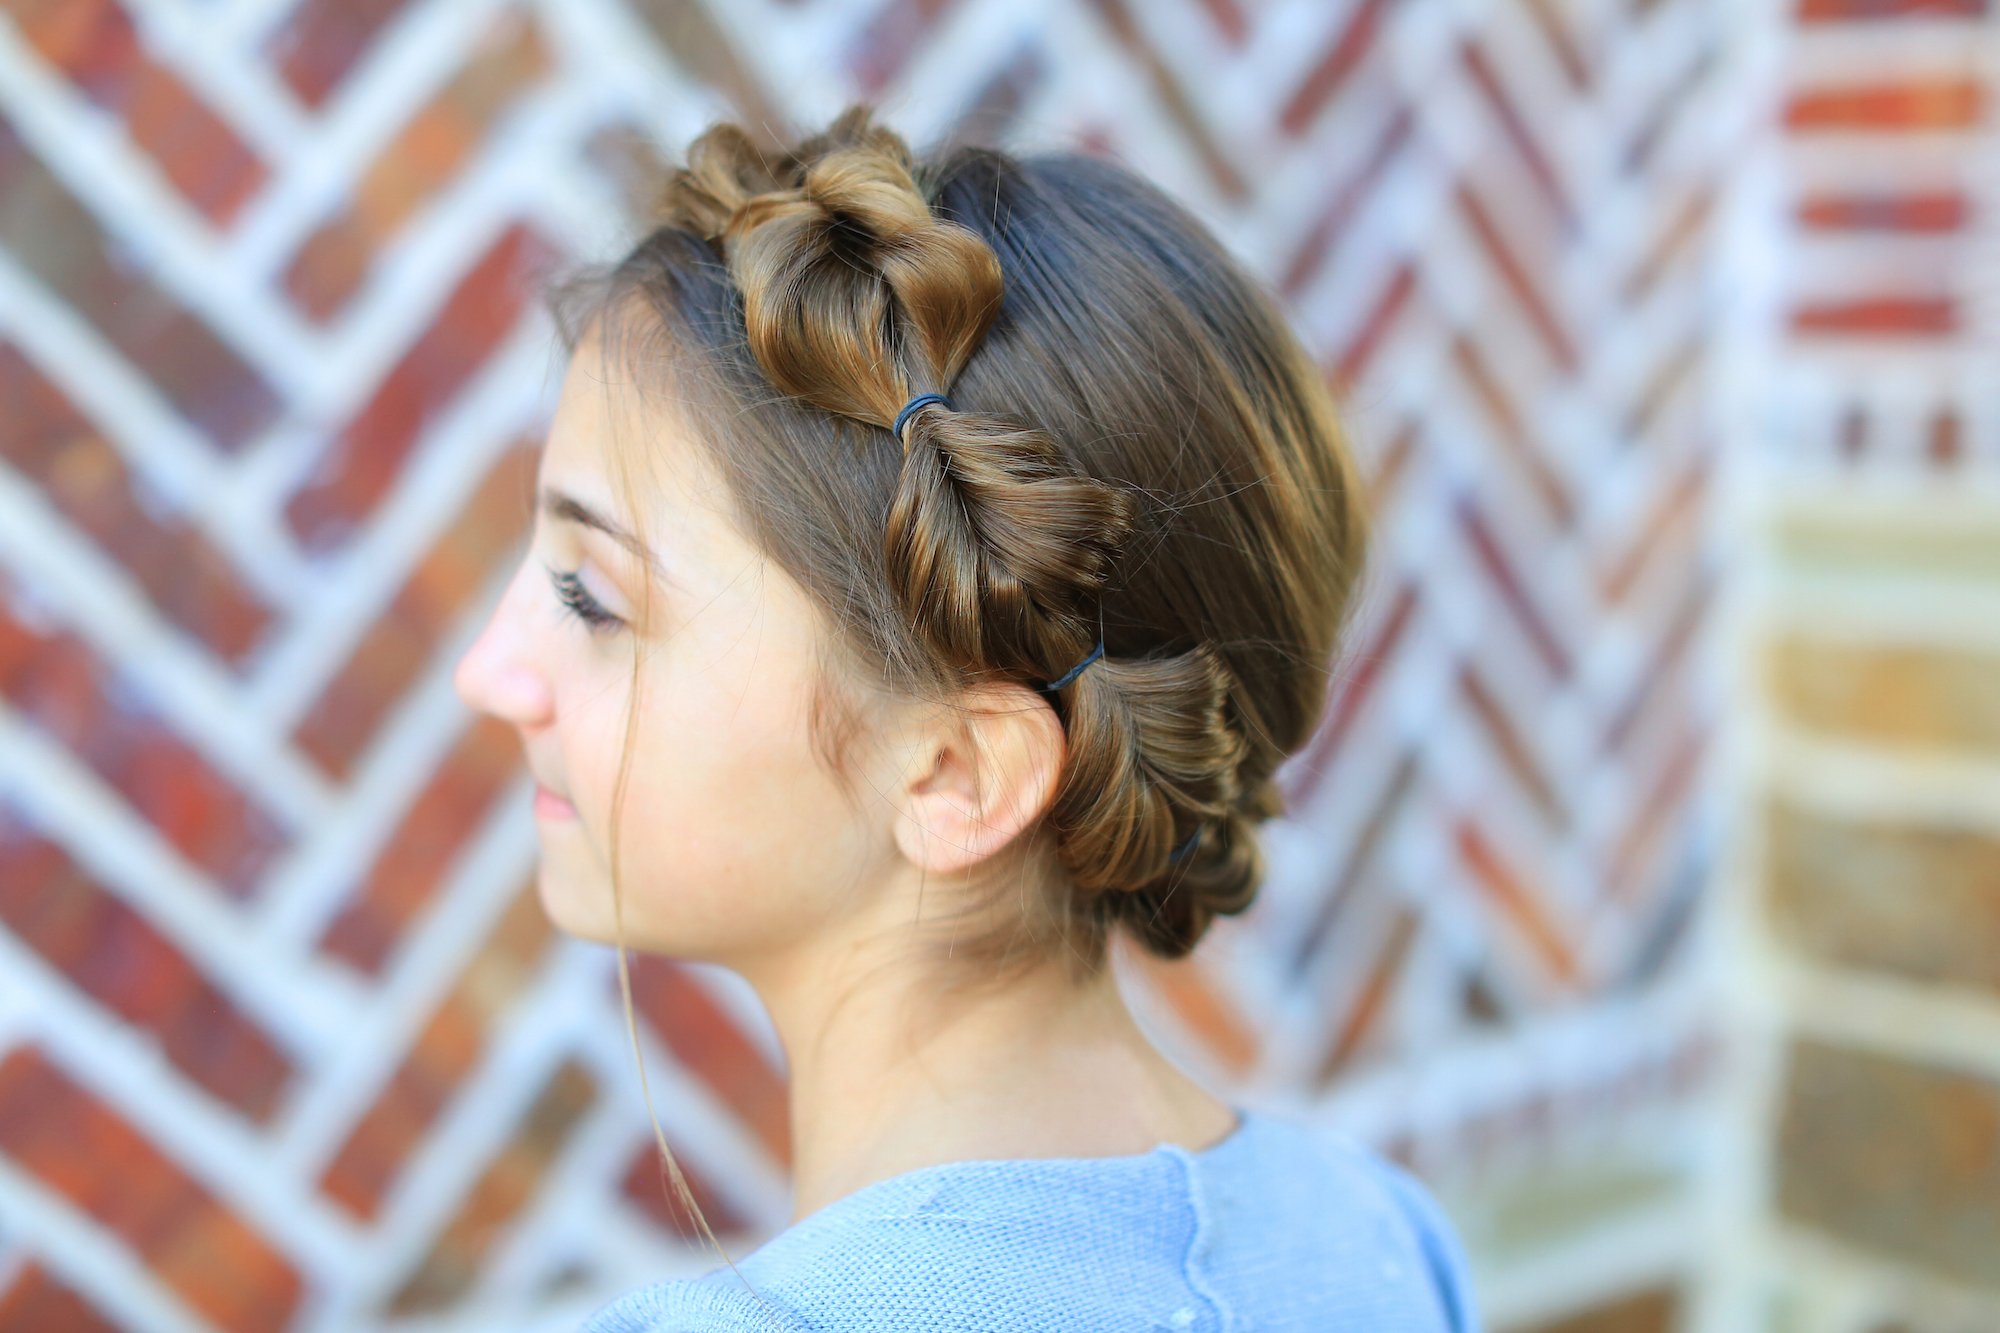
In one of my last steps, I show you how to pancake the bubbles. I know, I know… it seems like I pancake everything these days, but the look has caught on and really adds so much to braided hairstyles! Pancaking is essential to giving this braid right look, and be sure to leave a few loose strands on either side of the face to frame the style!
 If you are attending wedding, or any kind of renaissance or boho event, simply accessorize the style with a few small fresh flowers! It doesn’t have to be with dressy attire, either! It would look equally as cute with a t-shirt and jeans! Wouldn’t you agree that this hairstyle is stunning?
Items Needed: Brush, rat-tail comb, spray bottle, 12 small hair elastics, 5-7 small bobby pins, hairspray {if desired}.
Time Requirement: 7-10 minutes
Skill Level: Medium
Hairstyle Video:
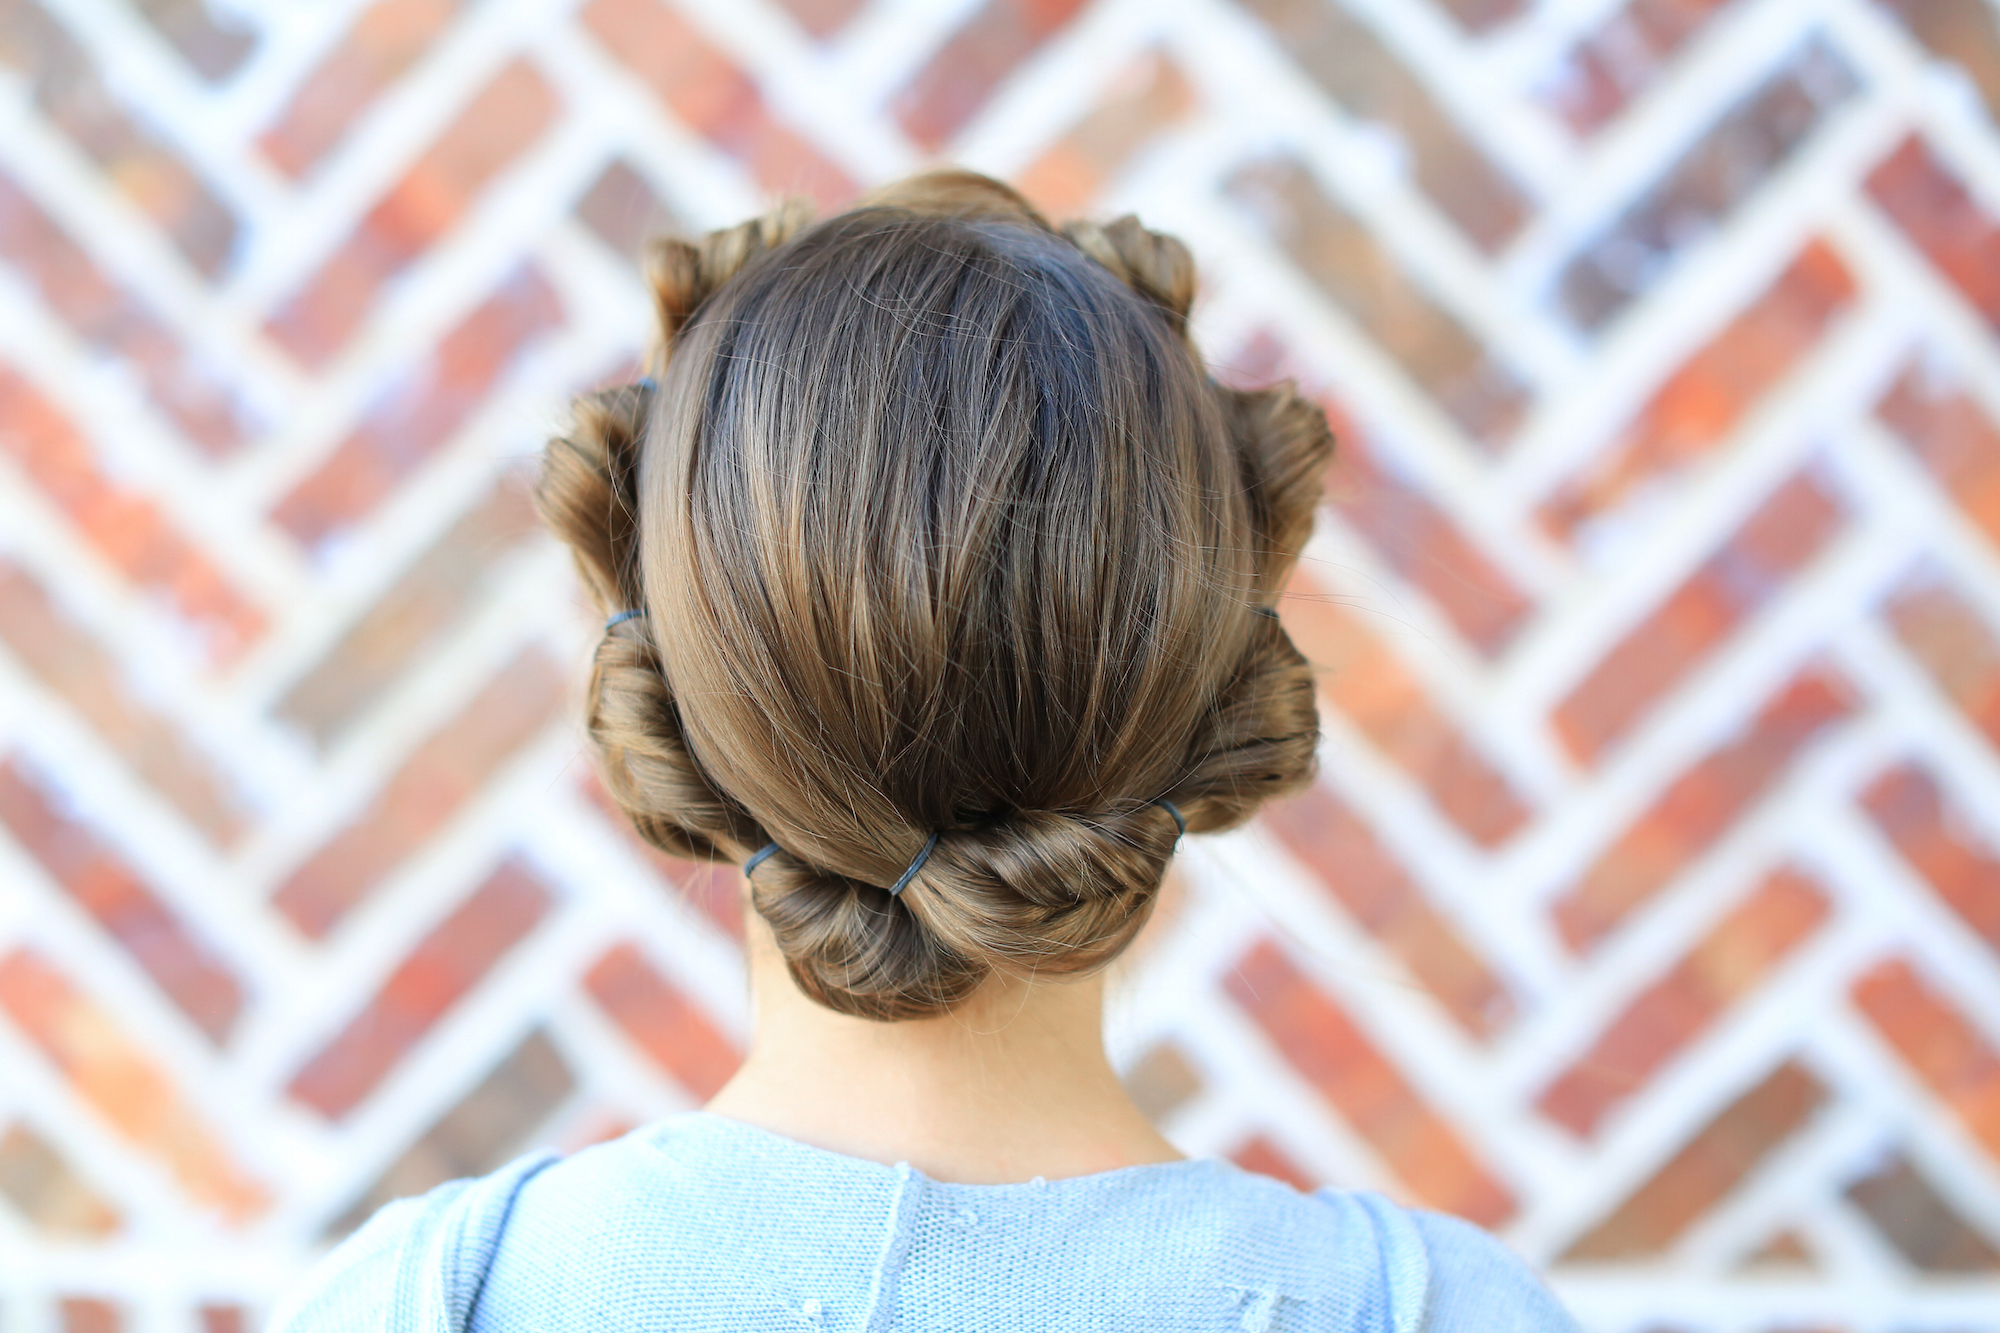
- Begin by parting the hair down the middle of the head, into two sections…
- Loosely secure both sections of hair at the nape of the neck with an elastic that matches the hair…
- Move down about 2-3 inches, and secure hair with yet another elastic…
- With your index finger, create a hole in between the two elastics and flip the rest of the hair down through the hole {this creates the faux fishtail look for that braided section}…
- Move down another 2-3 inches and, again, secure the hair with another elastic…
- Create another hole in between the elastics and flip the hair through the hole…
- Repeat Steps #3-6 until you run out of hair on that braid…
- Repeat steps above on the second braid as well…
- Now, go back and gently pancake each section of hair by tugging on the outer edges, until the braided section is nice and puffy…
- Then cross the braids in back and wrap them up around the side and top of head until they overlap and form the look of one continuous braided crown…
- Bobby pin to secure in place…
- Add hairspray and accessories, if desired.
Where would you most likely wear this hairstyle? If you loved this tutorial, please leave a comment below!
Happy Hairstyling!
This past week my twins BrooklynAndBailey uploaded a funny video on the Do’s & Don’ts of Dating, given that they have only been dating for six weeks! It is funny, though, and there are some hilarious cameos from K-Swag {Kamri} and Danger Dan {Kamri’s friend Kenni}! Click below for a good laugh!


Such a fun style! Fun and different, and so pretty!
This so could have been in starwars
i love this
Love this hairstyle !!!!
So pretty????
What a beautiful, sophisticated style:)
Can someone do this on me? It looks so good
Such a cute idea! I’d love to try this on my sister!
Love it!
what? how!! this is so awesome!
So creative!
I love this look, its easy and super cute !
Cute
This is so cute!
this look is so pretty!
this looks so pretty ♥
I love this hairstyle! ????
this is so pretty on Kamri, you explain how to do all your hairstyles very well. It made it so much easier to try this hairstyle at home.
So pretty, wish my hair was longer so I could do the beautiful braid! Kamri is super pretty as well, where did she get her dress?