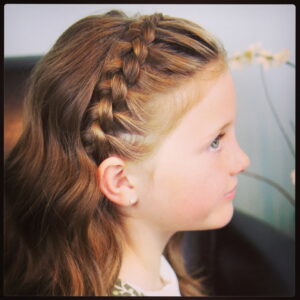
The Viking Braid Ponytail | Hairstyles for Sports
When we started playing around with this hairstyle, it totally seemed like something a viking princess would’ve worn, hence the name…
The Viking Braid Ponytail | Hairstyles for Sports
When we started playing around with this hairstyle, it totally seemed like something a viking princess would’ve worn, hence the name…
Scissor Waterfall Combo | Latest Hairstyles
I’ve noticed this cool new Scissor Waterfall Braid technique several weeks ago, and now a few YouTubers and Instagrammers have shown how…
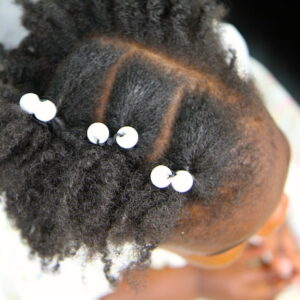
Zombie Cheerleader | Hair Pin Curls
Today we are going to show you how to create Hair Pin Curls, a tutorial that we’ve been waiting nearly…
Miner-Inspired Hair & Beard Styles | Disney’s #8thMinerContest
One of the joys my family has, by doing what we do, is our association with Disney over the past…
How to Create “No-Heat” Paper Towel Curls
You all know that we love posting no-heat curls tutorials from time to time! This one is inspired by a…
Bandana Curls | No-Heat Curl Hairstyles
Our No-Heat Curl tutorial series has been very popular, because a lot of teens and moms are trying to avoid…
How to Get Deep Waves | Curled Hairstyles
Don’t forget to hashtag your own photo recreations of these waves by using #CGHDeepWaves on Instagram and Twitter… they just…
Six DIY 1-Minute Bandana Hairstyles
We want to see your recreations of this hairstyles… simply tag #CGHBandanaStyles and @CuteGirlsHairstyles in your photos on Instagram! {We…
Corner Flip-Under Accents | Hairstyle Tips
Feel free to follow CGH on Instagram and see behind-the-scenes photos of our family! Welcome everyone to Sweet Pea’s “official”…
Dutch Lace Braided Headband | Braid Hairstyles
Be sure to subscribe to our twins’ new YouTube channel, BrooklynAndBailey! They uploaded their very first video upload today and…
Cocoon Curls | No-Heat Curl Hairstyles
The hairstyle for this week is sure to be a popular one, since so many women are reluctant to use…
Money Curls | With Guests Michelle Money and Laura Armstrong
I know you are going to love this week’s tutorial! We are so happy to introduce two special guests for…