If you care to venture back to our earliest days on this website, you will find several tightly twisted or braided hairstyles… some involving a zig-zag part.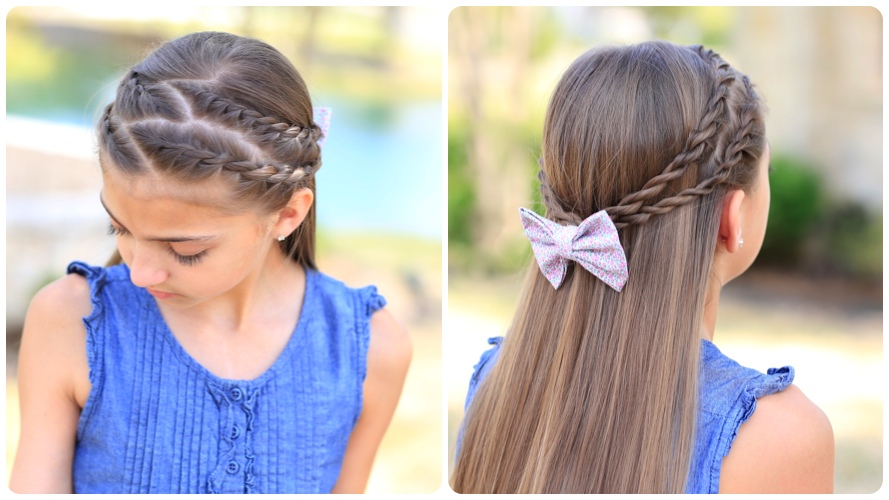 I stumbled upon my earliest hairstyle album a few weeks ago and found a photo of this style that we have never filmed before. Today is the day that we show you how to create a Zig-Zag Twistback!
 My 3rd daughter volunteered to be our model, and here we show you first how to create the zig-zag part, and then how to incorporate four twistbacks into a super cute tieback.
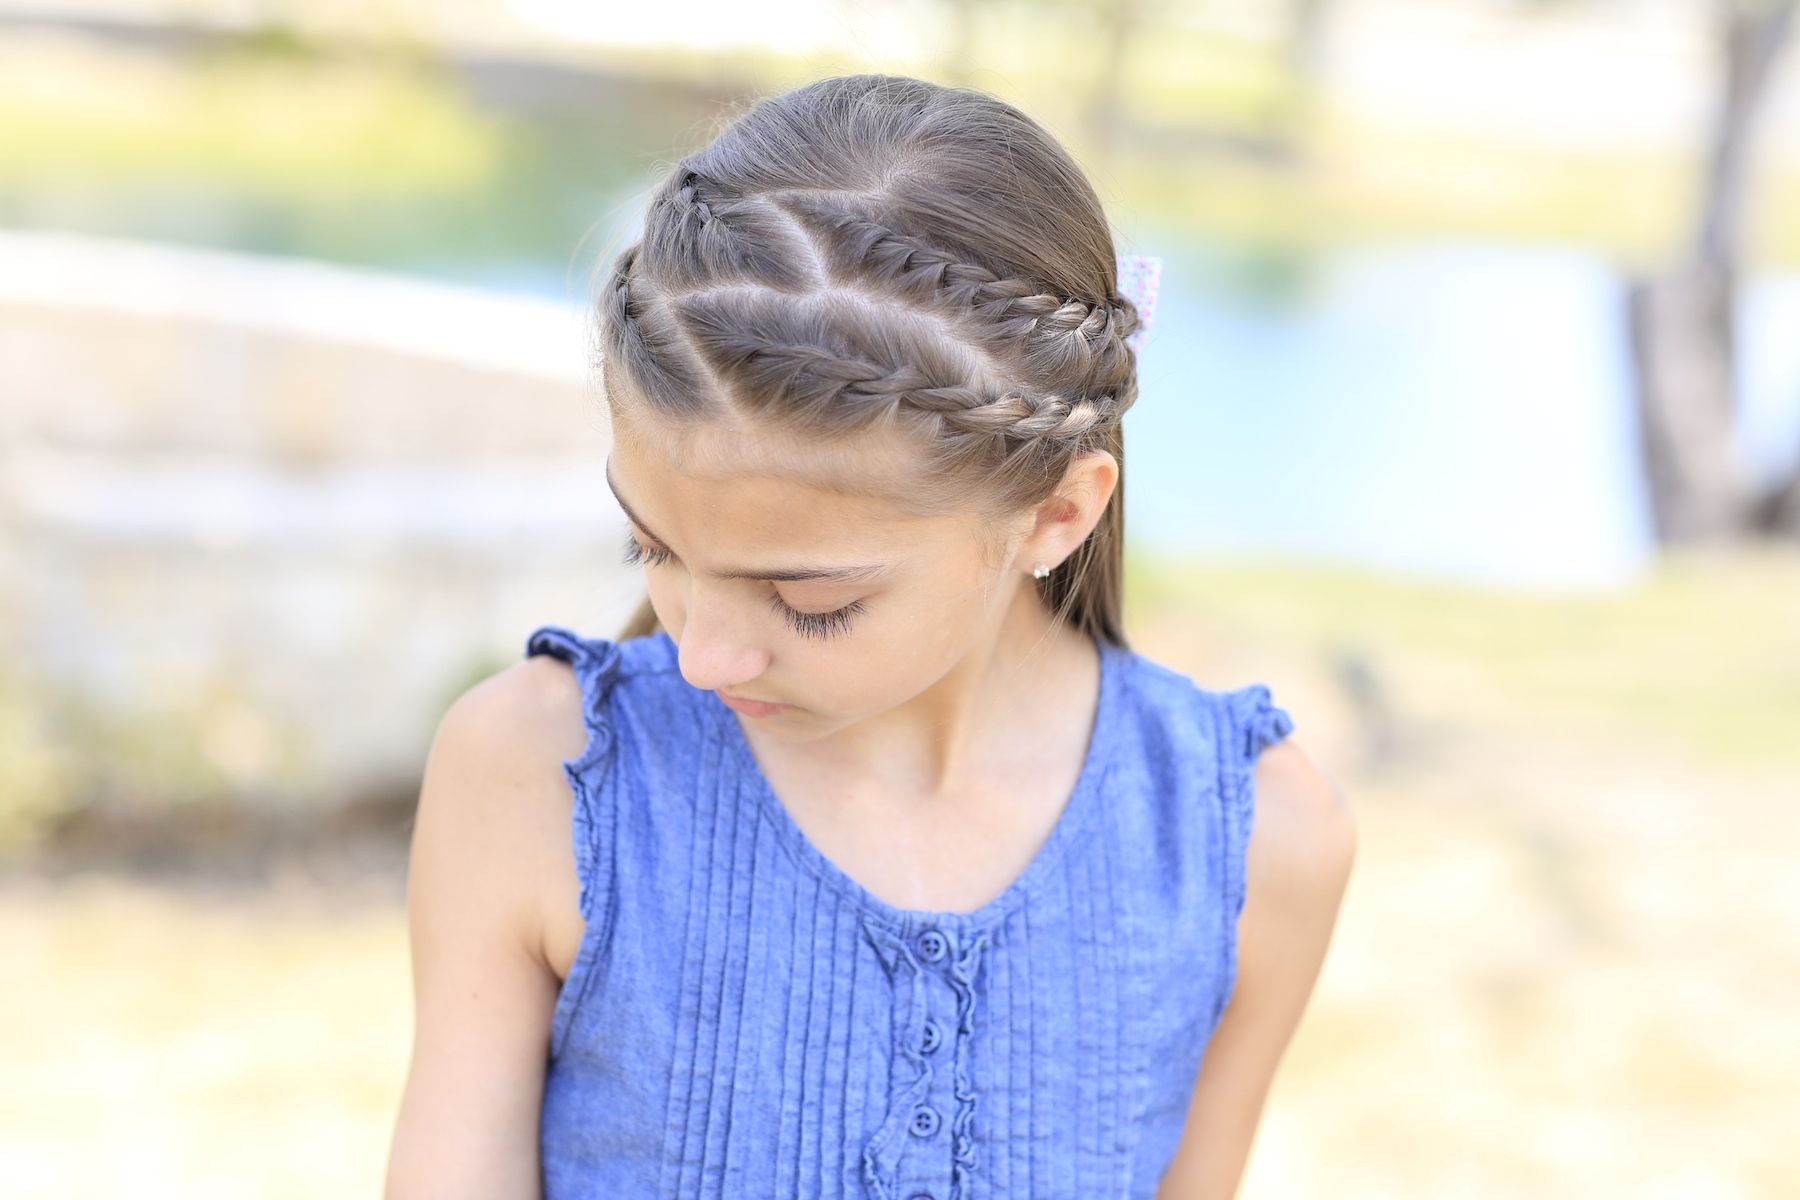

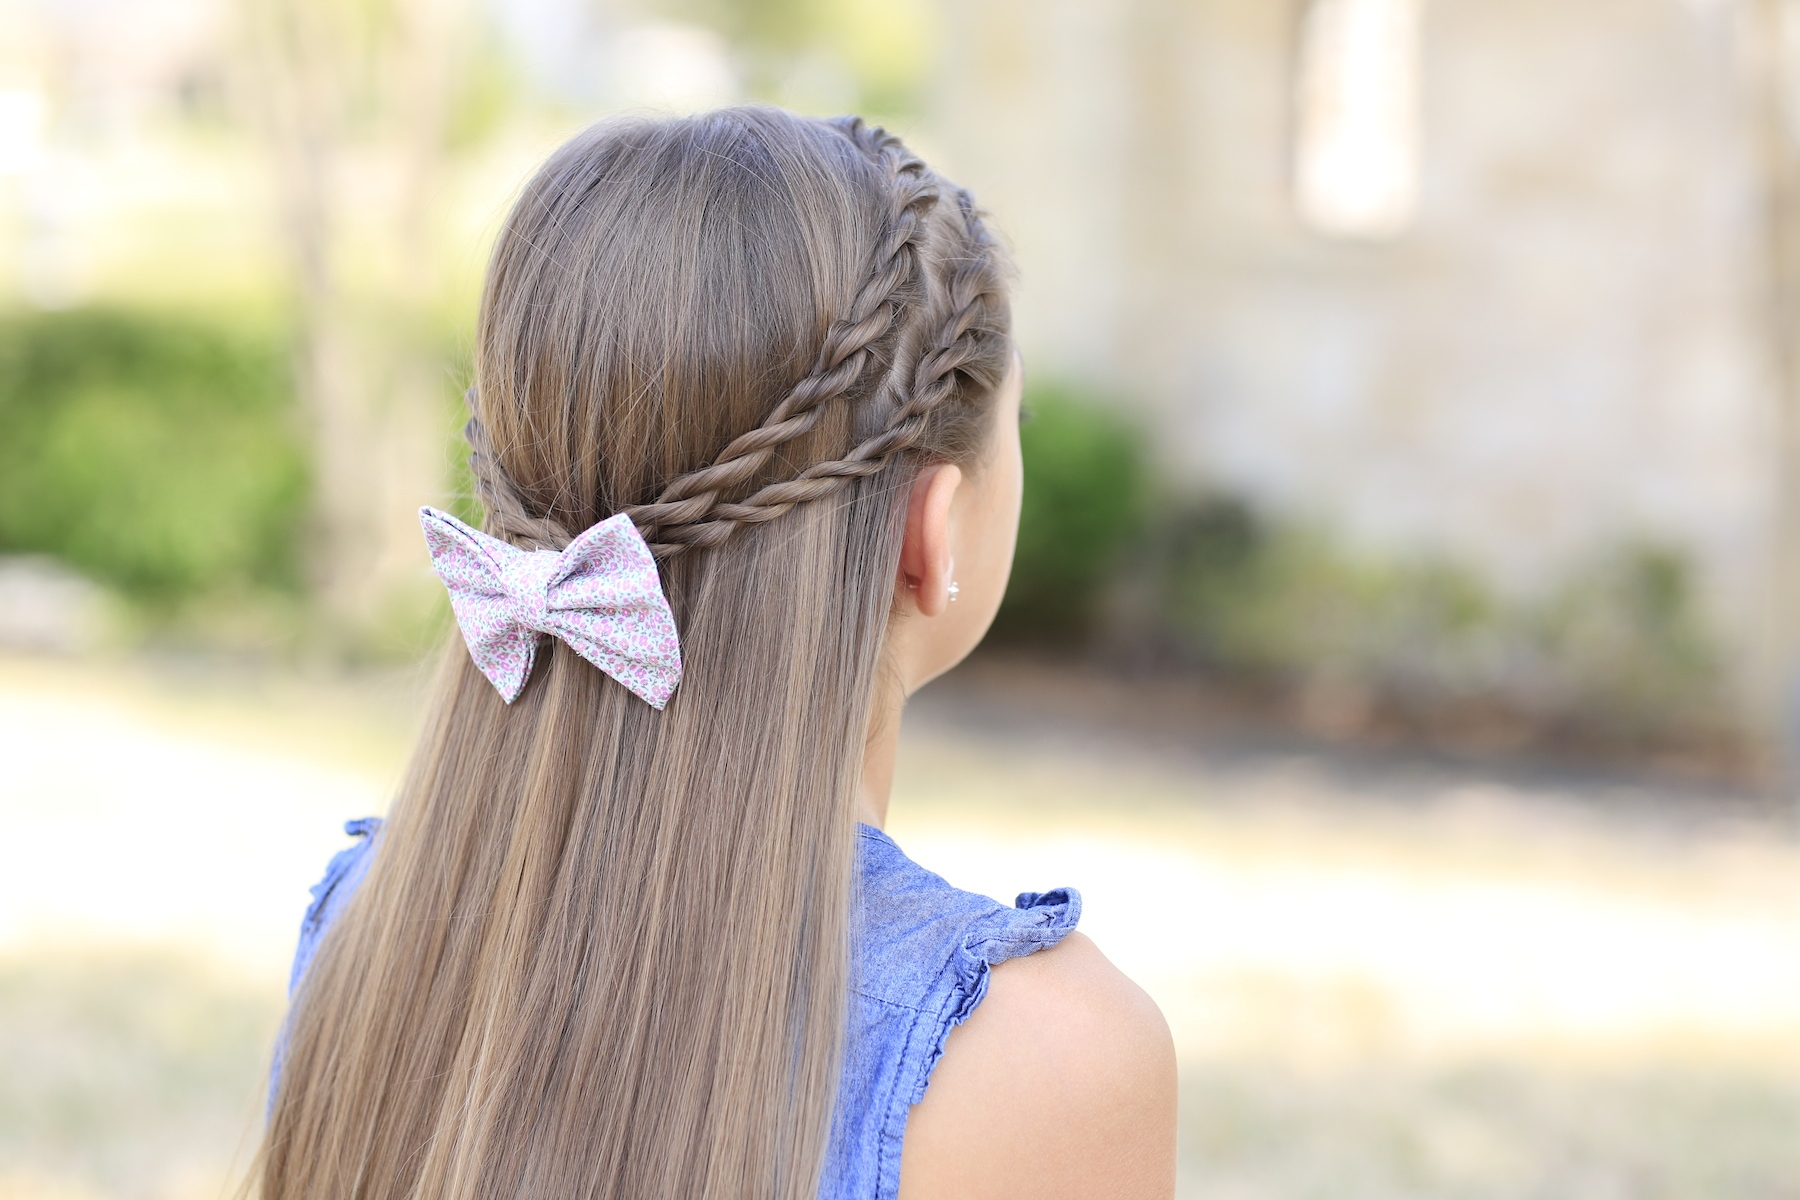
 You could actually use this hairstyle in a combo with a bun, for a super beautiful updo! Feel free to tag your own photos of this hairstyle with: #CGHZigZagTwists My girls often wore this style to sports activities, such as soccer and softball, because the twisting pulled the hair out of their eyes. Better yet, the hairstyle stays fairly well after a long active day! That being said, this twistback hairstyle can also be worn by girls of all ages, especially as “half-up, half-down” hairstyles are very popular right now! Enjoy!
Items Needed: Brush, rat-tail comb, spray bottle, 1 small hair elastic, 2 alligator clips, spray wax or hairspray, accessory {if desired}. Time Requirement: 5-8 minutes Skill Level: Medium Step-by-Step Instructions:
- To begin, comb all the hair away from the face towards the back of the head…
- Then with a rat-tail comb, part from left to right in a diagonal direction to create the first “Zig”…
- Near the end of the first zig, take the comb and part toward the left to create the next “Zag”.
- Repeat this one more time, to create two equal sections of hair on either side, with a nice zig zag part line down the middle…
- Now go back to the first triangle section of hair, nearest the face and use a comb to continue the partline down next to the ear, or simply use your finger to create a rough part…
- Except that section, pull all remaining hair out of the way and secure until you need it…
- Using the hair from the first triangle section, grab a strand of hair near the front and divide it into two equal strands…
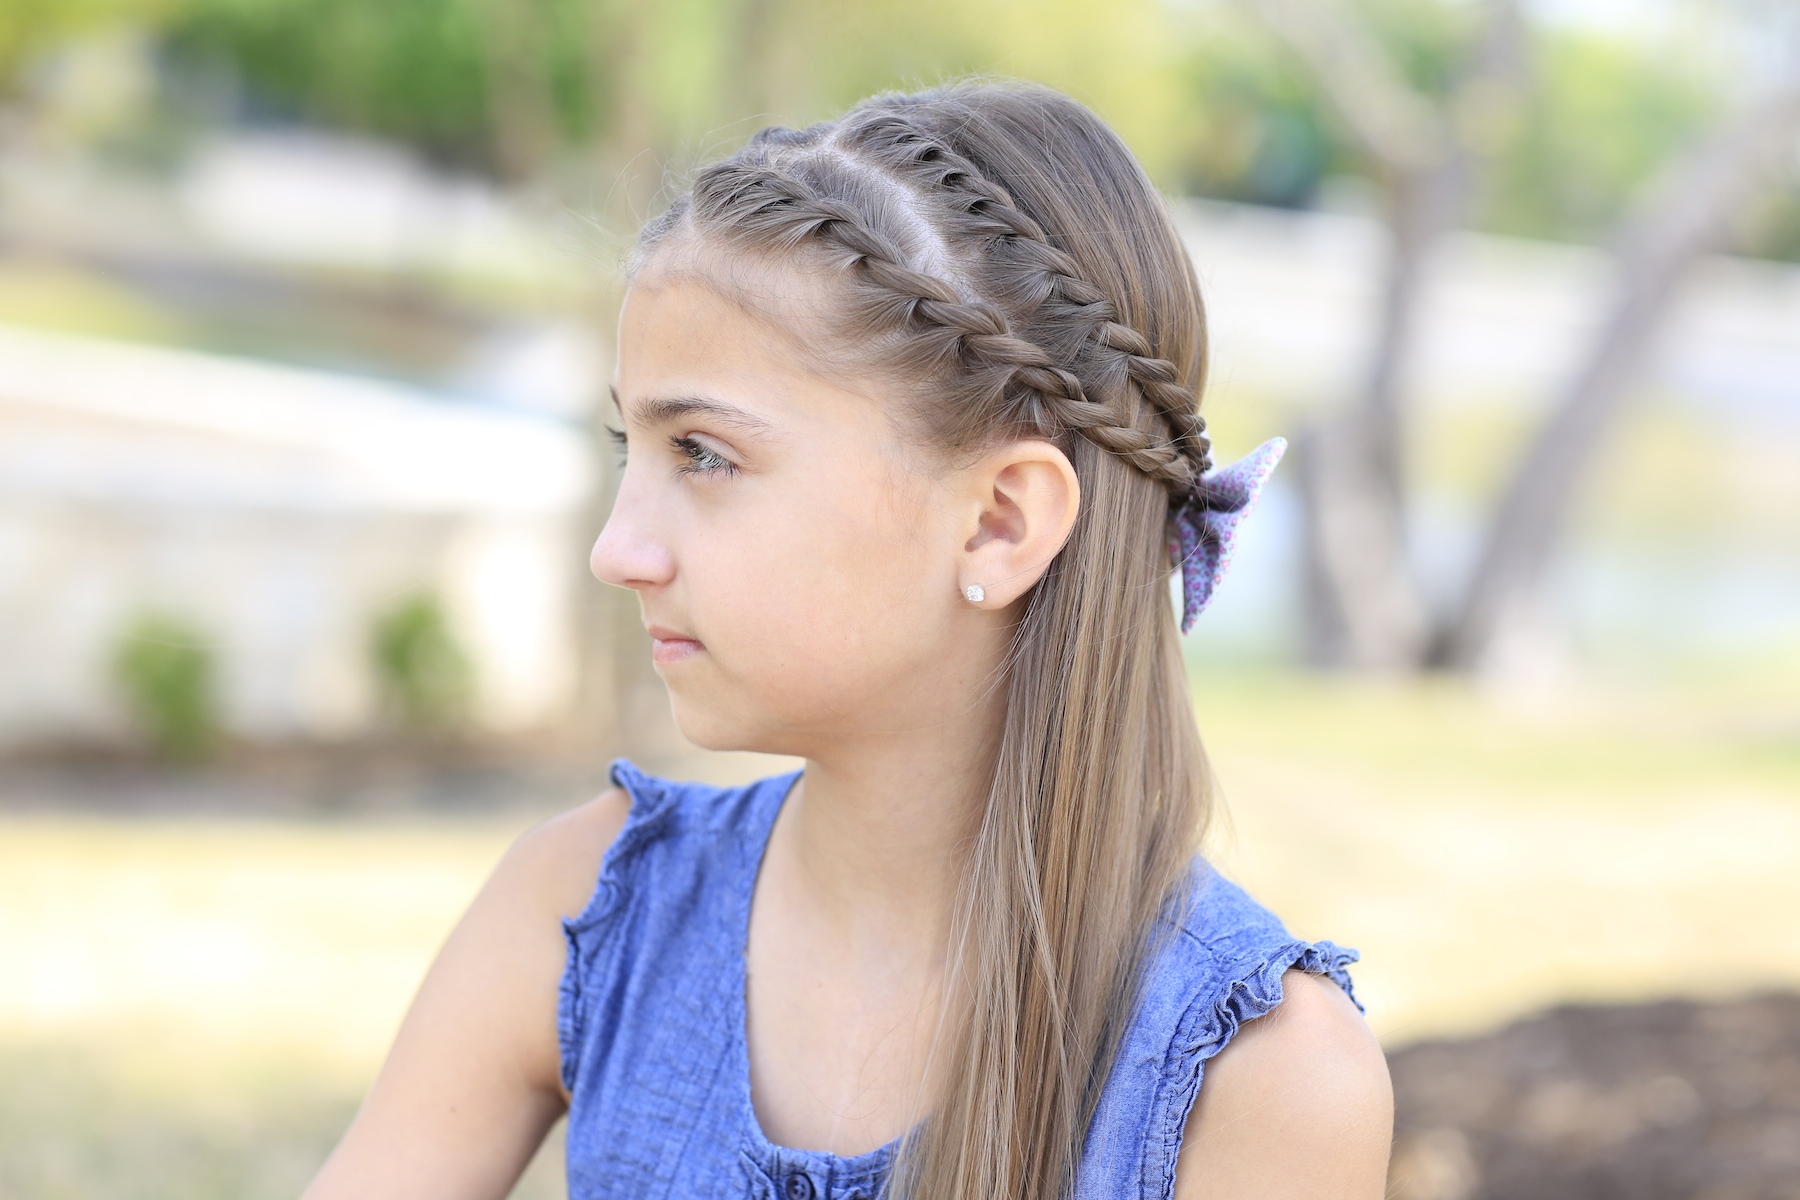
- Begin a rope twist with those two strands {give the hair a gentle twist to the right before crossing it over each other, to ensure the twist remains tight}…
- Repeat a rope twist, adding in hair on both sides with each stitch, until you run out of hair near the ear…
- Continue twisting the rest of the strands into a rope braid, and have your daughter hold, or secure with an alligator clip…
- Repeat Steps 5-10 on each of the three remaining sections of the Zig Zag, which will give you two rope twists on each side of the head…
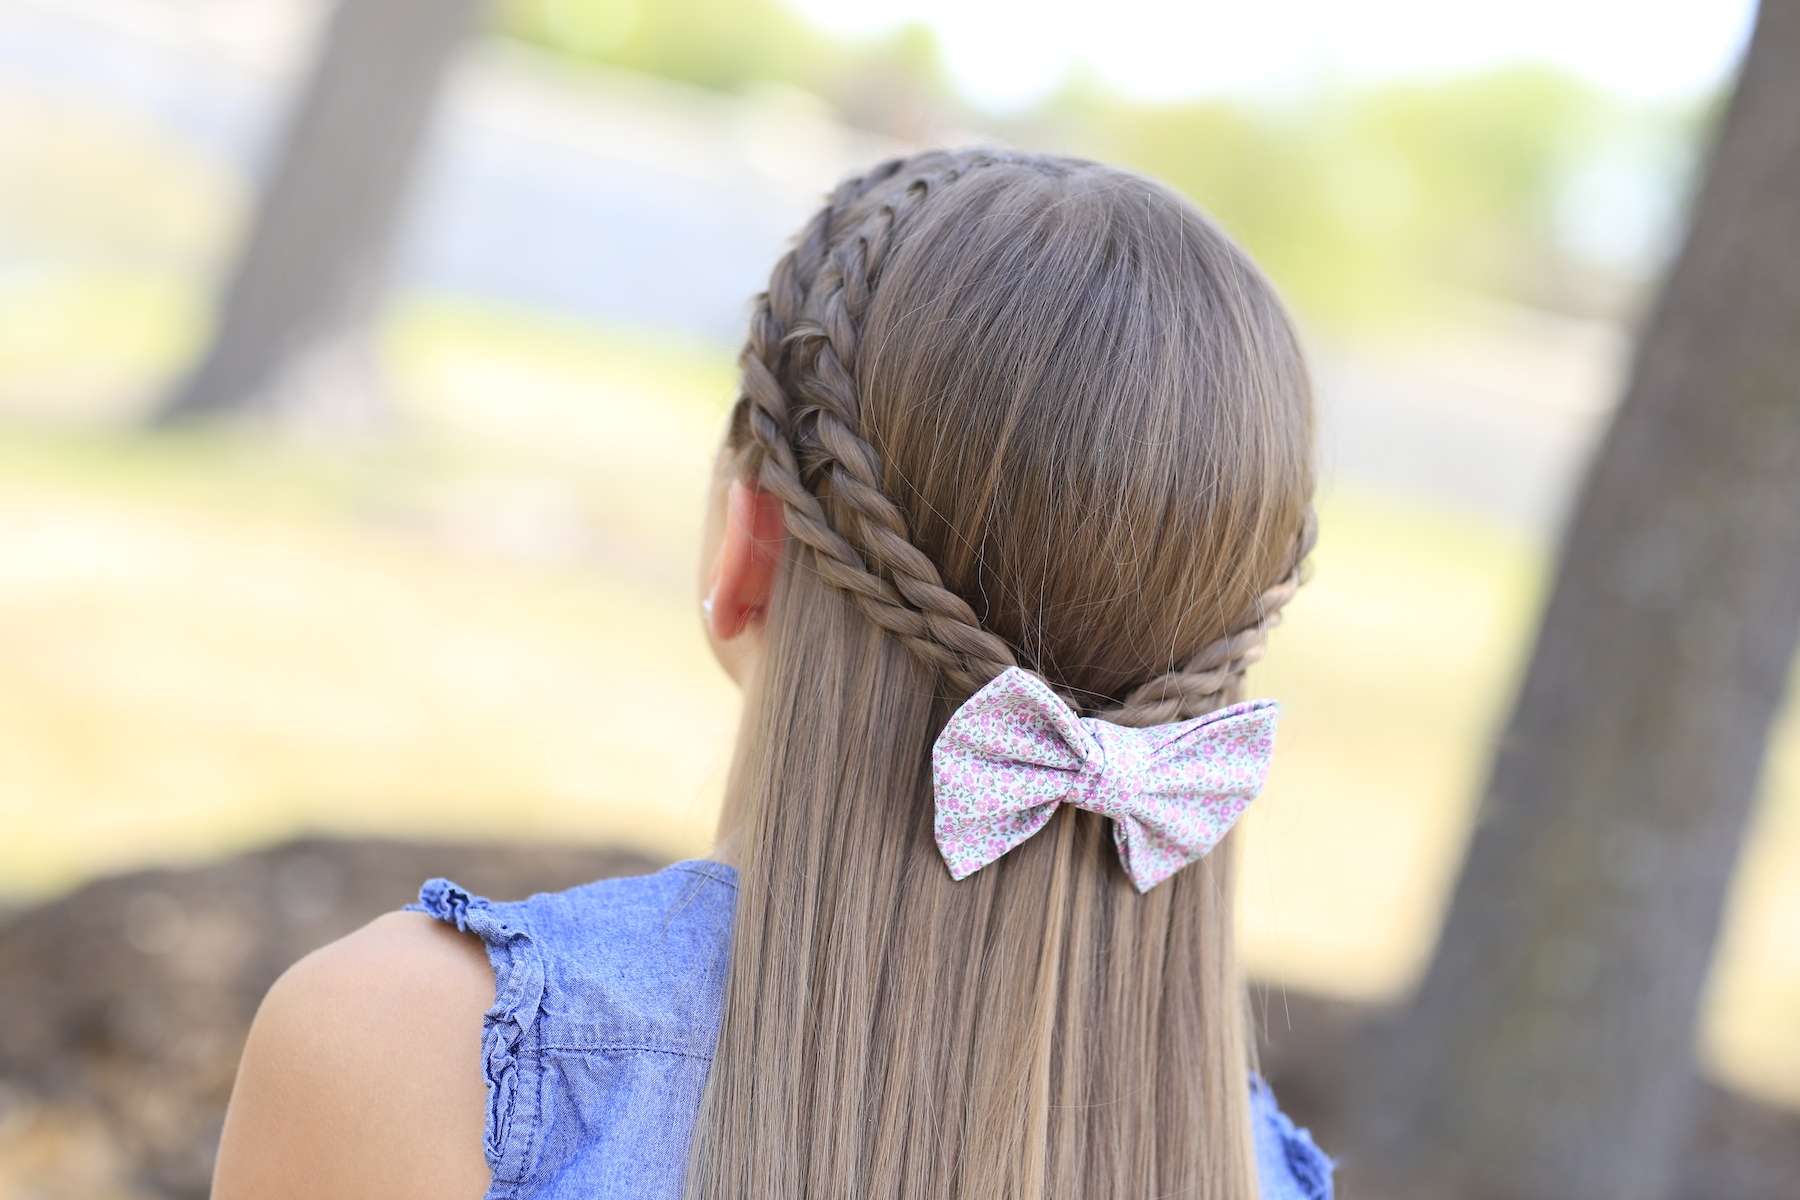
- Gather all four twists together, combine them, and secure with an elastic into a tieback on the back of the head.
- Add hair spray or accessory {as desired}.
Please feel free to leave me a comment below letting us know what you think of this Zig-Zag Twistbacks hairstyle! As always, if you loved the tutorial, please feel free to share it! Happy Hairstyling!  BrooklyAndBailey‘s video for this week showed us all how to create the most vibrant Easter eggs using ingredients you have at home! Sure beats those pale egg-dying kits you can buy at the store! Simply click below to watch…


I just found you…a neighbor shared your site with me. I did my first hairstyle on my daughter today and she loved it. Looking forward to having more than headbands and pony tails!!
I tired this one on myself and it works great! A friend of mine gave me ur website and I have been watching tutorials since then (5 weeks ago). THEY ARE ALL SO AMAZING!
My daughter and I have learned so much by watching your videos. We thank you!-Edna
My oldest daughter is 6 so I have been watching your videos for five years. I get compliments on my girl’s hair every day. Thank you so much for sharing your life, talent and beautiful family with us.
I have a BIG Q.
How do you edit your video’s?????
PLEASE answer.
BTW, love your video’s 😉
That what app do you use?
We use iMovie that came pre-installed on the Mac computer…
thank you! I am just amazed at how good you and your husband can make the video look so profesional!!!!
♥ Your Family!
Can you give ideas for graduation hairstyles plz
Hi 2 all at cgh
I have 3 daughters an have tried most of your hairstyles out on them,
Had some lovely comments and would like to say a big thankyou to u all x
I have a problem tho lol
I can’t seem to download or watch hairstyle 401 plz help as would love to give this one ago
Many thanx Debs x
Keep up the great an amazing work 🙂
i love your hairstyles and i thank u so much for all the great ideas! your hairstyles have gave me something to look forward to and to brag about to all my friends. Everyone is so jealous and again i thanks you so very much!
My daughter and I have been watching for about 3 months and we are hooked. We love this particular hairstyle. Thank you!
You are welcome, Krista!
Omg!!! My mom and I are obsessed with your videos!!! We watch them so much at night that we stay up to late. I am so glad that we found your website! Well my friend Emma actually told us about your website. I am so glad that she did! Thanks!!!! I love cute girls hair!!!!!!!!!!!!!!!!!!!!!!!!!!!!!!!!!!!!!!!!!!!
I have been watching for about 3 weeks and have seen all that I can find!
I have a question… how often do you need to clean your hair?
I take a shower every day but I can’t find out how often I should clean my hair.
Every 2nd or 3rd day would be the best 😀
I’ve been watching your videos from THE.VERY.BEGINNING! And, now that my daughter is getting older, she’s learning to do fun hairdos and watches your vids all the time 🙂
i have been watching ever since 2010
This hairstyle is easy to make and really cute!
http://fashion-soup.com/
Dear Brooklyn and Bailey,
I would love to email you. I think my best friend and I did have a lot in common. You will see my email in the comment box when you look at this.
okay thanks Delanie!!!!!!
Been watching your videos just over 6 months..liked this hairstyle.
Hi there – I starting watching your videos because my 8 year old daughter wanted to grow out her bangs and I hate having those gangly looking long bangs in her face. I decided to learn how to do a headband braid. I only had a slight idea of how to do a french braid. That was in the beginning of the school year. Now, I’m styling her hair in all different ways – all thanks to your videos. She has long, very thick hair, and she looks stunning every day. We get the nicest compliments and I always refer people to your web site! Thank you so much for sharing. My daughters bangs are down below her chin now, and no one ever knew she was growing them out 🙂
been watching since he 28th January 2013.so about a year.(:
*the
Just realized that this is similar to what some of the dance moms girls used to wear, but as a headband! I always thought that was so cute:)
cute style as always!! I’ve been watching for about 3 years:) I can do pretty much all the styles but I have no model and some are hard to do on yourself!
This is simple yet eye-catching.Pretty!
Love this one!! Can’t wait to try it on my daughter. I’ve been watching your videos for about a year or so and I’ve tried a lot of your hairstyles on my daughter.