Hi everyone! It’s Jenny from thedotcouture! Today I thought I would talk about the everyday tools nail artists (and you too!) use to create interesting nail art.
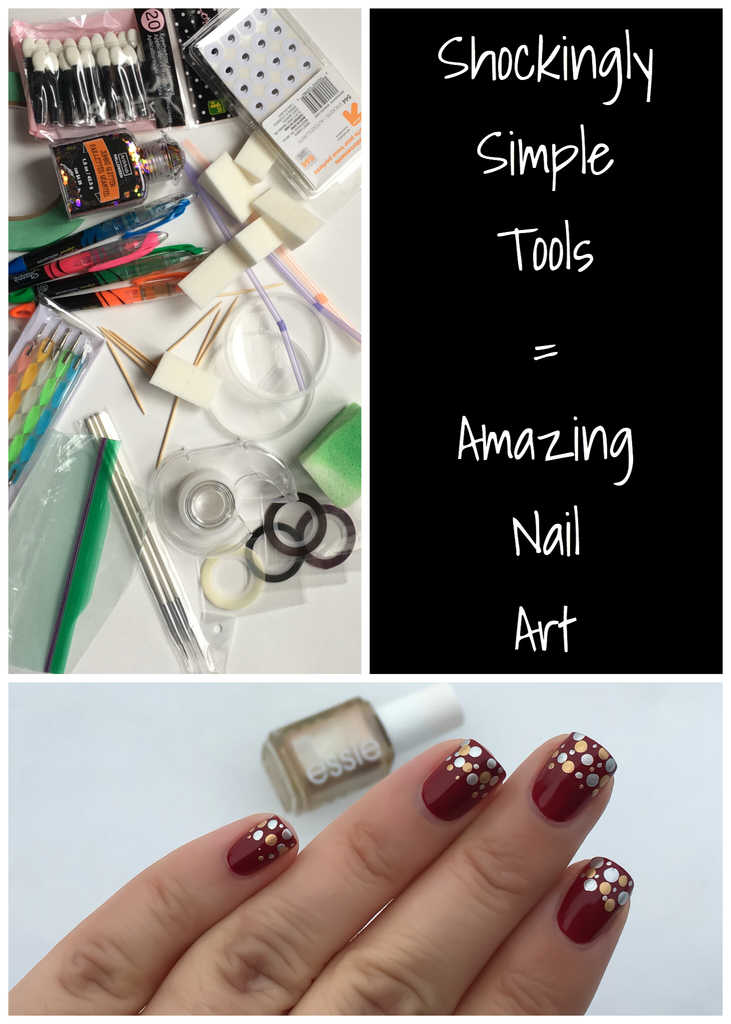
So you may wonder exactly how those nail artists create their looks. You probably think you need a fully stocked tool kit to even attempt some of them. Truth is, you can use things from around your home to create amazing and unique nail art. In fact, most nail artists started with the most basic of household tools (and probably still use them!) So let’s get started shall we?
Sponges
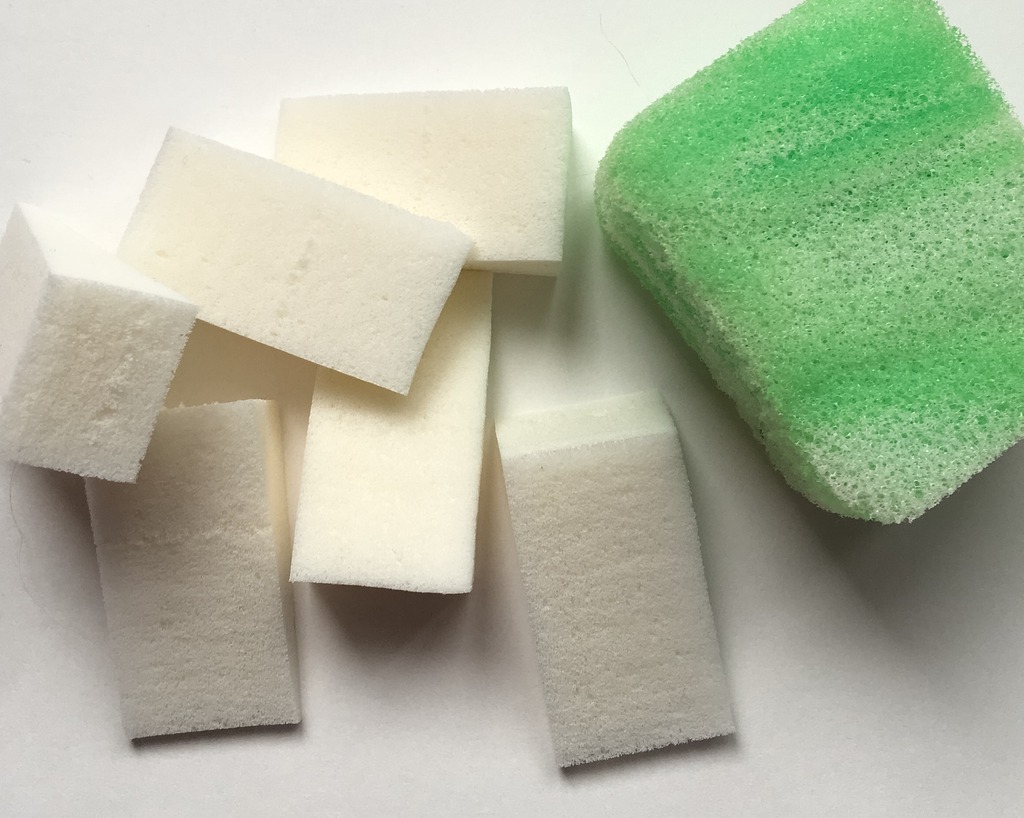
Sponges are something most of us have in our homes already. You can use any type of sponge you could think of (makeup sponge, kitchen sponge, automotive sponge, sea sponge) and each one is going to give you a very different look. Pictured above are some makeup sponges (generally used to create smooth colour gradients on the nail), and an automotive sponge (wonderful if you want to sponge some polish lightly over a contrasting base). Sponges are inexpensive and require little to no cleanup (just cut off the used portion of the sponge when you’re finished).
Tape
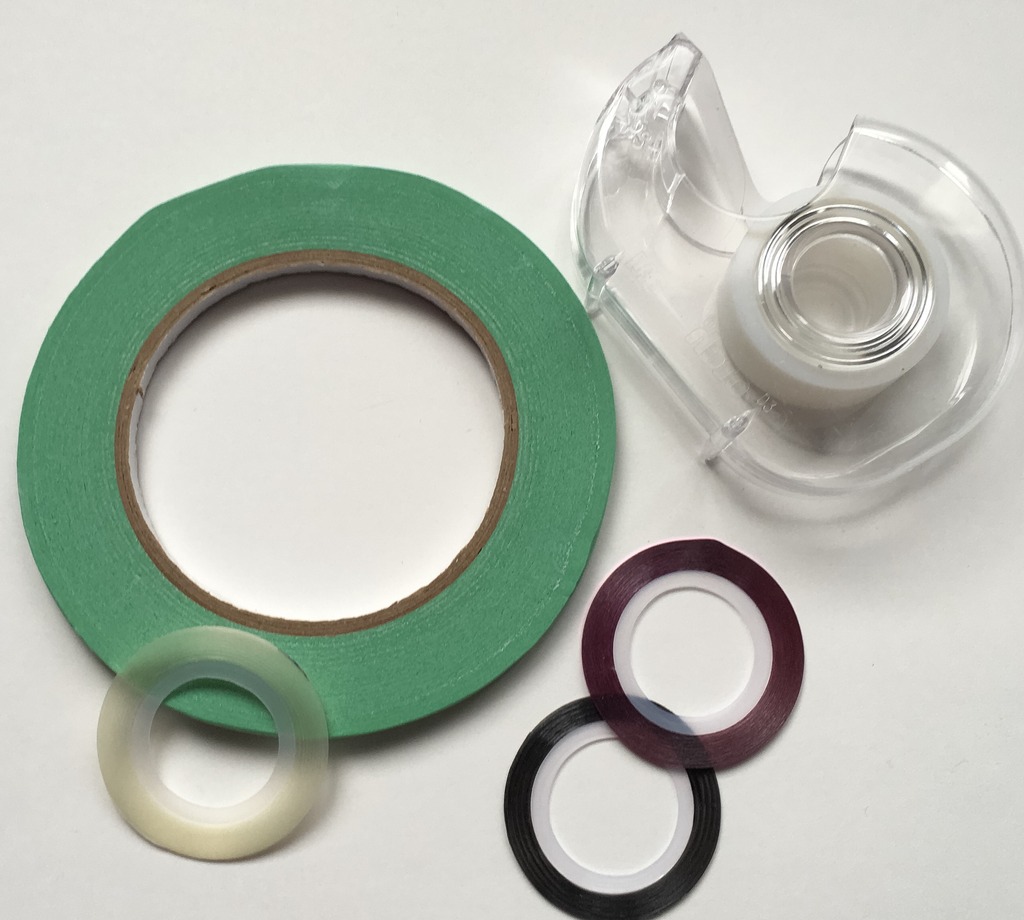
Another inexpensive and readily available tool is tape. Tape is wonderful for creating stripes, or more detailed images using stripes. Pictured above is 1/4″ painters tape (available at any hardware store), transparent tape, and if you want to get really fancy you can purchase nail art striping tape. These come in many different colours which means you can leave it directly on your nail and top coat over it as opposed to peeling it up after you have applied your nail polish. You can purchase nail art tape at your local beauty supply store, eBay, or Amazon. It’s very inexpensive as well. To create nail art using tape, you will want to paint your nails a base colour, use a quick-dry top coat, then let that dry a good 15 – 20 minutes (this will prevent the tape from ripping up your base colour when removed). Then, apply your tape of choice in any pattern you desire. Paint nails again with a contrasting colour, and remove tape before that top layer dries. Top coat again and you’re done!
Office Supplies
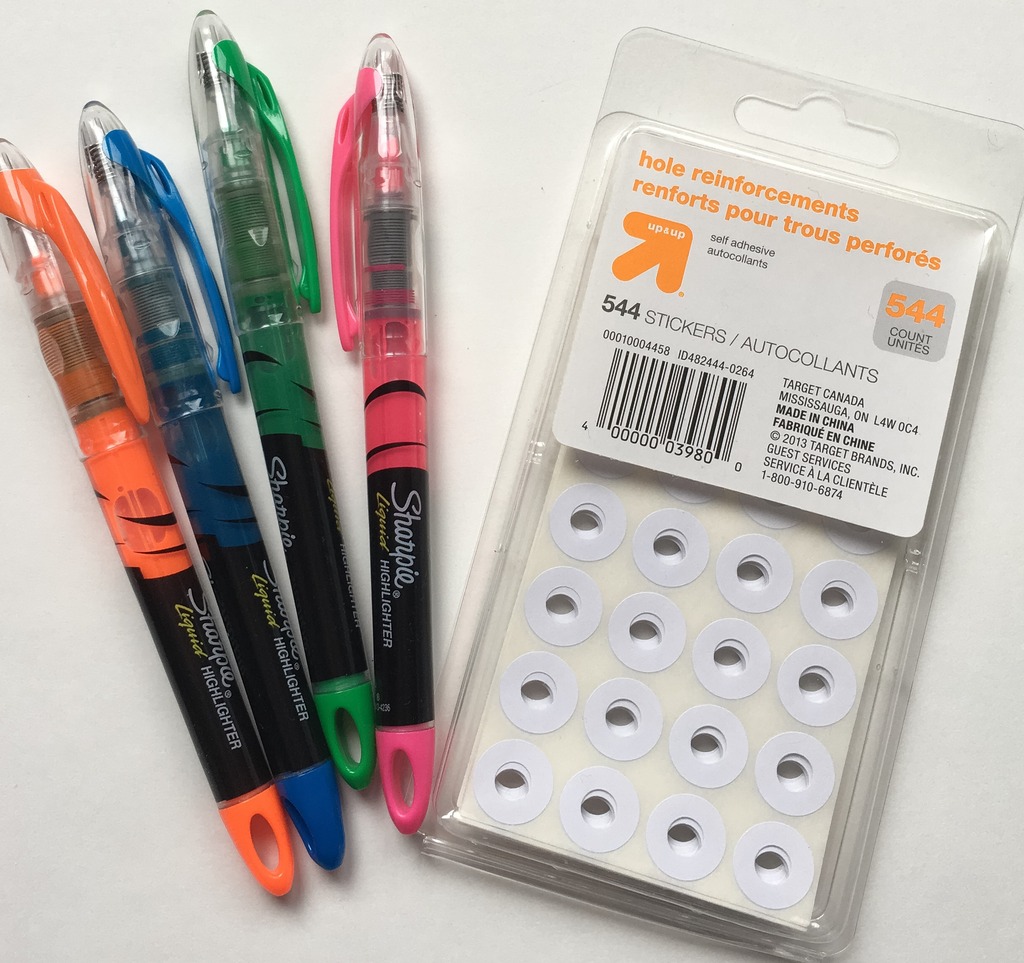
Remember when you were in school and you’d colour on your nails with your markers, or stick those binder reinforcements on the tips of your nails to make it look like you had long nails? Well you were on to something. Sharpies are often used in nail art. Depending on the look you are going for you can colour directly onto a white or silver base, or you can add some rubbing alcohol to dilute it and give it an interesting effect. Hole reinforcements are often used as a tip guide for creating French Tip manicures.
Miscellaneous Items
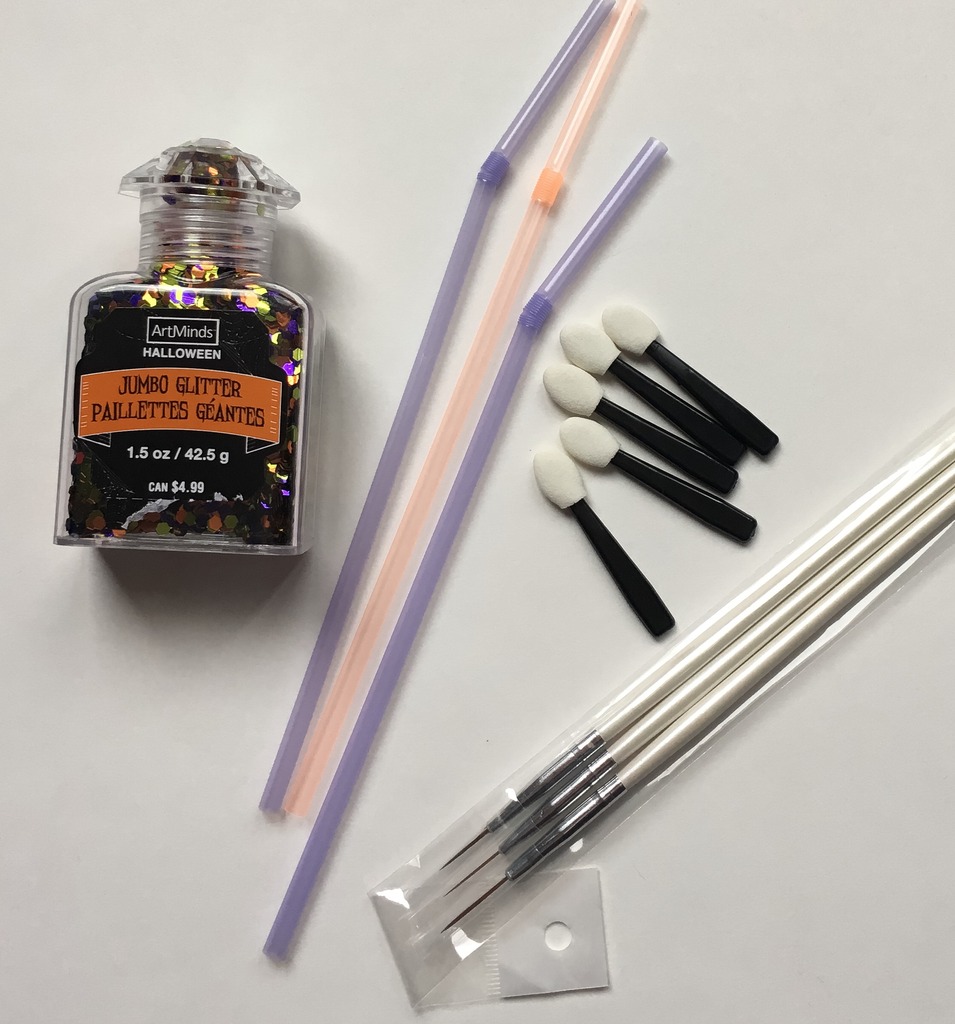
Eye makeup applicators are handy for glitter application, especially if you want to create a dramatic glitter gradient. Straws are great for splatter manis – you dip your straw into the polish bottle and blow all over your nails (warning – this technique requires some major cleanup!). Craft glitter can be used to add drama to any manicure. All you need to do is apply a drop of topcoat and carefully place the glitter on the nail. Top coat to seal it all in. And of course a small set of paint brushes for freehand work is always helpful!
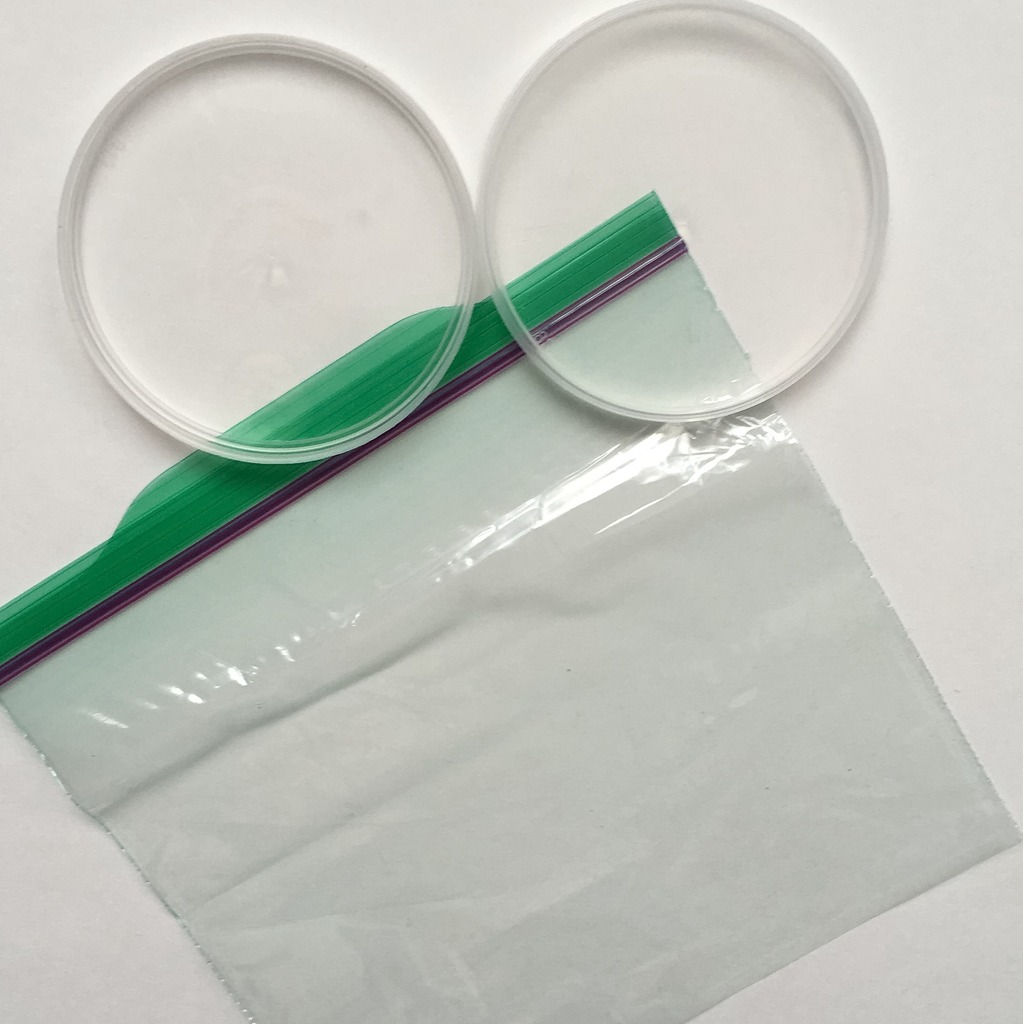
Sandwich bags and lids from food products make excellent paint palettes for when you’re using multiple colours of nail polish. You can also use the ziploc to create a decal (especially helpful if you find it difficult to paint details using your non-dominant hand). You just paint your design onto the sandwich bag, allow to dry, gently peel off, and apply to the nail.
And last but not least, here are some options to create cute polka-dot manis (often referred to as dotticures).
nail
At the top you can see a set of dotting tools (you can purchase from eBay, Amazon, or other online sources), but you don’t need them to create cute polka dots. A bobby pin pulled open will work just as well, as will toothpicks. Some people even use sewing pins (the kind with the ball on the end) stuck into the eraser of a pencil. And just to show you, I created the mani below using both tooth picks and a bobby pin:

I hope this post was helpful for you, and I encourage you to look around your house to see what you can use to create amazing nail art designs!! If you’d like to see more fun nail art, come on over and check me out on Instagram at @thedotcouture. Until next time, happy painting!
I already used these tools. I admit that I don’t have any “official” tool for nail art.????
I’ve done a splatter mani before using a straw, but I actually put clear tape around my nails (& place a piece of news paper down first) so there would be less clean up. I hadn’t thought about doing dots with a toothpick before though.
Thank you) it was helpful to me))
Looks cool.
I actually needed this stuff for a few ideas
is really cool
The highlighters are the best idea ever
That is so cool!
It’s very handy to know about how you can paint your design on a sandwich bag,I’m very grateful to learn of that! It seems like every time I do my nails I have to completely remove and redo all the polish on my dominant hand due to mess ups. I’ll have to try the bag idea for certain!
????????
I love this because most of the stuff you probably have in your house
Amazing! I can not wait to try!
They are so convenient and easy tools to used~!
LOVE
Great tips!!
This is really cool!
i ɽeɑɭɭɣ ɳeeɗ ʈɧiʂ ʂʈʋʄʄ!
boutt to try this for school tomorrow c:
Love this
These are awesome ideas. I’m a nail tech and use them myself 🙂
Love this idea!
My sister gonna love it. <3
GIVEAWAY COMMENT i love these tools to get perfect nail art with everyday things that you have lying around!
This made my life much simpler.
I’ll pick these up at Walmart my nails need serious help!
I’m good at doing solid nail colors, but I’m ok with doing designs, but these tips will really help!
So excited to try these out
this is my 3rd favorite because it helps me a LOT thanks!!!
great tips I love doing my own nails Thanks 🙂
I really love it , is very helpful
Now I can finally do the nail art that requires tools! Those dotted nails are so cute and I can’t wait to recreate them!
Okay, now I can do my nails more often! thank you for this post!:))
This is soooo helpful, I never even thought of using some of these household items , I thought you needed professional nail tools!!!! Thank you so much, this is great!
You should do a tutorial for some of these items cause i’m curious about how to incorporate straws in nail art!
Thank you for the little pointers on paint beautiful nails using the easiest and cheapest tools. My daughters will love these ideas as well. We do our nails on sunday nigjt before the beginning of the week and we love it.
This was so helpful! Thank you ever so much! Cannot wait to paint my nails! ????????
Thx for the tips!
These are awesome! I tried some of them and they are amazing!
These are such great tips, thank you!
sooo cute
Cool
This is cool, I have always loved nail art but I’ve never had the tools and it also just seemed way to difficult, aka multiple try and fails 😛 But I love the dot art from the last picture and its something i can’t wait to try.
Great Ideas! Thanks! 🙂
It seems pretty obvious once you read this post! But wouldn’t have thought of one or two of the items above.
This is so awesome
i’m generally an all black nails girl but this post inspired me
this is cool im going to try these
The dots look really nice with the maroon colored nail!!
i lve the polka dots
Cool, thanks for the great tips!
I like this ideas. I never thought that I could use this.
Great Ideas!
Cool.
Amazing!
This is amazing!
This is awesome!!
Thx for the tips!
Very helpful. CGH has saved us once again!
This is so cute
Wow I am amazed
Wow i never knew you could use them!!!
This is really informative ????????????????
Love it
I love the nails!
this is so helpfull!
Im going to try these tricks out! So much cheaper to buy that stuff than the actual nail art supplies!! Xxxxxxxxi
I love nail art and these tricks look so fun!
I love experimenting with my nails, and this has given me some ideas on what tools to use. 😀
super good ideas!
These are very useful and easy thanks for sharing
awesome
Definitely going to use some of these tricks
This is so helpful!
Great post!
This is, by far, my favorite post of yours!! I am tremendously obsessed with painting my nails and love how you introduced me with easier techniques!! This has been extremely helpful!!! Thanks!! (btw, I love this website)
I love this! It makes doing my nails so much easier, ????????????
Can’t wait to try this!!
never thought of some of these they are so handy
Love this so much. So handy .Thanks
This is awesome!!!!!!!!!!!!!!!!!!!!
awesome, love thisss
Brilliant! Thanks for the tips
Awesome!!
My favourite colours are maroon and gold, so doing the last picture
Love the nails; Its really creative!
Love this
This is so useful and cute!
Love these nails sooo much!!! Love u and ur videos more tho!! ❤❤❤ #fangirl xxx
So cute and easy tips!!